Telegraph key
A 3D exploration of electrical transmissions
Grades 4 to 8 (Ontario)
Elementary cycle 2 to secondary cycle 2 (Quebec)
The telegraph was one of the earliest devices to harness the power of electricity to communicate. It revolutionized long-distance communication.
The telegraph key was an essential component of this communication device.
Through these activities your students will build a simple circuit with a switch and they will learn basic aspects of conductivity. They will also explore how the telegraph (an important early communication device) was used both in the everyday lives of Canadians as well as during the First World War. Finally, they will explore the concept of code breaking, an important aspect of the First World War.
Share :
Curriculum links
Grade 6
- Science
- Electricity and electrical devices
Grade 7
- History
- Canada, 1800–1850: Conflict and challenges)
Grade 8
- History
- Creating Canada, 1860–1890; Canada, 1890–1914: A changing society
Grade 10
- History
- Canadian history since World War I, (Canada, 1914–1929)
- Elementary cycle 2 to secondary cycle 2
[Soft, pleasant music plays in the background.]
[Text on screen: “Build a working telegraph key.”]
Against a black background, the parts of the working telegraph key are lain out, and identified one at a time by text appearing on screen, one after the other.
[Text on the bottom of the screen: “9V Battery – 9V Battery holder – Glue gun – 3D printed telegraph parts – insulated wires with alligator clips – Elastic band – Brass fasteners – LED light”]
The items on the screen are a pale blue glue gun, a rubber band, black plastic printed telegraph key parts, brass fasteners, an LED, three different wires with alligator clips: one black, one yellow and one red, a black 9V battery holder with one red and one black wire, and a yellow 9V battery.
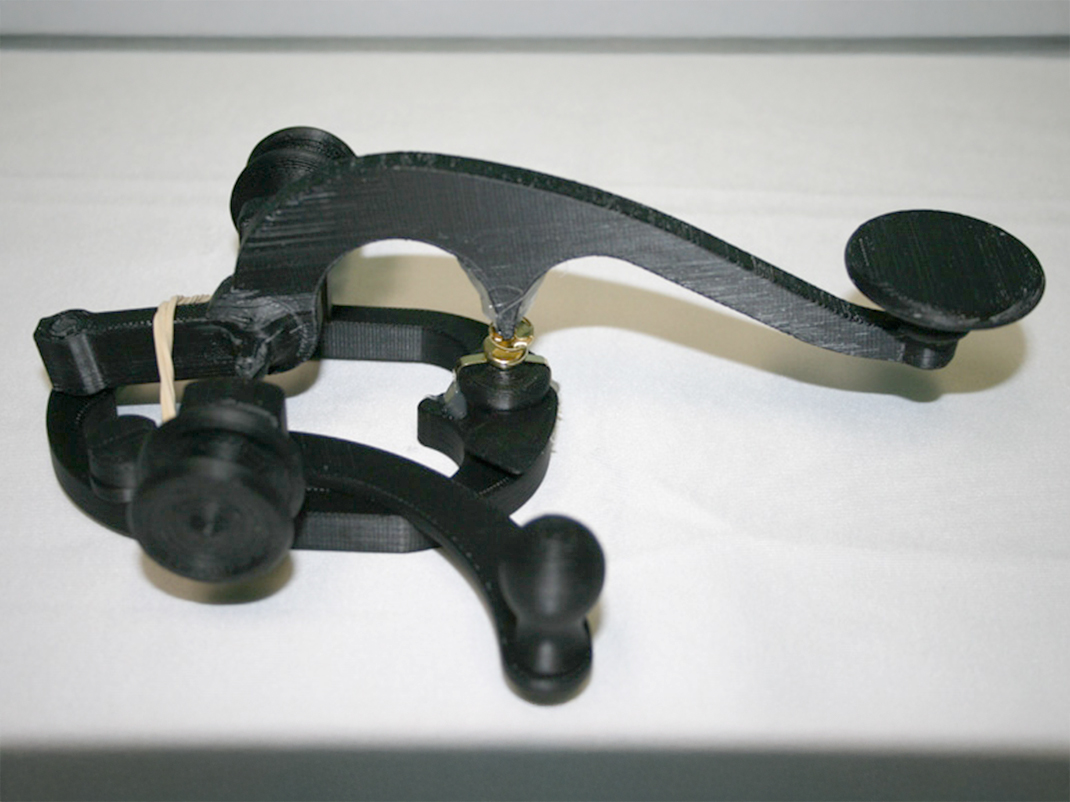
Against a black backdrop, the plastic pieces of the telegraph key are assembled by a pair of hands.
[Text on screen: “Step 1: Assemble the 3D printed key”]
Two pieces are assembled: an arm and a base.
[Text on screen reads: “Step 2: Attach fasteners to the key”]
A pair of hands uses the hot glue gun to adhere the brass fastener to the arm. Another brass fastener is then glued to the base.
[Text on screen reads: “Step 3: Attach arm to base and elastic band”]
The hands proceed to attach the arm to the base with the elastic. The assembled key is turned over and the elastic is wrapped several times around the base to secure it.
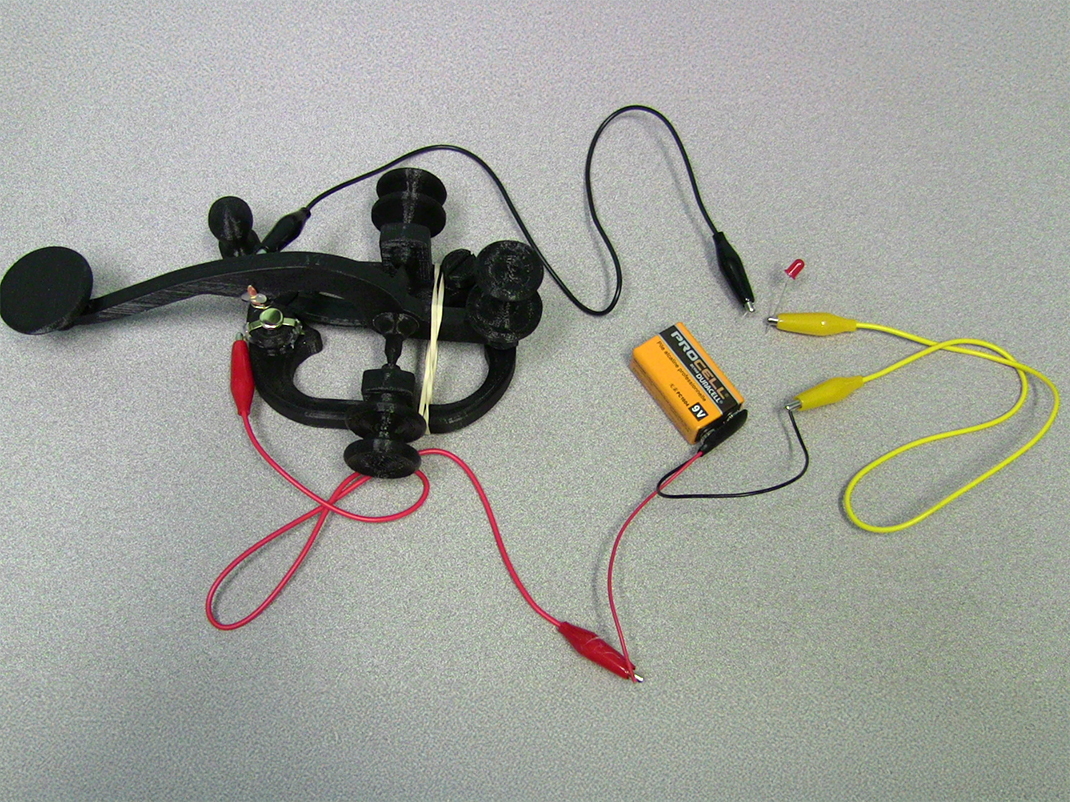
[Text on screen reads: “Step 4: Connect the battery to the LED and wires.”]
A yellow 9V battery sits on a black backdrop, and a hand moves on to the screen holding a 9V battery holder, which is then connected to the battery. The hands then clip one end of a red insulated wire to the red insulated wire attached to the battery holder, and one end of the yellow insulated wire to the black wire from the battery holder. The loose end of the yellow wire is then connected to one end of the LED, and next a black insulated wire is connected to the loose end of the LED.
[Text on screen reads: “Step 5: Connect wires to the fasteners.”]
Atop the lid of a large plastic bin sits the wires from Step 4, and a pair of hands places the telegraph key on to the lid. The loose end of the red wire is attached to the fastener on the base, and the loose end of the black wire is attached to the fastener on the arm.
A close shot of the telegraph key shows the hands pressing the arm down and releasing it multiple times. The shot then cuts to a close-up of the LED, which flashes on and off. The scene fades away to Ingenium’s logo on a white background.
Build your own telegraph key
With downloadable 3D files and activity sheets, students explore an early form of electrical communication, electrical circuits and how codes can be used to transmit information. Emphasis is placed on creating a working telegraph key and seeing how it can be used to transmit Morse code.
The 3D printing file for the telegraph key can be downloaded as one ZIP file. Worksheets and 3D print files for the module can be reproduced as necessary for your classroom.
Materials
- 1 – 9V battery (You can also use a different battery and holder, for example, AA)
- 1 – 9V battery holder
- 1 – Glue gun
- 1 – Printout of telegraph key parts
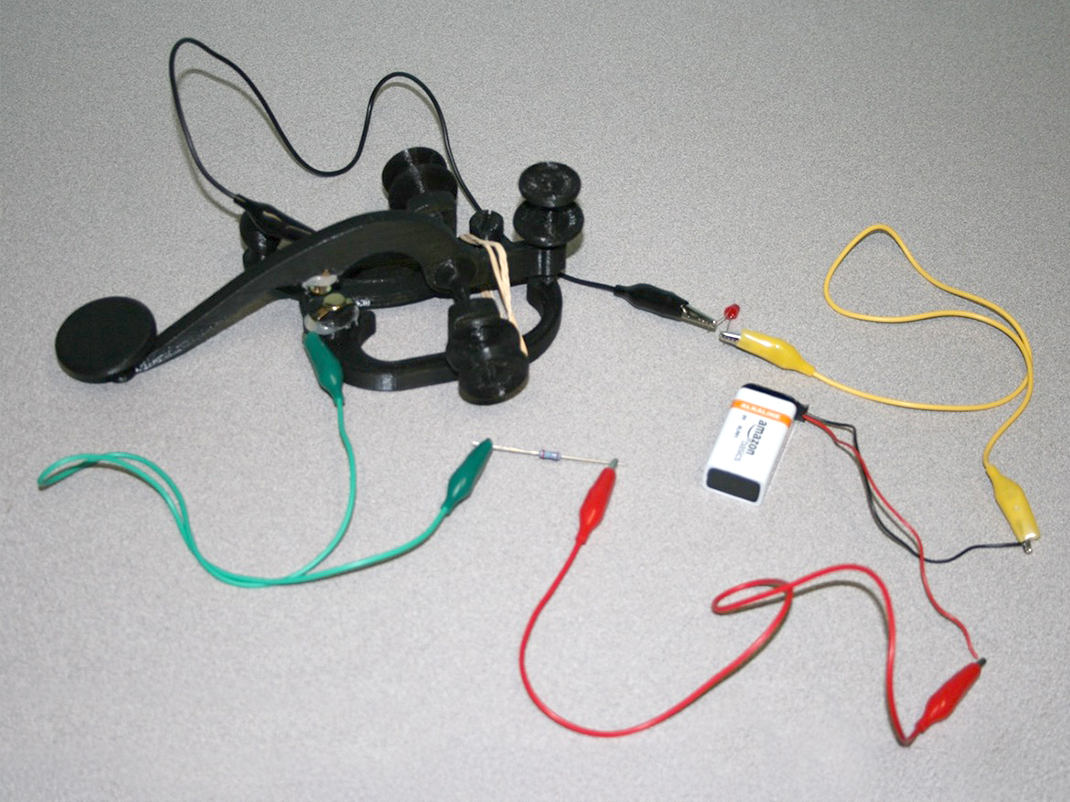
- 1 – 200-300 Ω resistor (optional)
- 4 – Insulated wires with alligator clips
- 1 – Rubber band
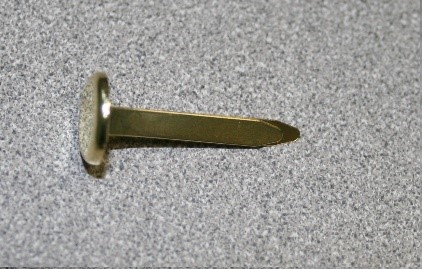
- 2 – Brass fasteners
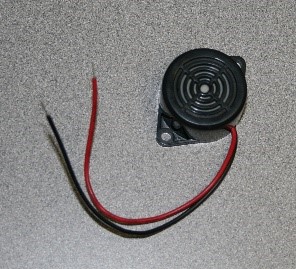
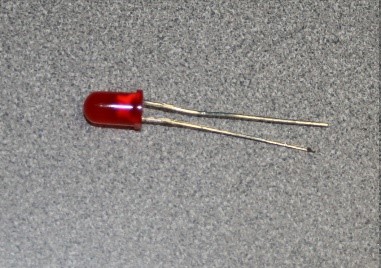
- 1 – Electric buzzer or LED light bulb (You can use anything that indicates the presence of an electrical current. Make sure that whatever you use can handle the voltage of your battery.)
For this activity, we will use the following letters to indicate the various screws and discs in the device.
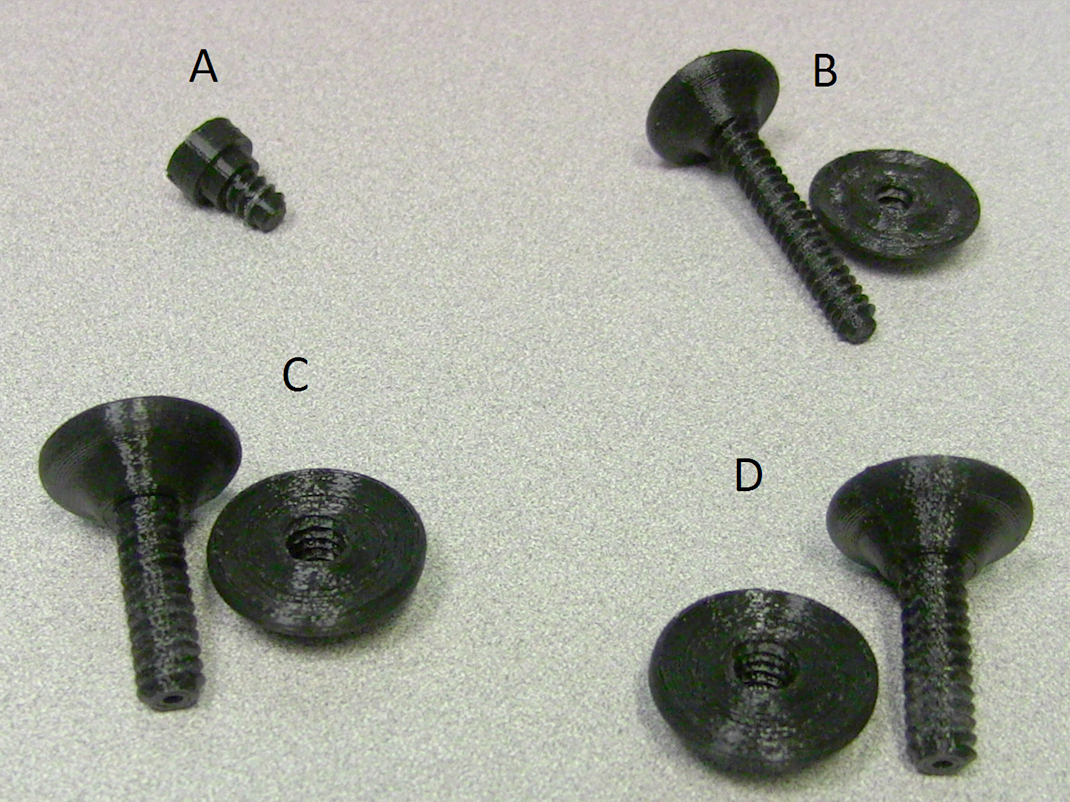
Constructing the base
- Fasten the curved handle into the O-shaped base of the telegraph key with screw A. Make sure that the handle curves toward the base.
- Twist discs C and D onto their respective screws. Fasten each of the disc-screw combinations into the side of the base.

Build the lever
- Fasten disc B onto its screw. Fasten the disc-screw combination onto the lever of the telegraphy key.
Operating the telegraph key
Now it’s time to add parts to the telegraph key to make it operational.
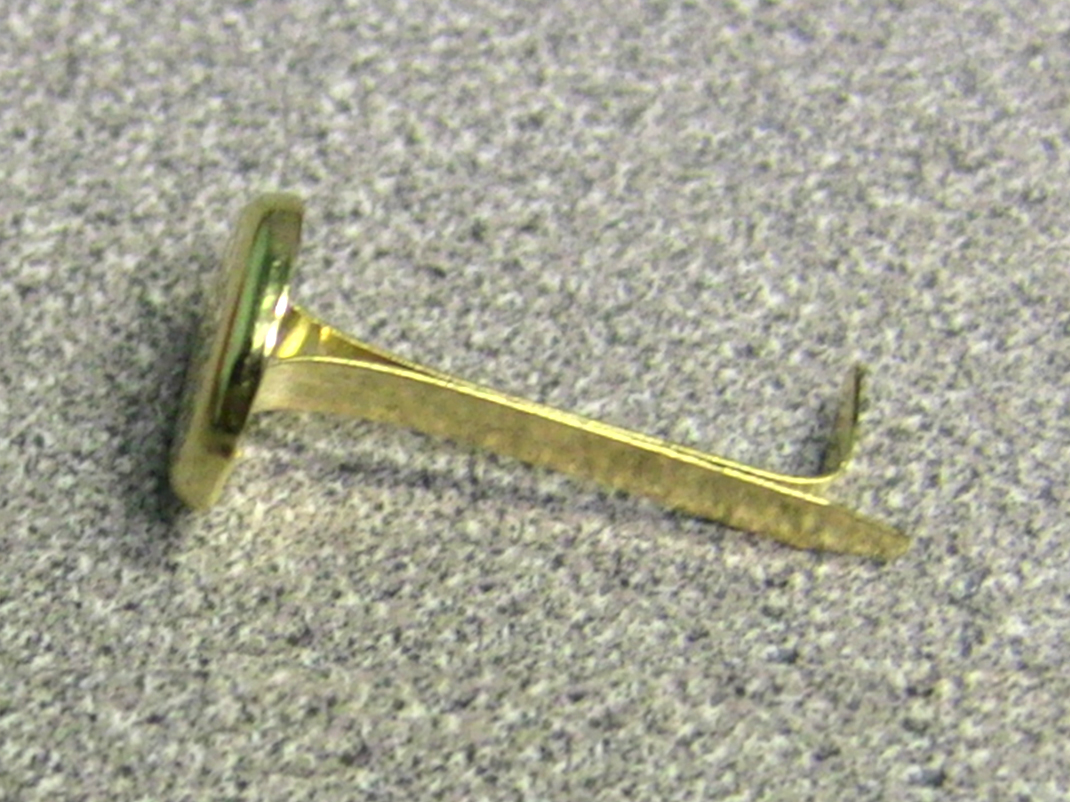
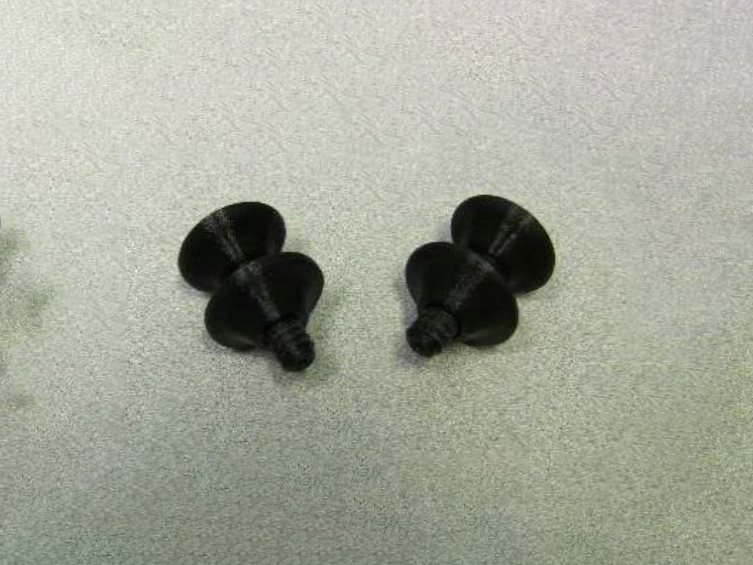
- Take the two brass fasteners and bend the tip of the longer arm to create a small tab on each.
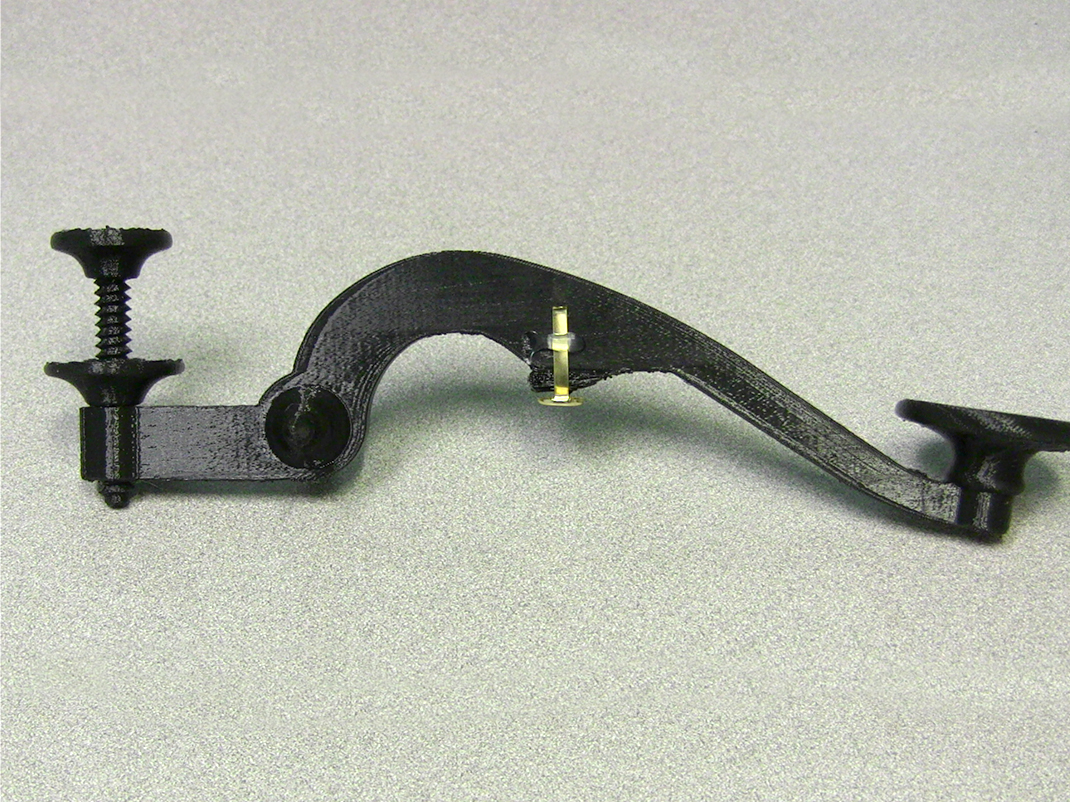
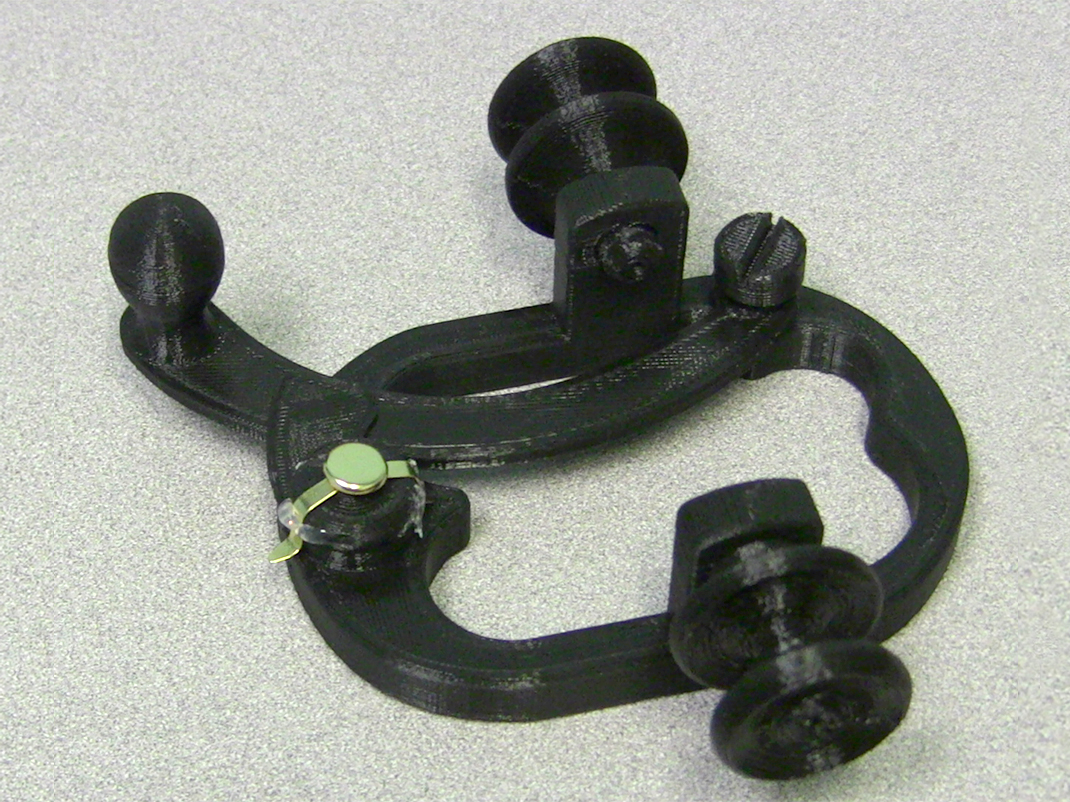
- Glue one of the brass fasteners to the hammer of the lever (see image 2 above). Glue the other brass fastener to the anvil of the base (see image 3 above). In each case, separate the arms of the brass fastener so that they lie on either side of the object to which they are glued.
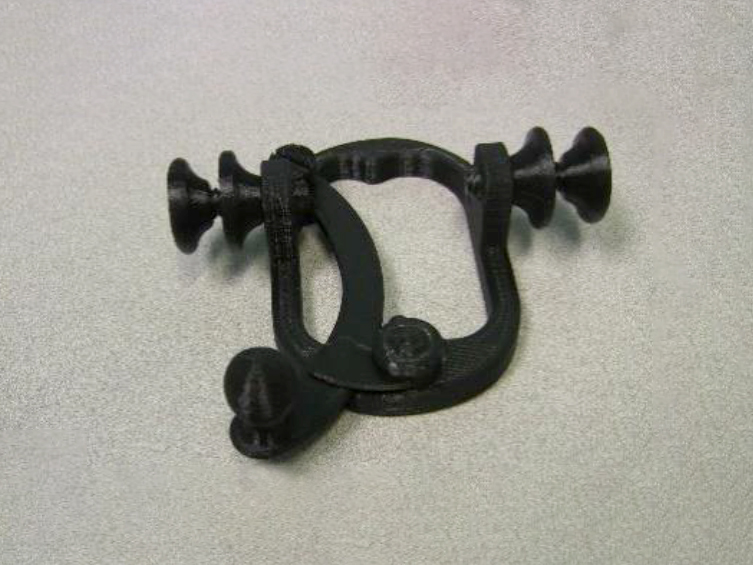
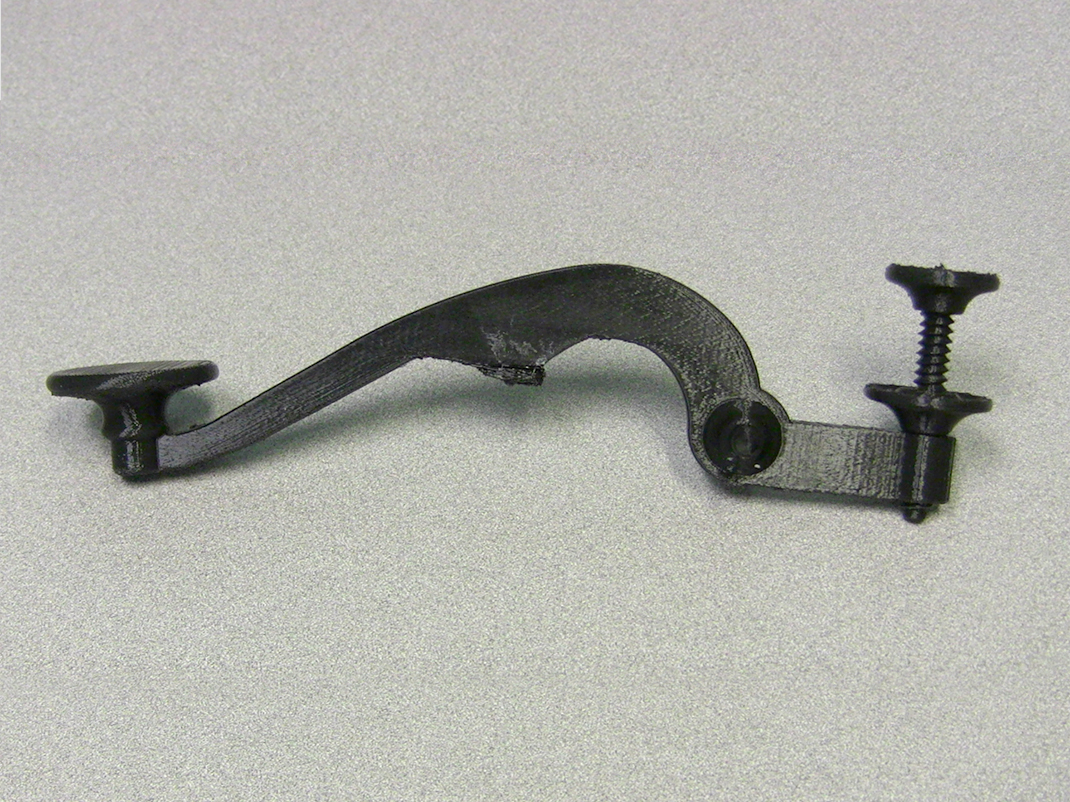
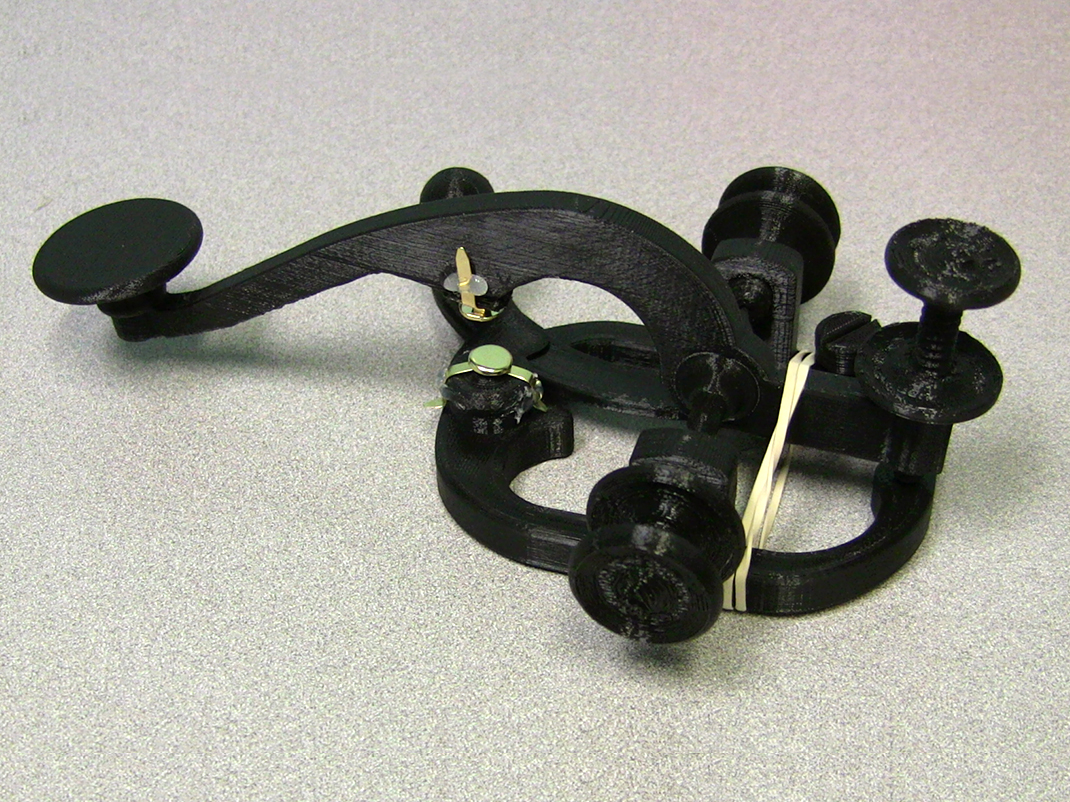
- Attach the lever to the base by inserting the pointed ends of the lever into screws C and D (which were fastened to the base earlier).
- Wrap the rubber band around the lever and the base at the end furthest away from the brass fasteners. This will make the telegraph key bounce back up when used.
- Attach an alligator clip to the tab on each brass fastener.
- Attach the other end of one of the alligator clips used in step 5 to positive wire of the 9V battery holder (this is usually the red wire). Attach the other end of the other alligator clip used in step 5 to positive terminal of the light/buzzer (in a LED light, this is the longer lead/wire).
- Use a third alligator clip to attach the negative terminal of the light/buzzer to the negative wire of the 9V battery holder (this is usually the black wire).
- Clip the 9V battery into the holder.
- Optional: If you are using a LED light, the telegraph key can cause it to heat up and burn out if the key is held down for an extended period of time. To prevent this, you can add a resistor to your circuit. A resistor between 200-300 Ω for a 9V battery should be sufficient (see step 10 for an optional calculation). In addition, you will need another insulated wire with alligator clips (we’ll call this “wire 4”). To add a resistor:
- Locate the wire with alligator clips that is attached to the positive wire of your battery
- Unhook one of the alligator clips of this wire
- Attach this alligator clip to one end of the resistor
- Attach the other end of the resistor to one of the alligator clips of wire 4
- Attach the other alligator clip of Wire 4 to where you unhooked the wire in step B
- Optional: If you wish to determine the exact resistor needed for your LED light, use the equations below:
- Voltage (in V) = Voltage of battery (in V) – Voltage of the LED light (in V)
- Resistance of resistor needed (in Ω) = Voltage (in V) ÷ Maximum current of LED light (in A)
- You can usually determine the LED light’s voltage and maximum current from its packaging
- Your telegraph key is now ready to use!
Scientific explanation
The telegraph is essentially an electrical circuit that, when completed, causes the signal to be sent. Pressing the telegraph key is what completes the circuit. In this activity, when the telegraph key was pressed, the two brass fasteners touched each other. This completed the circuit and caused the buzzer to buzz or a bulb to light up. When the telegraph key was not pressed, the circuit was not complete so nothing happened.
To further explore the concept of conductivity, ask your students what they think would happen if different types of material are introduced into the telegraph circuit. Some things to try: a piece of paper, a piece of string and a coin. Then introduce these new materials into the circuit using an insulated wire with alligator clips.
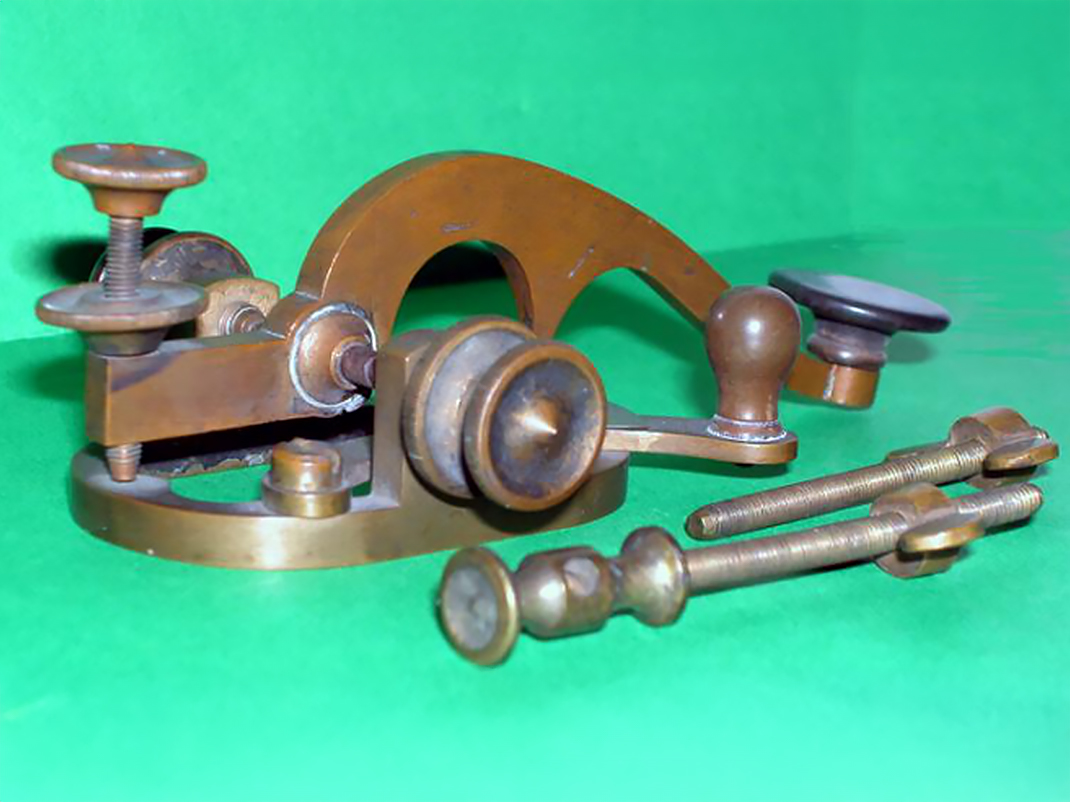
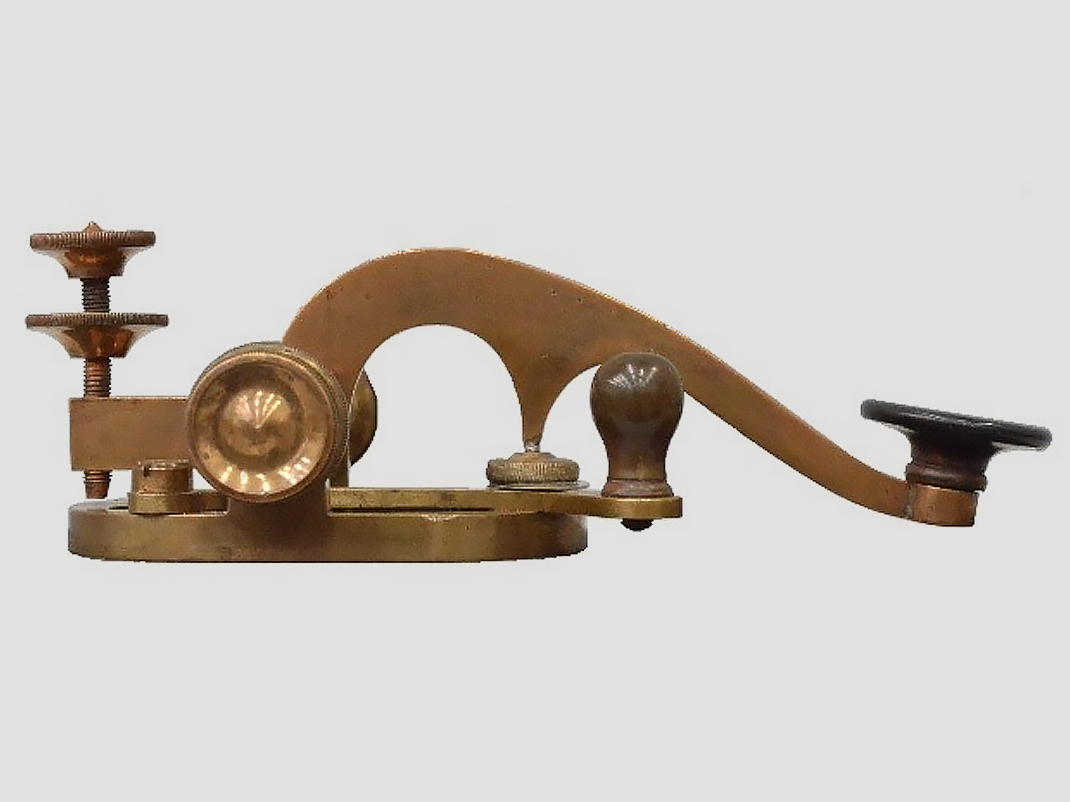
Ingenium has more than 150,000 objects in its collection, including many different telegraph keys. A photo of the telegraph key that was scanned to make the 3D model that you printed can be found below.
What is Morse code?
Your students will learn about how the telegraph key can transmit information using code, such as Morse code, in which letters, numbers and punctuation marks are represented by a series of short and long signals. They’ll then have a chance to complete a series of coding challenges.
Materials
Functional 3D printed telegraph key
Instructions
- Explain the basics of Morse code to your class and show them the chart below.
- Explain the meaning of the dots and dashes. The dash represents a long signal, and the dots represent a short signal. Samuel Morse and Alfred Vail (inventors of Morse code) arranged it so that the most common letters have the simplest codes (such as “e”).
Morse code
- A
- . –
- B
- – . . .
- C
- – . – .
- D
- – . .
- E
- .
- F
- . . – .
- G
- – – .
- H
- . . . .
- I
- . .
- J
- . – – –
- K
- – . –
- L
- . – . .
- M
- – –
- N
- – .
- O
- – – –
- P
- . – – .
- Q
- – – . –
- R
- . – .
- S
- . . .
- T
- –
- U
- . . –
- V
- . . . –
- W
- . – –
- X
- – . . –
- Y
- – . – –
- Z
- – – . .
- 1
- . – – – –
- 2
- . . – – –
- 3
- . . . – –
- 4
- . . . . –
- 5
- . . . . .
- 6
- – . . . .
- 7
- – – . . .
- 8
- – – – . .
- 9
- – – – – .
- 0
- – – – – –
- .
- . – . – . –
- ,
- – – . . – –
- ?
- . . – – . .
- Tap out some messages or words using your telegraph key to demonstrate how Morse code works. After each letter there is a short pause. If you are using multiple words, after each word there is a slightly longer pause (about three times as long as the pause between letters). Some possible words to start with:
SOS
- S
- . . .
- O
- – – –
- S
- . . .
CANADA
- C
- – . – .
- A
- . –
- N
- – .
- A
- . –
- D
- – . .
- A
- . –
MUSEUM
- M
- – –
- U
- . . –
- S
- . . .
- E
- .
- U
- . . –
- M
- – –
Try this! Tap out a different word, but this time only give your students a small clue to your students to see if they can decipher what you’ve tapped. For example, for the word “school” your clue could be “Where you learn.”
Try this! If you have multiple telegraph keys, divide your students into groups and allow them to create their own Morse code messages. You can also set it up so that the student(s) receiving the message (from the LED light or electric buzzer) cannot see the student tapping it out.
Can you break the code?
Breaking an enemy’s code is an important element in any kind of conflict, including the First World War. Below are two activities that you can do with your students to explore this intriguing concept.
Challenge #1
In this activity, your students will see how fast they can decipher a code when given some possible coding systems.
- Show the two coding systems below to your class. One is the Morse code system shown above. The other is a rearrangement of the Morse code in the table below.
- Tap out a word or short message on the telegraph key and provide a clue. The challenge is for your class to decide which coding system is being used.
How fast can your students decipher your message?
You can also create your own “jumble”. With more than two possible options, this challenge becomes more difficult.
Jumbled Morse code (code patterns given to alternate letters)
- A
- . – .
- B
- – .
- C
- – . –
- D
- . – . .
- E
- . . .
- F
- . . . –
- G
- – – –
- H
- . .
- I
- . . . .
- J
- . – – .
- K
- – . – .
- L
- – . .
- M
- – –
- N
- – . . .
- O
- – – .
- P
- . – – –
- Q
- – . – –
- R
- . –
- S
- .
- T
- – –
- U
- . – –
- V
- . . – .
- W
- . . –
- X
- – – . .
- Y
- – – . –
- Z
- – . . –
Challenge #2
In this activity your students will try to see how fast they can decipher a code without being given a coding system. For this activity you will need multiple telegraph keys.
- Set up teams or groups.
- Have each group create a unique coding system.
- Have each group challenge another to decipher their code.
- Have one group code a word or short message, and send it by tapping it out on a telegraph key. Have them provide a clue as well.
- Decode! Have the other group try to decode the word or short message. This is a trial and error process that also involves decoding something that unlocks the rest.
- Tell the decoding group to start with smaller words and look for repeating letters as these can be important hints as to what the word might be.
Here are some other hints that you can give them:
Hint – Look at FREQUENCY: Look for the most common letters and combination of letters to see if they make sense.
Decreasing frequency of single letters:
E T O A N I R S H D L C W U M F YG P B V K X Q J Z
(“e” is the most frequent letter in English, “z” the least)Hint – Look at COMBINATIONS: Look for frequent combinations of letters to see if they help.
Decreasing frequency of two-letter combinations in words:
th er on an re he in ed nd ha at en es of or nt ea ti to it st io le is ou ar as de rt ve
(“th” is the most frequent combination in English, “ve” the least)
Decreasing frequency of three-letter combinations in words:
the and tha ent ion tio for nde has nce edt tis oft sth men
(“the” is the most frequent combination in English, “men” the least)
Decreasing frequency of double letters in words:
ss ee tt ff ll mm oo
(“ss” is the most frequent combination in English, “oo” the least)
Hint – Look at the STARTING LETTER: The starting letter in each word may provide important clues.
Decreasing frequency for first letters in a word:
T O A W B C D S F M R H I Y E G L N P U J K
(“T” is the most frequent letter in English, “K” the least)
Hint – Look at the LAST LETTER: Sometimes the last letter in each word can be helpful.
Decreasing frequency for letters that end a word:
E S T D N R Y F L O G H A R M P U W
(“e” is most frequent letter in English, “w” the least)
Hint – Look at WORD LENGTH: Word length can help you decipher important words in order to reveal a hidden message.
Words with one letter in English:
a, I
Most common words with two letters in English:
of, to, in, it, is, be, as, at, so, we, he, by, or, on, do, if, me, my, up, an, go, no, us, am
Most common words with three letters in English:
the, and, for, are, but, not, you, all, any, can, had, her, was, one, our, out, day, get, has, him, his, how, man, new, now, old, see, two, way, who, boy, did, its, let, put, say, she, too, use
Most common words with four letters in English:
that, with, have, this, will, your, from, they, know, want, been, good, much, some, time, very, when, come, here, just, like, long, make, many, more, only, over, such, take, than, them, well, were
Source: https://www.exploratorium.edu/explore/secret-language
Artifact sheet
The artifacts collected, preserved, and displayed by Ingenium showcase Canada’s rich history of innovation in science and technology. Each artifact tells a story of innovation and illustrates how science and technology have contributed to the transformation of Canada.
Early forms of long-distance communication were based primarily on sending codes and symbols using visual indicators. Examples of this include smoke signals and semaphore towers. One of the principal disadvantages of this method was that it required clear line-of-sight, which could be affected by things such as poor weather, as well as natural and man-made structures.
The discovery of electricity made it possible to transmit messages along electrical lines. This spurred considerable research, culminating in the invention of the electric telegraph. The electric telegraph was more versatile and reliable than visual indicators. It also provided instantaneous contact, revolutionizing long-distance communications.
The invention of the electric telegraph in the 1830s is attributed to two groups of researchers: Sir William Cooke and Sir Charles Wheatstone in England; and Samuel Morse, Leonard Gale and Alfred Vail in the U.S.
In Canada, development of the electric telegraph closely followed developments in the U.S., with the first telegraph lines laid in 1847. The telegraph remained popular until the 1920s when its use started to decline due to the increased usage of the telephone. Many artifacts related to telegraphy, such as the telegraph key pictured on this page, can be found in the Ingenium collection.
Artifact details
Telegraph key, 1849 – 1869
Manufacturer: Unknown
Artifact no. 1975.0035.001
A telegraph key is used to transmit messages in an electrical telegraph. Telegraph keys come in many different models. The one pictured above is called a Camelback, because of the hump-shaped look of the lever. It is made out of brass and was used in a telegraph office in Metcalfe, Ontario, which opened in 1870 and closed in 1912.
Fun fact
Samuel Morse wanted to sell the electric telegraph to the U.S. government. The government declined, and subsequent development was handled by private industries.
You may also be interested in
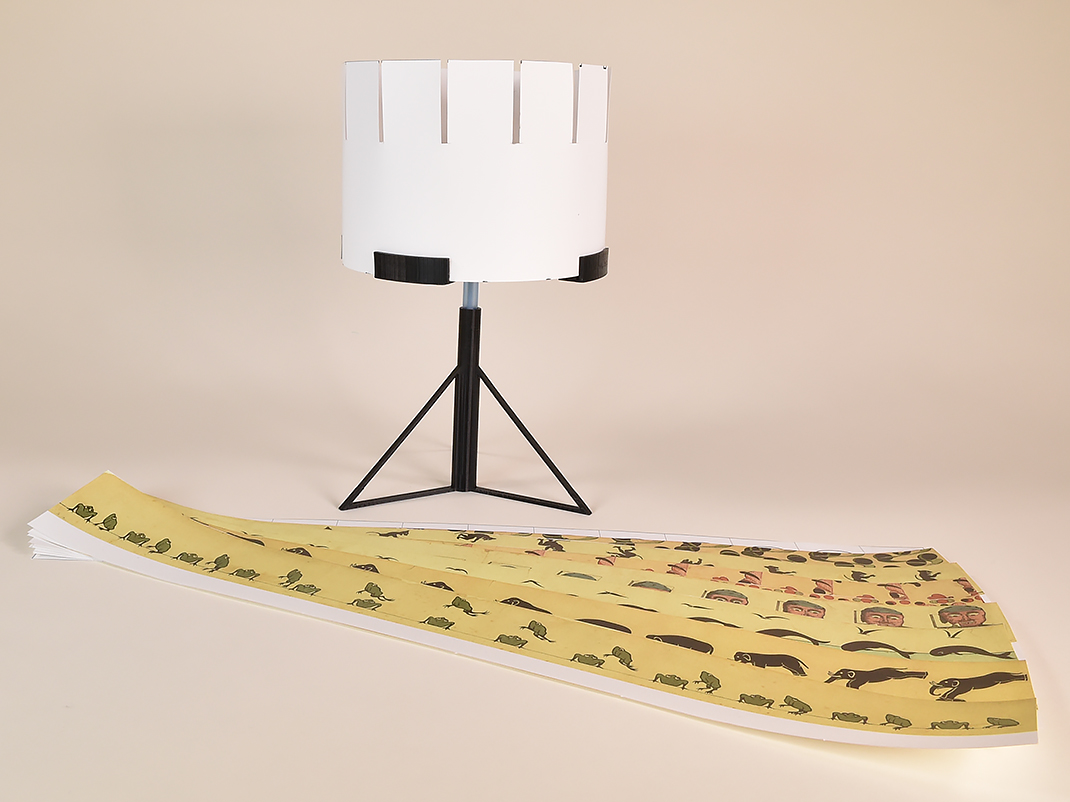
Zoetrope
Explore the zoetrope, an early animation device that uses an optical trick to make moving images. This lesson plan contains instructions on how to build your own 3D-printed zoetrope, assemble it and make it work. Students will be enthralled by the science behind this artifact from the Ingenium Collection.
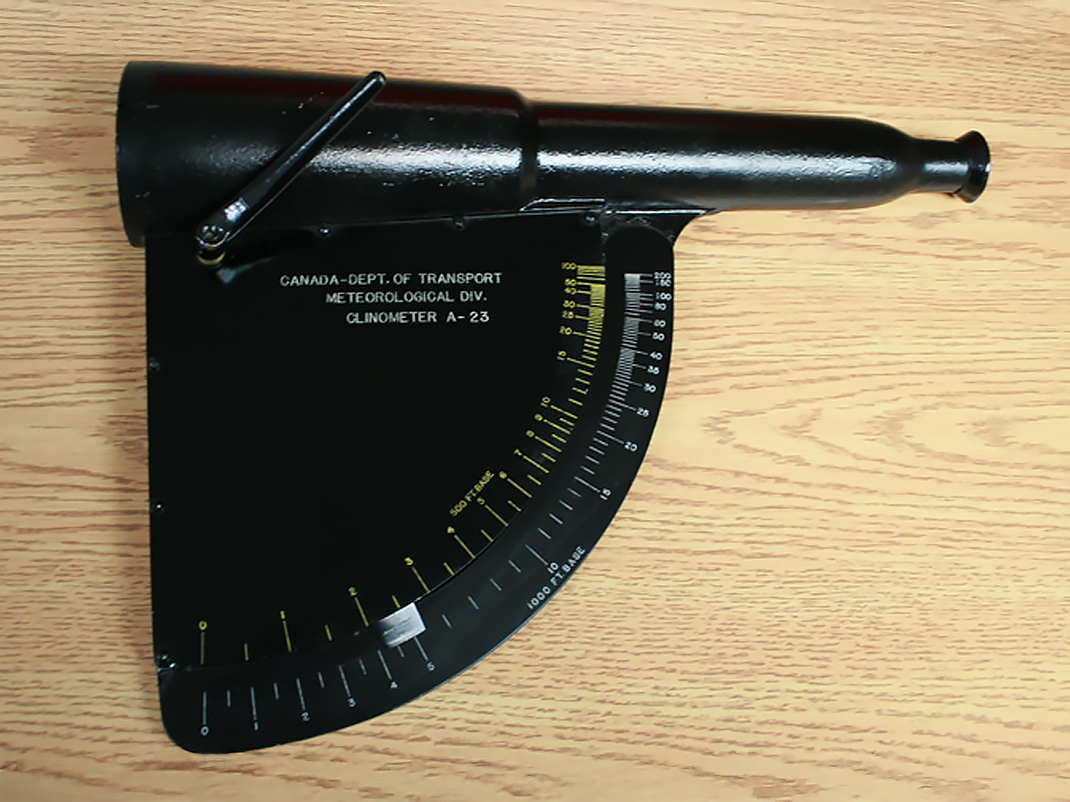
Clinometers
Find out how you can use a clinometer to determine how tall something is in your everyday life! Students can explore this 19th century tool through this educational resource from Ingenium, including downloadable 3D files and activity sheets.
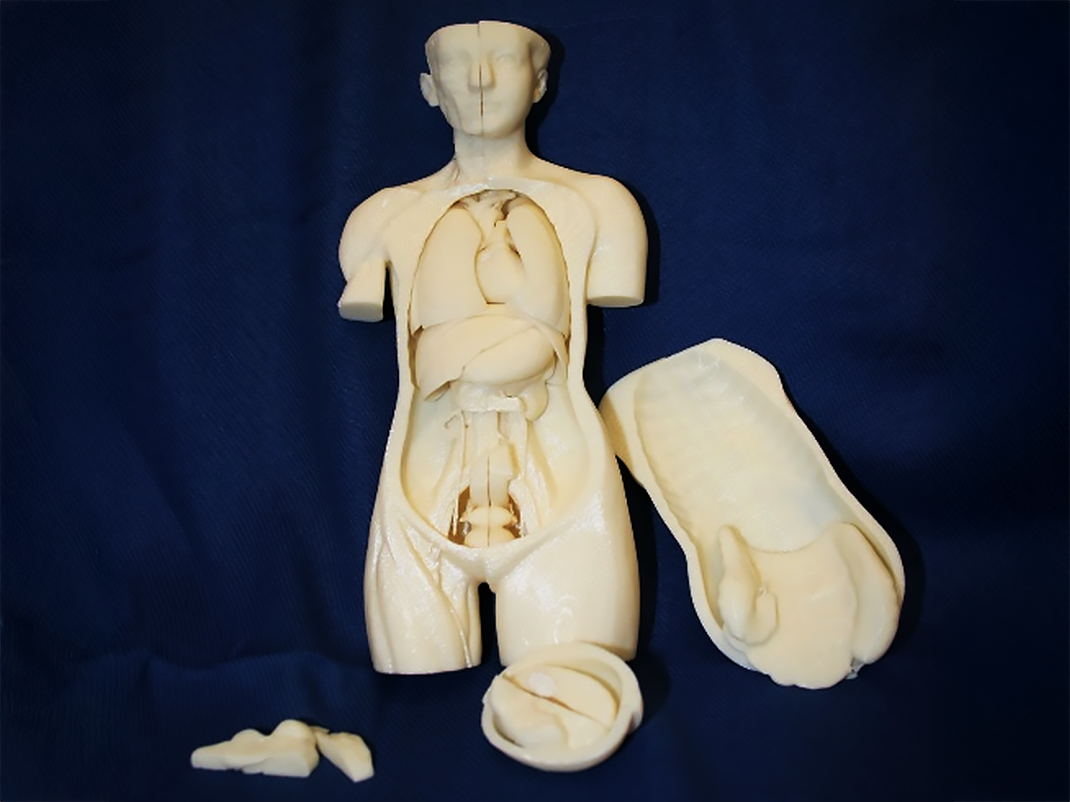
Anatomical model
Learn about the amazing human body and how complex organs perform all sorts of functions that work together to keep us alive in a series of fun, educational mini-activities and demonstrations from Ingenium.