Zoetrope
A 3D exploration of animation and sight
Grades 1 to 8 (Ontario)
Elementary cycle 1 to Secondary cycle 2 (Quebec)
A zoetrope is an early animation device that delighted children and adults during the late 19th century. It uses an optical trick to make a series of still images seem as though they are moving.
With downloadable 3D files and activity sheets, students can explore this device and how it uses the optical illusion of persistence of vision to give the appearance of motion. Emphasis is placed on building a functional zoetrope and allowing your students to be creative in determining its final form.
The 3D printing file for the zoetrope can be downloaded as one ZIP file. Worksheets and 3D print files for the module can be reproduced as necessary for your classroom.

Share :
Curriculum links
Through this activity, your students will learn about optical illusions, and how the zoetrope tricks the brain into thinking a sequence of still images is in motion. This activity can be connected to multiple aspects of the school curriculum.
Grade 5
Science (Human organ systems)
Grade 8
The arts (Visual art)
Elementary cycle 3
Secondary cycle 2
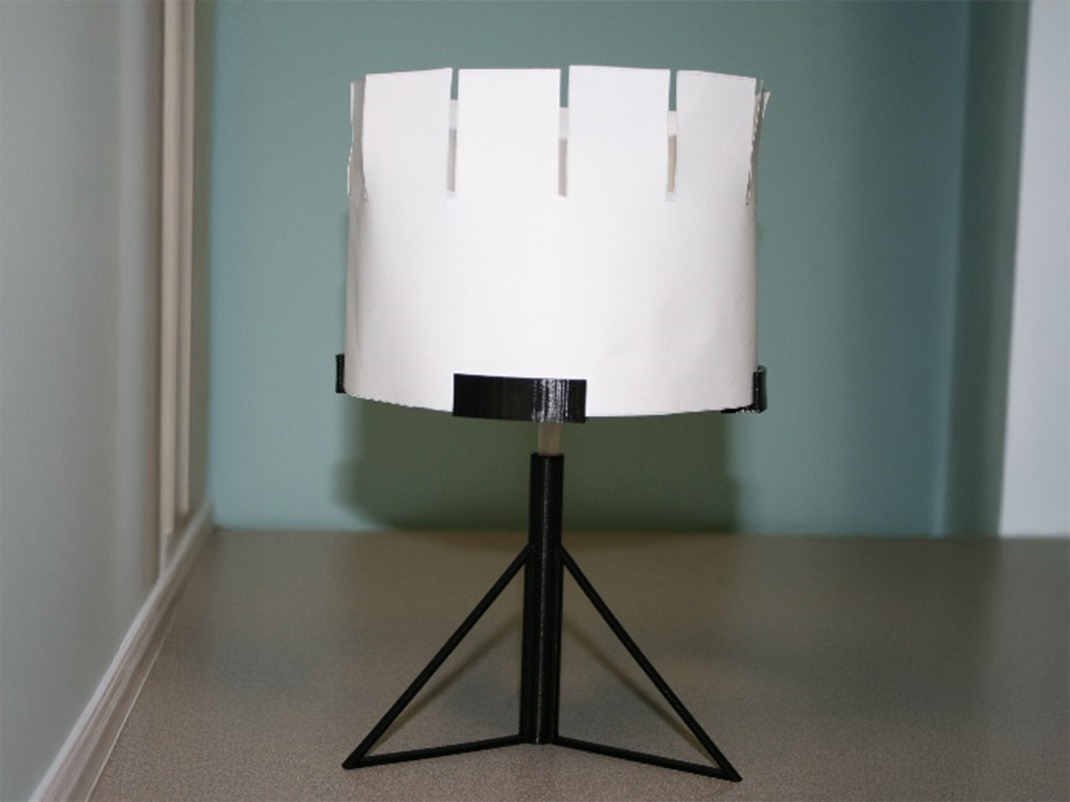
Build a zoetrope
In this activity your students will build their own zoetropes and learn how it makes a series of images seem like they are moving.
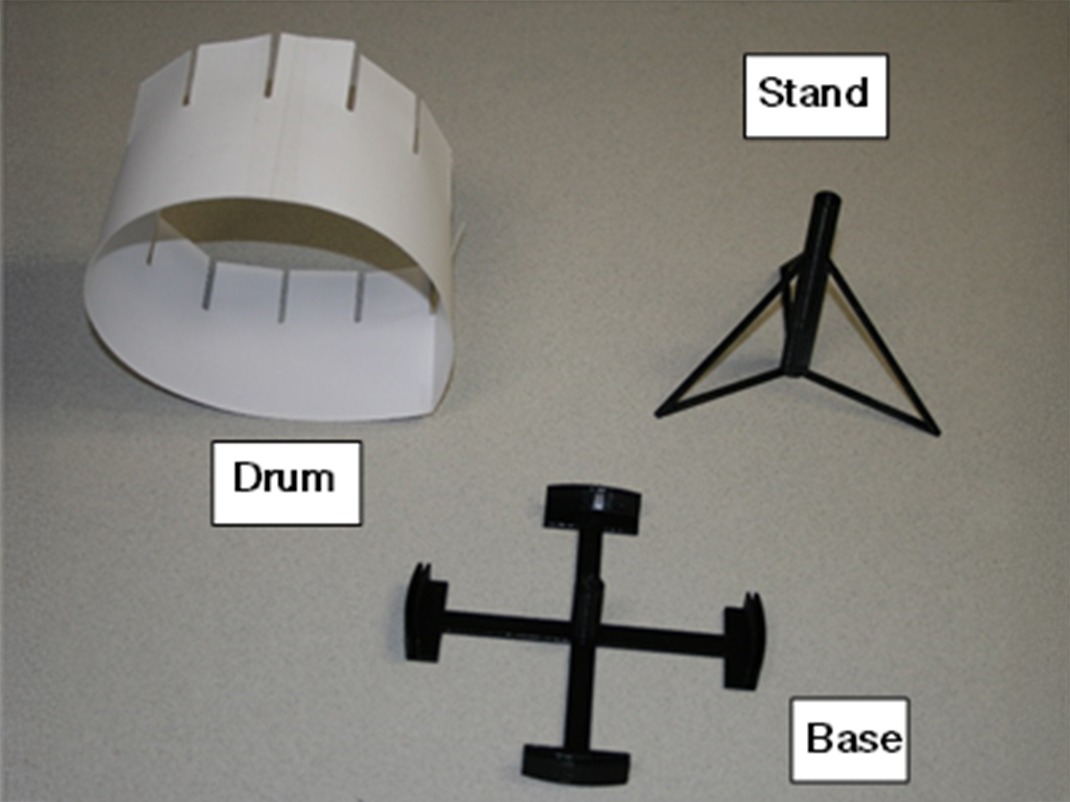
Materials
- Set of 3D zoetrope parts
- Printout of zoetrope drum template
- Pen (BIC® pens work particularly well)
- Printout of the zoetrope strips you wish to use*
- Tape
- Scissors
3D printing files
Download and print your very own zoetrope! These .stl files contain a modified version of a zoetrope found in Ingenium’s artifact collection and are used in the activities found on this webpage. They can be reproduced as needed for your classroom, and edited by students to see the impact of their changes.
The file below is an unmodified 3D scan of the zoetrope found in Ingenium’s artifact collection. It is not used in the activities found on this webpage, but it can be downloaded, viewed and examined.
Download these files to use in the activities below.
These zoetrope stripes are part of Ingenium’s collection of artifacts. They were made out of paper, their images drawn with ink, and they were likely manufactured before 1900. Download these strips to use in the “Build a Zoetrope” activity.
Instructions
For this activity, these naming conventions will be used.
Constructing the drum
- Cut out one of the drums from the zoetrope drum template along the dotted lines. If your printer cannot print edge to edge, extend the top and bottom of the zoetrope drum so that the edges of the paper serve as the drum’s edge (similar to what it looks like when viewed as a PDF).
- Form a cylinder by attaching one side of the drum to the other. For best results, slightly overlap the edges by about 2 mm.
Making the zoetrope strips
- Cut out the zoetrope strips along the dotted lines.
- Form each zoetrope strip into a cylinder by attaching one end to the other. The greyed-out section at the end of the strip can overlap with the other end. If your printer cannot print edge to edge use the paper’s margin to serve as this tab.
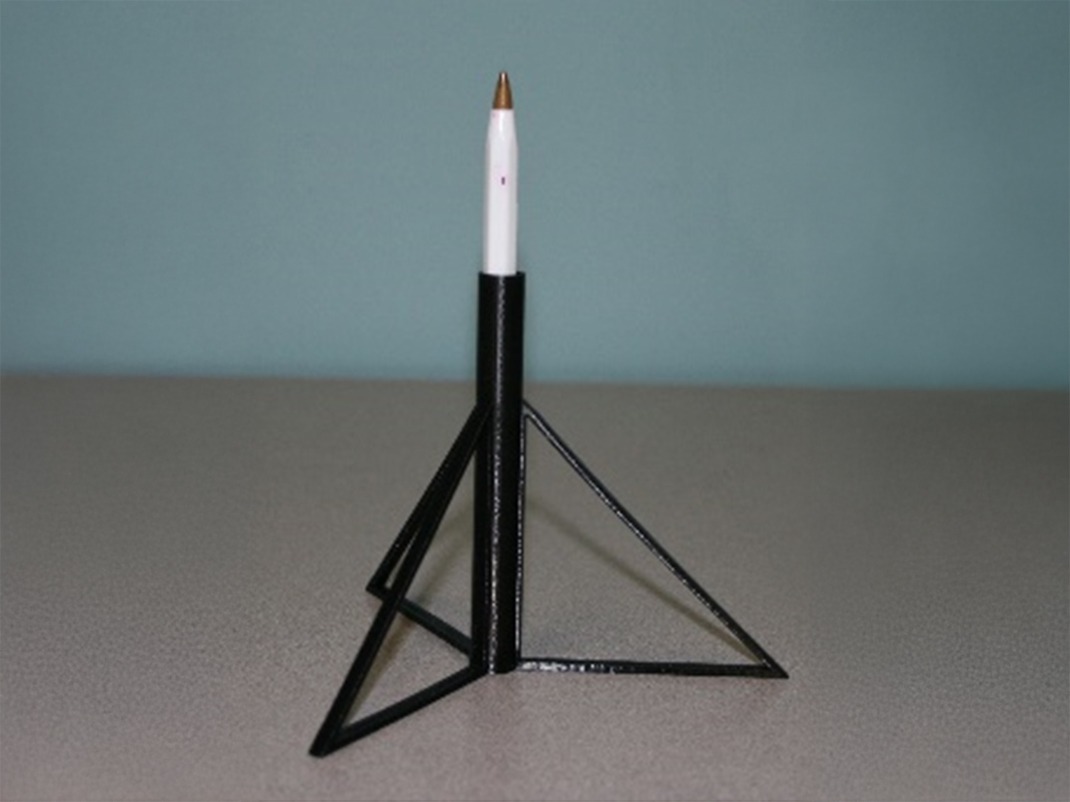
Building the zoetrope
- Place the pen in the stand. Make sure that it is pointing upward and that the top of the pen extends at least 4 cm beyond the top of the stand.
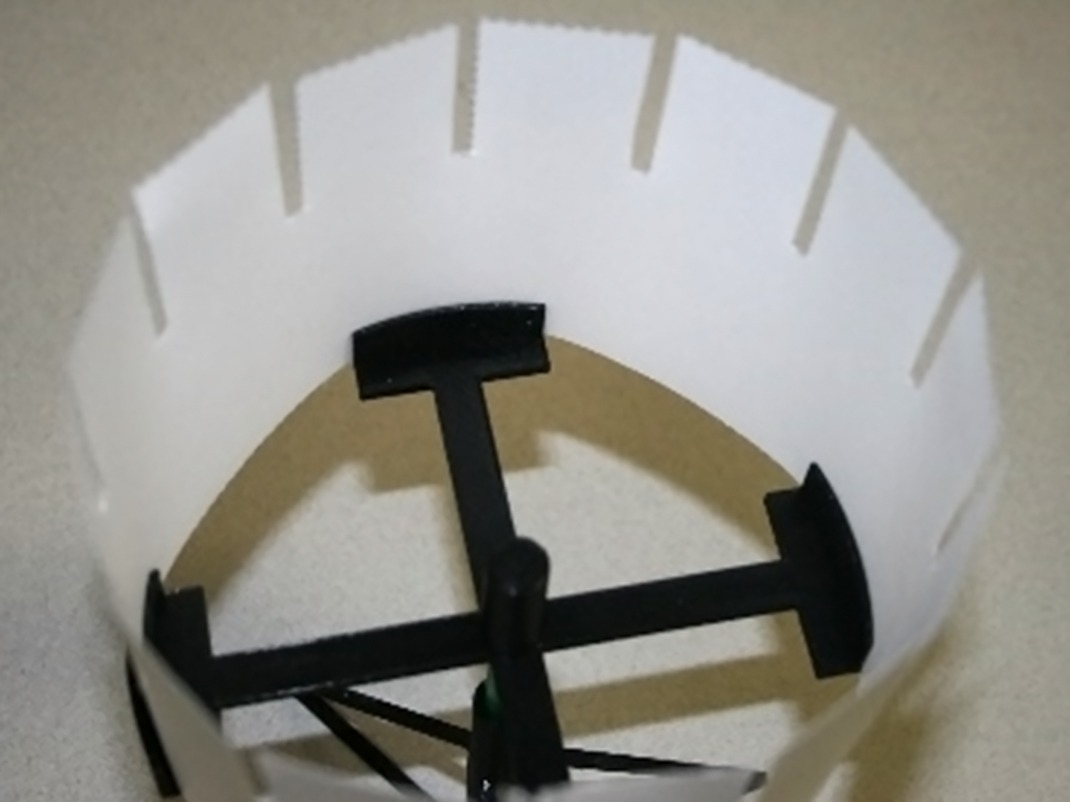
- Insert the bottom edge of the drum into the slots at the ends of the arms of the base.
- Place one of the cylindrical zoetrope strips into the zoetrope drum. For best results, ensure that each image is directly across from a slit in the drum.
- Insert the base with the drum and strips onto the pen in the stand.
- Your zoetrope is now ready!
Scientific explanation
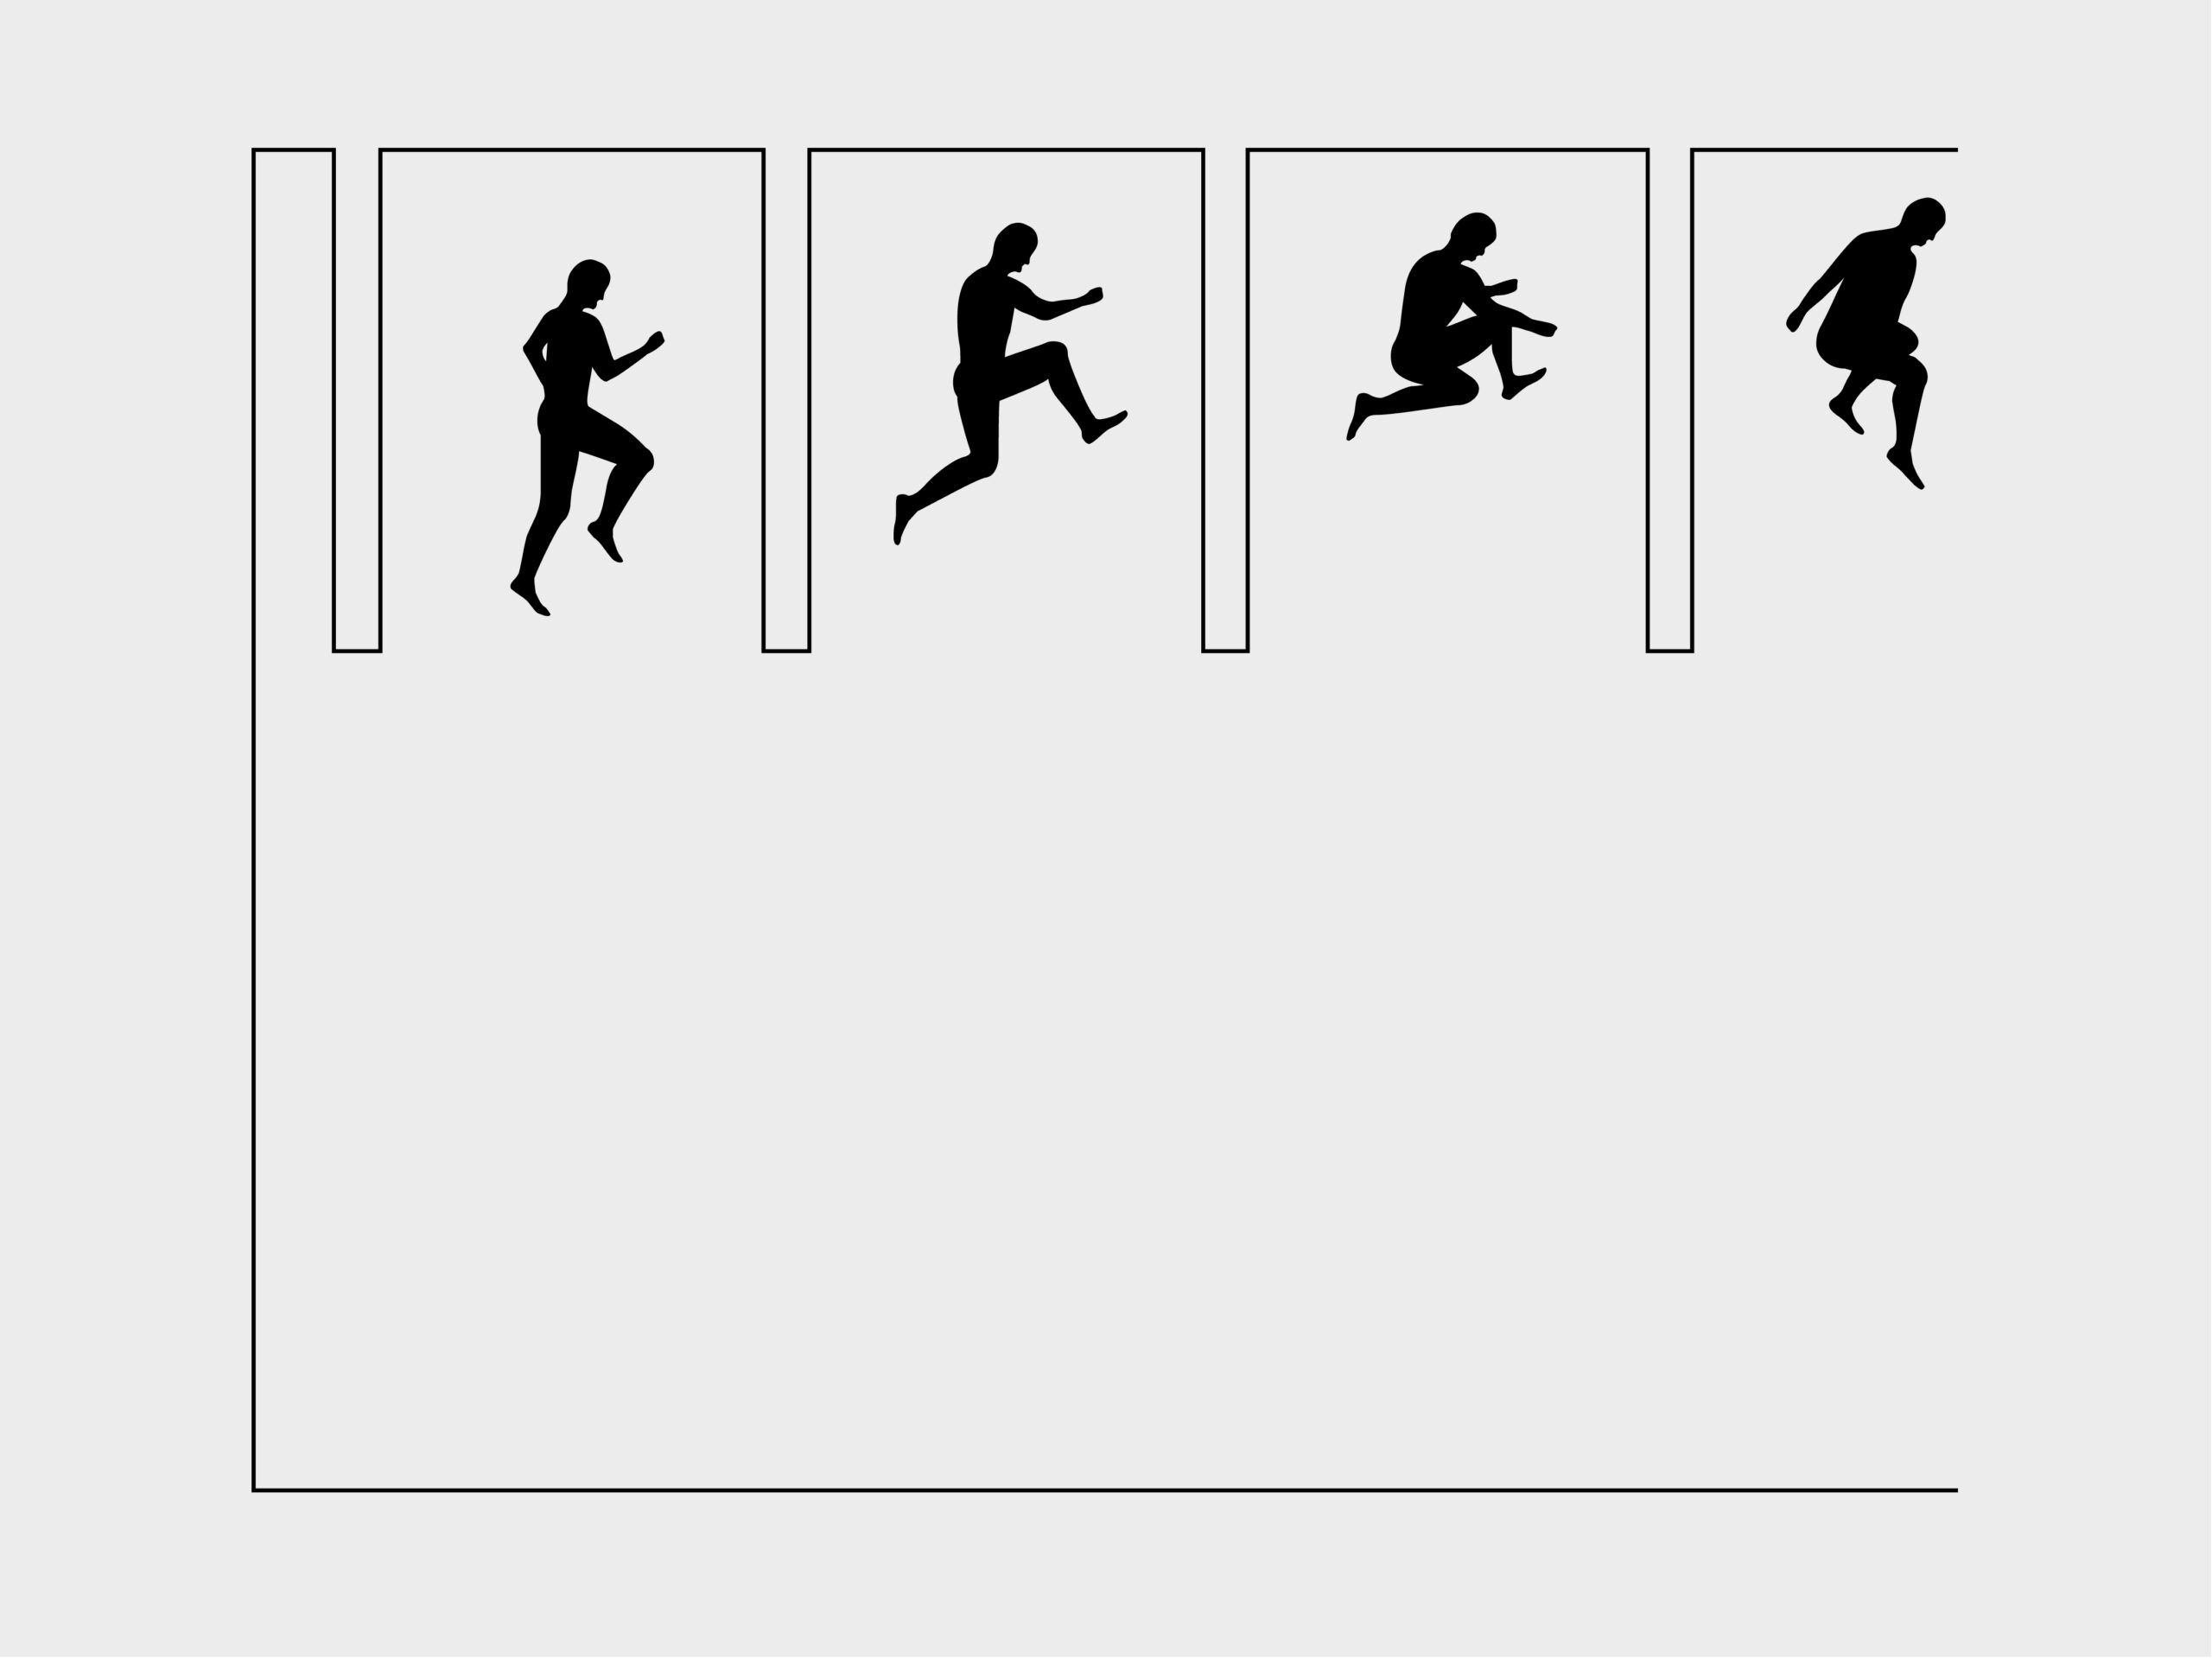
The animation produced by the zoetrope is based on something called persistence of vision. Persistence of vision is when, after seeing an object, our brains retain an image of the object for about 1/30 of a second after we stop looking at it. In a zoetrope, as you look through one of the slits, you see an image. Our brain then retains the image until the next image appears making it seem as though one image is “moving” to the next one. The slits in the zoetrope are important because they limit observation of each image to a brief moment. Without the slits, the spinning images in a zoetrope would become a blur. Some artists have created 3D zoetropes using strobe lights instead of slits. The periods of darkness created by the strobe light breaks up the image sequence, similar to the slits.
Try this! To further explore the concept of zoetrope animation, have your students alter a single aspect of the zoetrope while also predicting what will happen (and why). Then have them make the alteration, and observe the results. An easy alteration would be changing the speed at which the zoetrope spins. In general, the faster a zoetrope spins, the smoother the animation. If it is spun too fast, however, our brains cannot register the images properly and everything becomes a blur.
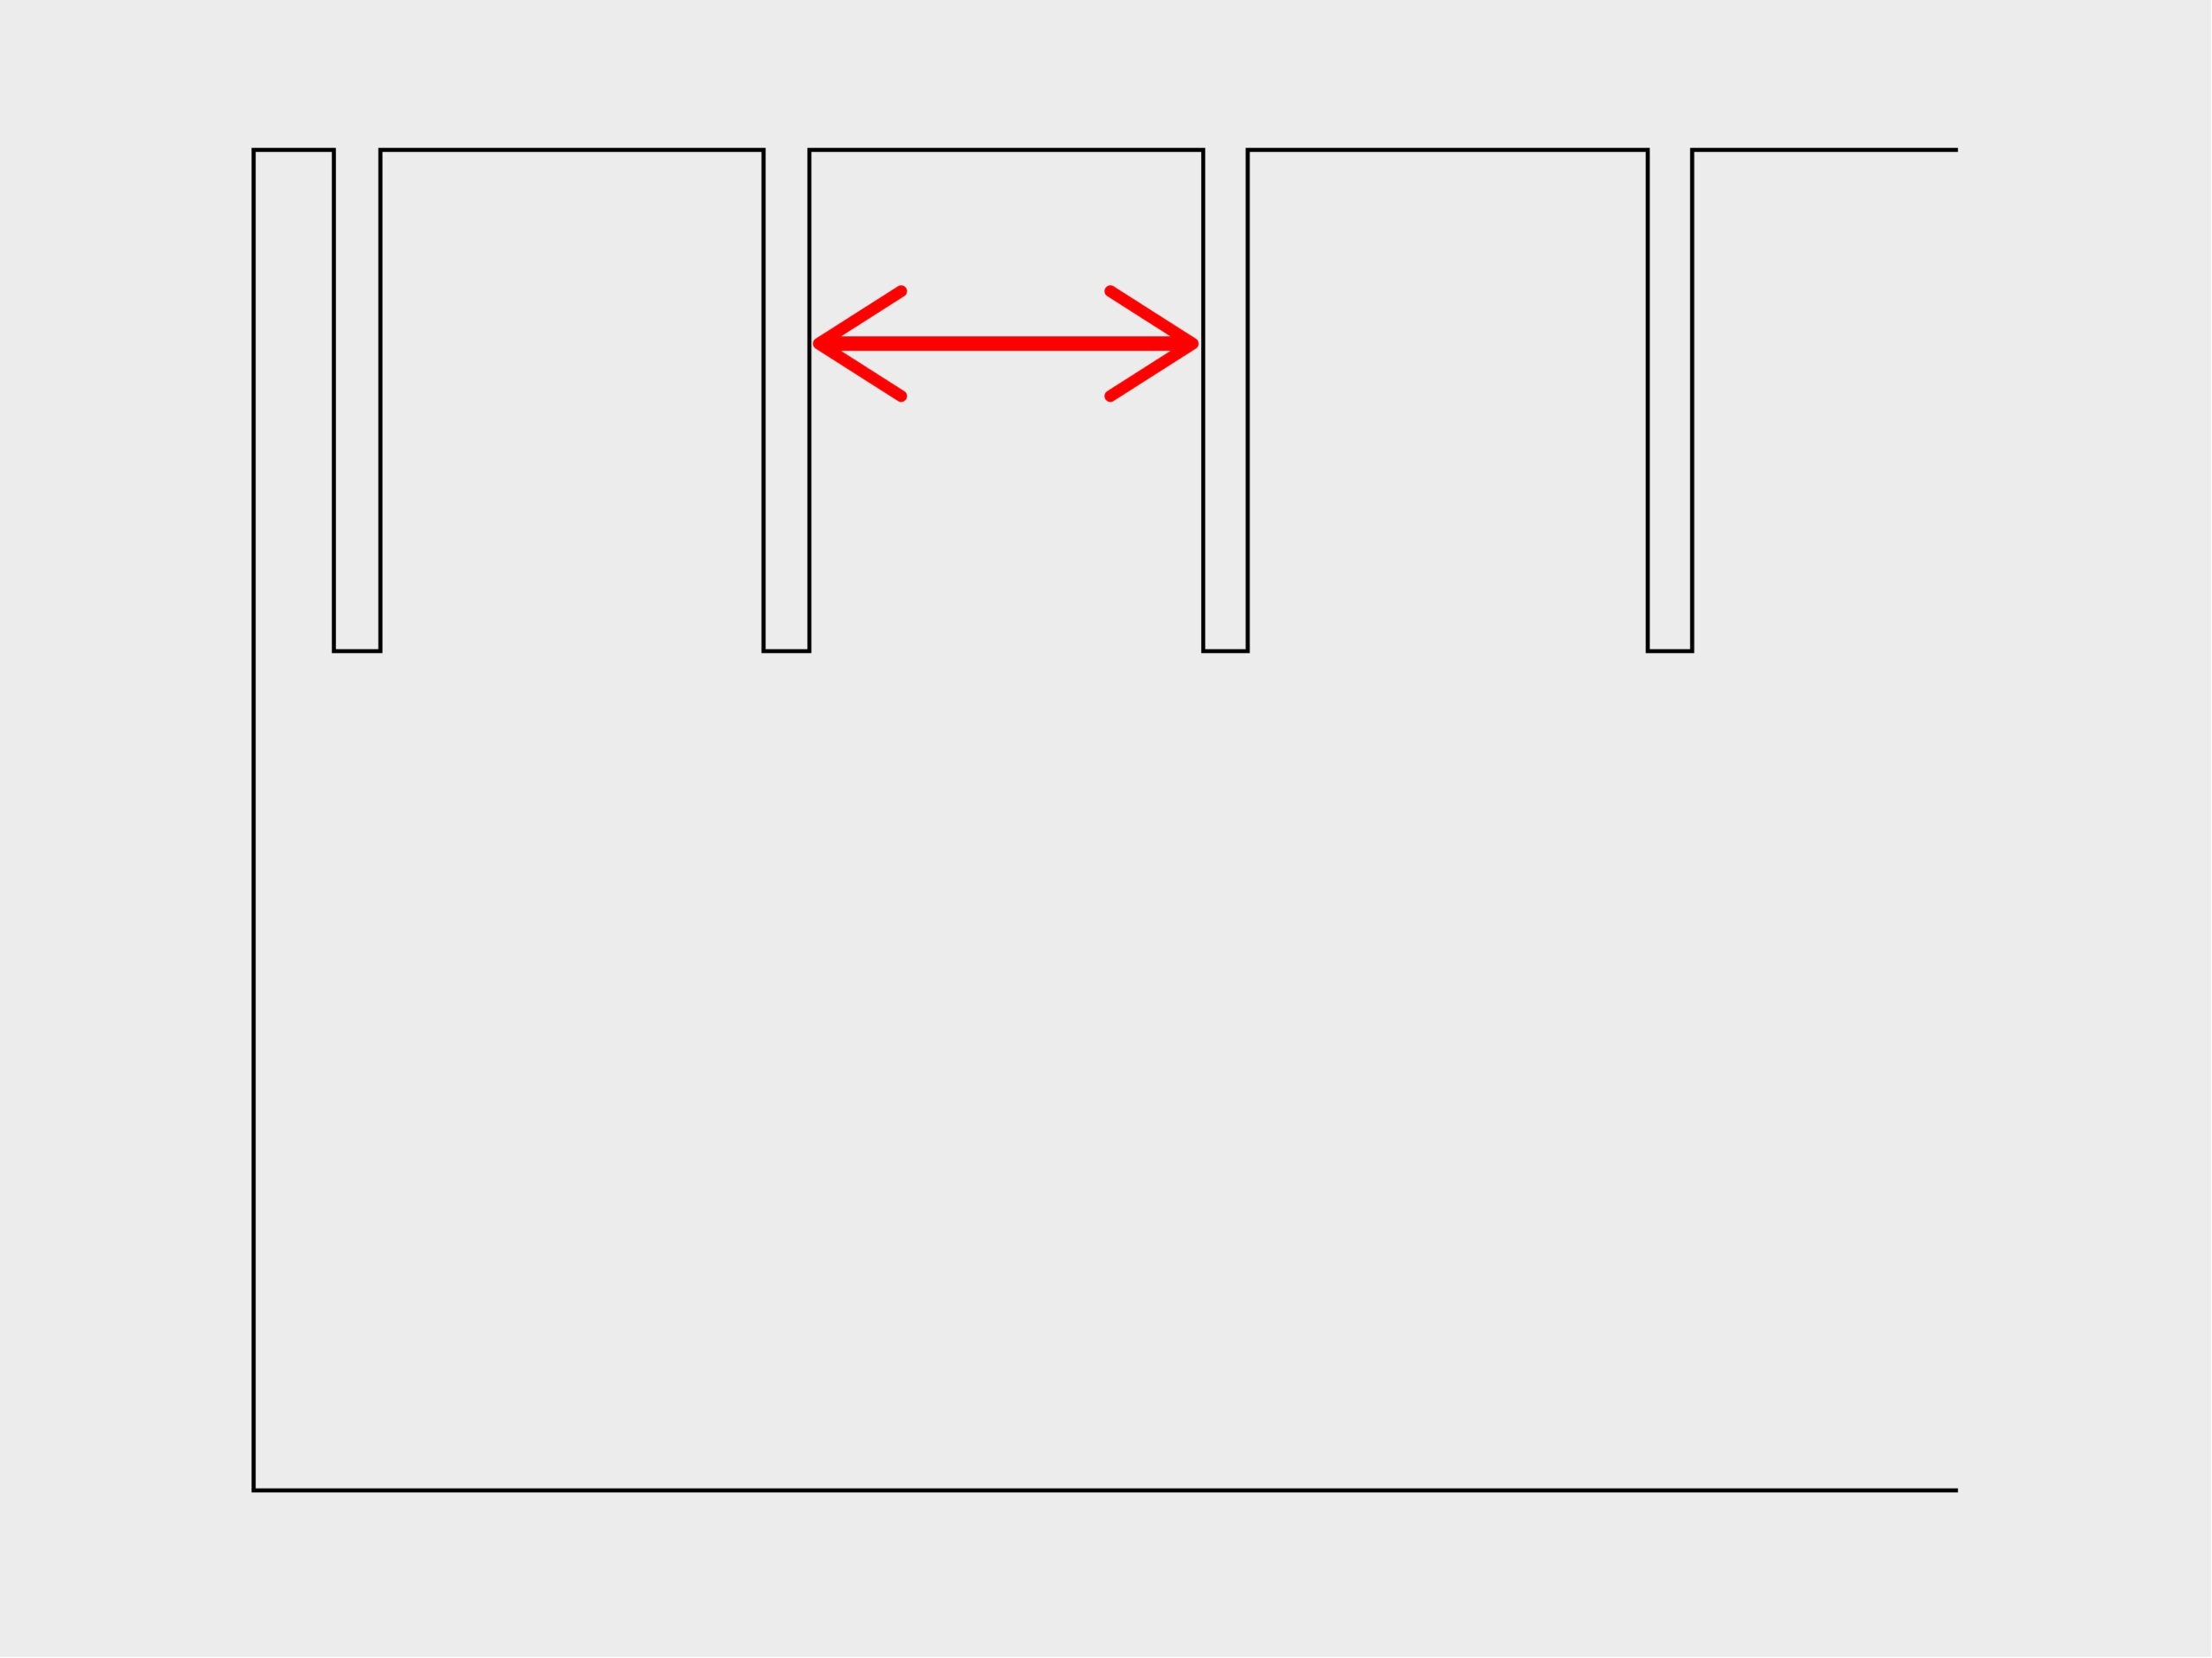
A more complex alteration would be to alter the slit width in the zoetrope drum. For this alteration, a new drum would need to be constructed. To do this:
- Cut out one of the rectangles on the zoetrope rectangle template along the dotted lines.
- Decide on the width of slit that you want; the original slit width is 0.3 cm.
- Draw the slits onto your rectangle. The height of the slits should be the same as the height used in the main activity (3.9 cm). The width is the width that you determined in step 2. Use the zoetrope drum template to determine where to draw the slits; the slits on your altered version should be in roughly the same position as the original. To help with this task, the distance between the slits (see red arrow in image to the right) can be calculated as:
- Length taken up by slits (in cm) = 13 × width of slits (in cm)
- Length taken up by tabs (in cm) = 43 (Length taken up by slits)
- Distance between slits (in cm) = Length taken up by tabs ÷ 13
- Follow the rest of the steps in the original activity to build your new zoetrope and see the results of the change you have made. An ideal slit width would be one just wide enough to allow a clear view of the image directly opposite of the slit, but not wide enough to reveal much of the other images. Slits larger or smaller than this ideal width will likely affect the quality of the animation.
Ingenium has more than 150,000 objects in its collection, including many about zoetropes and zoetrope strips.
Create a zoetrope strip
A zoetrope can be something that inspires a lot of creativity! In this activity, your students will draw their own images for this device.
Materials
- Set of 3D zoetrope parts
- Printout zoetrope drum template
- Pen (BIC® pens work particularly well)
- Scissors
- Printout of the zoetrope blank strip template or zoetrope pre-drawn template
- Tape
- Pencil, crayons (something to draw)
Instructions
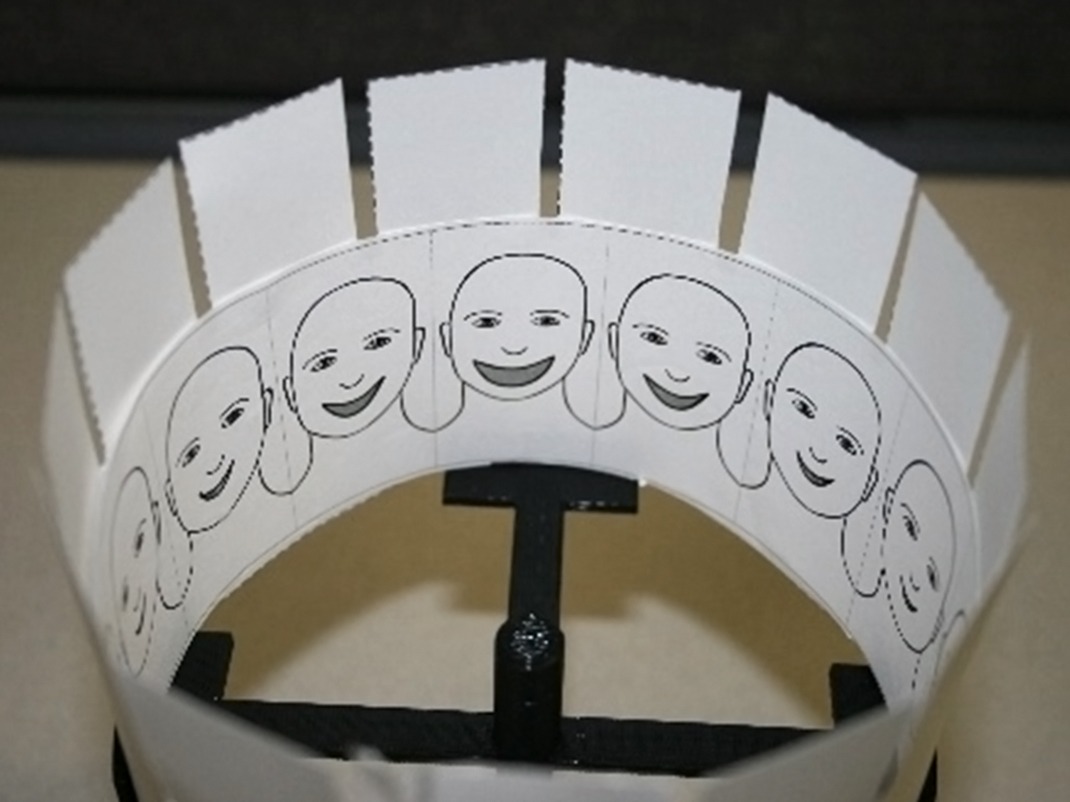
The exact template that you use with your class will depend on age. For younger students, you can use the zoetrope pre-drawn template of faces, on which your students will only need to add mouths. We’ve included an example of what could be done. For older students, you can use the zoetrope blank strip template, on which your students can decide what images they want to draw.
- Ask your students to plan what they want to draw on each of the panels of the zoetrope strip. A good idea is to have them sketch their ideas on a piece of rough paper before actually drawing it onto the zoetrope strip. Some general hints that you can give them:
- Keep things simple
- Have the strip begin and end with similar images. This way, the zoetrope strip will show a continuous sequence of images when spun. This is called a “looping animation”
- Cut out the strips from either the zoetrope pre-drawn template or the zoetrope blank strip template along the dotted lines.
- Have your students draw their planned image sequence on the strips. Leave about 1.2 cm of blank space at the bottom if you’re using the zoetrope blank strip template to ensure that the base doesn’t interfere with the animation.
- To use these newly designed strips, your student will need to build a zoetrope. To do this, follow the instructions in “Build a zoetrope” activity above.
Try this! You and your students can increase or decrease the number of slits in the zoetrope drum, and, thus the number of panels in the zoetrope strip. To do this, you will need to use the zoetrope rectangle template to re-design the zoetrope strips and you will need to re-design the zoetrope drum template.
Re-designing the zoetrope strips
- Determine the number of panels (or slits) you wish to have.
- Determine the width of the panels on the zoetrope strip. To do this, use this equation:
- Width of each panel (in cm) = 41.9 ÷ (number of panels)
- Draw the panels onto one of the rectangles of the zoetrope rectangle template. You should end up with something that looks like the zoetrope blank strip template that you used earlier in this activity.
Re-designing the zoetrope drum template
- Draw a rectangle on a piece of tabloid-sized paper that has the same height (10.2 cm) and length (43.0 cm) as the drum used in the activity above.
- Determine the distance from the edge of one slit to the edge of the next one (see red arrow in the image below), using the following equations:
- Length taken up by slits (in cm) = (number of slits) × 0.3
- Length taken up by tabs (in cm) = 43 (Length taken up by slits)
- Distance between slits (in cm) = Length taken up by tabs ÷ (number of slits)
- Draw the slits onto the rectangle that you drew in step 1 above.
- The height of the slits should be 3.9 cm
- The width of the slits should be 0.3 cm
Build the zoetrope
You can now build your new zoetrope following the steps outlined earlier in this activity.
Ingenium has more than 150,000 objects in its collection, including many about the zoetrope and zoetrope strips.
Explore the collection onlineArtifact: Zoetrope
The zoetrope is one of the earliest animation devices. Invented in 1834 by William George Horner, it was originally named the Daedalum or “wheel of the devil”. It was not very popular until around 1867, when it was rediscovered and patented by William F. Lincoln in the U.S., and Milton Bradley in England. It was Lincoln who gave it the name “zoetrope” or “wheel of life”.
With the invention of more sophisticated animation devices, such as the praxinoscope, and ultimately film and television, interest in the zoetrope declined significantly. Today, it is rare to find a zoetrope in a person’s home, although it is still used by some artists and animators.
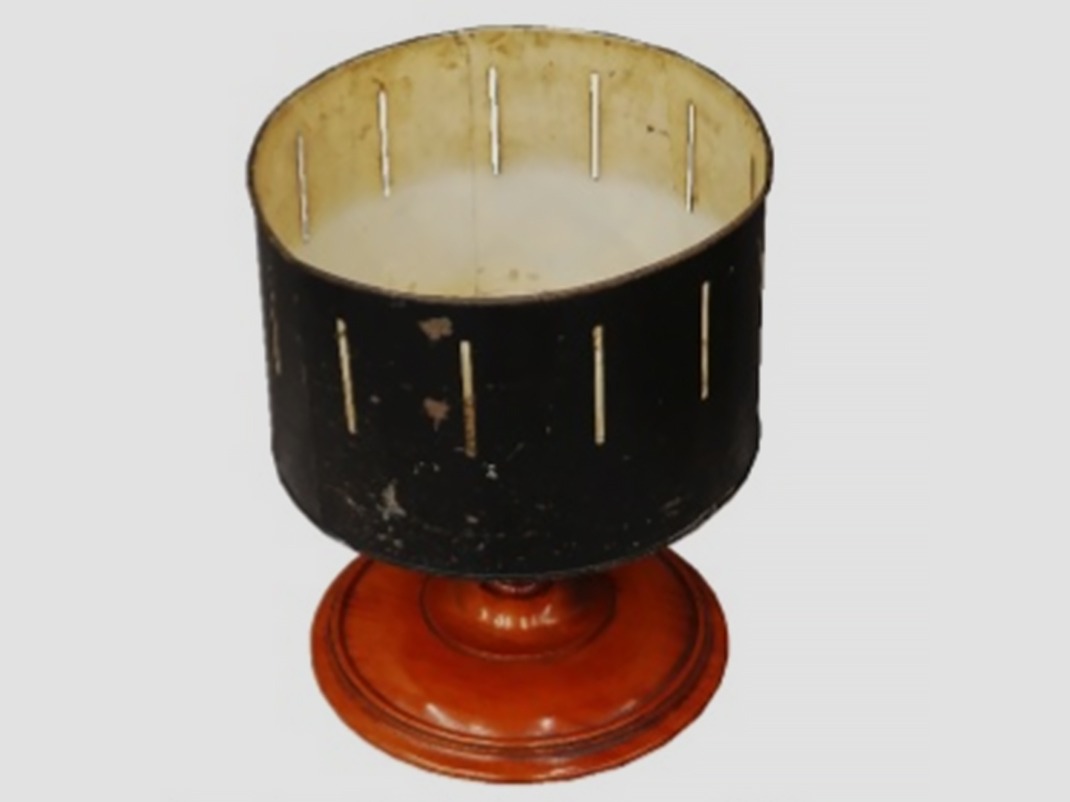
Artifact details
Zoetrope, before 1900
Manufacturer: London Stereoscopic Photographic Co.
Artifact no. 1987.0280.001
Manufactured in London, England, the base of the zoetrope was built out of wood, while the drum was built out of metal, possibly tin. The drum was painted black on the outside and white on the inside. Zoetrope strips would be placed inside of the drum.
Fun fact
The largest zoetrope ever made measured 9.9 m in diameter. It was created by Sony and spun at a speed of 25 frames per second.
Files for downloading
3D printing files
- Zoetrope stand, base and artifact (ZIP, 1 MB)
Printable templates and strips
- Blank strip template (PDF, 5 KB)
- Drum template (PDF, 10 KB)
- Pre-drawn template (PDF, 4 MB)
- Pre-drawn template example (PDF, 47 KB)
- Rectangle template (PDF, 4 MB)
- Strips (PDF, 5 MB)
Note: Print the drum template onto a tabloid-sized piece of cardstock (11” x 17” or 279 mm x 432 mm). Print the zoetrope strips onto a tabloid-sized piece of paper. When printing do not “print to fit”; make sure it prints at 100%. If possible, have your printer print “edge to edge”.
You may also be interested in
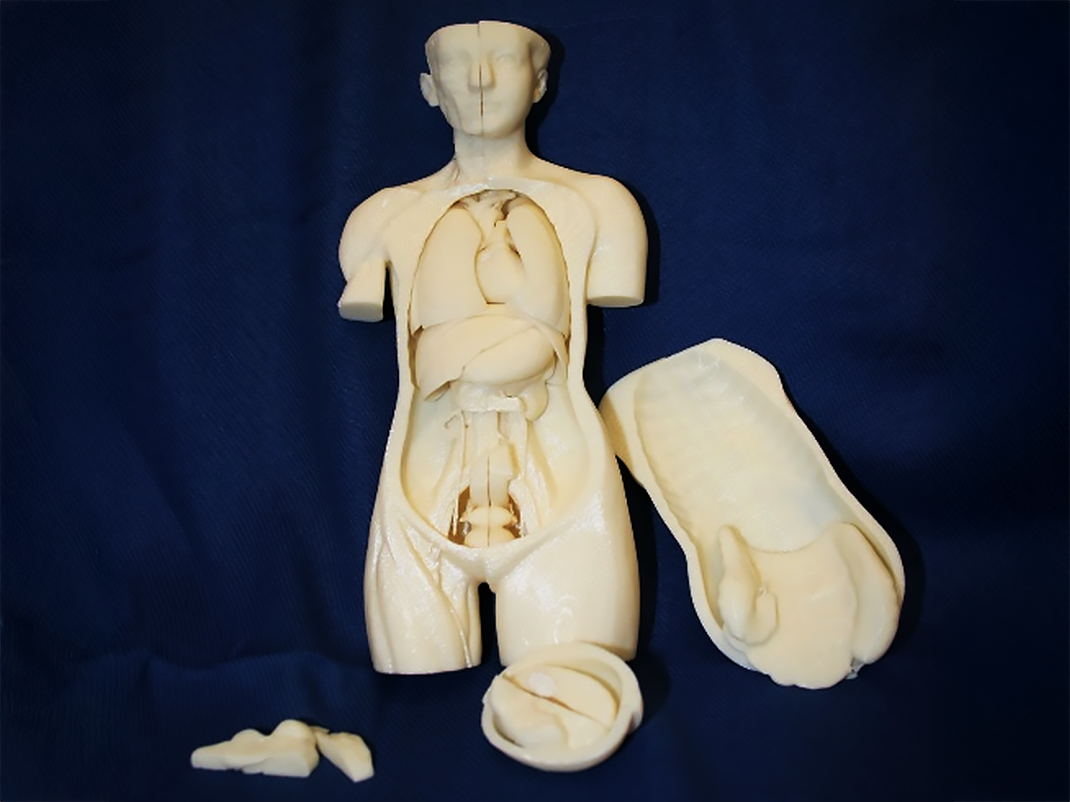
Anatomical model
Learn about the amazing human body and how complex organs perform all sorts of functions that work together to keep us alive in a series of fun, educational mini-activities and demonstrations from Ingenium.

Butter-making artifacts
Make your own butter in your classroom with these 3D printable files and activities. Then, create a stamp to decorate and name your butter with a butter stamp like the kind used in the 18th and 20th centuries.
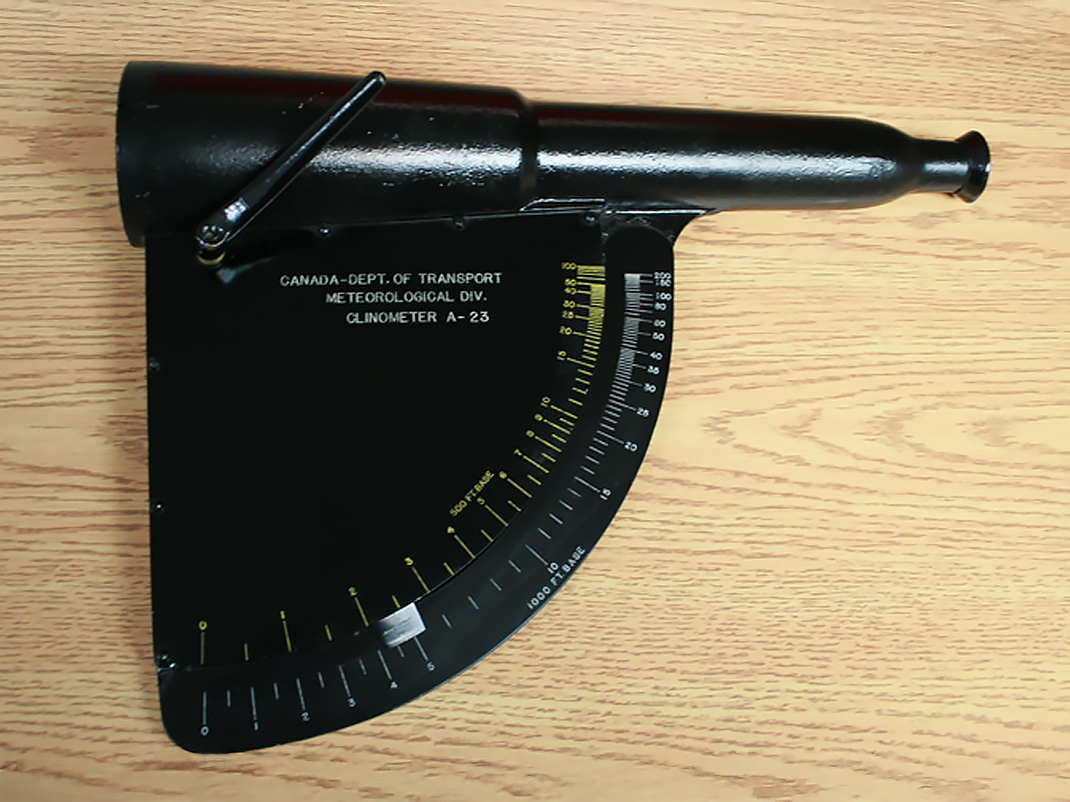
Clinometers
Find out how you can use a clinometer to determine how tall something is in your everyday life! Students can explore this 19th century tool through this educational resource from Ingenium, including downloadable 3D files and activity sheets.