Energy
Grade 1 (Ontario)
Elementary cycle 1 (Quebec)
Discover energy in our lives with this educational lesson plan. With a focus on the Sun as a central source of energy, this kit investigates energy in the context of its use on the farm, in the classroom, and at home. Students will use energy from the Sun’s rays to conduct an experiment and to make an art project. They will discover energy transformations on the farm and even transform their own wind energy into sound! Compare energy use in the four seasons, investigate ways to save energy and, together, learn about how farms are increasingly becoming energy producers.
Share :
Background information
Mathematics
General activity
Printable PDFs
Background information
- Energy is the ability to do work. This means that energy makes things happen.
- We need energy to play and grow. It is what makes cars drive and airplanes fly. We need it to run computers, video games, and lights. We need it to cook our food and to keep warm in the winter. We need energy for everything we do!
- Where does energy come from? Most energy comes from the Sun!
- Energy from the Sun can be captured as either heat or light.
- Energy from the Sun is stored in wind, water, biomass, and fossil fuels.
- The Sun, as the principal source of energy for the Earth, makes each of the following sources of energy possible.
Renewable sources
Energy generated from sources that can be easily replenished
- Wind: The Sun warms the air (Heat energy); this warm air, which weighs less than cold air, rises; as it rises, cooler air rushes in to take its place; this movement of air is wind
- Water: The Sun is the driving force of the water cycle; without the Sun, water on Earth would be stagnant (and frozen); the Sun allows for the fast-moving water we harness for hydropower
- Biofuels: These are fuels made from plants; through photosynthesis, plants convert light energy from the Sun into chemical energy; this stored energy is released when biofuels are burned and converted into other forms of energy (often electrical, heat, or kinetic)
Non-renewable sources
Energy generated from sources that cannot be easily replenished
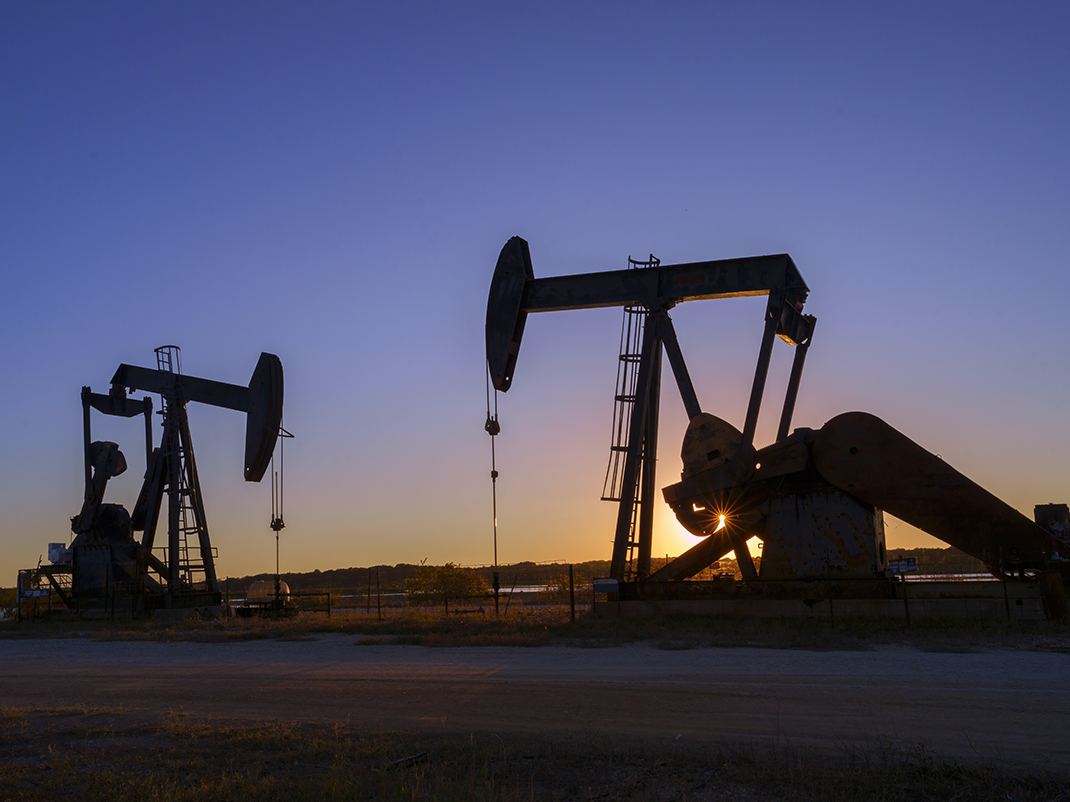
- Fossil fuels: Long ago, these were living plants and animals; these plants and animals stored and converted energy from the Sun in the same way as plants and animals living today (plants store the Sun’s energy and animals eat the plants, or some animals eat the animals that eat the plants); over millions of years these remnants of prehistoric organisms have decomposed and been pressurized, converting them into fossil fuels such as coal, natural gas, and oil; when these are burned, the stored energy from the Sun is released and converted into other forms (often electrical, heat, or kinetic).
Energy sources on the farm
Solar energy (The Sun)
- Energy stored in plants (Biomass)
- Wind energy
- Energy stored in fossil fuels (Coal, natural gas, oil)
Energy from these sources can be transformed into different forms of energy. Some forms of energy include:
- Electrical
- Chemical
- Mechanical
- Sound
- Light
- Thermal (Heat)
- Kinetic (Motion)
Energy transformation vs energy transfer
- Energy transformation: energy is changed from one form into another (e.g., electrical energy into light energy)
- Energy transfer: energy is moved from place to place (or from one object to another), but the form of energy does not change
There is a law in science (the Law of Conservation of Energy) that states that energy cannot be created from nothing and it cannot be destroyed. Energy can, however, be transferred or transformed.
Sample activity to illustrate the Law of Conservation of Energy:
- Ask the students to rub their hands together very quickly. What do they feel? Some of their kinetic energy (the movement of rubbing their hands) is being changed into thermal energy (their hands will feel warm).
- Ask the students to clap. What do they hear? Again, the kinetic energy is being changed into another form of energy: sound energy.
- In both cases, the energy to move their hands comes from the food they eat. The food is able to grow because of the Sun. Therefore, the Sun, ultimately, is the principal source of energy.
Living things sunbeams
Through this craft activity, students see that living things get their energy from the Sun.
Learning objective
- Identify the Sun as the principal source of energy for living things
Learning method
- Creating a visual representation of a sun
Materials
- Yellow paper
- Glue and/or tape
- Scissors
- Copies of Living things sunbeams activity sheet (1 copy per 12 students)
Before the activity
- Cut the yellow paper into:
- One large circle, to represent the Sun
- Strips to represent sunbeams (referred to as strip A in the instructions); cut enough for 1 strip per student
- Cut along the solid lines of the “Living things sunbeams” activity sheet (referred to as strip B in the instructions); cut enough for 1 strip per student
Instructions
- Tape the large yellow circle to the chalkboard.
- Distribute strips B. Ask students to identify their image and write its name (e.g., “pig”) on strip B. Note: If necessary, write the animal and plant names on the chalkboard for students to copy.
- Distribute strips A. Ask the students to glue strip B onto strip A.
- Collect the strips and glue or tape them around the large yellow circle, like sunbeams.
- Ask the students to identify what they have created: The Sun!
- Explain that the plants and animals on the sunbeams get their energy from the Sun.
Suggestion
Have the class brainstorm about some living things. Write the students’ responses on the chalkboard. Have students choose their favourite living thing and copy it directly onto their strip of yellow paper.
See printable PDF at the bottom of this page.
Energy chains
By building chains of energy transformations students see that the Sun is a source of energy for living and non-living things. Energy transformations allow us to turn some less useful forms of energy into forms of energy that we need in everyday life.
Learning objectives
- Identify the sun as the principal source of energy for living and non-living things
- Understand that energy can be transformed from one form into another
Learning method
- Creating a chain of energy transformations
Materials
- Scissors
- Glue
- Energy chain activity sheet (chains 1 to 4) 1 copy per student
- Energy chain worksheet (1 copy per energy chain) 4 copies per student
Instructions
- Select one or more chains (see below for descriptions of chains 1 to 4). Distribute the associated activity sheets to students.
- Have students cut out each picture.
- Have them glue the picture of the energy source onto the first box of the worksheet.
- Have them glue the remaining 3 pictures in the correct order.
Depending on student skill, there is space for students to write either a word or sentence describing each picture.
See printable PDFs at the bottom of this page.

Hot or not
By conducting a heat absorption experiment, students feel how the Sun’s heat is a form of energy.
Learning objectives
- Understand that the Sun’s heat is a form of energy
- Discover that dark colours absorb the Sun’s heat energy better than light colours
Learning method
- Conducting a heat absorption experiment

Materials
- Piece of black plastic, 1 per small group of students
- Piece of light-coloured or clear plastic, 1 per small group of students
- Copies of Hot or not? observation sheet, 1 copy per student
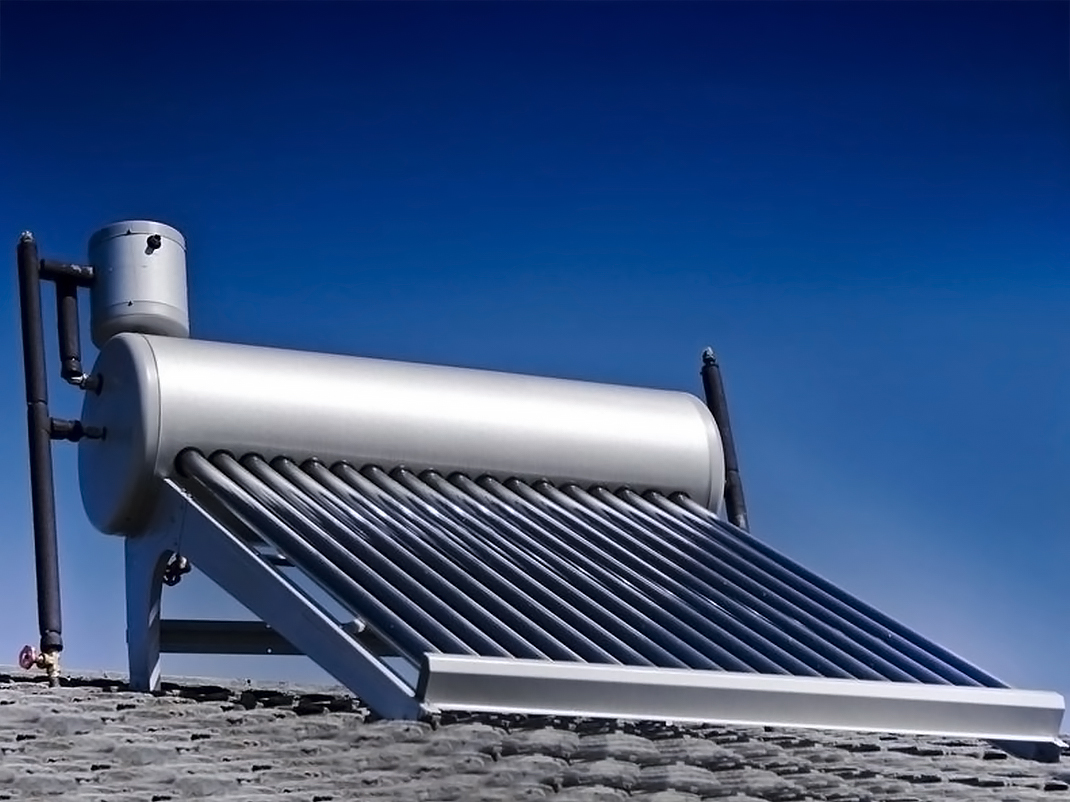
- Optional: roof-mounted solar hot water heating unit picture
Note: this experiment could also be done with black or dark-coloured objects to be compared to white, clear, or light-coloured objects.
Before the activity
On a sunny day, bring the students outside. If this is not possible, ask students to use their memory and imagination for the following exercise.
- Have students stand in a sunny location.
- Have students move to a shady location.
- Have students compare the temperature of the sunny location to the shady location.
Instructions
- Conduct this experiment on a sunny day. Divide the class into small groups. Distribute the pieces of plastic (or objects) to each group.
- Have students feel each piece of plastic and describe the temperature of the black plastic compared to the clear plastic (warmer, colder, or the same). Have students record their observations on the “Hot or not?” observation sheet.
- Have students place the pieces of plastic in a sunny location (e.g., classroom windowsill).
- After 15 to 30 minutes, have students take turns resting one hand on each piece of plastic. Have students record their observations on the “Hot or not” observation sheet?
See printable PDFs at the bottom of this page.
Suggestion
Black absorbs the Sun’s energy, whereas white or light-coloured objects reflect the Sun’s energy (like a mirror). This means that black or dark-coloured objects heat up faster than white or light-coloured objects. To expand on this concept, show the picture of the roof-mounted solar hot water heating unit.
Lights out!
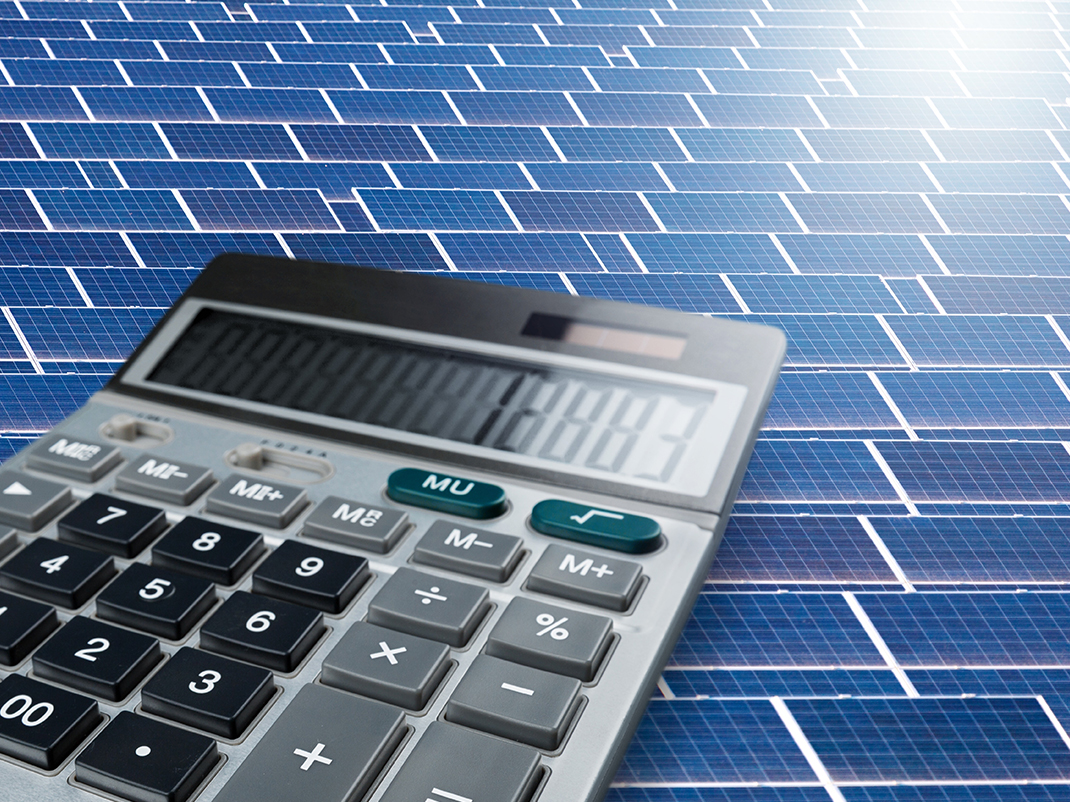
By conducting an experiment with solar powered calculators, students see that the Sun’s light is a form of energy.
Learning objective
- Discover that the Sun’s light is a form of energy
Learning methods
- Experimenting with a solar powered calculator
Materials
- Solar powered calculators
- Solar panel picture
Instructions
- Distribute the calculators to each student or small group of students.
- Present the picture of the solar panel. Explain that photovoltaic panels change light energy into electricity.
- Have students find the solar panel located on each calculator.
- Once all students have located the panel, ask them to turn on the calculators.
- Have students cover the solar panel. When the panel is covered, what happens to the calculator? Discuss the results.
When the calculator’s solar panel is covered, the calculator turns off. This is because there is no light for the panel to change into electricity, and without electricity, the calculator does not work.
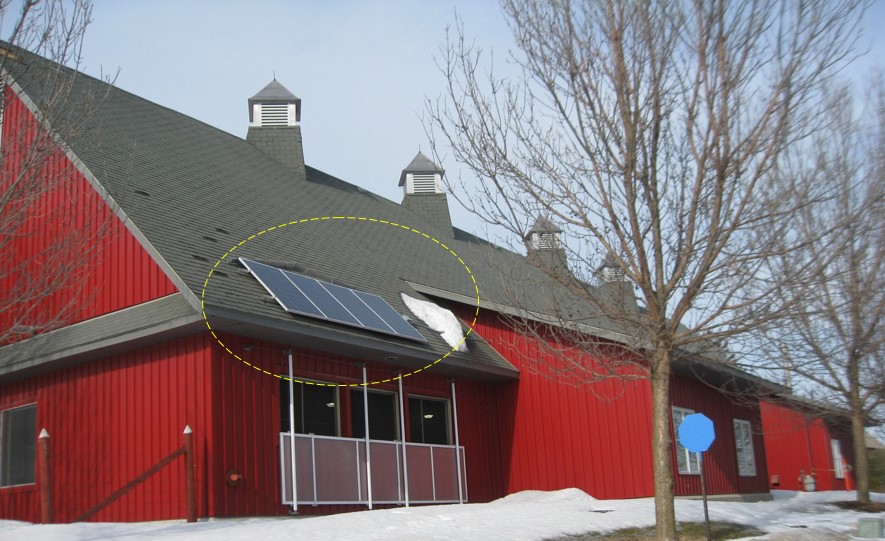
Solar panels and farming
Some farmers are placing solar panels in fields and on the roofs of their farm buildings.
The Canada Agriculture and Food Museum has solar panels on the roof of the Horse and Cattle Barn. These panels produce enough electricity to power fans and lights in the barn!
Solar panel
The farm vs. my house — Electricity uses
In this activity, students identify some of the ways they use electricity, which is a form of energy, and compare this to electricity usage on farms.
Learning objective
- Consider objects that use energy and what this energy helps us to accomplish
Learning methods
- Identifying items that use electricity at home
- Comparing electricity-using items from home to items used for similar purposes in agriculture
Materials
- Copies of Electricity at my house checklist, 1 copy per student
- Electricity on the farm picture series
Instructions
- Have students complete the “Electricity at my house” checklist.
- For the items that use electricity, ask students to identify either:
- What is it for?
- What does it help you to do?
For example, a refrigerator is for storing and preserving food, or, a computer helps you to do your homework.
- Present the “Electricity on the farm” picture series.
- Ask students to compare electricity usage on the farm to their own electricity usage. Discuss what is similar and what is different.
See printable PDF at the bottom of this page.
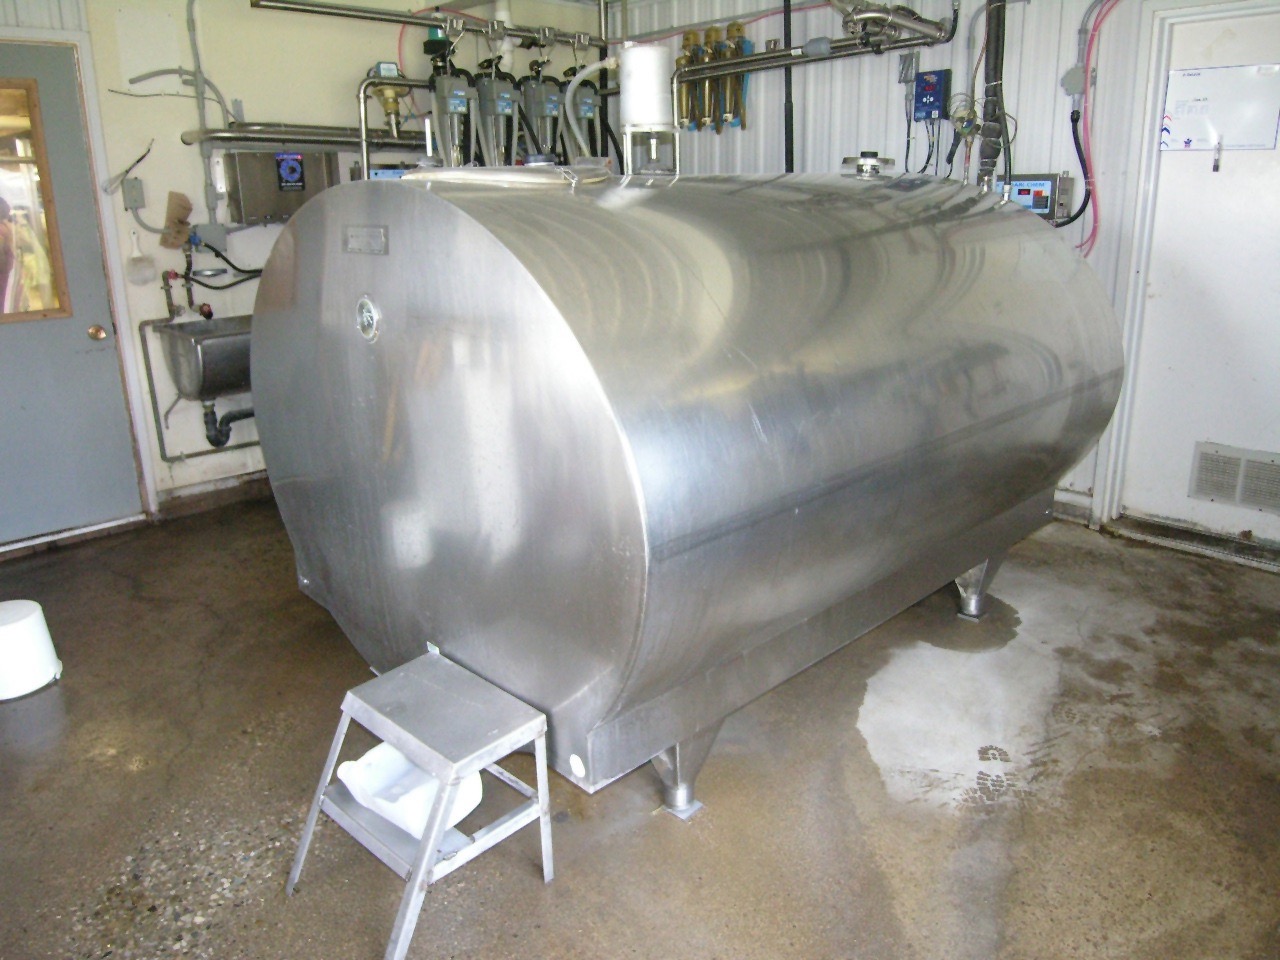
Refrigerator → Bulk tank
At a dairy farm, the milk is stored in the bulk tank. This tank is refrigerated. The bulk tank cools the milk and keeps it cold until a refrigerated truck picks it up to take it to the dairy.
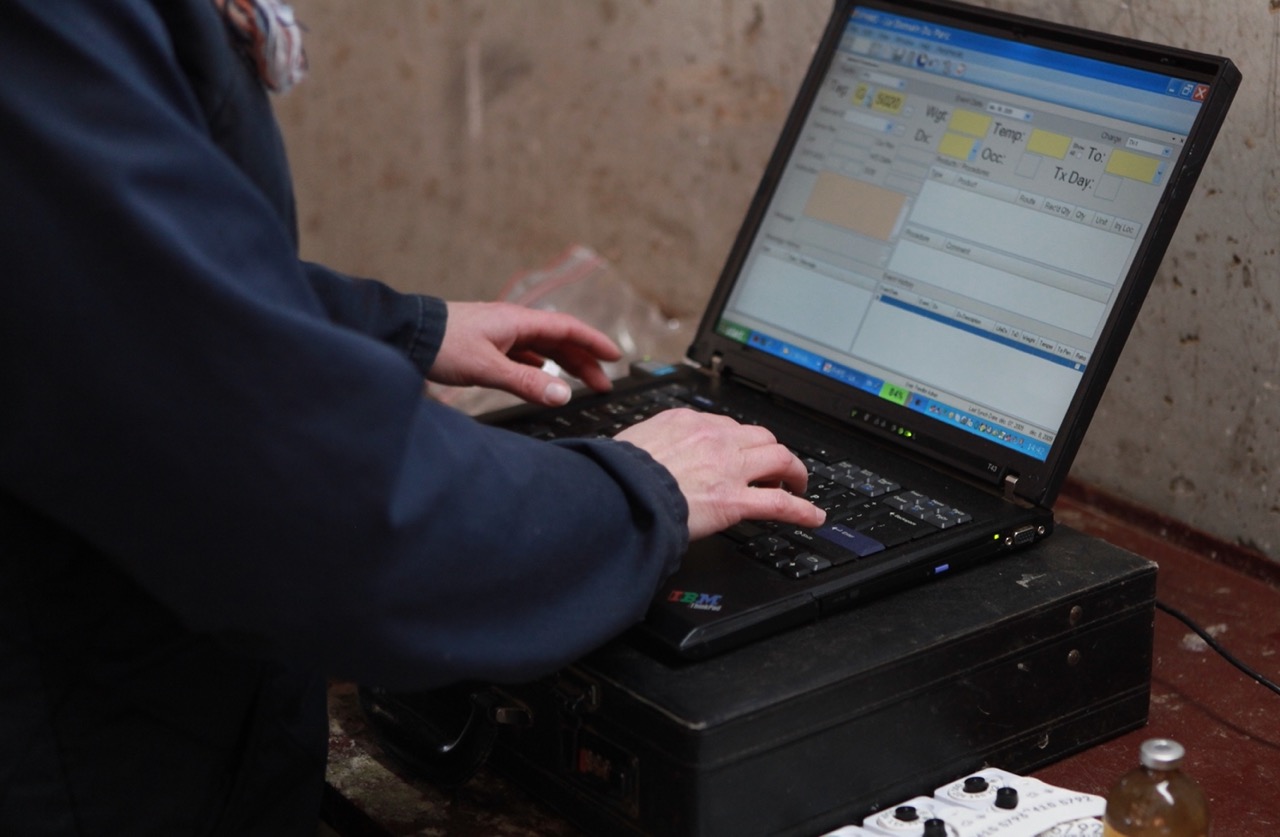
Computer → Farm computer
Computers are used on farms in many different ways. Farms are businesses, so computers can be used to keep business records (e.g., budget information, equipment inventories, or animal health logs). Computers can also be used to program and monitor certain equipment, set temperatures, or automatically adjust fertilizer sprayers.
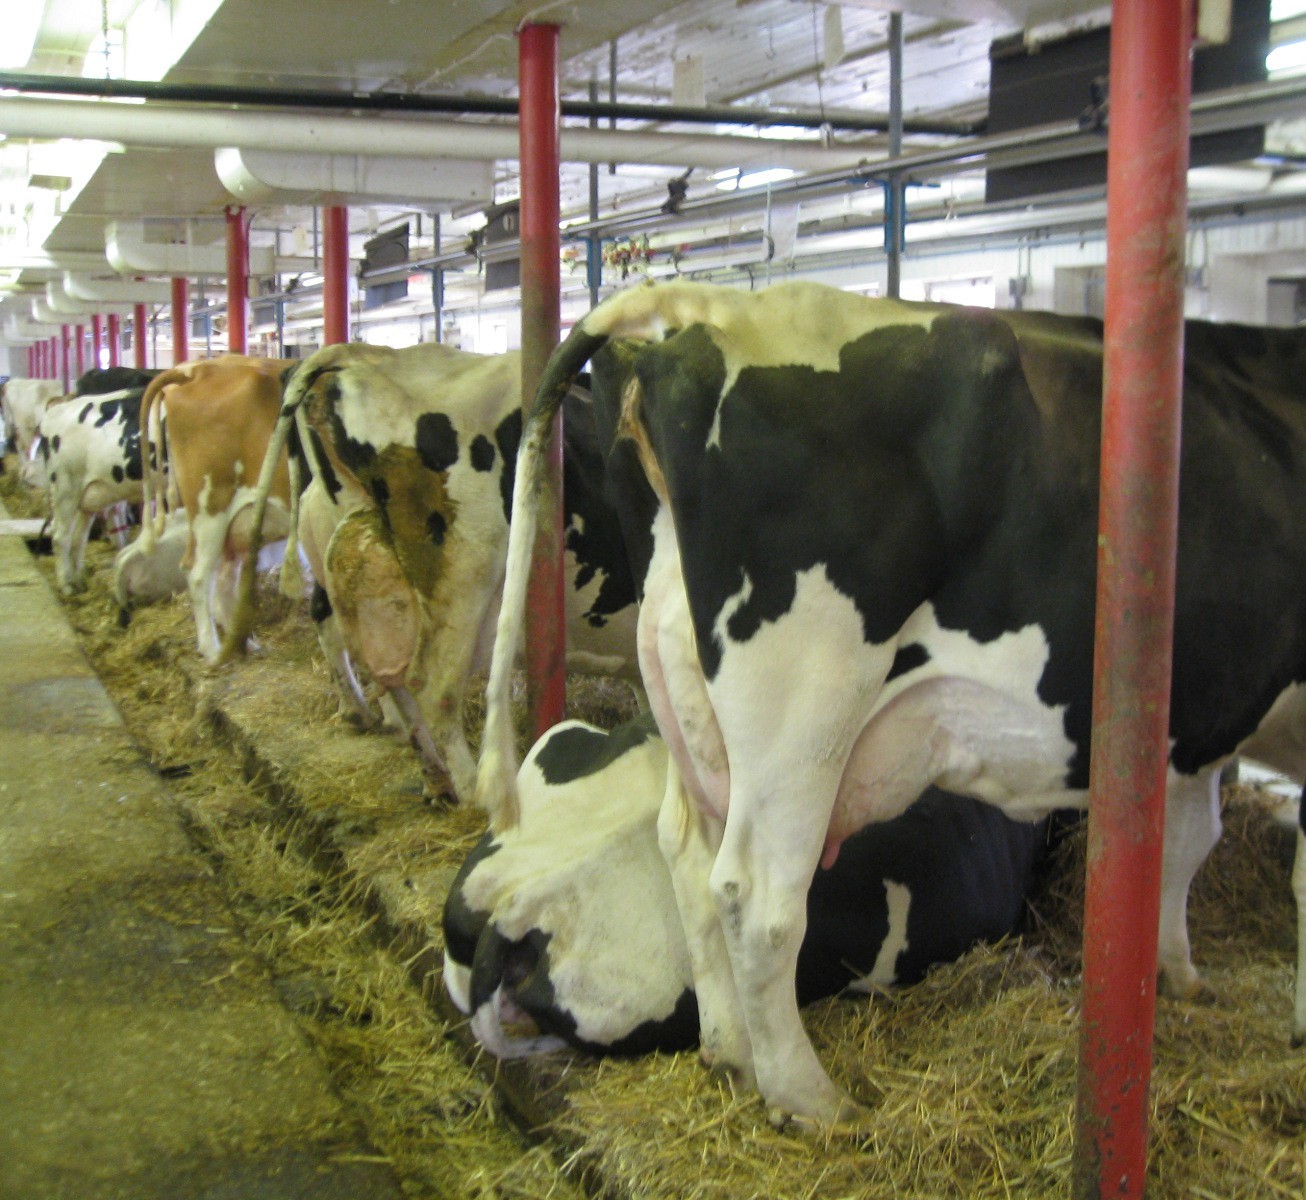
Fan → Barn fan
Barn fans are used to circulate air in the barn. This keeps the animals from overheating during the warmer months and ensures a supply of fresh air year-round. The fans in the above photographs are in a dairy barn. They are important because heat stress can have a significant impact on dairy cows’ milk production. Barn fans work to keep dairy cows and other farm animals cool and happy.


Lamp → Lighting in a barn
Barns have lights, just like houses. In some kinds of farming, lighting plays an important role. For example, hen egg production is stimulated by light cues. By controlling the light, Canadian farmers can ensure a steady supply of eggs year-round.

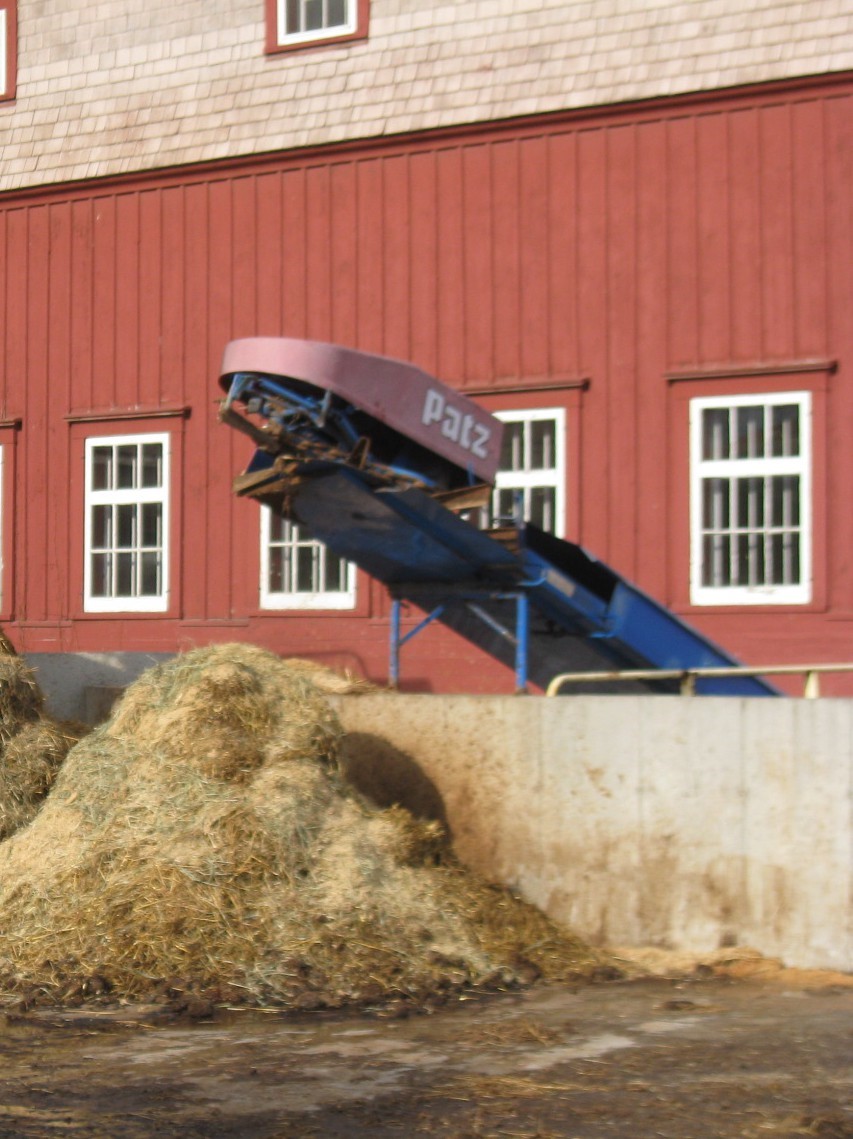
Vacuum → Barn cleaner
A barn cleaner is used to keep the barn clean and tidy. Unlike a vacuum, however, it does not use suction to pick up the dirt. Instead, it uses a conveyer chain to collect manure and other waste from behind the cows and transports this waste out of the barn.
Wind energy flyer
Students see wind energy in action by building a wind energy flyer and making it fly. Wind energy can be harnessed by structures like windmills and wind turbines.
Learning objective
- Discover that wind energy can make things move
Learning method
- Building a device that uses wind energy to move
Materials
- Paper, cut according to instructions, 1 per student
- Scissors
- Hole-punch
- Tissue paper
- Markers or crayons
- Tape
- Popsicle sticks, 1 per student
- String or yarn, about 60 cm long, 1 piece per student
Before the activity
- Using the template, prepare one piece of paper per student, or instruct the students to cut along the solid lines to create their own.
- Cut the tissue paper into strips.
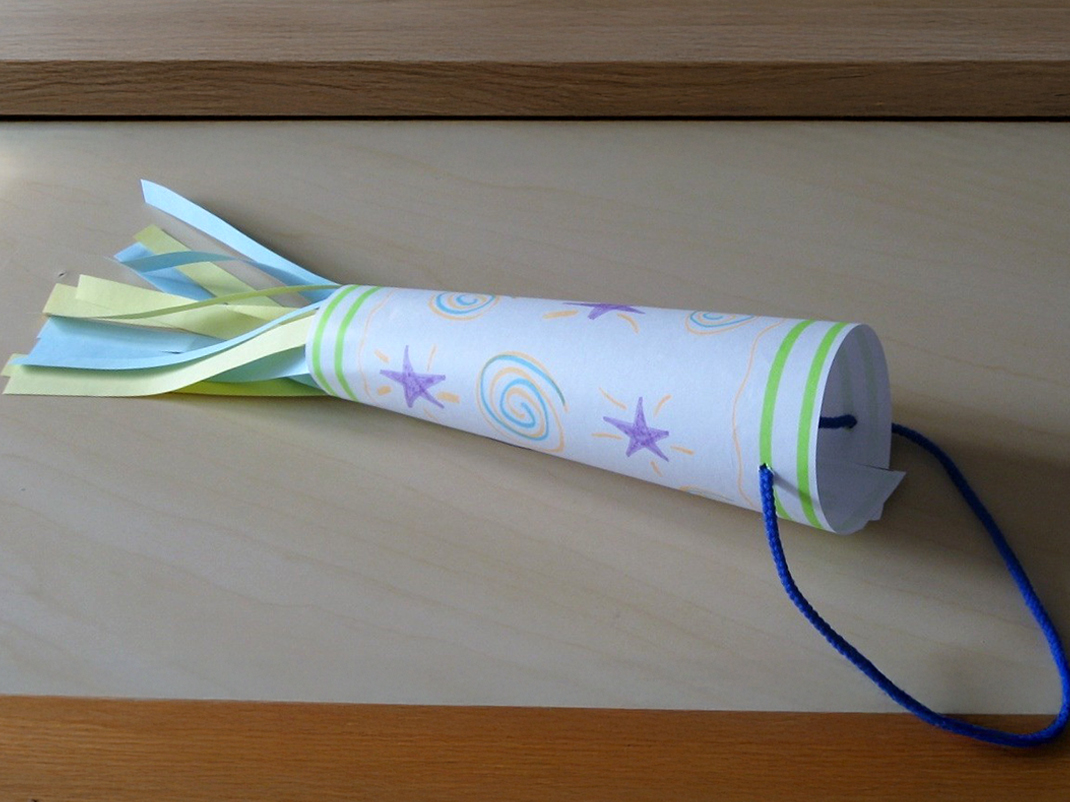
Instructions
- Have students decorate their templates with markers or crayons.
- Distribute the tissue paper strips to the students. Have them tape the strips to the narrow end of the template.
- Show students how to roll the paper, overlapping the wide end, until the edges of the narrow end meet. Secure with tape.
- Punch two holes opposite one another, near the end with the wider opening.
- Have students thread the piece of string through the holes and attach the ends to the Popsicle stick with tape.
- Bring the wind energy flyers outdoors or to the gymnasium. Ensuring that there is plenty of open space, have students hold the Popsicle stick and run with their flyer. The energy from the wind will make their flyers fly!
See printable PDFs at the bottom of this page.
Shared reading text: Growing wheat
Using the text provided, students participate in a shared reading activity about energy used for wheat production.
Learning objective
- Discover some sources of energy required in wheat production while developing literacy skills
Learning methods
- Reading and engaging with a shared reading text
- Making comparisons and connections
Materials
- Growing wheat text (9 pages)
- 8 acetate sheets
Before the activity
- Print the “Growing wheat” text onto the acetate sheets.
Instructions
- Project the text so that all students can read it together.
- Suggestions:
- Have students read the refrain as a chorus between each page.
- Have students identify what happens in each season.
- Have students identify the sources of energy for wheat production.
- Compare the sources of energy mentioned in the story with sources of energy used to do tasks at home or at school.
- For example, where does the energy come from to:
- Play at recess
- Use the computer or video games
- Light the classroom
- Discuss the reasons why different stages of wheat production occur in different seasons. Incorporate the characteristics of each season into the discussion.
- For example:
- Why is wheat planted in the spring? (lots of rain, ground is thawed)
- Why is wheat harvested in the fall? (getting colder, plants die over the winter)
- Wheat is planted in the spring — what are other activities done in the spring? In summer? In fall? In winter?
- Read “The Little Red Hen”. Using this story, identify differences and similarities between traditional and contemporary wheat production.
See printable PDF at the bottom of this page.
Biofuels
In this activity, students complete a series of estimation and pattern completion exercises on the subject of biofuels.
Learning objectives
- Be exposed to biofuels and their applications
- Strengthen mathematical skills, specifically estimation and pattern completion
Learning methods
- Using estimations skills to determine quantity
- Completing several series
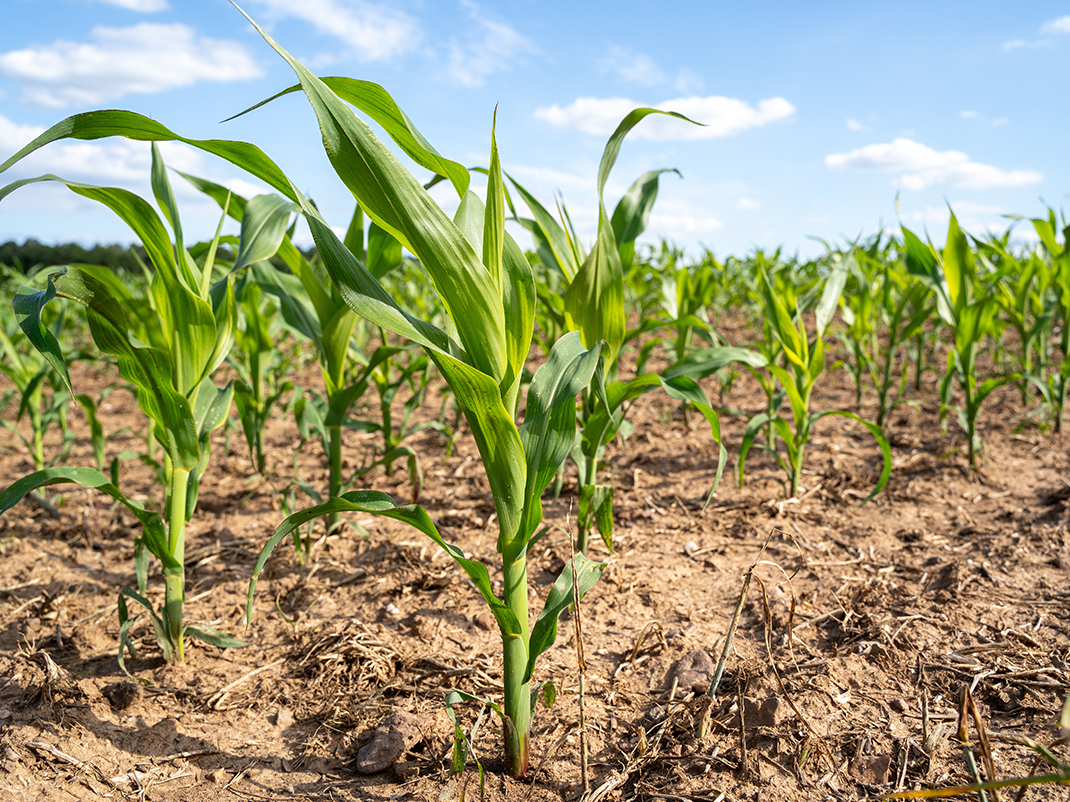
Biofuels: Guess how many?
Example: Switchgrass is a plant used to make biofuels. A biofuel is a fuel made from plants.

Without counting, estimate how many switchgrass plants are growing in this field.
10 25 50 75 100
See printable PDF at the bottom of this page.
Sun silhouette
Through this activity, students see the energy from the Sun’s light in action as it fades a sheet of paper.
Learning objective
- Discover that the Sun’s light is a form of energy
Learning method
- Using the Sun to fade construction paper
Materials
- Construction paper, 1 sheet per student
- Variety of objects
Instructions
Ask students to bring some objects from home, or, as a class, collect objects from outside or from the classroom.
- Give one sheet of construction paper to each student. Have students arrange their objects on the construction paper.
- Place the sheets of construction paper, with the objects, in a sunny place (e.g., classroom windowsill).
- Leave the papers in the sunny place for several days.
- Remove the objects and observe the results.
Background information
The Sun is a source of light for the Earth. Light is a spectrum. This means that a sunbeam contains white light, made up of all the colours of the rainbow, as well as two invisible parts of the spectrum: infrared and ultraviolet light.
The colours that make up white light are what allow us to see colour. Using red construction paper as an example, when light hits the red dye in the paper, all of the colours in the light are absorbed except the colour red. The red portion of the light is reflected, which allows us to see the red colour. When dyed products are exposed to the Sun, there is a chemical reaction between the ultraviolet light part of the sunbeam and the molecules of dye, which causes the molecules of dye to break down over time. As the molecules break down, less of the red light is reflected. This reduced reflection is what we see as a faded colour.
Wind energy: Music to my ears
Students create an instrument that transforms wind energy into sound energy.
Learning objective
- Explore energy transformations
Learning method
- Creating a musical instrument
Materials
- Straws, cut in half or full length (the shorter the straw, the higher pitched sound it will make), 1 straw per student
- Scissors
- Optional: recorders or other wind instruments (see suggestion below)
Instructions
- Ask students to create their own wind energy by blowing through the straw. Ask them what they hear.
- Have students flatten one end of the straw by pinching it between thumb and forefinger and holding for 20 seconds.
- Help students to carefully cut the corners off of the flattened end to form a point.
- This step can be tricky and may take some practice: have the students use pursed lips to blow into the pointed end of the straw. If there is no sound, have them try moving their lips around until they hear a sound.
Suggestion
This activity requires practice. However, even with practice some students may have difficulty getting their straw to make a sound. Having recorders or other wind instruments on hand can ease frustration for these students and will illustrate the same concept.

Transfer of energy game
Using their own energy and a parachute, students observe energy transfer in action.
Learning objective
- Understand that energy can be transferred from one object to another
Learning method
- Observing the transfer of energy from themselves to a parachute, and from the parachute to balls
Materials
- Parachute
- Balls, any kind (2 or 3)
Instructions
- Have students sit in a circle around the parachute.
- Have students hold onto the edge of the parachute and wave it up and down.
- Have students identify the source of the parachute’s energy.
- Explain that the students are transferring energy from the movement of their arms to the parachute.
- Have students stop waving the parachute. Once it is still, place the balls on it.
- Have students wave the parachute again.
- Experiment with manipulating the parachute in different ways, to make the balls roll around, bounce gently, or bounce high.
- Ask students to identify the source of the balls’ energy.
- To prompt, ask students if they are touching the balls. Ask students what is touching the balls.
- Once students have identified that the balls are getting their energy from the movement of the parachute, make the link to the complete transfer of energy: students transfer their energy to the parachute, and the parachute transfers this energy to the balls, making the balls move. This is energy transfer in action!
Background information
The form of energy in this activity is kinetic energy. This kinetic energy is transferred from the students to the parachute and from the parachute to the balls without changing form. Because the energy does not change form, this is energy transfer rather than energy transformation.
Appendix A
Energy overview
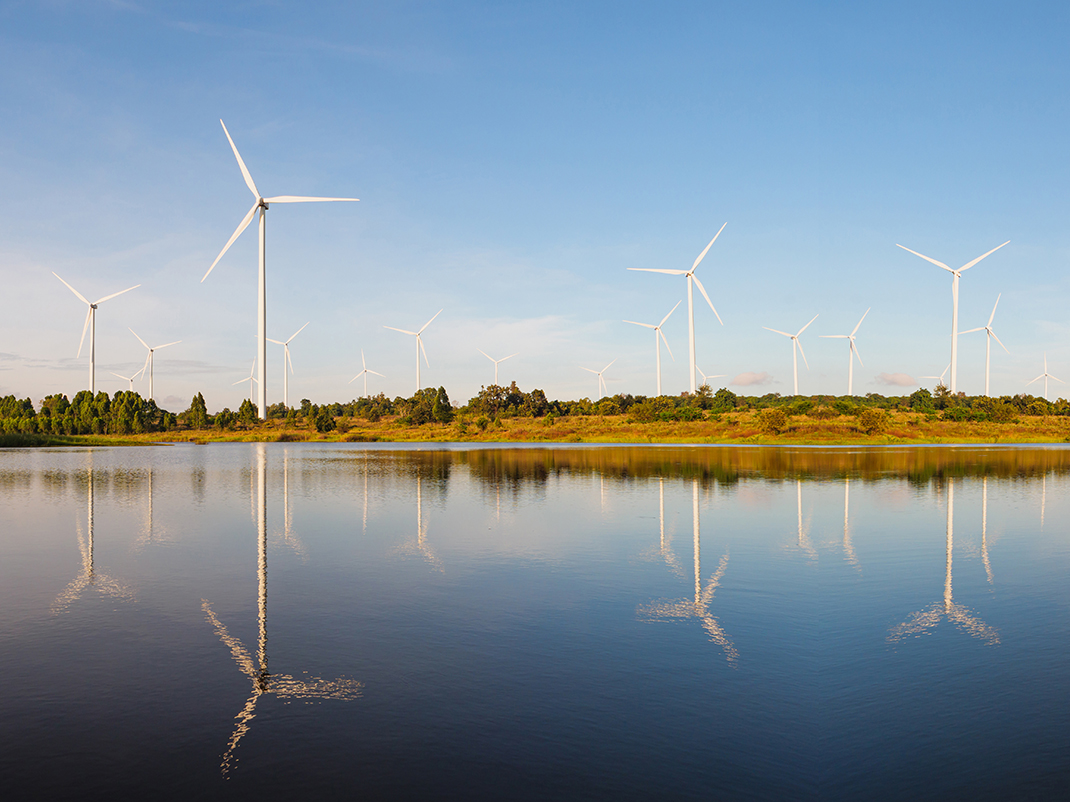
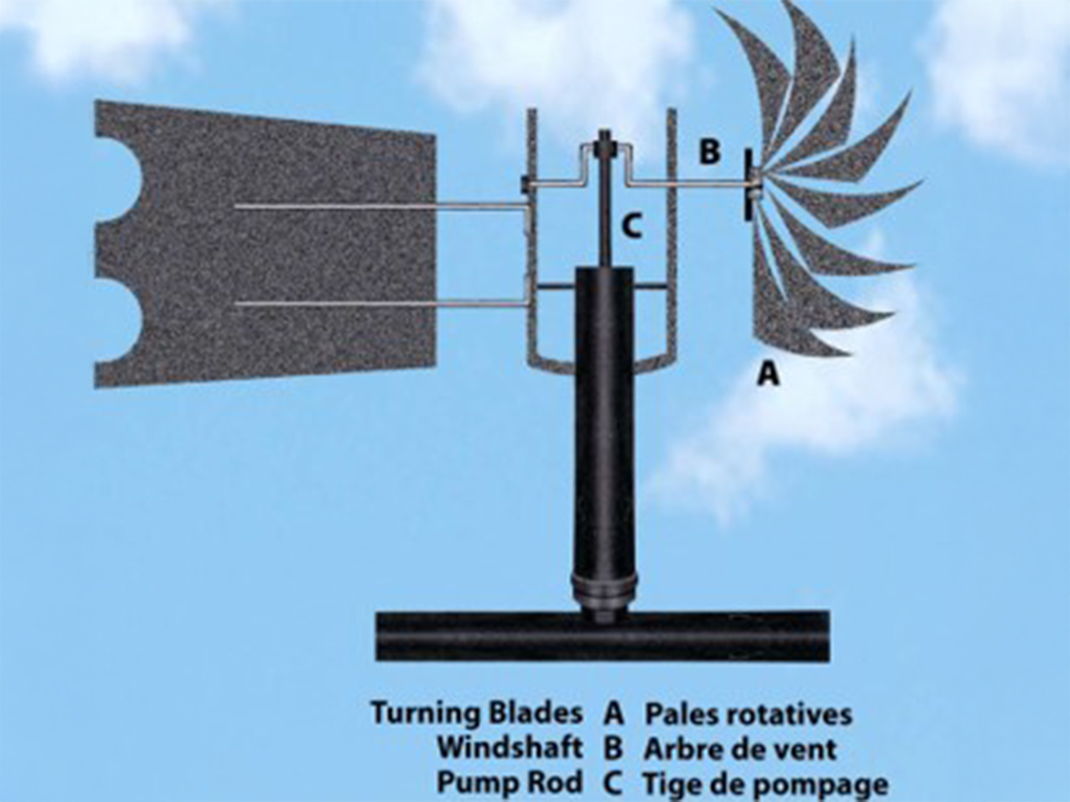
Energy from the wind
On the farm, wind energy is sometimes converted into electricity but usually windmills are used to convert wind energy into mechanical energy.
If the windmill’s blades are turning, then the windmill is at work. Farmers use windmills to pump underground water into their animals’ water troughs. Even in regions with no rivers or lakes, farmers could use windmills to pump underground water for livestock. Farmers also use windmills to pump air into dugouts and troughs. The bubbling air keeps the water free of algae that can poison livestock.
How they work
When the wind blows, it pushes against the windmill’s blades, causing the rotor to turn. The rotor then turns the windshaft. The turning windshaft forces the pump rod to move up and down. This up-and-down or “reciprocating” movement is put to work pumping water or air.

Energy from biomass
Biomass is a renewable energy source. It is a broad category that includes any biological material from living or recently living things. As an energy source, biomass is important because some forms of biomass can be converted into biofuels.
Biofuels can be used to run cars, heat houses, and even generate electricity. Farmers in Canada are growing crops used to produce the following biofuels:
Ethanol
- Ethanol is a renewable liquid fuel. It can be blended with gasoline in various concentrations.
- Ethanol is used as motor fuel to power a wide range of vehicles
- Ethanol is made from corn, wheat, miscanthus and switchgrass.
- In Canada, ethanol is made primarily from the fermentation of corn sugar or wheat starch. Cellulose- based ethanol is made from switchgrass and miscanthus.
Biodiesel
- Biodiesel is a renewable liquid fuel. It can be added to diesel and blended in various concentrations, or produced in a pure form.
- Biodiesel is used as a motor fuel to power a wide range of vehicles.
- Biodiesel is made from canola and soy.
- Agricultural biodiesel is made from a process in which canola and soy seeds are crushed to release their oil. The extracted oils are combined with alcohol to produce biodiesel.
Solid fuel
- Solid fuel is a renewable resource made from plant matter.
- Pellets are burned to heat homes or farm buildings, Logs are being tested as a supplement to coal in electrical power-generating stations.
- Solid fuel is made from miscanthus, switchgrass and straw.
- Agricultural biomass is converted through a mechanical process into solid forms of fuel such as pellets, briquettes, and logs.
While some farmers use this fuel themselves, most sell their energy crops to fuel producers.
Appendix B
Vocabulary
- Absorb
- Biodiesel
- Biofuel
- Biomass
- Electricity
- Energy
- Ethanol
- Fossil fuel
- Fuel
- Heat
- Light
- Non-renewable
- Renewable
- Power
- Solar
- Sun
- Transfer
- Transformation
- Wind
- Windmill
- Wind power
Printable PDFs
Living things sunbeams: Activity sheet (PDF, 256 KB)
Energy chains: Answer sheet (PDF, 367 KB)
Energy chains: Activity sheet (PDF, 527 KB)
Energy chains: Worksheet (PDF, 169 KB)
Wind energy flyer: Template (PDF, 193 KB)
Energy in the four seasons in my life and Energy in the four seasons on the farm: Worksheet (PDF, 242 KB)
Day or night: Worksheet (PDF, 193 KB)
Saving energy: Worksheet (PDF, 162 KB)
Fill in the blanks: Worksheet (PDF, 247 KB)
Growing wheat: Worksheet (PDF, 1 MB)
Biofuels: Guess how many?: Worksheet (PDF, 502 KB)
Biofuels: What comes next?: Worksheet (PDF, 368 KB)
Electricity on the farm picture series (PDF, 11 MB)
Electricity at my house checklist (PDF, 218 KB)
Solar panel (PDF, 3 MB)
Hot or not observation sheet (PDF, 197 KB)
Solar water heater (PDF, 1 MB)
You may also be interested in
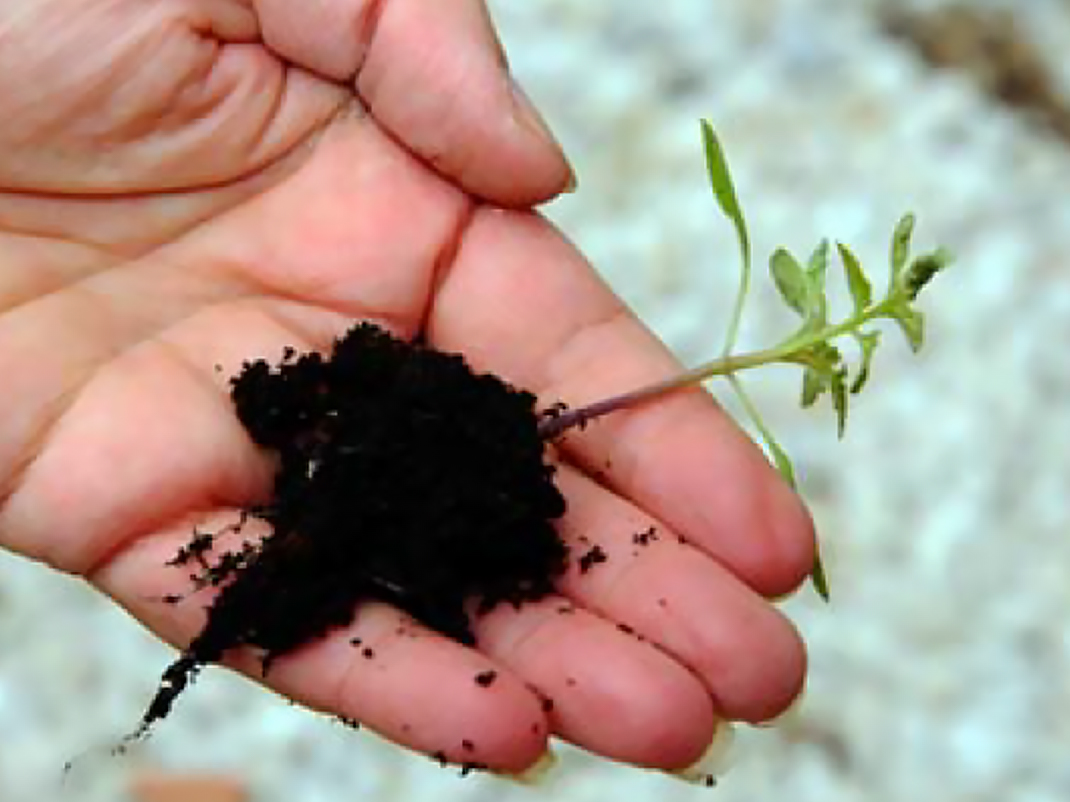
A handful of soil field trip
It’s easy to forget that soil is teeming with life! With your students, dig into the ground and discover the creatures hiding there.
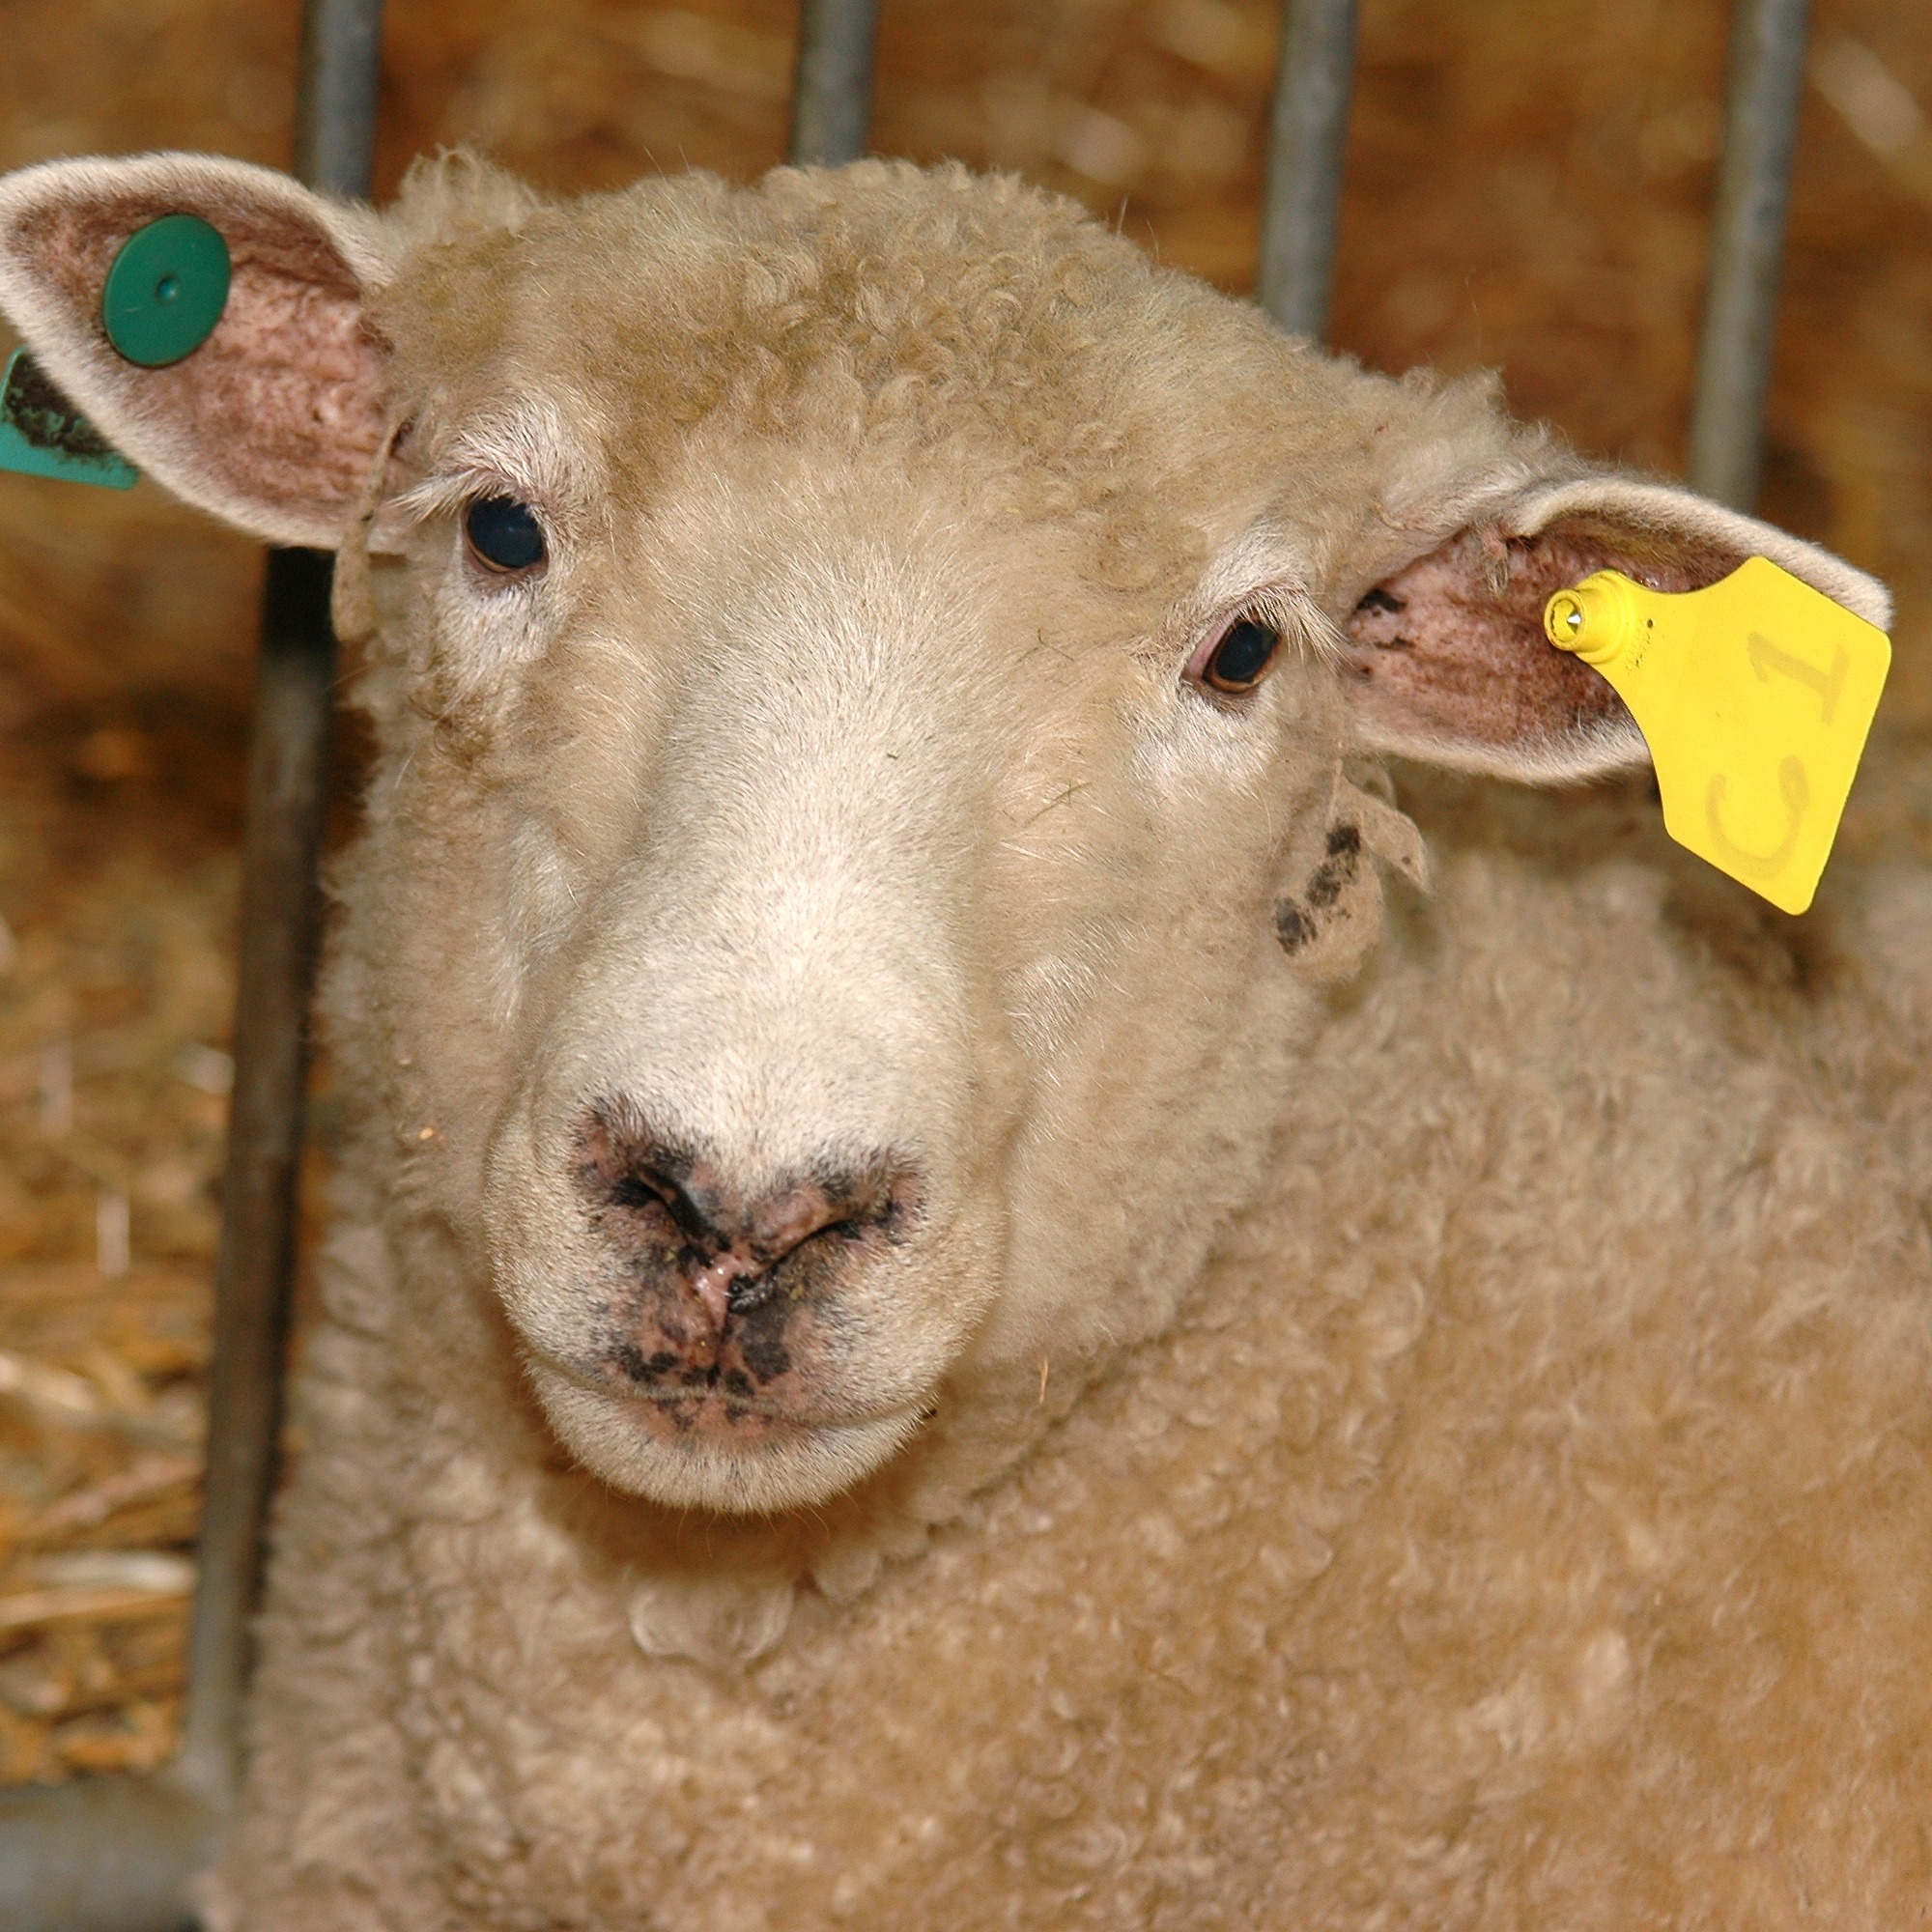
AgVenture: From sheep to sweater
How did pioneers turn a sheep’s fleece into clothing? This flexible program will allow your students to explore the properties of wool through fun activities.
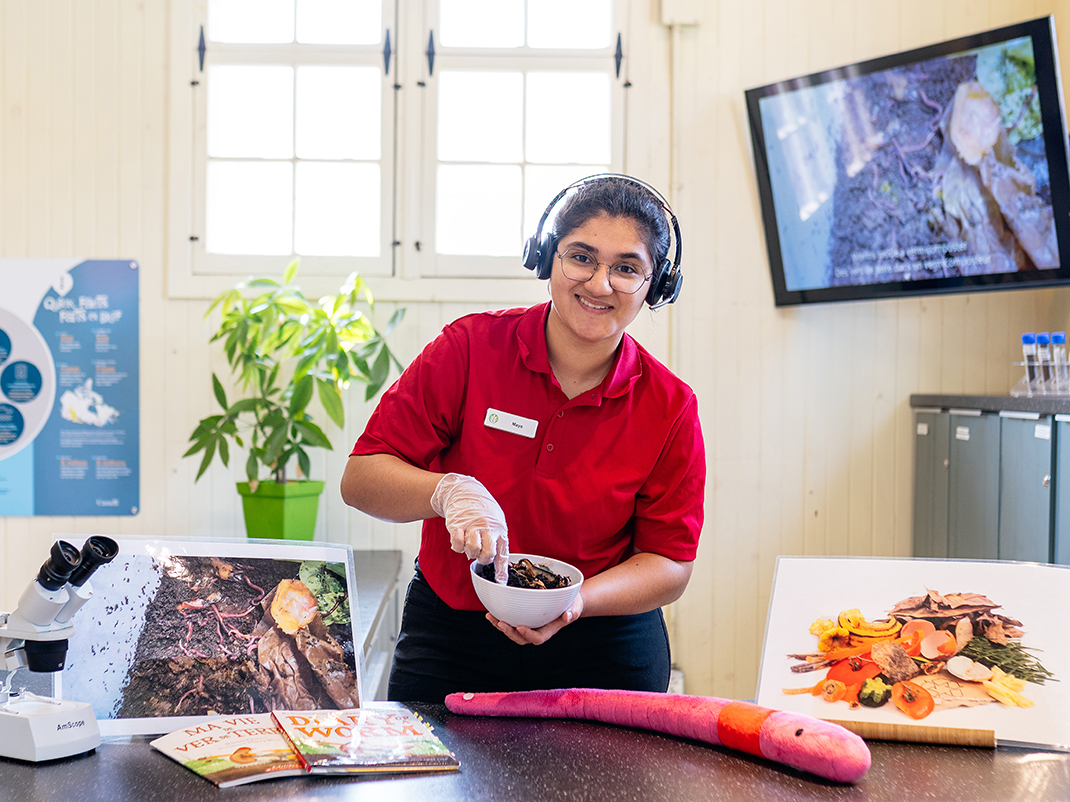
Virtual field trips
Bring the museum to your classroom with bilingual, curriculum-linked programs for all grade levels that allow your students to discover various STEM topics.