Busy bees
Kindergarten to grade 3 (Ontario)
Preschool to elementary cycle 2 (Quebec)
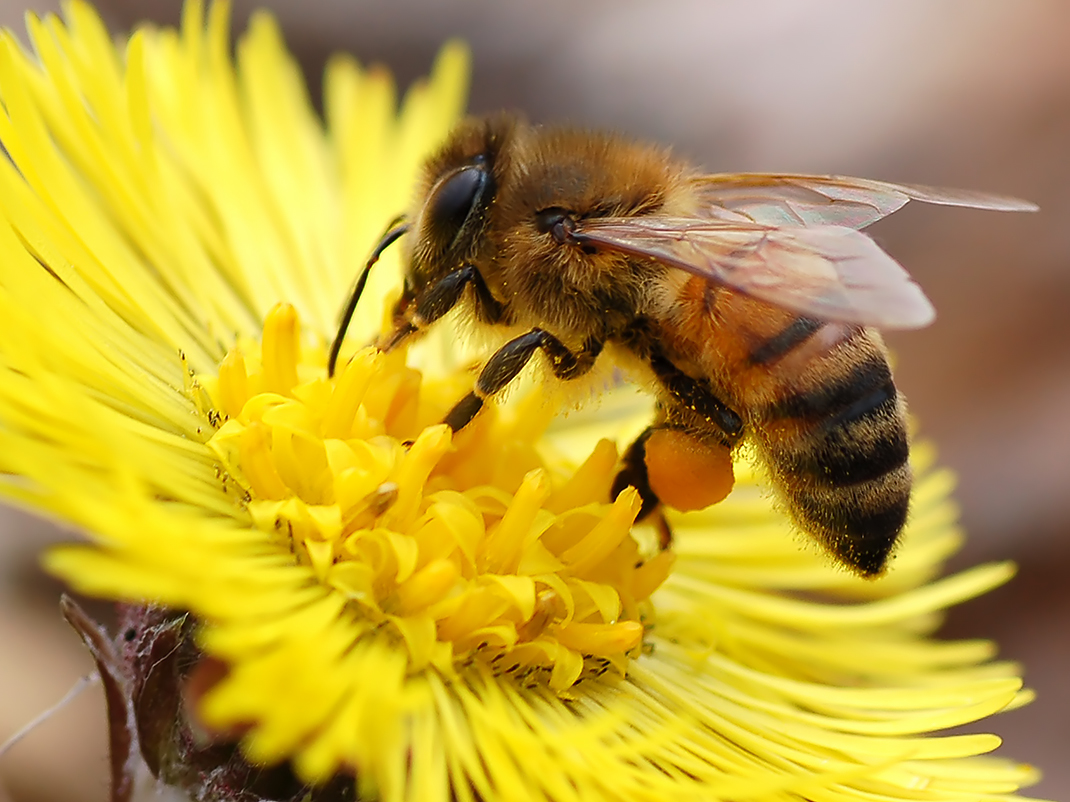
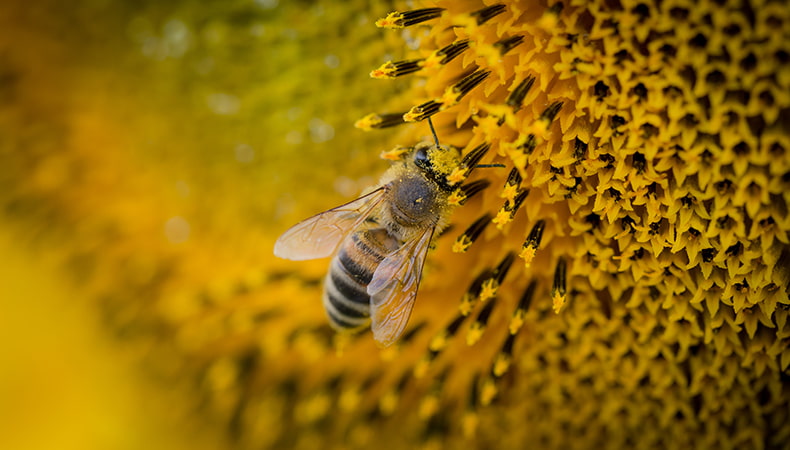
Did you know that the smallest farm animal plays the greatest role in food production? Through play-based or inquiry-based learning, students discover the bee life cycle, how bees turn nectar into honey, and why many plants rely on them to produce fruits and seeds.
Share :
Play-based learning stations with bees
General activities
Fun facts
Vocabulary list
Printable PDFs
Curriculum links
Kindergarten
Problem Solving and Innovating
Grade 1
Science and Technology: Life Systems – Relating Science and Technology to Our Changing World
Science and Technology: Life Systems – Exploring and Understanding Concepts
Grade 2
Science and Technology: Life Systems – Relating Science and Technology to Our Changing World
Science and Technology: Life Systems – Exploring and Understanding Concepts
Grade 3
Science and Technology: Life Systems – Relating Science and Technology to Our Changing World
Science and Technology: Life Systems – Exploring and Understanding Concepts
Preschool
Cognitive Development: Thinking Skills
Physical and Motor Development: Motor Skills
Physical and Motor Development: Healthy Lifestyle Habits
Elementary Cycle 1
Mathematics, Science and Technology – Science and Technology: Living Things – Matter
Mathematics, Science and Technology – Science and Technology: Living Things – Systems and Interaction
Mathematics, Science and Technology – Science and Technology: Living Things – Appropriate Language
Elementary Cycle 2
Mathematics, Science and Technology – Science and Technology: Living Things – Matter
Mathematics, Science and Technology – Science and Technology: Living Things – Energy
Mathematics, Science and Technology – Science and Technology: Living Things – Systems and Interaction
Mathematics, Science and Technology – Science and Technology: Living Things – Appropriate Language
Play-based learning stations with bees
Before setting up the stations, read a story about honeybees to your class.
Suggestions
- The Honeybee by Kirsten Hall and Isabelle Arsenault
- Are you a Bee? by Judy Allen
- unBEElievables by Douglas Florian
After reading the story, go over the stations with the students. Explain how the stations are connected to honeybees.
Mathematics station
Background
Do you remember what honeybees collect from flowers? Why do they collect pollen and nectar? For food. Honeybees turn nectar into honey. Honey is their winter food. Honeybees mix pollen and nectar together to make bee bread — food for the baby bees, the larva. Can you collect the nectar and the pollen like honeybees? Can you store it in the honeycomb?
Materials
- Yellow (pollen) and pink (nectar) pompons of different sizes
- Egg cartons (honeycomb)
- Optional: Small, colourful containers to act as flowers to hold the pompoms
- Optional: Plastic tongs
Instructions
- Place egg cartons, pompoms, and tongs at the centre of a table.
- Students can sort the pompoms (pollen and nectar) by colour and size in the egg cartons (the honeycomb), or directly on the table. They can make different patterns. They can use their hands or use the tongs.
- Another option would be to have the pompoms in small containers so kids can take the “nectar and pollen” from the flower container and put it into the “honeycomb” egg cartons.
Questions for further reflection
- Why did you sort the pompoms the way you did?
- Could you have sorted the pompoms differently? How?
- Can you show me the section of the honeycomb with the most pompoms?
- Can you show me the section of the honeycomb with the most nectar (pink pompoms)? And with the most pollen (yellow pompoms)?
- How many patterns have you created?
- How would you describe your patterns?
- Did you choose a specific spot to put the nectar pompoms? The pollen pompoms?
- Do you think the bees choose a specific spot?
- Could I add this nectar pompom to your pattern? Is it still the same pattern?
Water station
Background
What is nectar and where does it come from? Where do you find it in the flower? How do the bees transport the nectar back to the beehive? Do they use buckets? No, they use their tongue, which is like a straw, to sip the nectar and then they store it in their tummy (honey stomach). (Use Illustrations in the appendix A to show the honey stomach. Students pretend to be honeybees and collect nectar to put in the honeycomb.)
Materials
- Ice cube trays
- Pipettes
- Water in a container
Instructions
- Place the container with water, ice cube trays, and pipettes at the centre of the
- Students pretend they are They collect the nectar (water) from the flower (container) using the pipette, then fill up the honeycomb (ice cube tray) with water.
Questions for further reflection
- Did you fill all the holes in your honeycomb the same way?
- Which spot has the most nectar? Did you have a reason for that?
- Was it hard to bring nectar to the hive? Or was it really easy?
- Did it take a long time?
- Can you take the nectar from one side of the honeycomb and put it on the other side?
- Does the flower still have nectar?
Play station
Let the students’ imaginations run free.
Pretend play
Students can role play with these different character suggestions: a bee, a beekeeper, a farmer, or a farm animal. They can also pretend to sell honey.
Art station
Honeycomb
Materials
- Egg cartons
- Paint and paint brushes
Instructions
- Place the egg cartons, paint, and paint brushes at the centre of the table.
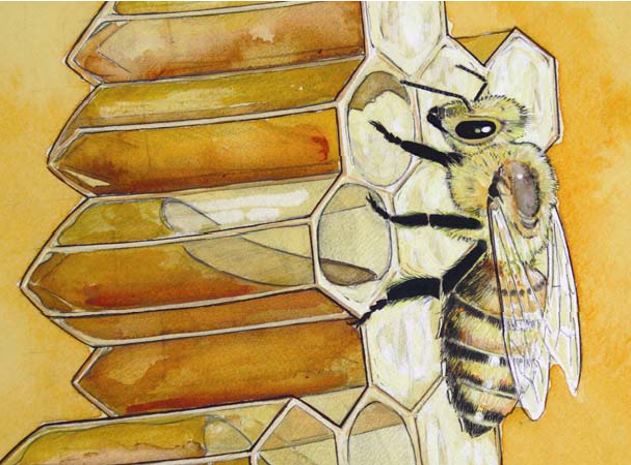
- Students paint the egg cartons to act as honeycomb to go in the hive. The students can paint it all one colour, or you can give them a couple of extra colour options to paint in some bees. For the visual learners, print out some pictures in appendix A to show the inside of a hive.
- Optional: On a wall, outline the shape of the hive so the students can add their honeycomb piece to the hive by taping it to the wall. Or using a big cardboard box with the front cut out to resemble a hive box; the students can stack their honeycomb inside. For a more temporary hive, the students can use blocks (wood, plastic) to make a “hive box” where they can stack their honeycomb. Afterwards, it’s fun to allot time for the students to play bees, adding the nectar and pollen pompoms to the honeycomb.
- Use various craft materials such as construction paper, tissue paper, and felt sheets to make flowers. The flowers could be displayed in the classroom, creating a meadow for the bees.
See the world through a bee’s eyes
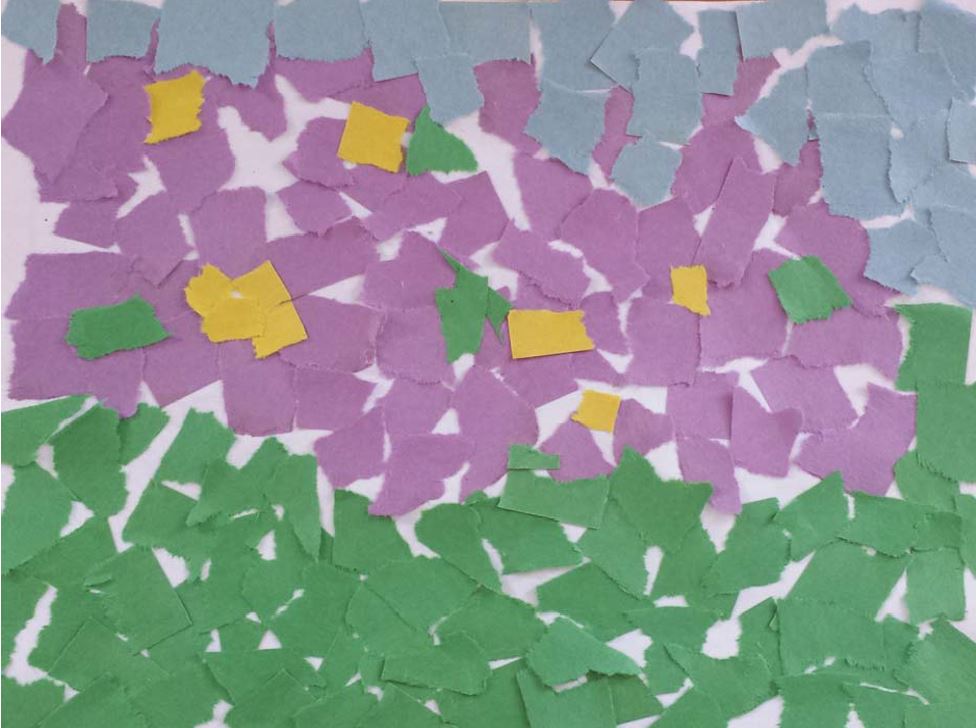
Honeybees don’t see the world the way we do. Their vision is made up of pixels — many little coloured shapes. Let students create a piece of art the way they think bees would see the world.
Materials
- Pieces of coloured paper
- Scissors
- Glue
- Blank paper or colouring sheets
Instructions
- Place the coloured paper (either pre-cut paper or add scissors for students to do the cutting), glue, and blank pieces of paper in the centre of the table.
Let the students glue on coloured pieces of paper to create a mosaic image. If they wish to have a template, they can glue pieces onto a colouring sheet.
Language station
Students practise communicating the way bees do: by dance or through scent. If using a storybook, refer back to it and ask students what they have learned from it.
Background
Can we communicate without using words? Yes, we can. Some people use sign language. There are many different movements and signs that we make to communicate without words. Can you name a few of them?
Act out the following, and let the students identify the meaning of each movement:
- Be silent: index on mouth
- It smells bad: pinching nose between fingers
- It’s hot: fanning face with hand
- Stop: palm facing out, arm stretched
- Come here: hand or finger gesture
- This, that, you, her, etc.: pointing at things or people
What do you they think bees communicate about? Bees have different dances that communicate different things, such as distance, quantity of flowers and/or pollen and nectar, as well as the scent of the field they have found. Honeybees pass information to other bees by dancing.
Option A
Create your own dance ‘words.’
- Teach the students a few dance moves and their associated words
- For example, pick a dance move for happy, excited, sad, and angry
- The dance moves could be easy arm movements or clapping that could be done while sitting or standing
At circle time, let the students express how they are feeling by dancing/acting out the emotion.
Option B
Have students come up with a dance move to be associated with an object or a station in the class or show a direction. Then have them teach it to the class. The students can practise these new dance moves created by their peers.
Option C
After the students have learned some new dance moves—and their associated meanings—they can play a game similar to broken telephone.
- Have the students line up, each facing the back of the student next to them
- The last student in line taps the person in front of them, on the shoulder, to turn around
- Then the last student performs the dance move/hand signal to the student in front of them
- Next, the student who just saw the move would turn around and tap the next person on the shoulder to turn around, and show them the dance move
- The object of the game is to see how fast they can send a message from one end to the other, and if the right message gets sent along the line
- Remind students that they should all stay facing the same direction—unless they get tapped on the shoulder
Option D
Bees also communicate through scent. You can ask the students if smells (scents or odours) help us discover anything. Some odours mean certain things. Give the students a few examples, then ask them to come up with their own examples.
Examples
- Toast burning: Time to take the bread out of the toaster or the fire alarm will start
- Smell of food: Lunch or supper is almost ready to eat
Bees also pass on messages by producing special scents. Some bee odours mean that there is danger, or that the queen is getting old.
Students can practise their sense of smell by identifying objects according to their scent. Place the objects in socks or other small, breathable bags. Don’t forget to tie them off to stop their contents from spilling out.
Ideas for scents
- Tea bags or coffee beans
- Spices such as cloves, cinnamon, cardamom, cumin, fennel, etc.
- A few drops of essential oils or flavour extracts on a cotton ball
- Scented candles
- Food that won’t be squished in the sock or bag (apples, whole orange, tomato, etc.)
Questions for further reflection
- How does the scent make you feel?
- What does it remind you of?
- Do you like the smell?
- Can you tell what’s in the bag by simply smelling it?

Science and technology
Who am I?
Please see the printable PDF at the bottom of the page.
Honeybees and me
Please see the printable PDF at the bottom of the page.
The bee’s life cycle
Please see the printable PDF at the bottom of the page.
From nectar to honey
How do bees turn nectar into honey? Using their imaginations, students try to describe the process, correcting their stories using knowledge gained either at the museum or through the Educational Activity Kit.
Materials
- Large sheets of paper
- Illustrations on how bees produce honey (attached)
- Markers
Instructions
Part 1: Honey as imagined by students
- Divide the class into groups of three or four, and give each group a large sheet of paper and several markers.
- Using drawings and/or text, students explain how they think bees make honey. What do the bees use as raw materials? How do the bees transform these substances into honey?
- Invite each group to share its drawings and/or text with the class.
Part 2: The actual production of honey (if your class does not take part in the “Busy bees” program)
- If possible, make colour copies of the illustrations describing the production of honey (Appendices A-1 to A-6).
- As a class, read the texts describing the illustrations. Mix up the illustrations, and ask students to put them back in the correct order.
Part 3: From nectar to honey
- Using the same groups, give each group a large sheet of paper and several markers.
- Using drawings and/or text, students must explain again how bees make honey, based on what they’ve learned.
- Give each group the answer sheet they created during the first part of this activity. Compare these sheets with their new drawings and texts. Identify the elements that have changed, as well as those that have remained the same. Ask students what they have learned.
Bug farming
Domesticated bees are not the only insects people raise. The goal of this activity is to help students discover the many different types of insect-rearing activities around the world, as well as their products and by-products.
Materials
- Photographs of insect-rearing activities and/or photographs of the insects themselves (Appendices B-1 to B-9). Please see the printable PDF at the bottom of the page.
Instructions
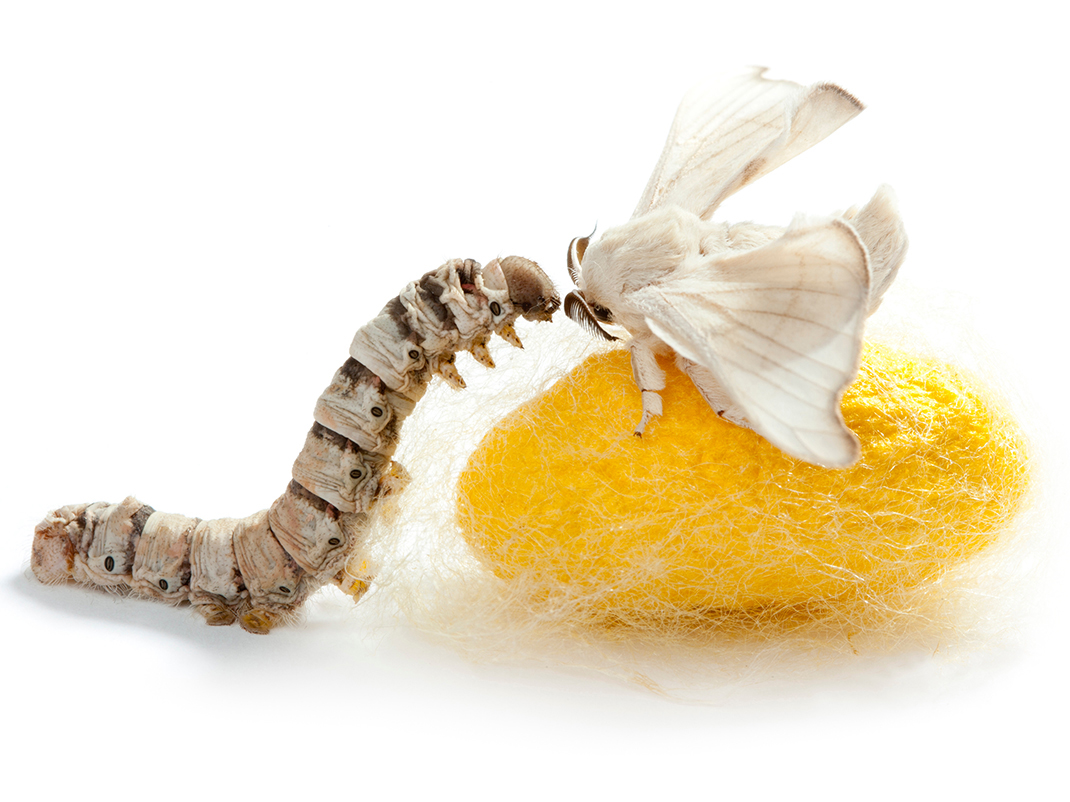
- Explain to students that domesticated bees are not the only insects raised on farms. Show students photographs of insect-rearing activities and/or the insects that are raised. Ask them if they know of these insects, and why they are raised. Explain that certain insects, such as silkworms and bees, are raised to make products or foods used by people. Others are raised because they eat insects that harm crops— sometimes even replacing synthetic insecticides in the fight against crop-destroying pests.
- Option 1: Divide the class into smaller Assign each group one insect from the list in appendix B. Have the students research why people raise these insects, and how they are used. Groups can prepare a PowerPoint presentation, poster, video, or other media to share their findings with the class.
Option 2: Write the names of the insects on the chalkboard and, for each, identify one or more products that come from raising them. If necessary, refer to the attached table listing the various insects people raise, along with their uses.
Discuss the importance of these insects to humans.
Parts of a flower
Please see the printable PDF at the bottom of the page.
Kids to the rescue!
For several years, populations of pollinating insects have been declining. The destruction of their habitat and the disappearance of their food sources are among the principal causes of this decline. Luckily, your students can come to the insects’ rescue by planting flowers rich in nectar and pollen in your community.
This activity takes place over a period of several months. By cultivating melliferous plants (plants rich in nectar) native to North America in the classroom, students learn how to grow and care for a plant that they can transplant outside in the spring. These plants will provide pollinating insects—such as bees, butterflies, flies, and thousands of others—with food in your community.
Materials
- Echinacea seeds
- Pots (recycled yogurt cup or other similar objects from students’ lunch boxes)
- Soil (type not important)
- Trays
- Small watering can
- Plastic wrap
Before the activity
If your class participates in the Busy Bees school program at the Canada Agriculture and Food Museum, museum staff will give you a free bag of echinacea seeds. If you do not take part in the program, echinacea seeds can be found at most nurseries and garden supply centres.
Instructions
- Introduce the term pollinating insect.
- Explain they carry pollen from one flower to another
- To produce seeds and fruit (babies), the flowers must first be fertilized: the pollen (the male part) must land on a style (the female part).
- Pollinating insects feed on nectar and/or pollen produced by flowers. As they forage for food, the insects accidentally transport pollen from flower to flower.
- Pollinating insects are thus very important. Without them, many flowers would not produce fruit and seeds at all.
- Ask students to name some pollinating insects, and write the names of these insects on the chalkboard.
- These are the insects that we often see on flowers
- The ones covered in fine hairs are the best at carrying pollen
- The pollen sticks to their hairs as if they were made of Velcro
- Identify the needs of pollinating insects. Write them on the chalkboard.
- Tell students that there are fewer and fewer pollinating insects in the world every day.
- Why? There are many reasons, including the destruction of their habitat, which means less food and nesting sites for pollinating insects.
- How can we help pollinating insects? The goal of this activity is to grow a plant— echinacea—that produces a lot of nectar and pollen, the food eaten by pollinating insects.
- Echinacea is native to North America
- It is a perennial plant, which means that it lives for many years
- The stem and leaves die in the autumn, but the roots survive throughout the winter, allowing the plant to grow back in the spring
- Echinacea is hardy and easy to cultivate: it tolerates cold, drought, and other difficult conditions
- Once established, it spreads in the garden by seeding itself. If it is planted indoors early, during the winter, it produces beautiful flowers with purple (rose-mauve) petals the following summer
- Give each student a flowerpot (clean yogurt, pudding, or other container, pierced with several holes in the bottom).
- Fill the pots with soil and press it down firmly. Leave the top 2 cm of the pot clear of soil, to make it easier to sow and water the seeds.
- Give each student three or four echinacea seeds. Have them place the seeds in the centre of the pot and cover them very lightly with soil (1 to 2 mm only).
- To avoid spills, place the pots on trays. Pour water onto the trays, rather than directly into the pots. The soil will absorb water from the tray through the holes pierced in the bottoms of the containers.
- Keep the containers in a warm, shaded location until the seeds germinate. To keep the soil moist, cover the pots with plastic wrap. The seeds may take several weeks to sprout. Remove the plastic wrap when the sprouts reach it.
- Keep the plantlets in the sun. Echinacea needs lots of light to grow. Keep the soil barely moist. Echinacea doesn’t like waterlogged soil.
- In the spring, transplant the plants outside in the school garden, or give the plants to the students. Echinacea plants make lovely gifts!
Suggestions
- Observation journal
Students can create individual journals, or the class as a whole could create a journal to track the progress of the plants. Here is a list of suggested elements that students could observe and note in their journals:
- Sowing date
- Germination date
- Watering (date and quantity)
- Growth of plants (measure growth at regular intervals using a ruler or other measuring tool)
- Illustrate growth with drawings (germination, first pair of leaves, second pairs of leaves, etc.)
- Plant’s appearance (healthy, withering, yellowing, etc.)
- Reading and comprehension activity on the purple coneflower (Echinacea). Please see printable PDFs section.
Students can read the text on purple coneflowers in the Language section and answer the questions.
Language
Tell me a story
Since a picture is worth a thousand words, this activity is designed to encourage students to write a short story, using a humorous illustration as their starting point.
Materials
- Tell me a story activity sheet
- Humorous illustration
- Crayons (optional)
- Stapler (optional)
Instructions
- Give all students a copy of the “Tell me a story” activity sheet, as well as a copy of the humorous illustration. Please see the printable PDF at the bottom of the page.
- Using the elements in the illustration as a starting point, ask students to think up and write a short story on the activity sheet. Remind them to write the title of their story at the top of the page.
- Students can also colour the illustration and staple it to their story.
- Ask students to read their stories to the class, or to a smaller group of students. Discuss the similarities and differences between their stories. Although all of the stories used the same illustration as a starting point, none of the stories are identical. Why is it so?
Suggestions
- Preschool and kindergarten students
Use the humorous illustration as a colouring page. Ask students to describe what they see. What are the ants and bees doing? More advanced students could write a title at the top of the page, describing the illustration.
- All levels
In books and films, animals often have human or stereotypical characteristics. Hand out copies of the illustration and ask students to identify the human characteristics that have been given to the insects. Ask students if they have seen films or cartoons featuring insects. Discuss realistic and unrealistic ways of describing insects.
Word search and word search answers
Please see the printable PDF at the bottom of the page.
The purple coneflower: Reading, answers and activity sheet
Please see the printable PDF at the bottom of the page.
Mathematics
Count the bees activity sheet
Please see the printable PDF at the bottom of the page.
A golden harvest activity sheet
Please see the printable PDF at the bottom of the page.
Bees on the move: Answers and activity sheet
Please see the printable PDF at the bottom of the page.
General activities
Bran honey muffins
Please see the printable PDF at the bottom of the page.
Honey lip balm
Discuss beehive products and by-products with your students. Explain that honey contains antibiotic elements that inhibit the growth of bacteria. Throughout history, honey has been used to help heal throat infections and colds. Beeswax is secreted by the wax glands of honeybees and used to build combs. When combs are damaged or too old, beekeepers melt them. They sell the wax or build new foundations. Beeswax can be found in beauty products of all kinds.
Honey and beeswax are excellent at helping to heal dry winter lips. Make this lip balm recipe with your students in class.
Ingredients
- 1 tbsp. grated beeswax (15 ml)
- 2 tsp. almond oil (10 ml)
- 1 tsp. honey (5 ml)
- 12 drops essential oil (orange, mint, lavender, etc.)
Ask students to bring in little containers with lids. You can also use empty mint tins or make-up containers.
Preparation
- In a double boiler, melt the beeswax, almond oil, and honey.
- Remove from heat and add essential oil.
- Pour liquid into small containers and let cool.
Fun facts
- A single honeybee makes 0.8 g (1/10 tsp) of honey in its lifetime.
- Bees contribute not only to the increased production of fruits and vegetables (crop pollination), but also to their size.
- A honeybee flies at a maximum speed of 24 km/h and its wings beat 200 times per second, or 12,000 times per minute.
- The colour and taste of honey varies, depending on the flowers (the source of nectar) visited by the bees.
- The average lifespan of a honeybee during the working season is about six weeks.
- In the summer, a colony of honeybees contains 50,000 to 80,000 bees.
- The average Canadian consumes one kg of honey a year.
- Bees have four wings.
- As native pollinators continue to disappear, the production of many everyday foods depends more and more on honeybees.
- Honeybees must visit about four million flowers to produce one kg of honey.
- The individual cells of a honeycomb have six sides.
- Bees have been producing honey from flowers for about 10 to 20 million years.
- The bulging eyes of the drones help them to spot the queen.
- In Canada, the value of fruits, vegetables, and legumes from plants pollinated by bees is more than ten times the value of honey production.
- There are nearly 11,000 beekeepers in Canada.
- Each time a honeybee leaves the hive to seek food, it visits 50 to 100 flowers.
- Mead is the name for wine produced from fermented honey.
- A single colony of honeybees is enough to pollinate an entire acre of fruit trees.
- Alberta, Saskatchewan, and Manitoba are the Canadian provinces that produce the most honey.
- There are no African honeybees in Canada.
- Honeybees are responsible for the pollination of a third of Canada’s food-producing crops.
Vocabulary list
- bee
- dance
- beekeeper
- beekeeping
- beeswax
- bee yard
- brood
- cell
- centrifugal force
- colony
- cooperation
- drone
- egg
- extractor
- fanning
- filter
- foundation
- foraging
- frame
- guard bee
- hive
- honeycomb
- larva
- nectar
- pollination
- pollen
- pupa
- queen
- reproduction
- smoker
- super
- uncapping knife
- worker bee
Printable PDFs
Who am I? (PDF, 532 KB)
Who am I answers (PDF, 609 KB)
Honeybees and me (PDF, 269 KB)
The bee’s life cycle (PDF, 460 KB)
Parts of a flower (PDF, 510 KB)
Parts of a flower answers (PDF, 515 KB)
Tell me a story (PDF, 780 KB)
Word search (PDF 238 KB)
Word search answers (PDF, 243 KB)
The purple coneflower (PDF, 664 KB)
The purple coneflower answers (PDF, 296 KB)
Count the bees (PDF, 604 KB)
A golden harvest (PDF, 191 KB)
Bees on the move (PDF, 624 KB)
Bees on the move answers (PDF, 626 KB)
Bran honey muffins (PDF, 276 KB)
Appendix A: From nectar to honey (A-1 to A-6) (PDF, 7 MB)
Appendix B: Bug farming (B-2 to B-9) (PDF, 2 MB)
You may also be interested in
Busy bees field trip
Young students will discover the important role of bees in pollination, as well as the dangers they face.
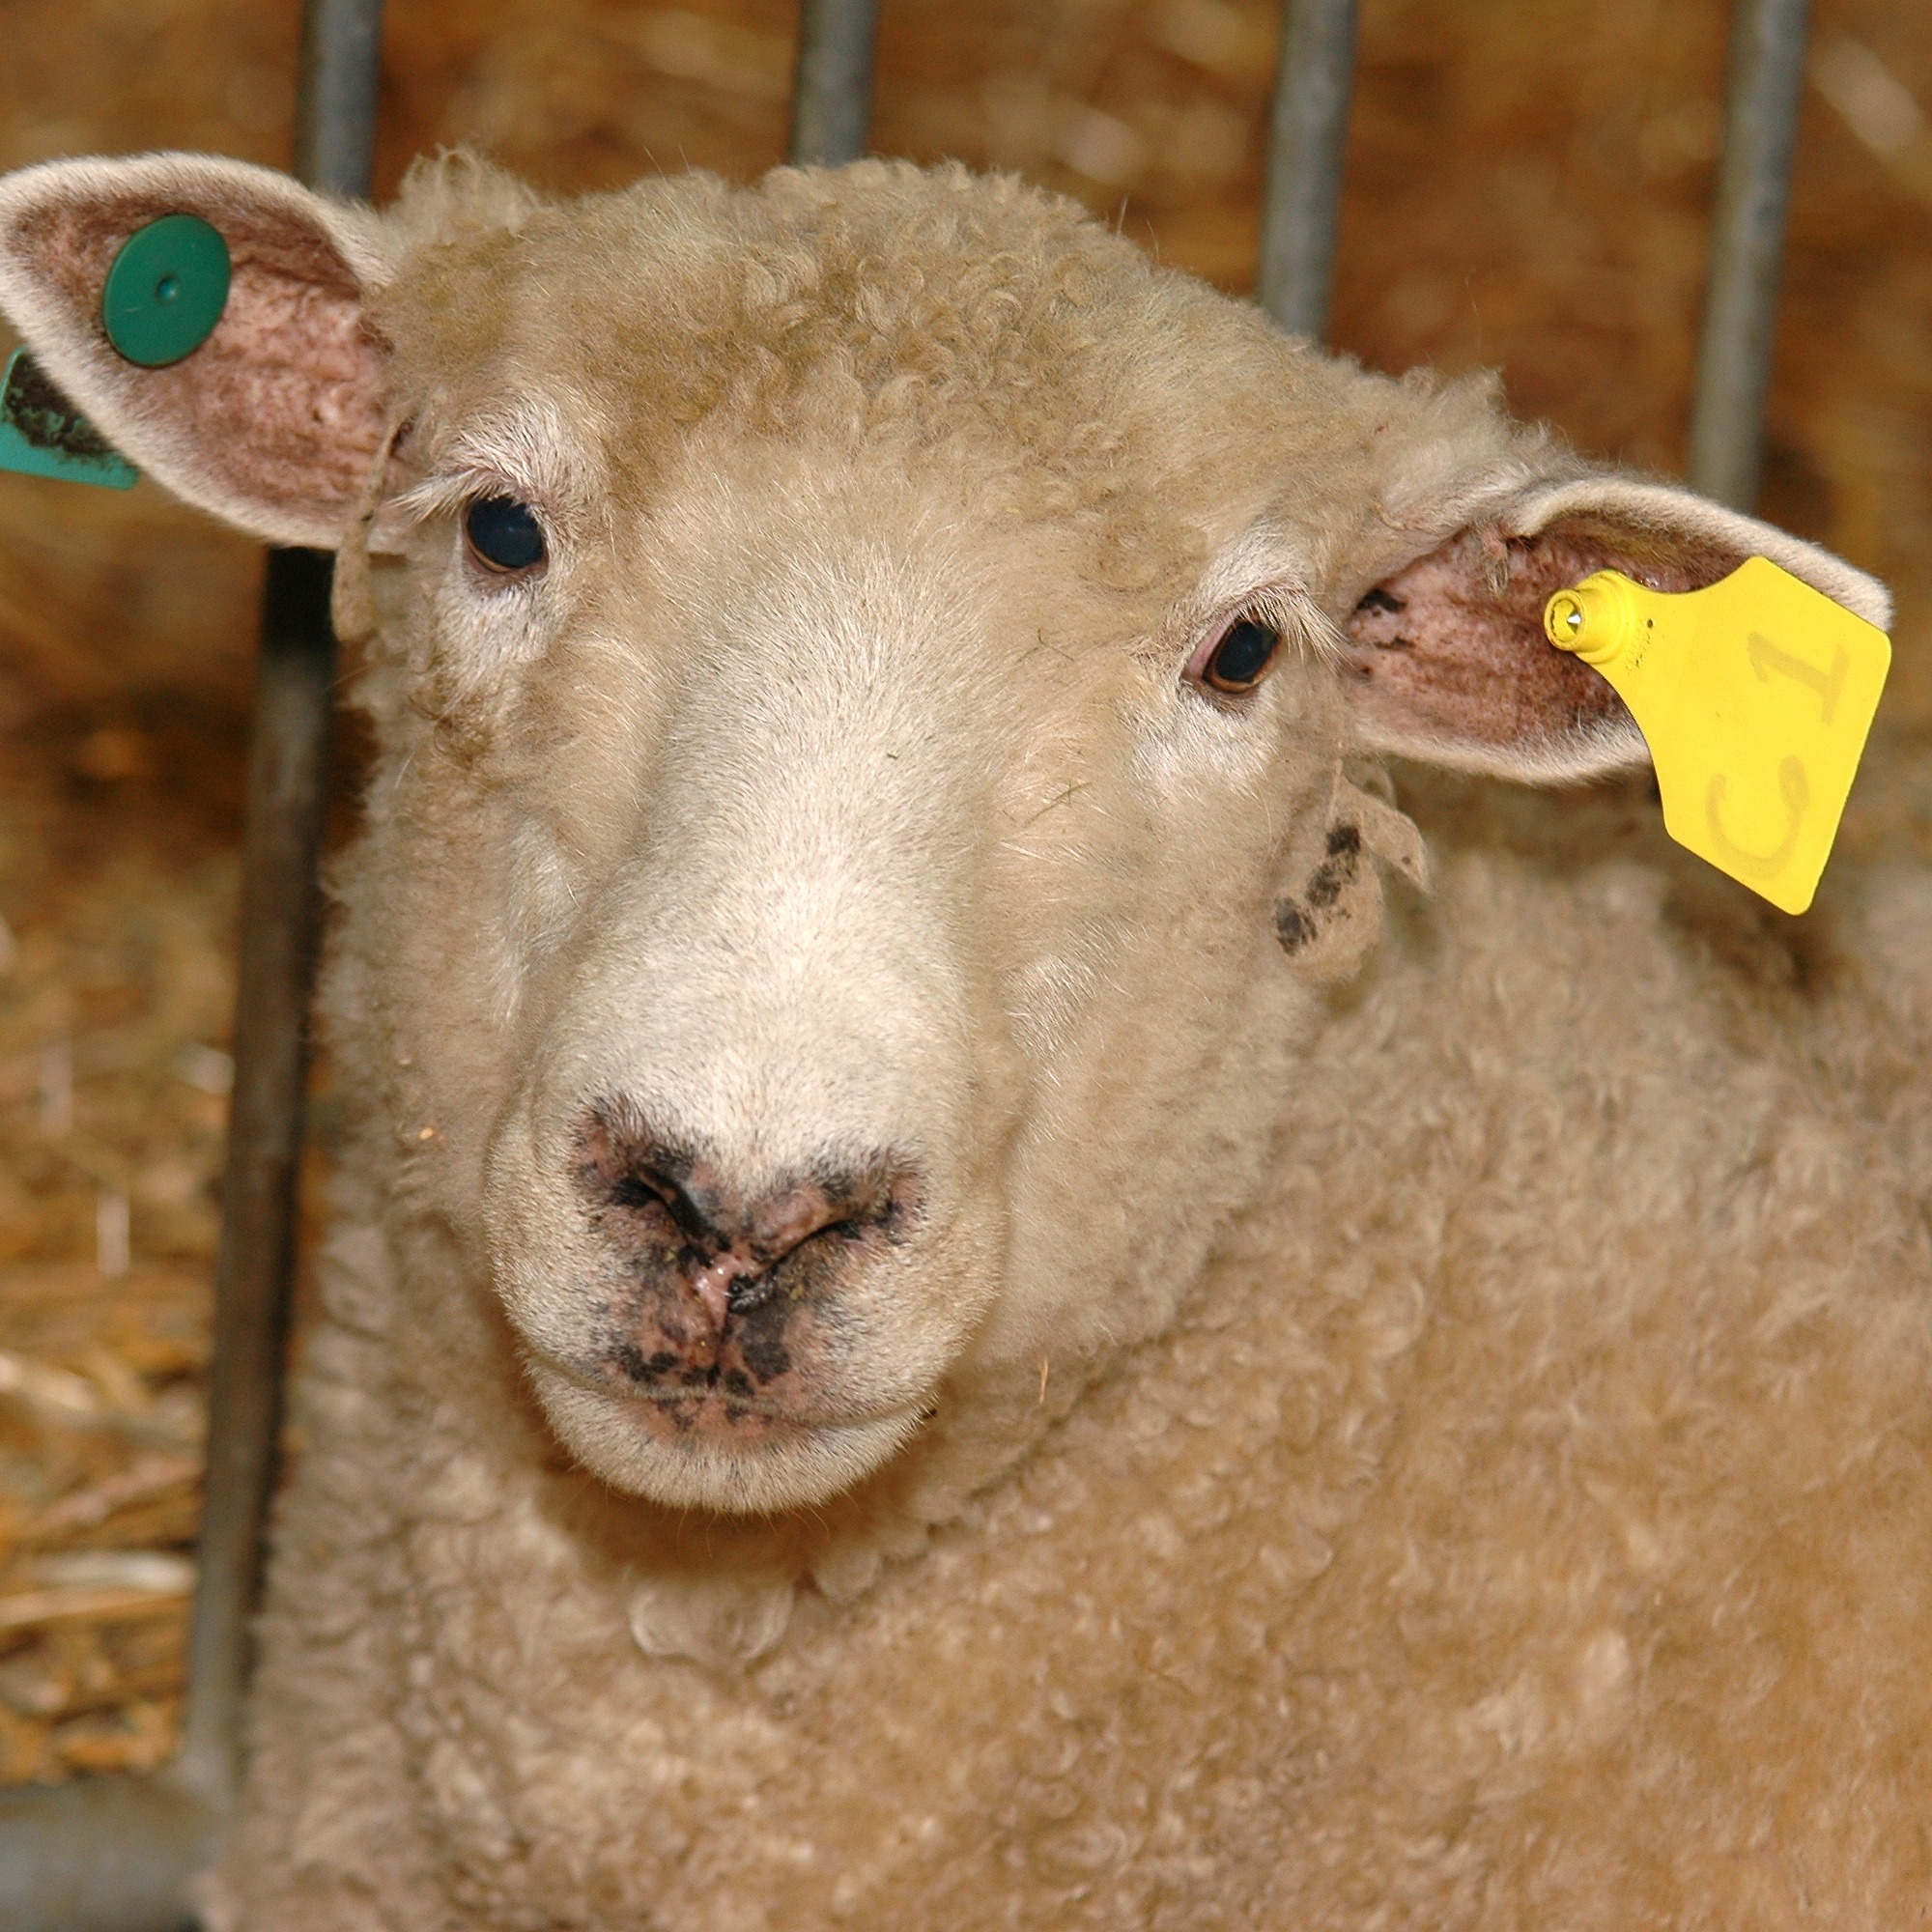
AgVenture: From sheep to sweater
How did pioneers turn a sheep’s fleece into clothing? This flexible program will allow your students to explore the properties of wool through fun activities.
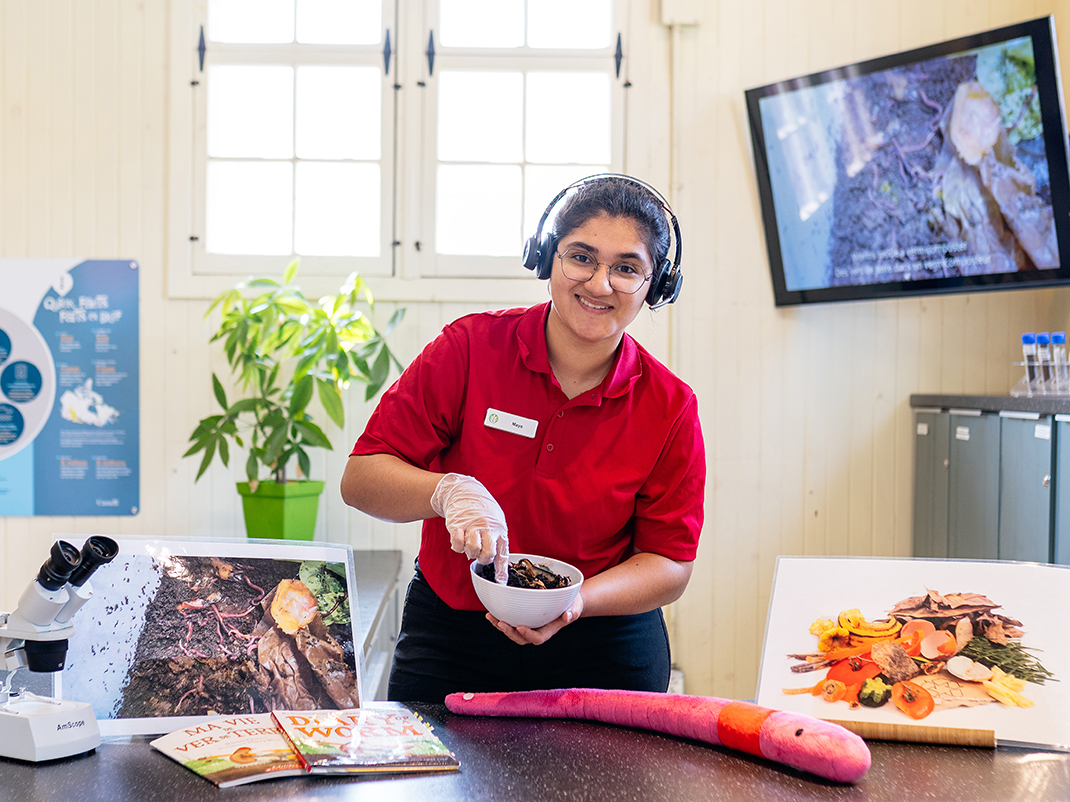
Virtual field trips
Bring the museum to your classroom with bilingual, curriculum-linked programs for all grade levels that allow your students to discover various STEM topics.