Agriculture and the environment
Grades 7 to 12 (Ontario)
Secondary cycles 1 and 2 (Quebec)
Perhaps more than for any other industry, success in agriculture is tied to state of the environment, and vice-versa. The actions taken by farmers can alter the ecosystems around them, sometimes permanently. At the same time, changes in the environment can affect the ability of farmers to feed Canadians and others around the world.
In this series of activities, students will consider some of the big questions surrounding Canadian agriculture:
- What impact does farming have on the environment?
- How can farmers and scientists work together to reduce any negative impacts?
- How is climate change transforming farming practices in Canada?
The museum would like to thank Agriculture and Agri-Food Canada for its contributions towards updating this lesson plan.
Share :
Picture-perfect relationships
Grade 7 (Secondary cycle 1)
Every ecosystem is made up of biotic (living) and abiotic (non-living) elements, which depend on each other to survive. Classifying these elements can help us understand interactions in ecosystems, so that we can be good stewards and mitigate the impact of our activities on the environment.
In this activity, students will be asked to observe different ecosystems, identify the biotic and abiotic elements, and describe how they interact with one another.
Students will understand that:
- Elements in an ecosystem can be classified as either biotic or abiotic
- Elements in an ecosystem are interrelated
- These connections between elements are important, and the survival of one element is often tied to the presence of another
Learning methods:
- Take pictures to recreate an ecosystem
- Discuss and explain the relationships within an ecosystem
Activity
- As a refresher, ask students to define what an ecosystem is. (Ecosystem: A complex system that comprises living organisms and their environments, which interact as a unit.) To help them, you may ask them to name some ecosystems, such as:
- A lake
- An urban park
- A prairie
- A tundra
- A woodlot or forest
- A farm
- Have students imagine that they are scientists tasked with studying all the different elements of an ecosystem (plants, animals, fish, rocks, soil, etc.), and grouping them. Ask students to think of some ways in which they could group the elements of an ecosystem. Some examples with which they may be familiar:
- By basic taxonomy (e.g., if an element is a plant, animal, fungus, bacterium, etc.)
- By whether a living thing is a mammal or non-mammal
- By whether an element is a producer or a consumer
- By what they eat (herbivore, omnivore, carnivore)
- By whether a living element is native (was not introduced to the environment by humans) or non-native (introduced by humans)
- Explain to students that one of the ways in which elements in an ecosystem can be grouped is by whether they are biotic or abiotic:
- Abiotic: A physical but non-living part of an ecosystem
- Biotic: The living parts of an environment
Help students understand the definitions of abiotic and biotic by having them identify some abiotic and biotic elements. Some examples are:
Abiotic:
- Sun
- Rain
- Wind
- Rocks
- Sand
- Ice
Biotic:
- Animals
- Plants
- Bacteria
- Fungi
- Have students choose an ecosystem to which they have easy access. Some examples might be:
- A schoolyard
- A backyard or community garden
- A public park
- A nature reserve or provincial park
- A creek, riverside, pond, lake or beach
- A farm
- Have students visit the ecosystem and take pictures of the different elements they find. This work can be done by students individually, or in groups.
- Afterwards, have students arrange their photos into a poster or collage. Students may do this digitally, or print out the photos to create their display.
- On their display, have students label the various elements as either abiotic or biotic. They should also identify and tag any relationships between the various elements. For example, an arrow could be used to show which element consumes another, while a dotted line might indicate if one element uses another as shelter.
- Have students present their collages or posters to the class, and answer questions about their work.
Guiding questions:
- Which ecosystem had the most elements? Which had the fewest?
- Were there any elements that were present in almost all the displays?
- Which elements were the hardest to classify as abiotic and biotic?
- Can students think of any elements that they were unable to photograph (e.g., bacteria, microorganisms, temperature, etc.)?
Additional activity
This activity will help enrich your students’ visit to the Canada Agriculture and Food Museum. Before your visit, review Steps 1 through 3 with students. During their visit, have students take pictures of the different elements they see in and around the barns. After the visit is over, have students use these pictures to complete Steps 6 through 9.

Vermicomposting
Grades 7 to 9 and 11 (Secondary cycle 1 and 2)
For farmers to grow large quantities of high-quality crops, they must have access to numerous hectares of fertile land. Farmers know that the presence of organic matter in the topsoil is essential for optimal plant growth.
- Organic matter is an accumulation of partially decayed and decomposed plant and animal residues
- Organic matter is not only a source of nutrients for plants and a source of energy for invertebrates and micro-organisms that live in the soil, but its porous, spongy structure also increases the water-holding capacity of soils
- Farmers maintain and/or increase organic matter in the soil through such farming practices as manure spreading, crop rotation, and reduced tillage (turning over the soil less often)
- Living organisms in the soil, such as bacteria, fungi, and invertebrates, help break down plant and animal residues that are left on soil, or added to soil through these farming practices
- These living organisms are called “decomposers,” and are vital to a healthy agricultural ecosystem
- One way to create this important organic matter is through vermicomposting
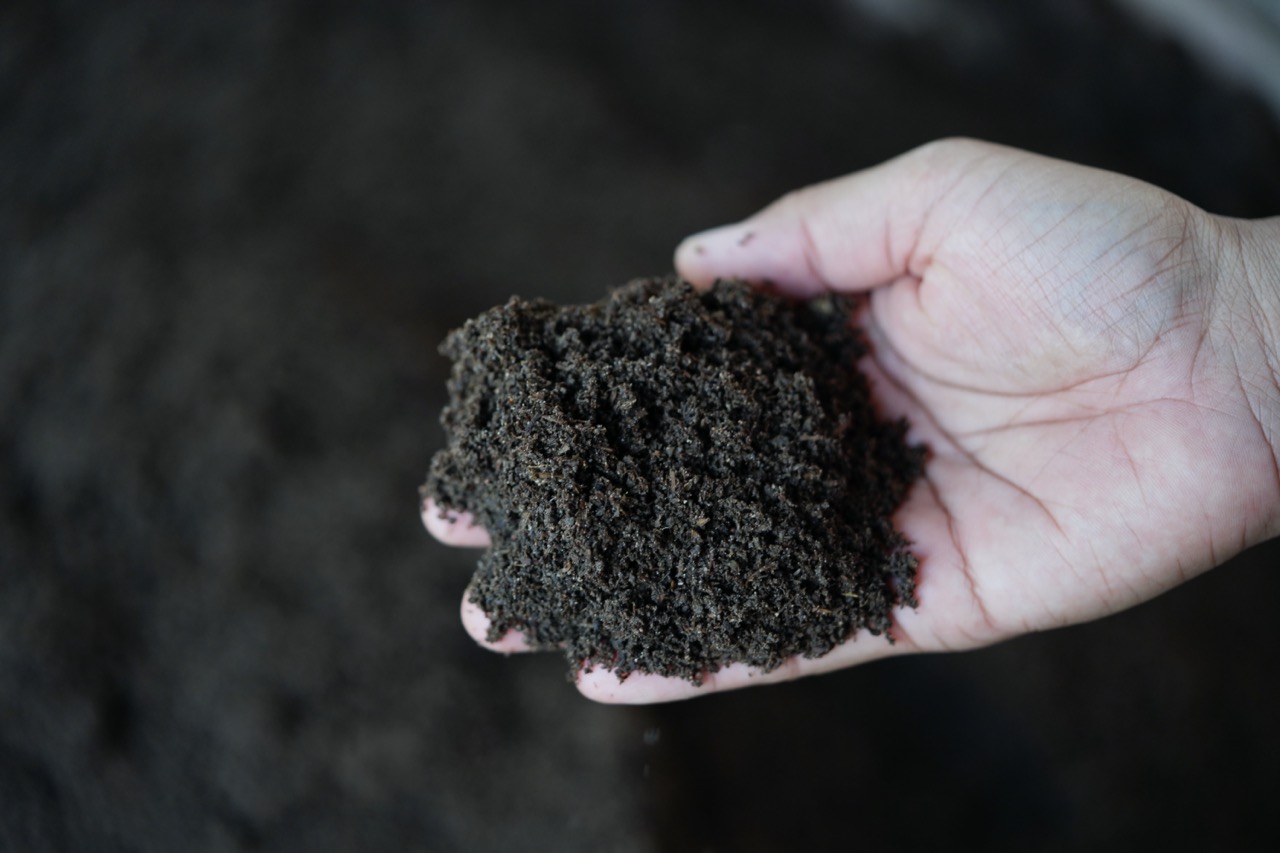
- Vermicomposting involves using earthworms, mites, bacteria, fungi and many other organisms to convert organic waste into black, earthy-smelling, nutrient-rich compost, or “vermicast”
- Vermicast can be mixed into soil to enrich it with organic matter and to help feed plants, while also promoting a vibrant microbial community in the soil itself
- By building and using a vermicompost bin, students will be able to observe decomposers at work, and create their own compost
Students will understand that:
- Decomposers break down organic waste into organic matter that can be used by plants, while enriching soil
- There are a number of different elements that need to be present in the environment to allow for decomposition
Learning methods:
- Help to construct a vermicompost bin
- Observe the decomposition of organic matter by worms
- Observe the lifecycle of worms in the bin
Materials
For one vermicompost bin
- Two plastic storage bins (size of a recycling bin), with one lid
- Drill and drill bit (1/16 to 1/8 inch)
- Shredded newspaper, cardboard or dry leaves
- 2 to 4 handfuls of soil
- 5 kg Eisenia foetida worms. These are also known as red worms, red wrigglers, compost worms, typically sold by private individuals in pre-portioned amounts. The weight does not have to be precise; use it as a guideline.
Optional materials:
- Nylon stockings
- Glue gun and glue sticks
Part 1: Creating a vermicompost bin
- Prepare bin
The bin needs to be well aerated, and excess liquid must be able to drain out. You can periodically collect the draining liquid (compost tea) that accumulates in the bottom bin, dilute it with water (10 parts water, 1 part tea) and water plants with it.
- Using the drill and bit, make multiple drainage holes in the bottom of one bin, at 3 to 4 cm intervals, forming a grid
- Optional: Worms can squeeze through surprisingly small openings, and sometimes fall through into the bottom bin where the liquid collects
- To avoid this, use one of the legs of the nylon stocking (cut the leg open into a sheet) to line the bottom of the bin
- Fasten it in place at the edges with beads of hot glue
- Drill aeration holes in the lid, at 3 to 4 cm intervals, forming a grid
- Optional: To prevent insects or other pests from entering the vermicompost bin, place the lid inside the second leg of the nylon stocking, or fasten it to the lid in the same way as in the previous step
- Insert the bin with holes into the intact bin, and place the lid on Your bin is now ready!
- Add worms and food
Worms work in cooperation with organisms from all kingdoms of life to degrade the organic matter we add to their environments. As the worms settle in, so will the other organisms (which often hitch a ride inside the worms’ guts, and in their bedding).
- In the bottom of the bin with holes, place 2.5 to 5 cm of shredded newspaper
- Spread a couple of handfuls of soil on the shredded newspaper. The grit it contains will help worms digest their food
- Add 5 kg of red worms to the bin
- You can now add some food waste to the vermicompost bin in a single layer (see the list in Appendix A for foods that should and should not go into a vermicompost bin)
- Cover the food waste with 2.5 to 5 cm of shredded newspaper. This will prevent smells, help absorb excess moisture, and will make the bin less inviting to unwelcome guests.
- Let this sit for at least a week, to allow the ecosystem to get established, before adding more food. Once all the first food scraps have been eaten, you can proceed to the next step.
- Feed the worms regularly
Successful vermicomposting is all about balance. Too much of one ingredient could make the compost too wet, too warm or too acidic, inviting population explosions of organisms such as mites and enchytraeid worms. However—in reasonable numbers, these are desired residents of your worm bin, and will not harm your worms. Vermicompost bins are very forgiving and lend themselves well to learning by trial and error.
- Once established, the worms will consume about 1 kg of food per week—more as their population increases
- At every feeding, make sure to add relatively equal proportions food (“greens”) and dry matter (“browns”)
- See Appendix A for examples of both
- This will prevent the compost from getting too wet or stinky, and will create a compost richer in spongy organic matter
- Try to feed the worms in a different part of the bin at every feeding
- Harvest the compost
After approximately six months of regular feeding, your vermicompost bin should be ready to be emptied (however, you can keep it going longer if you are not feeding it much). You can either empty the entire contents of the bin into a garden, or harvest the worms to start a new vermicompost bin.
To harvest the worms:
- Stop feeding the worms two to three weeks before your planned “harvest”
- Place a large sheet of plastic or plastic tray underneath a lamp with a bright Empty the contents of the vermicompost bin onto the plastic.
- Separate the compost into about nine pyramid-shaped piles. Leave the piles under the light for 5 to 10 minutes; the worms will head toward the centre of each pile to avoid the light.
- Gently remove the outer surface of each Repeat until you have only masses of worms, which you can then transfer to a new vermicompost bin.
Additional activity
Challenge students to think up other ways of separating the worms from the compost.
- Tips for a Productive Vermicompost Bin
- Two vermicompost bins will typically be required to dispose of the organic waste produced by a class of 25 to 30 students
- It is best to start slow. Do not feed the worms every day
- If the bin starts to smell bad, it may be a sign that too much food has been added
- If the bin contents seem too wet, add more dry matter or drill more holes into the lid and sides of the inner bin
- If you have an explosion of mites, put in melon rind, and dispose of it after the mites have covered it
- It is best to use red wriggler worms (Eisenia foetida) in your vermicompost bin
- Red wrigglers are surface-dwelling (epigeic) worms that do not like to burrow deeply, and they have a voracious appetite.
- Using common earthworms (Lumbricus terrestris, also known as nightcrawlers) in vermicomposting can work, but this species is not ideal, as these worms prefer burrowing deep, do not consume as much organic matter, and sometimes cannot survive in the damp environment of a bin
Part 2: Studying the vermicompost bin
- Biotic and abiotic interactions
The vermicompost bin is a self-contained ecosystem. By observing the bin, students can learn how the abiotic and biotic elements of this ecosystem interact.
Guiding questions:
- What are some abiotic elements of this ecosystem?
- What are some biotic elements of this ecosystem?
- How do these elements affect each other (abiotic and abiotic; biotic and biotic; abiotic and biotic)? What are some of the interactions occurring in this vermicompost ecosystem?
- Worms and their role in decomposition
Have students observe the vermicompost bin over a period of weeks to learn about the role that worms play in decomposition.
Guiding questions:
- Which foods decompose the fastest?
- Which foods take the longest to decompose?
- Does the size of the food scraps affect the composting rate?
- How many worms can you observe in different parts of the bin?
- Have students research the digestive systems of Does the knowledge they learned change anything about the way they feed their worms?
- Diversity of living things in organic matter
Vermicompost bins are great additions to the biology classroom, as they provide an endless supply of live biological specimens for observation through microscopes.
In the bin, students may find:
- worm cocoons
- shredding mites
- enchytraeids
- worms of all ages
- springtails
- symphylans
- fungi
- bacteria
- protozoa
Have students observe samples of the organic matter, and any liquid (compost tea), and identify the specimens they see in the different samples.
Resource for teachers
Worms Eat My Garbage: How to Set Up and Maintain a Worm Composting System by Mary Appelhof (Flower Press: Kalamazoo, Michigan, 1997).
Building a better garden
Grades 7 to 9, and 11
Agriculture in Canada evolves constantly in response to changes in the environment, and changes in society. One of these changes has been a gradual loss of agricultural land over the past 50 years. Loss of farmland challenges current agriculture practices in Canada, and threatens the country’s ability to continue meeting the needs of consumers at home and abroad.
In this activity, students will learn about the loss of agricultural land, and explore the extent of this loss in their own communities, and across Canada. They will also learn how, when faced with shrinking agricultural land, scientists have invented devices that allow agriculture to be practised within inhospitable ecosystems. Students will study one such invention: the biotop container garden. They will then be challenged to create their own self-contained gardens tailored to their local environments.
Students will understand that:
- Environmental factors, including the availability of land, have a major influence on where agriculture is practised in Canada, as well as the types of farming carried out across the country
- Agricultural land can become degraded
- Container gardens can provide a way for food to be grown in environments where traditional agriculture is not possible
Learning methods:
- Use data and maps to calculate the loss of agricultural land in Canada
- Discuss inventions by Canadian scientists that allow for agriculture in non-traditional settings
- Designing a container garden adapted to the student’s local ecosystem
Part I: Agricultural land in Canada
- Plant fundamentals
Start by asking students to identify the basic things a plant needs to grow. They should be able to name a number of components including:
- Light
- Air
- Water
- Nutrients
- Growing Medium
Growing medium is one of the components most affected by human activity. A growing medium is the material that provides support for both the plant and its root system, and supplies the roots with air, water and nutrients. Although there are different types of growing mediums used by plants, most plants grown by farmers in Canada are grown on agricultural land.
- What is agricultural land?
Agricultural land features soil that can be worked by farmers to plant crops, pasture, and produce. It is typically rich in nutrients and organic matter, and is home to invertebrates and micro-organisms. This type of soil also allows in water and air.
- How much agricultural land or soil does Canada have?
A very small portion—slightly more than 5%—of Canadian soils are suited to farming. The remaining soils are either too wet, too dry, too shallow, chemically unsuitable, or permanently frozen.
- Over the past few decades, the amount of agricultural land in Canada has shrunk.
- Statistics Canada estimates that, between 1971 and 2011, the amount of agricultural land in Canada decreased from 68.7 million hectares (one hectare is 10,000 square metres or about 2/3 of a hockey rink) to 64.8 million hectares.
- The amount of land lost (3.9 million hectares) during that 40-year period is equivalent in size to Vancouver Island. Restoring land to an agricultural state is difficult, costly, and takes a long time.
- Impact of agricultural land loss
The loss of agricultural land in Canada has an impact on the climate, society and economy.
- Agricultural land is a “carbon sink,” meaning that the amount of carbon dioxide produced when growing crops (including emissions from farm machinery and indirect emissions from fertilizers, pesticides, and herbicides) is less than can be absorbed by crops
- Crops can either release carbon dioxide during plant respiration, or absorb it during photosynthesis.
- During photosynthesis, the carbon dioxide is turned into glucose, a carbon compound that the crop can use for energy
- Some of the carbon compounds are stored in the crop’s tissues (roots, tubers, stems and leaves)
- When crops are harvested, whatever is left over in the field becomes organic matter
- As organic matter decomposes, the carbon is transformed back into carbon dioxide by microbes in the soil
- It is estimated that agricultural land in Canada stores between 500 and 700 thousand tonnes of carbon a year
- When these soils are disturbed or moved, they release this carbon back into the atmosphere
- Agricultural land is also an ecosystem that supports plants and animals not raised by farmers
- Many native species—including deer, turkeys, and geese—forage for food on Canadian farms
- In addition, native pollinators, such as bumblebees, eat pollen and nectar from crops like blueberries
- Loss of agricultural land also has an impact on Canadian society and the economy
- Agriculture and its related industries created $111.9 billion in gross domestic product (GDP) in 2016, accounting for 6.7% of Canada’s total GDP
- The food grown in Canada is not just for domestic supply, but also for export
- In 2016, Canada exported approximately $56 billion in agriculture and agri-food products
- The demand for food will only increase in the future
- It is estimated that, by 2050, the world’s population will be 9 billion, meaning that world food production will need to grow by 50%
- When agricultural land is lost, food security is threatened not just in Canada, but for its trading partners around the world
- Causes of loss of agricultural land
There are a number of ways in which agricultural land can be lost. Students may be able to name some of them, such as:
- Overcultivation: This is when fields are farmed too much without replenishing soil nutrients or adding organic matter. The soil in these fields becomes degraded, and can no longer support healthy crops.
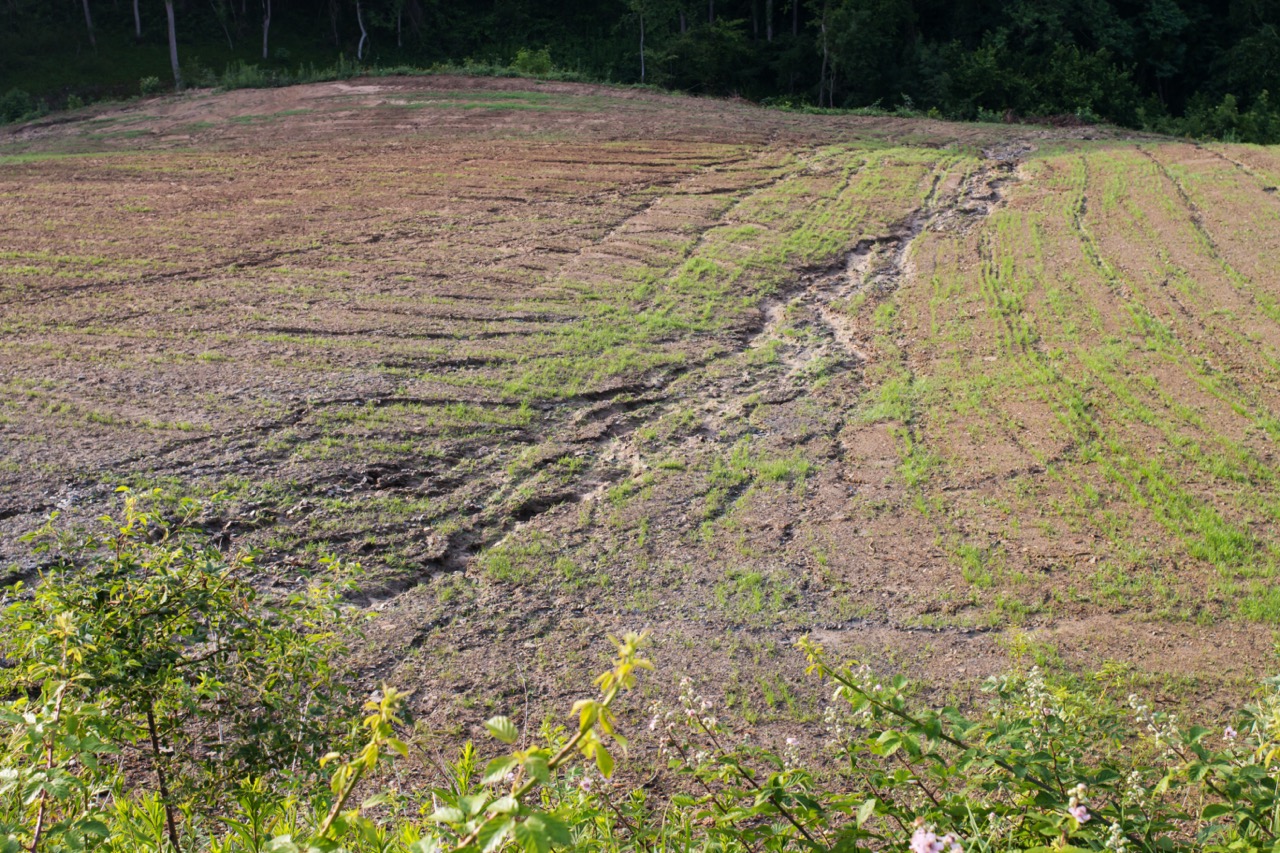
- Erosion: This occurs if soil is disturbed too much, or left without plants to anchor it for extended periods of time. When this happens, wind and water are able remove nutrients, organic matter, and soil particles.
- Contamination: This is when land is polluted by human-made chemicals or other substances that alter the soil’s ecosystem. This can be done once, or gradually over a period of time.
- Salinization: This occurs in soils irrigated with water having a high level of soluble salts (e.g., sulfates of sodium, calcium, and magnesium). It can also occur under environmental conditions that cause extensive water evaporation. The soluble salts left behind after the water evaporates can build up in the soil over time.
- Urbanization: This is when land is disturbed to develop buildings and cities for human occupation.
- Exploring agricultural land close to home
Students can explore how arable land has been lost to one of these causes—urbanization— by using Agriculture and Agri-Food Canada’s interactive land use map.
Using the land use change tool, they will be able to see on the map, as well as in data tables, the amount of land that has been transferred from agricultural use to settlement. Encourage students to explore the different features of the map, and to discuss their findings.
Guiding questions:
- How much cropland in Canada was turned into settlements between 1990 and 2000? How much between 2000 and 2010?
- Which provinces in Canada appear to have had the most cropland turned into settlements?
- Have students examine their province. Are there any areas of significant change?
- Have students examine a map of the local community. Has any cropland in their local community been turned into settlements?
- Has cropland been created anywhere in Canada from 1990 to 2010? What was the land used for before that?
Part 2: Biotop container garden
While some scientists study ways in which to preserve agricultural land, or speed up its rehabilitation, others look to mitigate its loss by creating ways to farm in environments that are traditionally considered unsuitable for agriculture. These new technologies and inventions have the added benefit of allowing people to grow food locally where they could not in the past, introducing greater variability to their diets and improving food security.
In Part 2 of the activity, students will be presented with a Canadian invention designed to fill this need: the Biotop Container Garden. They will also be asked to design a self-contained garden system that would allow them to grow food in their own back yards.
- Introduction to the biotop container
Have the students research the Biotop Container Garden, designed by Agriculture and Agri-Food Canada. Have them identify the different components that help plants grow:
- Bottom part of basket has holes to allow air and water to reach plant roots
- Upper portion of basket contains compost to nourish plants with nutrients
- Room for two types of roots to develop:
- Mineral supply roots in upper part of container, so plant can access the compost
- Aquifer roots in bottom portion of container
- Perforated holes in basket allow water to travel between basket and water reservoir below
- Water reservoir stores excess water until needed
- Relating the container to their environment
Once students have identified the different components of the container garden, ask them if they believe that this container would be a good way to grow food where they live. Ask them if they see any potential problems in using this design at their home or at school.
Guiding questions:
- Do they have enough space for a biotop container garden at home?
- Would there be enough sunlight?
- Would the local temperature or weather conditions affect plant growth?
- Building their own container garden
Now that students are familiar with the Biotop container garden, challenge them to create their own, tailored to the environmental conditions where they live. This work can be done in groups, or in pairs.
- Allow students to research the factors that affect how plants grow in their local area. Here are some online resources to help them get started:
- To calculate the amount of daylight they can expect: https://nrc.canada.ca/en/research- development/products-services/software-applications/sun-calculator/
- To calculate the average temperature and amount of precipitation they can expect: https://climate.weather.gc.ca/climate_normals/index_e.html
- Based on their findings, have students choose two or more plants they want to grow in their Students can choose plants from an online seed catalogue. Here are some definitions to help students make their selections:
- Full sun: Direct sun for six or more hours per day
- Light shade: Three to five hours of direct sun per day
- Partial shade: Two hours of direct sun per day
- Full shade: Less than one hour of sun per day
- Abiotic pollination: A non-living thing such as wind or water transfers the pollen from one flower to another
- Biotic pollination: Living things such as insects or birds transfer pollen from one flower to another
- Self-pollination: When pollen from a flower can pollinate itself, or pollinate other flowers on the same plant
- Cross-pollination: When pollen from a flower is used to pollinate the flower on another plant of the same species
- Next, have students draft a design for a container garden for their own home. Depending on the classroom environment, the design can be created digitally using software, drawn on paper, or a 3D model can be constructed.
- Finally, have students present their designs. In their presentations, they should be able to explain how their models respond to the needs of their chosen plants, and how it has been adapted to the local environment.
Guiding questions:
- How will the plants get enough sunlight?
- How will the plants get moisture?
- How will the plants be pollinated?
- What types of soil or growing medium will be used in the container, and how will it be kept healthy?
Additional activity
- When the presentations are finished, have the class as a whole discuss the challenges they faced when creating their designs, and how factors other than the environment (cost, time, access to resources, etc.) might affect the practicality of their designs.
Guiding questions:
- Which environmental factor was the hardest to incorporate into your design? Which was the easiest?
- Would food grown in your container garden be more or less expensive than food sold locally? Why? What factors affect the cost of both types of food?
- Would people be able to build your container garden on their own, or would it need to be manufactured?
- Have students examine what crops, if any, are grown in their local area, and discuss how their container garden fits into this broader picture of agriculture. A detailed map of the crops grown across Canada can be found here:
- Canada’s Annual Crop Inventory Map: https://www.agriculture.canada. ca/atlas/aci/
Discussion questions:
- What, if any, crops are grown in their local area? Would these crops grow well in their container garden?
- Is there variety in the types of crops grown in their local area? How can their container garden help to provide some diversity in the types of foods grown locally?

Second chances for waste reduction
Grade 11 (Secondary cycle 2)
One of the ways to reduce pollution from agriculture is to turn waste into secondary products that have a new use.
In this activity, students will learn about some of the waste generated on farms. They will then be asked to use their creativity to design a product that diverts that waste and turns it into a secondary product. Students will also be introduced to the concept of “circular economy in agriculture.”
Students will understand that:
- There is a difference between a primary product, a by-product, and waste
- Through innovation, waste can become a by-product
- Waste products contain elements that can be extracted and reused
Learning methods:
- Research by-products using online sources
- Use creativity and problem-solving to design a product
- Present their products to the teacher and/or to the class
Activity
- Introduction to waste on the farm
Like most human activities, agriculture generates waste. Farmers have been dealing with some waste products, like manure, for millennia. Consequently, farmers have discovered a number of ways to reuse these products and have turned them into by-products. Other waste products, such as the plastic used in crop storage, are relatively new. But whether old or new, how farmers deal with their agricultural waste has a significant impact on the surrounding environment.
Before exploring how farmers deal with waste, make sure that students are able to define waste. As a class, discuss and define the following terms:
- Primary product: Something intentionally created for a specific purpose.
- By-product: Something produced during the creation of a primary product. By-products can either be used for a purpose, or discarded as waste.
- Waste product: Something produced during the creation of a primary product. It is either undesirable or unwanted, and is discarded.
One of the ways in which farmers try to reduce the amount of waste they produce is by using the principles of something called “circular economy in agriculture”
- In this type of circular economy, farmers try to reintroduce materials that are at the end of their use back into the production cycle, reducing waste as a result
- The circular economy concept extends beyond the farm, and into the processing of agricultural products on their way to Canadian tables
- For example, in 2019, Agriculture and Agri-Food Canada developed a process by which excess whey—produced when milk is turned into cheese—can be reintroduced into the cheese
This process has two benefits:
- First, it prevents whey from being discarded as waste. Although there are some current uses for whey, such as an additive to some animal feeds, it is still seen as a waste product by some manufacturers, and is discarded.
- Secondly, the process improves cheese yield, and allows producers more control over the texture and amount of moisture in their cheese. This increases the profitability and quality of their product.
- Waste-diversion activity
Another way to reduce waste is to turn it into a useful new product. In this activity, students will use research skills and creativity to do just that. This activity can be done individually or in groups.
- Have students choose one of the following waste products from agriculture or food processing. For an added challenge, ask students to research and suggest their own waste products.
- Polyethylene mulch
- Polypropylene animal-feed bags
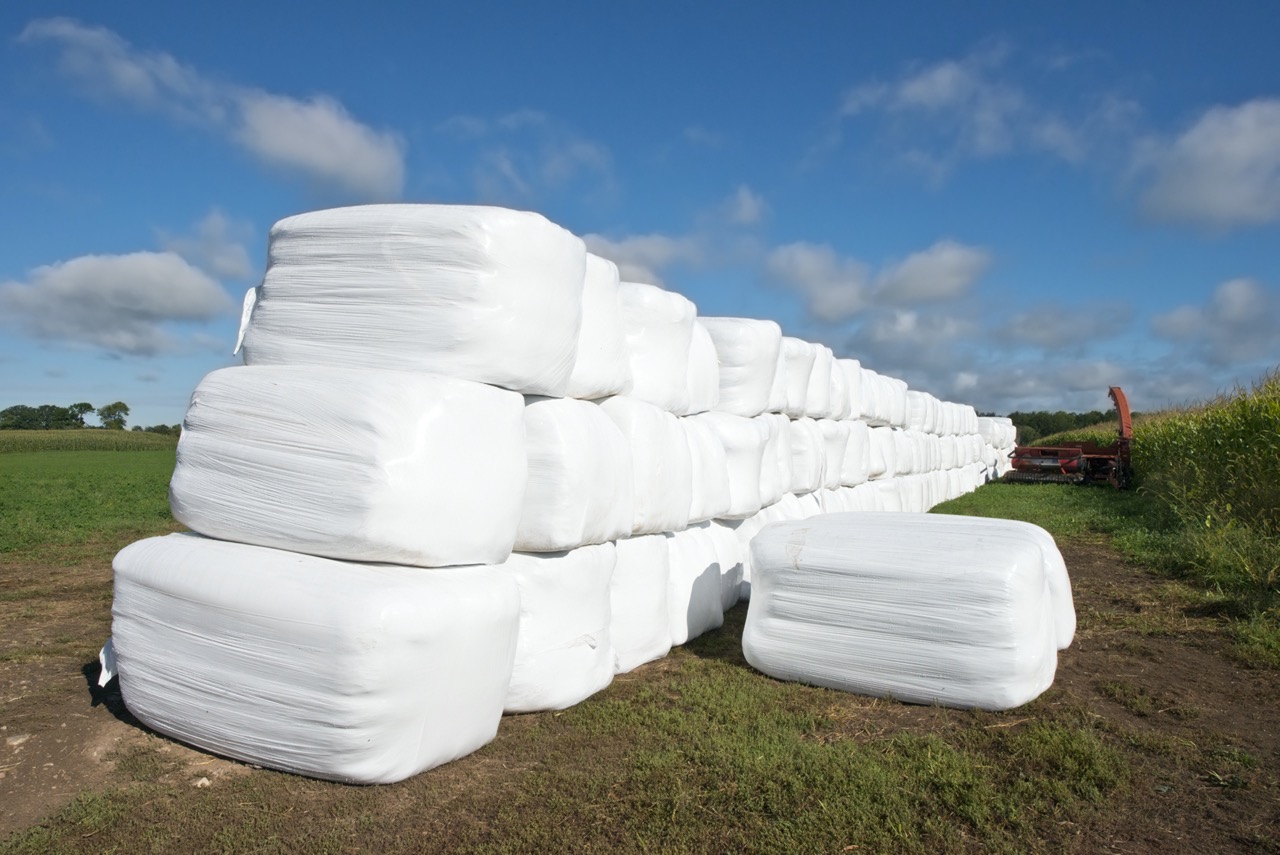
- Polypropylene bale wrap
- Bones from pig carcasses
- Hooves and horns from goats
- Lanolin grease from sheep’s wool
- Cornstalks
- Wheat germ
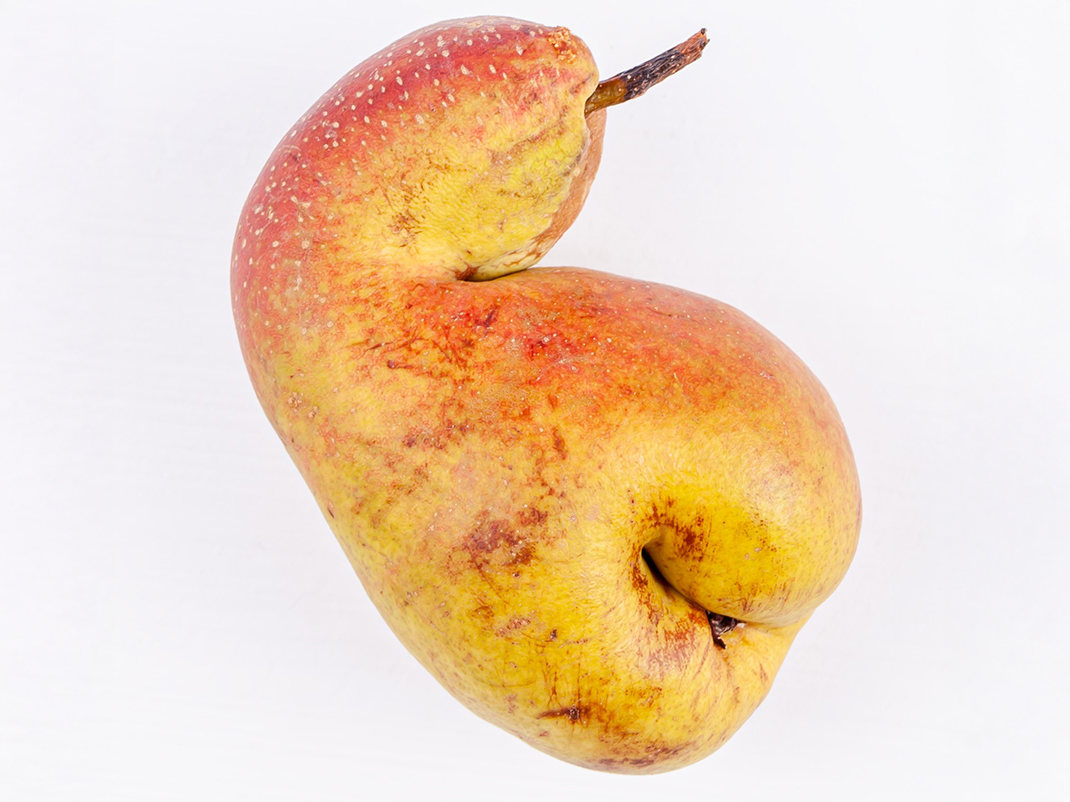
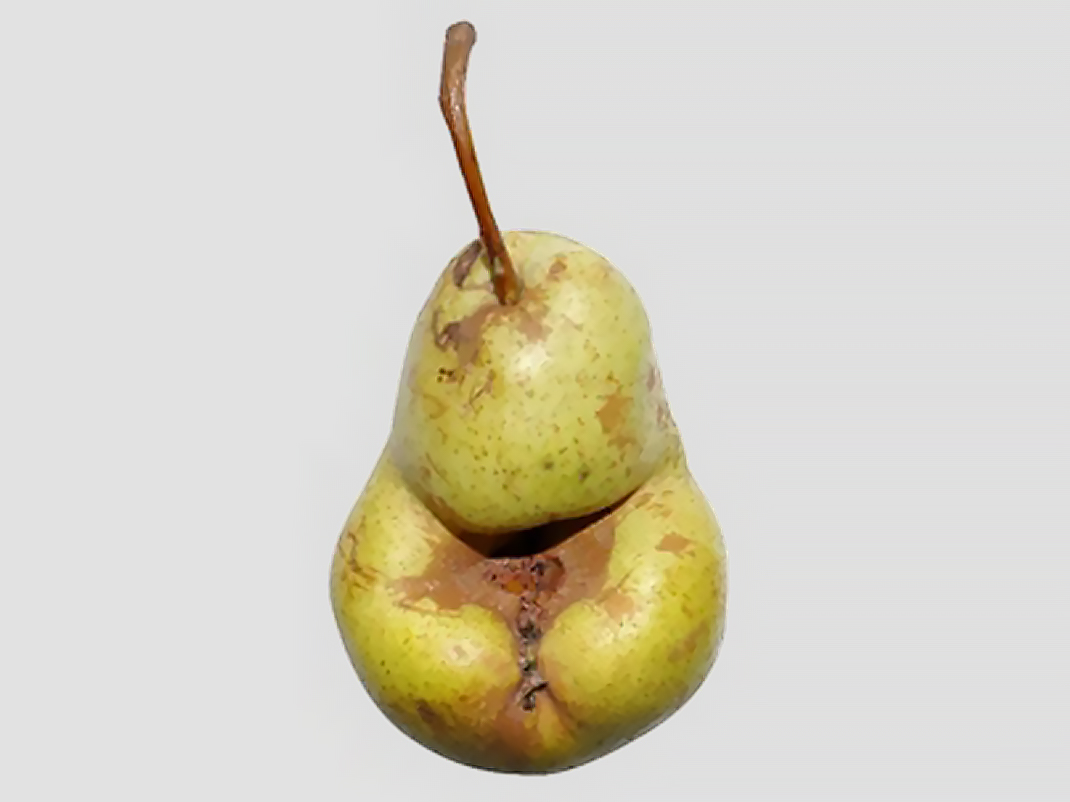
- Misshapen pears from incomplete pollination
- Feathers from Broad Breasted White Turkeys
- Whey from cow’s-milk cheese
- Excess fat from cattle carcasses
- Have students gather information about the waste product they have chosen.
Guiding questions:
- What is the chemical composition of the product?
- Are there any areas in Canada where a large amount of this waste is produced?
- How is the product currently disposed of?
Have students design something new using their waste product (e.g., a bruised apple) or one of the component parts of the waste product (e.g., cellulose from the bruised apple). Along with their design, have them create a pitch highlighting the strengths and benefits of their new product.
Guiding questions:
- If not the whole thing, what specific part of the waste product does their new product use?
- How is their new product made? What components will be needed to create it?
- How is their use for the waste product an improvement over the way it is currently used?
- Who is the target market for their new product?
- Approximately how much waste product will they need to create an initial batch of 100 units of their new product?
- Would they be able to make a profit turning their waste product into their new product?
- Will they create any additional waste products during manufacturing? What is their disposal plan for this waste?
Have students present their products to the teacher/and or class, and answer any questions about their As a challenge, the teacher and/or students may choose one of the products as the class winner, based on originality, efficiency of diverting waste, most profitable, etc.
Resources for teachers
When asking students to name a waste product on a farm, the first thing that may come to mind is manure. However, although manure is not a primary product for farmers, it is so useful as a fertilizer that it is most certainly a secondary product on many farms. In addition to nourishing the soil, manure can be a source of fuel.
Run-off battleship
Grades 7 to 9 and 11 (Secondary cycle 1 and 2)
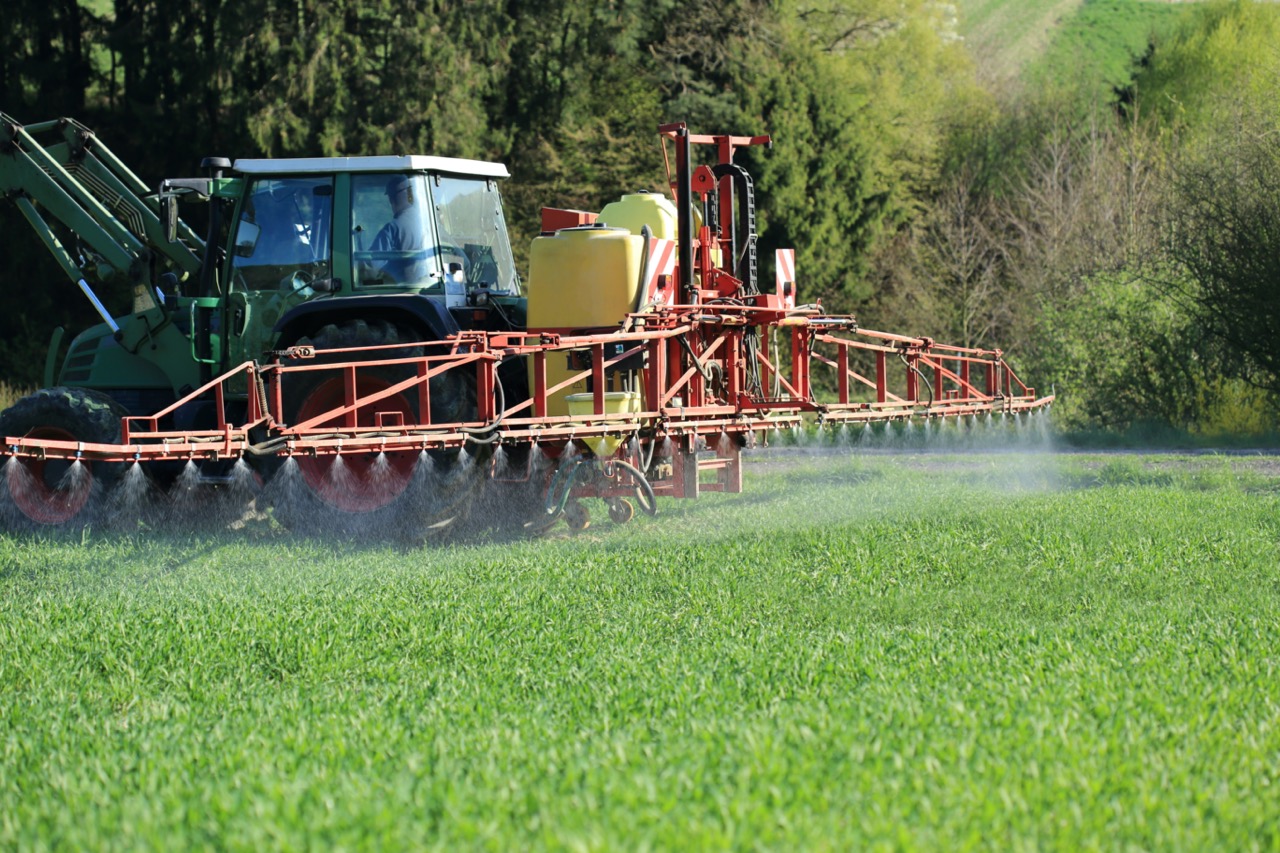
Run-off — the unintentional transfer of pesticides, fertilizers, nutrients or manure from farmland to the outside ecosystem — is a practical example of the intimate relationship between agriculture and the environment.
In this activity, students will learn the basics of how run-off occurs, along with the role soil plays in this process. Students will also play a game to learn how fertilizer management and precision agriculture can significantly reduce the risk of run-off.
Students will understand that:
- Run-off enters and travels within the hydrological cycle
- Different types of soil have an effect on run-off
- There is a risk-benefit calculation that farmers must make when applying fertilizer
- Precision agriculture is a method of farming used to reduce the likelihood of run-off
Learning methods:
- Play a game that simulates real-life scenarios
- Discuss game outcomes
Materials
- Printed copies of the maps provided in Appendix B
- Pencils
- Two dice
Activity
- Overview of run-off
Run-off refers simply to the movement of water across land. On a farm, however, this water can serve to transport materials that, beyond the farm, may damage the environment. Ask students if they can think of any substances used on farms that could damage the environment. Some examples are:
- Pesticides
- Synthetic and organic fertilizers
- Manure
These substances can either be dissolved in the water itself, or attached to soil particles suspended in the water. Farm run-off can travel along the surface of soil to bodies of water, or can travel downwards into groundwater.
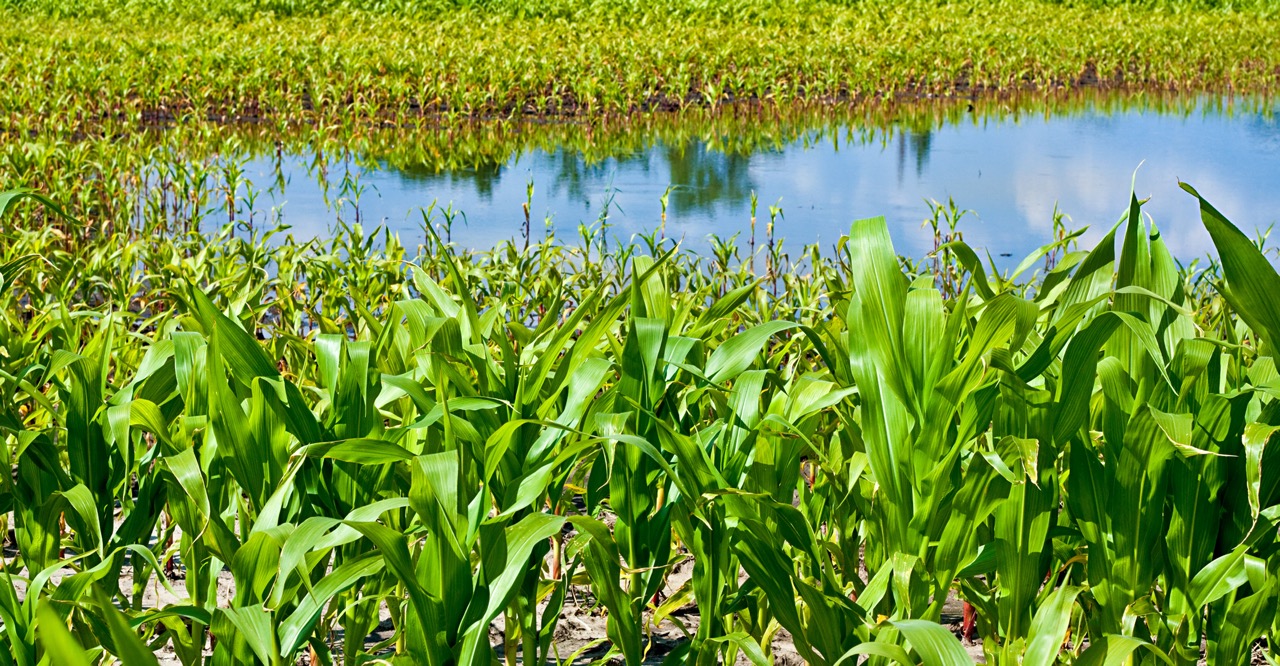
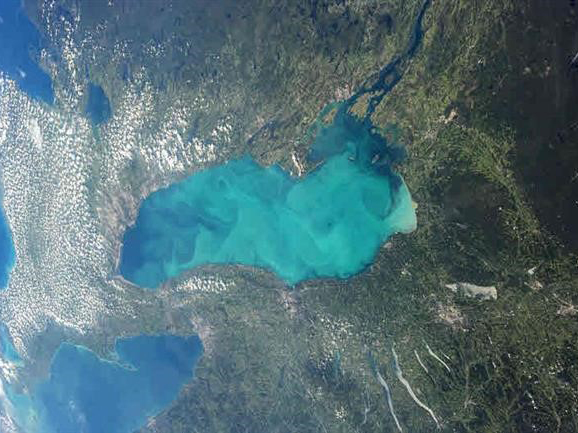
The substances in run-off can have a devastating impact on aquatic ecosystems in the bodies of water they reach. Too much phosphorus, for example, can lead to high levels of algae. Known as “algal bloom,” this phenomenon causes a lack of sunlight and oxygen in the water, causing the death of some of the living creatures in that environment.
- The role of soil in run-off
Although water is the main way substances are transported during run-off, soil plays an important role in the process as well. As mentioned above, substances can attach themselves to particles of soil, which are then moved by run-off. Soil texture can also facilitate the movement of water.
Texture is one of the properties of soil. The particles that make up soil are categorized into three groups by size:
- Sand
- Silt
- Clay
Sand particles are the largest, and clay particles the smallest. Most soils are a combination of the three. The relative percentages of sand, silt, and clay are what give soil its texture.
The different soil textures can increase or decrease the likelihood of certain types of run-off occurring.
- Sand: Because of the larger spaces between particles, it is easy for water on the surface to move down into the groundwater. These spaces also allow other substances, such as fertilizer or manure, to move into the groundwater. In addition, these larger particles result in a poor soil structure, which means that they are likely to experience wind erosion, which can transport substances attached to soil particles
- Silt: Due to the size of the particles, this type of soil is slippery. It is most at risk for water erosion, especially on slopes that allow the water to rush downwards.
- Clay: Although these soil particles are usually able to retain large amounts of water, certain conditions encourage run-off in clay. If the surface structure is allowed to degrade and form a crust, or if the soil is compacted, water will have a hard time being absorbed, and is more likely to travel across the surface, picking up substances as it goes. Also, in dry conditions, the surface of the soil may be broken down into small particles that are easily eroded by wind.
- Run-off simulation activity
Now that students understand the different ways in which run-off can occur, as well as how soil can increase or decrease the chances of run-off, have them try this activity to simulate how farmers make decisions in their day-to-day operations. This activity can be done individually or in groups.
- Distribute copies of the maps in Appendix B to the students. Students can either be given individual maps, or work in groups. There are three maps from which to choose: Sandy Soil Map, Silty Soil Map, and Clay Soil Map. Assign each student or group one of these three maps.
- Explain to students that they are acting as farmers, and that their map represents a field on their farm. Each map is divided into a grid, with each square representing one hectare (about 1-1/3 soccer fields). The number in each square indicates the kilograms of phosphorus present in the soil of that hectare.
- In this scenario, they will be attempting to grow a crop of chickpeas. Chickpeas require approximately 17 kg of phosphorus per square hectare. They have eight days to prepare their fields for planting. During that period, they will have three opportunities to apply phosphorus fertilizer. Their goal is to have 17 kg of phosphorus in each hectare at the end of the game.
- After each application, the teacher will roll the dice to determine the amount of precipitation over the next three days. Depending on the amount of precipitation, a certain percentage of the fertilizer may be lost to run-off between each application. This is because phosphorus binds to soil particles, which can be washed away by water or blown away by wind. The type of soil will have an effect on their calculations. Once the dice have been rolled for the last time, students will see how successful they were in applying the optimal amount of fertilizer.
- Once the rules have been explained, students can begin the game. Allow students to decide how much fertilizer (in kg/hectare), if any, they would like to apply on their first round. They will need to apply the same amount of fertilizer across their entire field. Once they have decided, have them add up and record the new amount of fertilizer in each square.
- Roll the dice. If the total is two, three, or four, record it as a period of low precipitation. If the total is between five and nine, record it as a period of regular precipitation. If the total is ten, eleven or twelve, record it as a period of high precipitation.
Have students calculate and record any amounts of fertilizer that were lost due to precipitation. Instructions are provided at the top of each page. Calculations will change, depending on the type of soil.
Sand:
- If the precipitation score is 2 to 4: You lose 10% of your fertilizer to wind erosion.
- If the precipitation score is 5 to 9: Your fertilizer levels remain the same.
- If the precipitation score is 10 to 12: You lose 10% of your fertilizer to groundwater run-off.
Silt:
- If the precipitation score is 2 to 4: Your fertilizer levels remain the same.
- If the precipitation score is 5 to 9: You lose 5% of your fertilizer to surface run-off.
- If the precipitation score is 10 to 12: You lose 15% of your fertilizer to surface run-off.
Clay:
- If the precipitation score is 2 to 4: You lose 5% of your fertilizer to wind erosion.
- If the precipitation score is 5 to 9: Your fertilizer levels remain the same.
- If the precipitation score is 10 to 12: You lose 5% of your fertilizer to surface run-off.
- Perform the same sequence of events two more times, each time allowing students to add fertilizer if they choose, and recalculate any losses during precipitation.
- After the last period of precipitation, have students tally their results. Have them record how many hectares ended up with 17 kg of phosphorus. Have them calculate the total amount of fertilizer lost to run-off.
- Distribute a second copy of the same maps to students, and run the activity again. This time, however, allow students to apply fertilizer individually to each square hectare. Once the activity is completed, have them again calculate the total amount of fertilizer lost to run-off, along with how many hectares ended up with 17 kg of phosphorus.
- Discuss the results of the two activities with the class.
Guiding questions:
- Which method of fertilizer application—broad spectrum or hectare-by-hectare—was the most successful? Why do you think that was?
- Of students who had the greatest number of hectares with the correct amount of phosphorus, how many lost fertilizer to run-off? How much fertilizer was lost?
- If they ran the activity a third time, what strategies would students use under either system of fertilizer application?
- In the real world, what tools could farmers use to anticipate or control run-off?
- Precision agriculture
In addition to helping students understand how fertilizer run-off can occur in the real world, this activity also gives students an introduction to precision agriculture.
- In precision agriculture, farmers use a variety of technologies, such as sensors and satellites, to track variables such as moisture levels or nutrient content across their fields
- Although in the past applications of fertilizers such as phosphorous would be broadcast over entire fields, precision agriculture allows farmers to apply different rates of fertilizer to different parts of a field, so that fertilizer is only applied where it is needed
- Much of what is done in precision agriculture has only become possible due to advances in technology over the past few decades
- Emerging technologies will almost certainly develop the field further in the future
The following is an article outlining a recent advances in precision agriculture:
Agricultural Innovations 2018—Precision Agriculture Increases Potato Production: publications.gc.ca/collections/collection_2018/aac-aafc/A1-33-2018-eng.pdf
Have students look through the article, and discuss what they have read.
Guiding questions:
- What types of technologies are being used in precision agriculture?
- What variables are farmers able to track?
- What types of technologies or infrastructure do farmers need in order to take advantage of advances in precision agriculture?
Additional activity
In the real world, a number of factors not included in the simulation activity can have a serious impact on the run-off of fertilizer or other additives. In this optional activity, have students research the different agricultural practices and tools of tillage, tile drainage, fertilizer type and fertilizer application. Have students discuss how these factors can affect run-off.
Using diversity in response to climate change
Grades 9 and 11 (Secondary cycle 2)
Climate change is affecting, and will continue to affect, the way agriculture is practiced in Canada. Thankfully, farmers around the world have spent thousands of years carefully breeding animals and plants that can grow in diverse and sometimes hostile environments.
In this activity, students will learn how animal breeds developed in the past can help to improve the health and productivity of herds across Canada. They will also learn how keeping a repository of genetic diversity helps speed up the creation of new varieties of plants adapted to environments shaped by climate change.
Students will understand that:
- The effects of climate change will change farming in Canada
- Heritage breeds and existing biodiversity are worth preserving, as they may help to solve farming problems in the present and future
Learning methods:
- Identify traits in heritage breeds of cattle that would make them resilient to some of the effects of climate change
- Research the Canadian Plant Germplasm System, which stores a broad diversity of seeds and germplasm
Activity
- Climate change and agriculture
Students should be able to identify some of the effects of climate change without any trouble. Ask them if they can identify specific changes, good or bad, that have affected agriculture in Canada. Some examples would be:
- Rising temperatures
- Higher carbon dioxide levels which can increase plant photosynthesis
- Increased frequency of droughts
- Increased frequency of heavy precipitation
- Increased pests, as new environmental conditions allow for them to move into areas that were hostile to them before
- Increased seed costs due to low yields
- Increased feed costs due to low yields
- Heritage breeds background
Crops and livestock will need to be adapted to changes in Canada’s natural environment. Both the practices used in farming, and the livestock and crops themselves, will need to adapt. One of the ways that Canadian farmers can facilitate this adaptation is to draw upon the genetic diversity already present in heritage breeds.
- Heritage breeds, sometimes called rare breeds, are livestock animals that were popular in the past, but are less common now
- Most heritage breeds are adapted to live in a very specific ecosystem or geographical area, and can provide multiple services to the farmer who raised them
- One example of a heritage breed is the Chantecler chicken
- Chantecler chickens were bred to thrive in Quebec’s climate
- Their bodies are adapted to cold winter temperatures—they have almost no wattles, and a very small cushion comb, reducing their risk of frostbite
- Chantecler chickens were also bred to provide multiple products to the farmer: eggs throughout the year, and meat at the end of the chicken’s life
- Because they are kept for multiple purposes, animals like the Chantecler chicken are also known as “dual-purpose breeds”
- Although Chantecler chickens are good at producing both eggs and meat, they are not as productive at either in relation to more specialized breeds
- The White Leghorn chicken is an example of a specialized breed of chicken
- It is a prolific egg-layer, laying around 280 eggs a year; however, it is a small bird with little meat on its bones
- Meat breeds, such as the Cornish and Plymouth Rock broiler cross (a hybrid chicken), only needs five weeks from birth to reach its 2.26-kilogram (five-pound) market weight
- These chickens, however, are poor egg-layers
- Dual-purpose breeds, such as the Chantecler, became less and less popular as farmers specialized and sought out the most productive specialized breeds of chickens like the White Leghorn for egg production
- However, the specific adaptations that allowed heritage breeds to thrive in a variety of ecosystems in years past are now being seen as useful tools in the effort to adapt farming to the effects of climate change
- Although there is an interest in keeping heritage breeds as they are, there is also the possibility of breeding them with popular, more productive breeds in order to raise animals with the advantages of both parents
- Heritage breeds activity
- Give students the information cards from Appendix C. Have them split into groups to read the profiles of the different cattle breeds, and the farm profile card.
- Have them identify some ways in which climate change could affect the lifecycles of beef cattle
Guiding questions:
- How would changes in temperature or precipitation affect cattle?
- How would changes in the price of feed affect cattle?
- How would the increased presence of pests affect cattle?
Have students choose one of the heritage breeds to cross-breed with either of the specialized breeds. The goal is to create offspring that will thrive, despite the impact of climate change, while also responding to the farm profile outlined on the card. Have students explain their choice to the class. For this exercise, students should consult: https://climate.weather.gc.ca/climate_normals/
Guiding questions:
- What characteristics are they trying to pass on from the heritage breed?
- What characteristics are they trying to pass on from the specialized breed?
- How will this offspring be an improvement over its parents?
- What specific effects of climate change did students have in mind when making their choices?
- Gene bank
There is an even greater genetic diversity in plants than in animals. Protecting this diversity has become a global concern. Students may have heard of the famous Svalbard Global Seed Vault. Established in 2008, this vault—cut into the permafrost in Norway’s far north—contains more than one million samples of crop varieties. Since the Vault opened, Canada has sent nearly 32,000 samples of 377 plant species from its own less popular, but equally important, genebanks.
- There are three genebank repositories in Canada. Collectively, they are known as the Canadian Plant Germplasm System. One of these genebanks is Canadian Potato Gene Resources in Fredericton, New Brunswick. As the name suggests, the focus of its collection is potatoes. The facility houses live tissue cultures, which are continuously being grown and replaced, as well as microtubers—tiny potatoes the size of raisins—which are kept in storage.
- The second location is the Canadian Clonal Genebank in Harrow, Ontario. This facility stores around 3,000 different samples of tree fruits such as apples, and small fruits such as strawberries.
This country’s largest repository is Plant Gene Resources of Canada in Saskatoon. This genebank houses around 115,000 different samples of plant species, both wild and domestic. The focus of the collection is crucifers (such as canola and mustard), as well as cereal crops such as barley. This facility also houses backup copies of samples stored at Canadian Potato Gene Resources.


- Have students visit the websites below to watch a video and read about the genebank in Saskatoon.
Website: https://pgrc.agr.gc.ca/about-propos_e.html
Video: https://www.youtube.com/watch?v=7lKTdoYBpe4
- When students have finished familiarizing themselves with the genebank, have them answer the following questions about the material, either in writing or in a class discussion:
- When did the project begin?
- What were the reasons behind the foundation of this project?
- What organizations are involved in the project?
- What is the difference between germplasm and a seed? Why have both been preserved, and not just one or the other?
- Where do the stored seeds and germplasm come from?
- Who can access samples from the genebank?
- Does this project benefit citizens of other countries? If so, how?
Resources for teachers
To learn more about the science behind the genetic selection of plants and animals on Canadian farms, consult the Canada Agriculture and Food Museum’s lesson plan Genetics and biotechnology.
Two truths and a lie
Grades 9, 11 and 12 (Secondary cycle 2)
There are a number of voices that compete for our attention when it comes to information about food and agriculture in Canada.
Although food is something with which all Canadians interact on a daily basis, over the past 100 years the number of Canadians directly involved or employed in agriculture has steadily decreased.
In 1931, 1 in 3 Canadians owned, worked, or lived on farms. By 2016, that number had declined to 1 in 68. Because of this lack of connection with farming, most Canadians rely on news, advertising, and social media for information about agriculture. Sometimes these sources can have conflicting messages. This can make it difficult for Canadians to make informed decisions about the food they purchase and consume. It is important for students, whether urban or rural, to learn to identify potential bias in their sources of information about agriculture, and to take the time to critically evaluate various arguments surrounding certain agricultural practices.
In this activity, students will be asked to think critically about their sources of information about agriculture, and will evaluate their own level of knowledge.
Students will understand that:
- There are many authors publishing information and opinions about agriculture
- The motives of these authors affect the types of information and opinions they publish
- Where people get their information about agriculture affects their choices about food
Learning methods:
- Have a discussion on sources of information about agriculture in Canada.
- Take a quiz on agricultural topics, and have a discussion on how sources of information may have influenced the results of the quiz.
Activity
- Canadians can find information and opinions on agriculture in advertisements, news articles, social media, and government reports. These sources of information are produced by a wide range of authors. Ask students to identify some of these authors, whether they be businesses, organizations, or individuals. Some examples would be:
- News outlets (e.g., newspapers, television, radio, news websites)
- Educational institutions (e.g., schools, universities, museums)
- Government agencies and departments (e.g., Farm Products Council of Canada, Canadian Grain Commission, Foodland Ontario)
- Businesses (e.g., restaurants, grocery stores, food and beverage manufacturers)
- Charities and non-governmental organizations (e.g., PETA, Rescue Farms, 4H Canada)
- Advocacy groups (e.g., Dairy Farmers of Canada, Canadian Federation of Agriculture, BC Agricultural Council)
- Farmers and agricultural workers (e.g., social media influencers, YouTubers, personal acquaintances)
- As a class, or in small groups, have students evaluate the sources they have named.
Guiding questions:
- What sources do the students trust to provide the most balanced, unbiased information? Which do they trust the least? Why?
- What sources have the biggest platform, or are the most vocal? Which sources do students hear from the least? Why?
- What interests drive the sources? (e.g., financial, moral, ethical). Does this affect how much trust the students place in the opinions and information produced by these sources?
- Either in a group or individually, have students complete the quiz provided in Appendix D. For each question, they will be presented with three statements, and must identify which one is incorrect. If completing the quiz as a group, keep track of their answers in order to help with the discussion afterwards.
- If possible, grade the quiz as a group. Use the grading of the quiz as an opportunity to discuss the topics covered in the question. The Teacher’s Copy in Appendix D contains the answer key. The answer key includes a brief explanation for each question, and links to additional information can be found in the Resources for Teachers section.
Guiding questions:
- Which question did the greatest number of students get correct?
- Which question did the greatest number of students get wrong?
- Which answer surprised students the most?
- Did they learn anything new about a food they consume regularly?
- If they remember, where did they learn the correct answers to some of the questions?
- Did the quiz change their impressions of agriculture as an industry in any way? Or did it confirm what they already believed?
Resources for teachers
On research around methane production in cattle:
https://agriculture.canada.ca/en/canadas-agriculture-sectors/fields-science/dr-karen-beauchemin
On greenhouse gas emissions in Canada produced by agriculture:
List of permitted substances in organic agriculture: http://publications.gc.ca/collections/collection_2020/ongc-cgsb/P29-32-311-2020-eng.pdf
Regulations about the use of pesticides and harvest:
National Standards for Pesticide Training:
Information about hormonal growth promotors:

Careers in agriculture
Grades 9 and 11 (Secondary cycle 2)
If you ask Canadians about jobs in agriculture, “farmer” or “farmhand” might be the only answers you’d get. However, there are many careers for anyone interested in agriculture, especially if they are also passionate about science.
In this activity, students will learn that people with various fields of expertise can find careers in agriculture. Students will also learn how Canadians scientists are helping to expand agricultural knowledge and improve many agricultural practices using science.
Students will understand that:
- Working in the field of agricultural research requires training
- There are different types of agricultural research in which Canadian scientists are engaged
- Scientific research affects the daily lives of Canadians
Learning methods:
- Watch videos and do online research
- Create a job advertisement or report
- Present the knowledge they have gained to others
Activity
- Have students consult the list of scientists, technicians, and administrators provided in Appendix E. For an added challenge, ask students to find profiles of actual scientists working in the field of agriculture instead of relying on those in the Appendix.
- Assign each student one of the individuals to profile, or have them choose for themselves.
- Have each student create a fictional job advertisement for the position of the individual they are profiling. They can use the information provided in the link, as well as their own research. The job advertisement should answer the following questions:
- What is the job title?
- On a typical day, what types of tasks would the individual do?
- What salary could the individual expect?
- What level and type of education is required?
- What type of previous work experience is required?
- Why should the candidate work in that lab, or on that project, rather than on another project or with another organization?
- How does this job help Canadian agriculture, and Canadians in general?
Additional activity
Have students present their job advertisements to the class. They can also act out the role of recruiters trying to persuade graduates or candidates to apply to their job over the others.

Integrated pest-management Dragon’s Den
Grade 11 (Secondary Cycle 2)
Just as there is a multitude of different pests affecting Canadian crops, there are multiple ways of managing them. Using research and creative thinking, students will learn about the different methods of pest control that make up an integrated pest-control system. They will discover the strengths and weaknesses of the various methods, and how combining different methods can help to reduce risk and improve yields.
Students will understand that:
- Scientific research can be used to create more environmentally responsible ways of dealing with pests on farms
- There are risks and benefits to every pest-management technology, and no universally perfect strategy
- Using different technologies in concert can provide better results and reduces risk more than a single technology on its own
Learning methods:
- Create a business pitch for a pest-management system using research skills
- Present their findings to the group, and defending their findings under questioning
Activity
- Pests on Canadian farms
In a farm ecosystem, there are animals and plants that are cared for by the farmers. Then there are animals, plants, and other organisms—such as fungi and bacteria—that choose to make the farm their home, and are not cared for by the farmer.
Some of these “squatters” are beneficial. They help the farm’s animals and plants. One good example of a beneficial squatter is the mason bee; while they are not cared for by farmers, they make their homes around fruit farms and pollinate cherry, plum, and apple trees.
Others squatters, considered pests, are harmful. They can cause damage and even kill crops, or make farm animals sick or uncomfortable.
Have students brainstorm pests that might be found on a Canadian farm. If they are having trouble, prompt them by asking about pests in their homes or at school. Some examples might be:
- Insects and invertebrates that consume crops, or use them for nesting or habitats.
- Birds that consume crops.
- Mammals such as deer and rabbits that eat crops.
- Mammals such as coyotes and raccoons that eat livestock.
- Bacteria and fungi that cause disease or rot in plants.
- Bacteria and fungi that cause disease in farm animals.
- Parasites—such as fleas, lice, flies and mites—that feed on farm animals.
- Vegetation that competes with farm crops for resources (e.g. sun, nutrients and water), or chokes them out.
- Dragon’s Den
This wide variety of pests requires a wide variety of methods to manage them. In this part of the activity, students will become experts on one of the new methods developed in Canada to deal with a specific pest.
- Have students form themselves into groups of two or three. Either assign one of the pest-control methods mentioned in the Resources for Teachers section, or let the students choose for themselves
- Have the group create a Dragon’s Den-style pitch to sell their method to the class. They should be prepared to answer the following questions in their presentation:
- Who developed this method or technology?
- Which pest does this method target?
- Which plant or crop does this method protect?
- What makes this method an improvement over the way this pest has been managed in the past?
- What is the impact of this method on the environment on and around the farm?
- What costs are associated with this method? Is it labour-intensive? Does it cost a lot to install or operate?
- Once they have prepared, have students present their pitch to the class and answer questions about the benefits and downsides of their method.
- Integrated pest management
When the presentations are over, explain to students that, although a single method of pest control can be very effective, most farmers in Canada today do not use only one method to deal with a pest. Instead, they rely on integrated pest management.
In integrated pest management, a variety of methods are used to suppress pests. The emphasis in this method is not to eradicate a pest, but to remove or reduce it in an efficient way that is both economically and environmentally responsible.
There also an emphasis on being proactive. Farmers are encouraged to track things such as weather conditions, which can indicate when a pest population is likely to expand, allowing farmers to take steps to control the population before it becomes damaging to a crop or livestock.
The methods used in integrated pest management can be grouped into five categories:
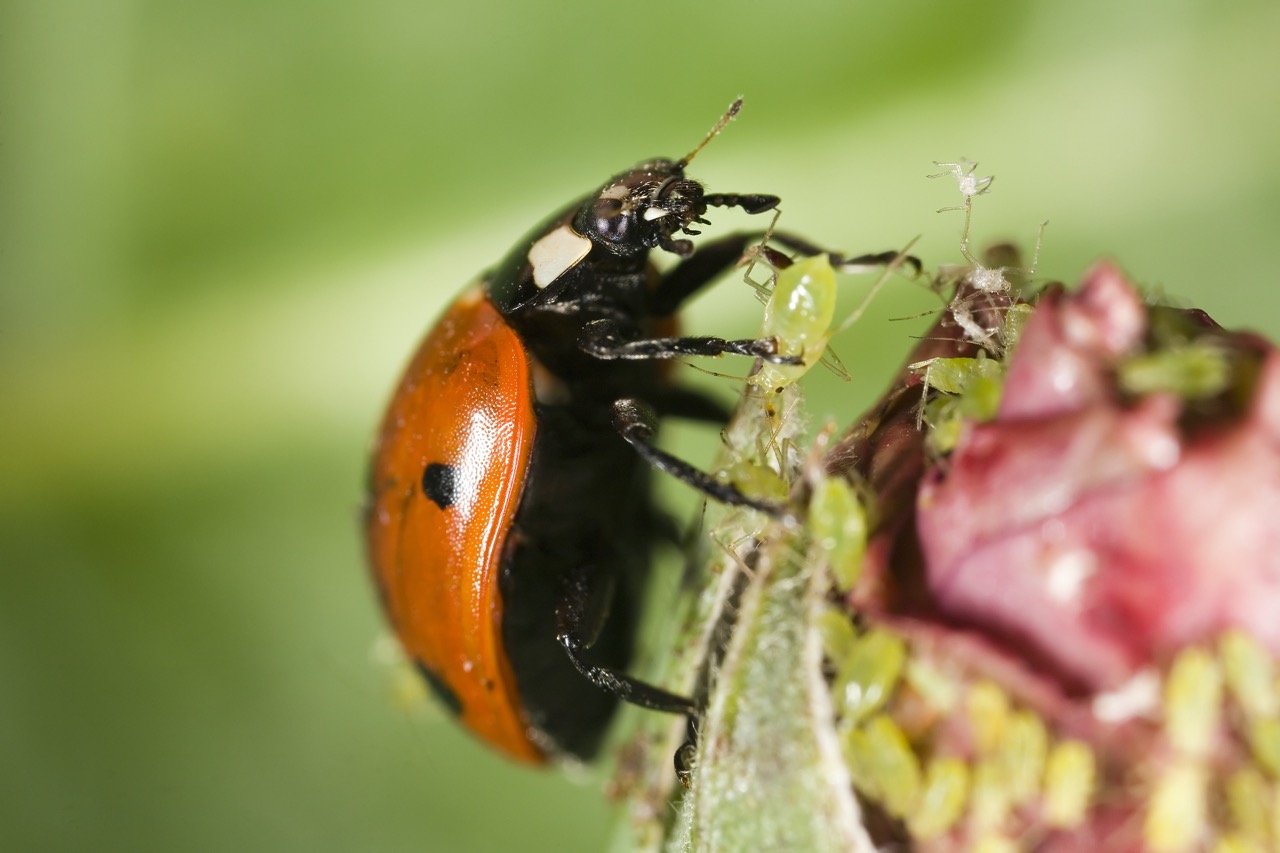
- Biological: Using a living thing to remove the pest (e.g., introducing bacteria or fungi that will attack the pest, or introducing a predatory animal or bird to eat or scare away the pest).
- Physical or mechanical: Using barriers to restrict access to plants, or using a tool to remove the pests from the environment (e.g., shields, traps, physically removing weeds or bugs, or adding mulch to cover the soil and stop weeds from growing).
- Cultural: Making changes to the environment, thus disrupting the lifecycle of a pest (e.g., rotating crops so that some years there is a plant in the field that the pest cannot eat, changing the variety of a crop to one that is not appealing to the pest, or planting the crop at a time of the year when the pest is less active).
- Behavioural: Using the pest’s own behaviour to remove it (e.g., using pheromones to control mating or the movement of pests, or introducing sterile mates for the pest so that it cannot reproduce).
- Chemical: Using a pesticide to kill or control the activity of pests.
As a group, have students try to place the method they pitched into one of these categories. In discussion, ask students if they can think of some other methods of pest control that they could integrate, along with their pitched method, in order to create an integrated pest-control plan.

Resources for teachers
- Agricultural Innovations 2018: http://publications.gc.ca/collections/collection_2018/aac-aafc/A1-33-2018-eng.pdf
- Agricultural Innovations 2019: http://publications.gc.ca/collections/collection_2020/aac-aafc/A1-33-2019-eng.pdf
- Carrot Foliage Trimmer: https://www.youtube.com/watch?v=0rz3MHssQ9M
- Cover Crops for the Control of Vineyard Pests: https://www.youtube.com/watch?v=-aByrbVDt_4
Printable PDFs
Appendix A: Vermicomposting cheat sheet (PDF, 198 KB)
Appendix B: Run-off battleship (PDF, 232 KB)
Appendix C: Using diversity in response to climate change (PDF, 186 KB)
Appendix D: Two truths and a lie student sheet (PDF, 195 KB)
Appendix D: Two truths and a lie answer key (PDF, 240 KB)
Appendix E: List of scientists, technicians, and administrators (PDF, 194 KB)
You may also be interested in
Earth in focus
Explore how Earth observation has evolved from the first space photos to advanced satellite technology with this engaging lesson plan! Teach students about remote sensing, climate monitoring, and the role of satellites in understanding our planet.
AgVenture: Soil science
In this hands-on program, students measure the levels of various soil nutrients and learn how farmers use this information to increase the sustainability of their farm.
Virtual field trips
Bring the museum to your classroom with bilingual, curriculum-linked programs for all grade levels that allow your students to discover various STEM topics.