Soil superheroes
Grades 3 and 4 (Ontario)
Elementary cycle 2 (Quebec)
Think soil is just dirt we need to wash off? Think again. The soil under our feet is actually a community of soil superheroes that works together to make the Earth grow green and strong. It’s a community of soil superheroes!
One team of superheroes is alive. One team calls the compost pile home. And one team is full of minerals—chips off the old rocks. Their mission? Working together to make healthy soil. Why does this matter? Because soil is at the root of all life on land. Take your students on a journey to explore the hidden world of soil superheroes.
Through fun, hands-on activities and experiments, students explore the composition and characteristics of soil, study the soil ecosystem, and discover how our actions can help or hinder the soil superheroes.

Share :
Science and technology
Health and physical education
Mathematics
Appendices
Meet the superheroes
Meet the team
In this two-part introductory activity, students first learn that soil consists of three superhero teams: Team Mineral (mineral particles), Team Critter (living things in soil), and Team Compost (organic matter). Students can then play a team-building game to learn why soil superheroes need to work together to make healthy soil.
Time
20 to 30 minutes
Materials
- Soil superhero cards; 1 set of 10 per student
- Chart paper or whiteboard
- Markers or dry-erase markers
Instructions
- Before beginning the activities, print off the Soil superhero cards.
- Begin by asking your students about soil: What is it made of? Record the students’ answers on the whiteboard or chart paper.
- Give a set of 10 soil superhero cards to each student and have them cut out the cards.
- Explain that soil is made up of living and non-living things. Each superhero in the three teams represents one of the key components of soil. Ask the students to sort out the soil superhero teams. Can they assign the superheroes to the right teams?
- Compare the students’ answers recorded on the whiteboard or chart paper to the descriptions of the superheroes that they see on the cards. Have the students correctly identified all the components of soil?
Extensions
Team Critter and Team Compost could have additional members. Have the students take turns suggesting new candidates for these teams. For example, Apple Core and Banana Peel could join Team Compost, while Centipede and Ant could be added to Team Critter. Students can be creative and give the new superheroes cool names.
Questions for discussion
- Do any of the soil superheroes surprise you?
- Are there any superheroes that you don’t recognize?
- Before you did this activity, did you know that soil is made up of many living things?
- Which superhero do you like best?
- Is there a superhero you would like to add?
Team mineral: They rock!
When you stand on solid soil, it’s thanks to this team! These superheroes come from rocks broken apart by wind and water. Can you guess who they are? Super-Sand, Captain Clay, and Secret Silt.
Because Team Mineral members differ in size, look, and feel, different combinations of these superheroes give soil different textures and special qualities. Each type of plant grows best in one kind of soil.
Team critter: They’re alive!
Did you know that one teaspoon of soil is home to more than a billion superhero critters and that more than a quarter of all species on Earth live in soil, full-time or part-time? These critters come in a wide range of sizes and make up an amazing soil community. Can you guess who’s on Team Critter?
The bigger members of this team, like Wonder Worm and The Mole, often get the spotlight, but they appear in the smallest numbers. Most members of Team Critter are microscopic, which means they are invisible to the naked eye. These include Band o’ Bacteria and Fabulous Fungus.
Team compost: They give back
Some people think this superhero team stinks. Okay, sometimes they do. That’s because they’re decomposing. Decomposition is a process in which organic matter, like dead leaves, changes into humus. Can you guess who’s a member of Team Compost?
Some members of Team Compost used to be alive, like Professor Leaf and Dr. Done (he doesn’t say much!). Others, like Number Two, are waste. Even though they may not appear to do much, they give valuable nutrients back to soil.
Soil superheroes work together
On its own, one superhero team can’t do much. But when it joins with the other two superhero teams, together they decompose organic matter, cycle nutrients, build soil structure, and keep soil populations in balance. The result: a healthy soil that supports life on land!
By taking part in this fun team-building activity, your students will realize that healthy soil is a team effort.
Time
30 to 45 minutes
Materials
- Chart paper, whiteboard, or another large surface for taking notes
- Markers or dry-erase markers
- Soil superhero cards printed and cut out; enough for 1 card per student
- Metre sticks (or any long, fairly light sticks or poles — tent poles work well!)
Instructions
- Hand out the soil superhero cards at random so that each student has one. Be sure to give out an even mix of all three superhero team members.
- Review which superhero belongs to which team.
- Explain that soil superheroes need to work together to create healthy soil. Ask your students to describe healthy soil. How might they identify whether a soil is healthy or unhealthy? Write their answers on the whiteboard or chart paper.
- Healthy soil is rich in nutrients — food for plants. Plants grow better in healthy soil because it has all the nutrients they need to thrive.
- Healthy soil has good structure (sand, silt, and clay particles — Team Mineral — are held together in small clumps); it is porous (has small pockets of water and air); it absorbs water, resists erosion, and is light (roots can dig easily in soil with good structure).
- Healthy soil is home to many different kinds of living things (Team Critter) who dig tunnels, turn soil over, produce waste and glue that hold soil particles (Team Mineral) together, and decompose organic matter (feed on Team Compost), releasing nutrients in soil.
- Healthy soil has organic matter (Team Compost) decomposing in it.
- Help the students form groups of 4 or 5, making sure that there is at least one superhero from each team in every group. You will need to have enough sticks or poles for each group, so encourage groups based on your materials. Group size is not hugely important but be aware that the activity will be harder for a larger group.
- Have each group form two rows with students facing each other. Ask each student to hold out their index fingers so that the stick can balance on everyone’s fingers. They may need to adjust the height of their fingers so that the stick is perfectly horizontal. This is the position that indicates a balanced, healthy soil.
- Now tell your students that their goal is to slowly lower the stick all the way to the ground. The stick must stay horizontal in order to represent a balanced, healthy soil.
- The key is that everyone’s fingers must always be touching the stick (all soil superheroes stay connected). If, at any point, someone is not touching the stick, the team must start over from the beginning. Make it clear that they should not grasp or pinch the stick, but should support it, using only their index fingers. Students will quickly discover that it’s difficult to move together and some of them will instinctively overcompensate in order to keep their fingers touching the stick, thereby causing it to move upwards!
Questions for discussion
- Who, at the start, thought that this was going to be easy?
- What was difficult about this activity?
- What skills did the team need to succeed? (Listening, communication, showing respect)
- How does this activity reflect how soil superheroes work together?
Extensions
Have the students form groups again and try the exercise once more. Explain that, this time, their superhero teams are depleted and weak. They must perform the task again, using only one index finger each. Then choose one superhero team at random and ask all the students belonging to that team to remove all their fingers.
Question for discussion
- Was the task easier or more difficult with just one finger?
- Do you think it’s harder for the soil superheroes to keep soil healthy when their teams are depleted or off balance?
- What happened when an entire team of superheroes was pulled out of the game? Was it possible for the rest of the players to complete the task?
- What happens to soil if one team is removed? Is it still soil? Can it still be healthy? Why not?
Try the activity with the whole class, either with a long tent pole or by taping the metre
sticks together. The larger the group, the harder it is. Imagine being one of a billion Soil
Superheroes trying to work together to keep soil healthy!
Team mineral rocks
The following three activities help students become more familiar with Team Mineral, the characteristics of the team members, and the roles they play in the soil habitat.
You can lead these activities in sequence or as stand-alone activities.
If your class is doing both the Dirt Shake and Drink Up!, it could be interesting to use the same soil samples for both activities. If you haven’t already introduced the superhero team yet, be sure to review the three members of Team Mineral before beginning these activities.
Meet team mineral
When you stand on solid soil it’s thanks to this team! These superheroes come from rocks broken apart by wind and water. Can you guess who they are? Super-Sand, Captain Clay, and Secret Silt!
Because Team Mineral members differ in size, look, and feel, different combinations of these superheroes give soil different textures and special qualities. Each type of plant grows best in one kind of soil.
Super-Sand is the biggest on the team, with particle sizes 0.05 mm to 2 mm
Secret Silt lies right in the middle, at 0.002 mm to 0.05 mm
Captain Clay is the smallest of the three, measuring 0.002 mm or less
The dirt shake
Most soil contains different mixes of sand, silt, and clay. Depending on the proportions, each soil can feel and look a whole lot different. Through this experiment, your students will discover the proportion of the different Team Mineral superheroes found in various soil samples.
Time
1 to 2 days
Materials
- Soil samples from home or around the schoolyard
- Large, clear jars with lids
- Masking tape or labels to write on
- Water
- Ruler
- Copies of ‘The dirt shake’ observation chart; enough for 1 chart per student
Note: Before beginning this experiment, it might be helpful to make a sample jar for the whole class, so that students can see what to expect. Depending on the soil samples collected and used, you may not get distinct layers, even after 24 hours. To create a dirt shake that will show distinct layers, fill a jar to halfway, using a mix of small pebbles or gravel, clay, sand, and potting soil. Then follow the instructions below.
Instructions
- Have the students bring in small soil samples (125 to 250 ml or 1 to 2 cups) from home or collect them from different areas around the school. Talk about the importance of disturbing the soil habitat as little as possible when taking a sample.
- Have the students work individually or in small groups to complete the following steps:
- Fill the jar to halfway with soil. Mark the level of the soil in the jar with a small piece of tape or a label. On it, write where the soil was collected.
- Fill the rest of the jar with water, leaving 2 to 5 cm (1 to 2 in.) at the top. Close the lid tightly.
- Shake the jar vigorously until the soil and water mix thoroughly.
- When combined, tap the jar a couple of times to encourage the soil to start settling.
- Place the jars on a table and allow the soil to settle for 1 hour.
- Ask your students how they expect the components of the soil to separate. Explain that, often, the largest elements fall through the water first. Any small pebbles will settle at the bottom of the jar. Next up, they’ll see layers of sand, then silt, then clay, and then organic matter (Team Compost). The amount of each type of sediment depends on what type of soil they have. If appropriate, you can also explain that denser elements may sink quicker than elements that are larger and are less dense.
- Have each student or group of students observe and complete the first part of the observation chart.
- Leave the jars in a spot where they will be undisturbed overnight.
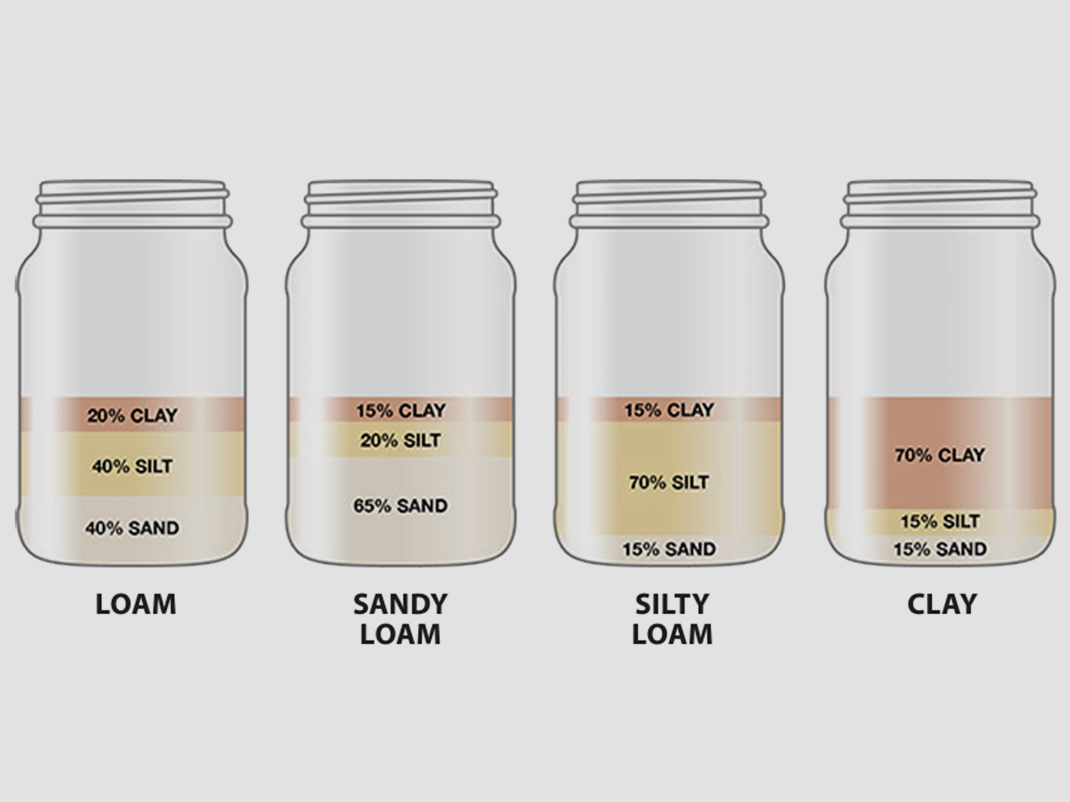
- The next day, it’s likely the soil will have separated even more and three distinct soil levels may be obvious below the waterline. Have the students use tape or a label to mark the layers, naming the members of Team Mineral as follows: a) The top portion = Captain Clay b) The middle portion = Secret Silt c) The bottom portion = Super-Sand
- Students can estimate the proportion of each mineral component in their jar. For example: 1/5 sand, 1/2 silt, and 2/5 clay.
- Students can then calculate the actual proportion. First measure the total depth of the soil mixture. Then measure the depth of each component individually to find a fraction. For example, if the overall depth is 20 cm and the depth of the sand is 5 cm, then 5/20, or 1/4, of the soil sample is sand.
- If, after 48 hours, it is still difficult to see any distinct layers, the following information may help the students to identify the soil makeup:
- If your soil is primarily sand, the water will appear fairly clear, as sandy soil drains water quickly. You may also notice sand-like particles.
- If your soil is primarily clay, the water will remain cloudy past the 24-hour mark, since it takes longer for clay particles to settle. This may also be true of silty soil.
- If you find a lot of debris floating on the surface with a small amount of sediment on the bottom, then your soil may be peat-like. This soil is full of organic matter, but it lacks nutrients, is acidic, and can become waterlogged.
Extensions
- Using the diagrams below, have the students identify which type of soil they have in their dirt shake (Loam, Sandy Loam, Silty Loam, or Clay, etc.). Loam is a word used to describe soil that has a relatively equal mixture of all three soil superheroes (Captain Clay, Secret Slit, and Super-Sand. This mixture of each type of mineral makes it a popular choice for gardens.
- Have the students research what type of plants would grow best in their soil. For example, carrots love soil that contains mostly sand, whereas cabbage prefers soil that contains a high amount of clay.
Drink up!
Plants need the right amount of water to grow. Too much and the roots may rot or the plant may drown. Too little and the plant will dry up.
The proportion of sand, silt, and clay in soil has an impact on its ability to absorb and retain water and nutrients. This is why each type of plant grows best in one kind of soil.
Through this experiment, your students will find out which soil is best at holding water.
Time
30 minutes
Materials
- Samples of gravel, sand, clay, and potting soil
- Coffee filters
- Funnels
- Large and small beakers (measuring cups or clear jars would also work
- Rulers
- Water
- Copies of the ‘Drink up!’ worksheet; enough for 1 worksheet per student
Instructions
- Split the students into groups of 3 or 4 students and distribute the materials so that each group has 4 large beakers or jars, 4 small beakers or jars, 4 coffee filters, 4 funnels, a copy of the worksheet for each student, and a sample each of gravel, sand, clay, and potting soil. If using jars instead of beakers, make sure each group has at least 1 ruler and 1 measuring cup.
- Have the students complete the following steps:
- Place the large jars or beakers close together in a line, and place a funnel on top of each jar.
- Measure out an equal amount of gravel, sand, clay, and potting soil, putting each material in a separate coffee filter (125 ml or 1/2 cup of each material works best).
- Place each coffee filter inside one of the funnels.
- Hand out a ‘Drink up!’ worksheet to each student. Ask them to fill out the first question (1. Making a Hypothesis), using their observations of the texture, size, appearance, etc., of the four samples.
- Have the students complete the following steps:
- Fill each of the 4 small jars or beakers with 50 (1/4 cup) of water.
- Working together, pour the water from one of the jars into each of the coffee filters. Make sure to try to pour the water out into each filter at the same time, and pour slowly to avoid splashing. Try your best to stay in sync!
- After about 5 minutes, have your students observe each sample to see how much water has passed through the soil components. They can compare visually and then measure the water level in each of the large beakers by using the markings on the beaker, or by using a ruler if they have used a jar. Have students fill out the second question of the ‘Drink up!’ worksheet (2. Observations), using their findings from the experiment.
Note: This activity can also be performed as a whole class. Simply follow the instructions as a group.
Questions for discussion
- Which soil sample absorbed the largest amount of water? Why do you think that is?
- Which soil sample absorbed the least amount of water? Why do you think that is?
- What kind of plants might thrive in soil that can retain more water?
- What would you need to consider when caring for plants grown in each of your soil samples?
If you have already completed the Dirt Shake activity with your class, students could repeat the experiment, using these soil samples. They can make new hypotheses based on the information previously learned about the composition of those samples.
Further information
Sandy soil
Want to grow carrots? Plant the seeds in sandy soil. Plants with deep roots grow best when their roots aren’t damp. Sandy soil drains quickly because of the large spaces between the sand particles.
Silty soil
Most vegetables and fruit crops, including grapes, flourish in silt-rich soil. This soil is well balanced — nutrient-rich and able to retain water, without becoming waterlogged.
Clay-rich soil
Plants with shallow roots that like lots of water, such as cabbage, thrive in clay-rich soil. There’s little space for water to move between the tiny clay particles. Clay soil drains slowly, staying wet longer.
Seed balls
Did you know that clay is the oldest-known ceramic material? More than 16,000 years ago, people discovered the useful properties of clay and used it to make pottery. When it’s wet, clay develops plasticity, due to the molecular film of water surrounding the tiny clay particles. As it dries, it becomes hard and brittle.
In this activity, your students will use the plastic properties of clay to craft seed balls. Seed balls make great gifts and are a fun way to add new plants to a garden.
Time
30 to 40 minutes
Materials
- 2 parts potting soil
- 5 parts clay (potter’s clay or, if you plan to use your seed balls right away, bentonite clay)
- 1 to 2 parts water (ideally in a spray bottle)
- Container to mix ingredients
- Mixing spoons
- Untreated small seeds (e.g., clover, marigold, lettuce)
Instructions
- Have the students work individually or in small groups to complete the following steps:
- Thoroughly mix the soil, clay, and seeds in a container, making sure there are no lumps.
- Slowly add about 1 part water by spraying mixture thoroughly. Stir it together until the consistency of the mixture is close to playdough or moulding clay.
- Make small balls, about 2.5 cm (1 in.) in diameter, by rolling the mixture gently in your hands (you don’t want to break the seeds). The balls should hold together well; if the mixture is too crumbly, add more water.
- Place all the seed balls on a tray and leave them in a sheltered space away from sunlight for 1 to 2 days so that they can dry.
- Once dried, the seed balls can be sowed. If possible, help students find a spot outside to place their seed balls. Or prompt the students to take one home for a gift for someone special or throw one anywhere that needs a little life! (Seed balls are designed to be grown in all sorts of environments; their compact size and design mean they can be placed, planted, or even thrown. Seed balls made with potter’s clay can also be stored in a cardboard box for later use; note that bentonite clay ones will not last long.)
- Leave the rest to nature — no burying or watering is needed!
Extensions
- Have the students experiment with germinating one of the seed balls inside the classroom. Is it possible to do so in a controlled environment?
- At school, students can mark where they have planted their seed balls and make observations as they start to grow. They can then compare the growth of their seed balls with those of other students.
Questions for discussion
- How do you think the seed balls will grow once they are out in the open? Once outside, natural elements such as rain and sun will begin to do their work to help the seeds grow into plants. When it rains, the clay will soften and expose the seeds to water so they can start sprouting. Then the Soil Superheroes living in the soil around the seed balls (e.g., Team Critter and Team Compost) will begin to contribute, as well.
- Why don’t the seeds get washed away? This is Captain Clay’s superpower: clay retains water very well and is heavy enough to anchor the seeds to the ground. Over time it will also crumble, providing a safe space for roots to grow.
Team Critter: Soil is our home!
More than a quarter of all species on Earth live in soil, full-time or part-time. These critters come in a wide range of sizes and make up an amazing soil ecosystem.
The ones you can see with your eyes
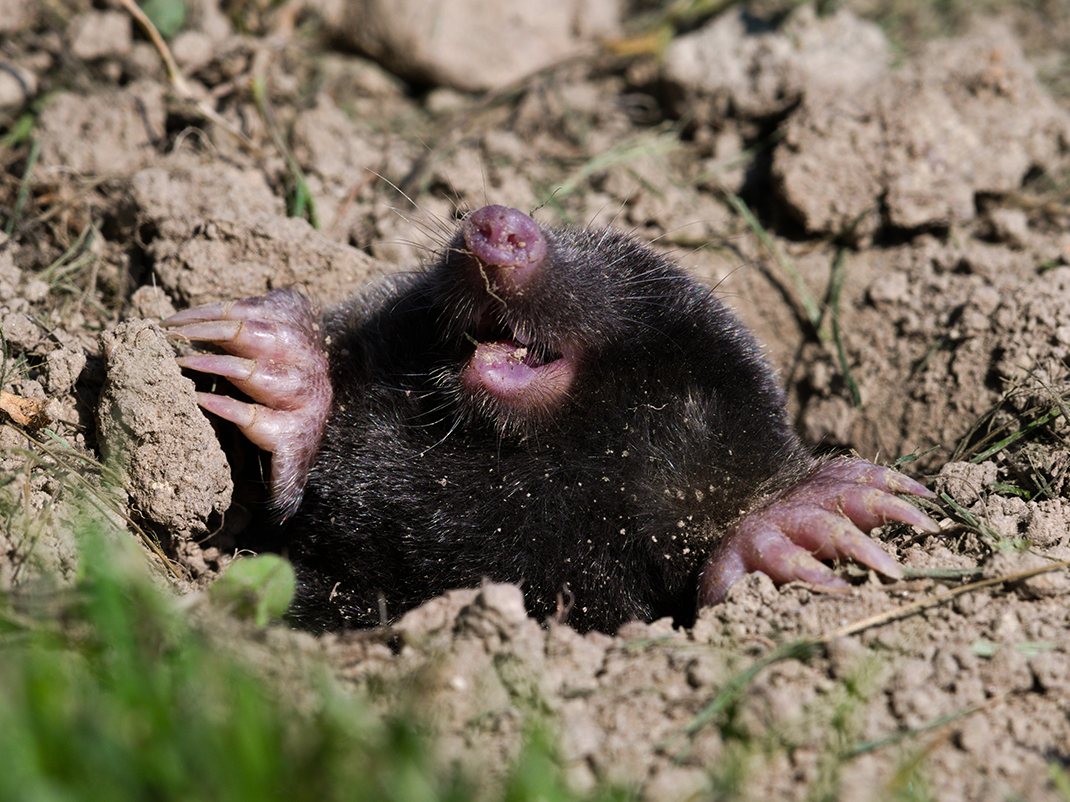
The biggest animals in soil come in the smallest numbers. Some, like The Mole, live in soil, while others, including salamanders, are part-time soil dwellers.
The medium-size animals are probably the ones you think of when you hear “soil creatures.” From ants to millipedes, they’re the most common soil critters visible with the naked eye.
The ones you can see with a magnifying glass
Look at soil with a magnifying glass and you’ll discover a busy world of scurrying, jumping tiny animals, such as mites, pseudocentipedes, and springtails. These thousands of different species feed on microbes and plant waste.
The ones you can see with a microscope
Nematodes, tardigrades, and rotifers are multicellular, microscopic soil animals that live in the water film on soil particles. They go dormant during droughts and revive when it rains.
Even smaller are protists, single-cell microbes that live in the water in soil, sometimes forming groups. Protozoa eat bacteria, while algae get their energy from the sun.
Most soil fungi, such as moulds and mycorrhizae, are invisible to the naked eye. They grow as hyphae, thread-like structures similar to roots. One teaspoon of soil contains hundreds of metres of hyphae!
Bacteria are the tiniest critters in soil — and the most abundant. They live attached to minerals and organic matter.
Did you know that energy in the soil ecosystem starts with plants. They convert sunlight into food for themselves — and for all the soil critters that dine on them.
In the following two activities, your students get up close and personal with some of these amazing soil superheroes. Some will be invited into your classroom, as you create a mini soil ecosystem in a vermicomposter, and you may even grow your own Fabulous Fungus!
Vermicomposting
Did you know that soil is its very own ecosystem? It’s a community of living and non-living things that interact with each other and share this habitat.
In this activity, by building and using their own vermicompost bin, students learn about how members of Team Critter and Team Compost interact.
A vermicompost bin, or vermicomposter, is full of living organisms called decomposers who are vital to a healthy soil ecosystem. These members of Team Critter (including worms, mites, bacteria, and fungi) are responsible for turning Team Compost into humus, a spongy material that holds water and nutrients.
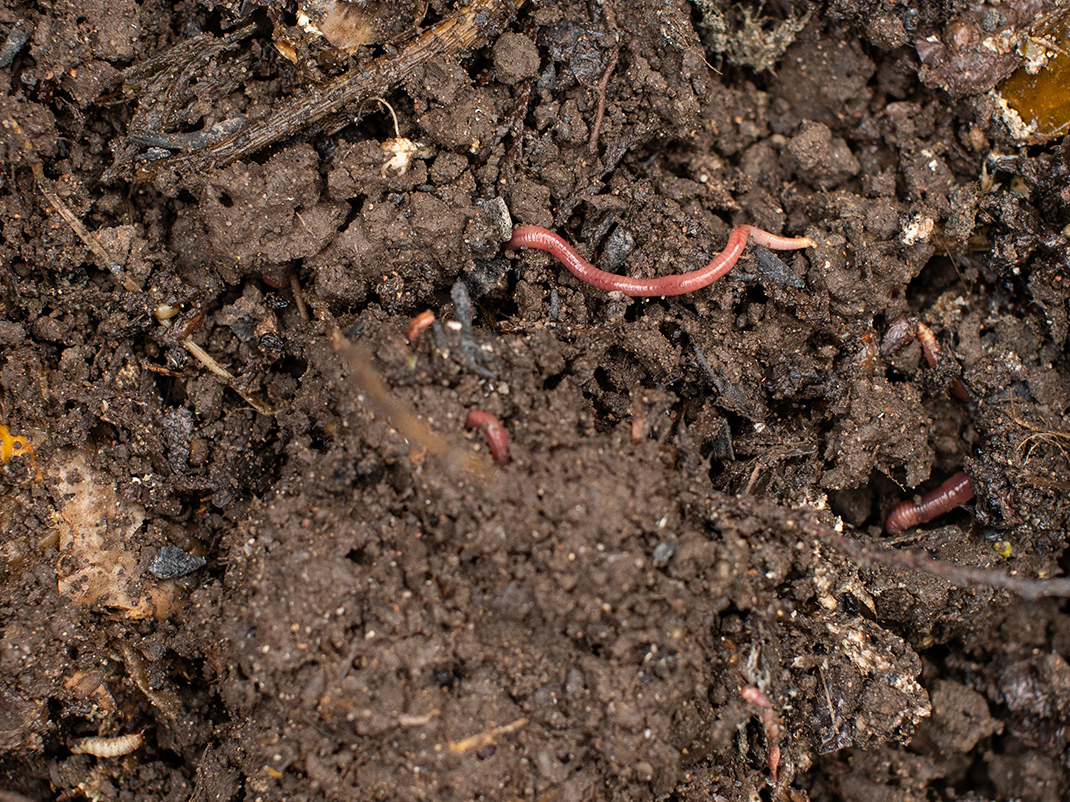
Meet Wonder Worm! He and his family are among the most effective decomposers. They consume more organic waste material than all other decomposers combined. The organic material that worms consume is transformed into excrement containing a high concentration of minerals that dissolve in water. These minerals are absorbed by plants when, through their roots, they take in water from the soil. As worms dig their burrows down into the soil where they live, the mucus that coats their skin (this is what makes them slimy to the touch) rubs off into the soil, giving their burrows strong walls that won’t collapse. This helps maintain good soil structure.
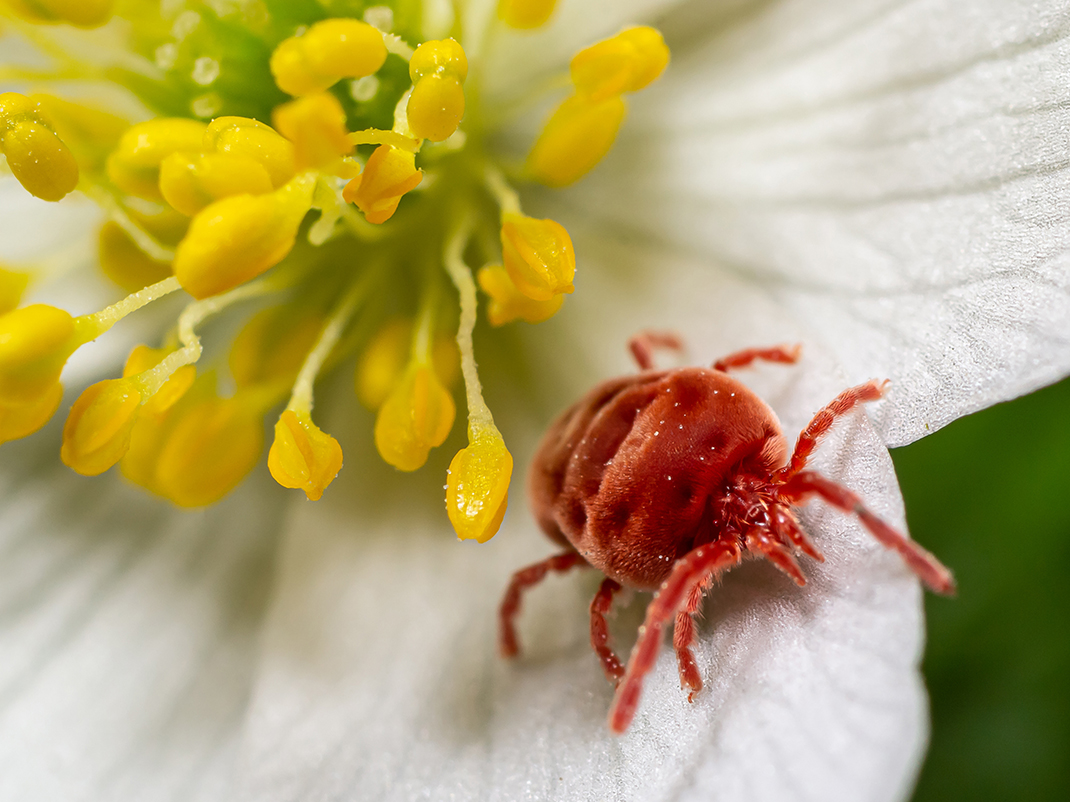
Most of the other members of Team Critter living in a vermicomposter are too small to see without the help of a microscope. The mite is one that can be seen with a magnifying glass and can be recognized by its 4 pairs of legs.
Why should you keep a vermicomposter in your classroom?
A vermicomposter helps to reduce the amount of waste that is produced in your classroom, while providing benefits to the soil. Approximately 33 percent of waste sent to landfills could be recycled into fertilizer for the garden. Worms do not give off an odour and do not need to be cleaned. At the end of the school year, your worms can be released into a garden.
Preparing your vermicomposter
Time
40 minutes to 1 hour
Materials
- 2 plastic storage bins (about the size of a recycling bin) with 1 lid
- Drill and 0.8 mm and 7 mm (1/8 and 1/4 in.) drill bits
- A few handfuls of dark soil
- Water
- Newspaper (black and white only)
- 1 /2 kg (1 lb) of red wiggler worms (can be ordered online or sometimes found at garden centres)*
- Organic waste: fruit and vegetable scraps
- Nylon pantyhose or a piece of screen to fit the bottom of the bin (*Optional*)
*Garden worms will work but they need a dry environment, so you will need to add more paper or cardboard to absorb the excess moisture. They also will not consume as much compost as the red wigglers.
Instructions
- Ask your students what they know about worms. Where can we find worms? Do they have predators who might want to eat them? What do worms eat? Are they an important part of the food chain?
- Discuss with your students what a worm’s natural habitat is like (dark, moist, temperate). Explain that in order for the classroom worms to thrive, the students will need to construct a habitat that is as similar as possible to the worms’ natural environment.
- Prepare the containers: Like us, worms need air to survive. Drill air holes (7 mm or 1/4 in.) in the lid and then drill drainage holes (0.8 mm or 1/8 in.) in the bottom of one of the containers. Insert the bin with holes into the intact bin.
Optional: Worms can squeeze through surprisingly small openings and they sometimes fall through into the bottom bin where the liquid collects. To avoid this, use one of the legs of the nylon pantyhose (cut the leg open into a sheet) to line the bottom of the bin. Fasten it in place with duct tape or hot glue. A piece of screen can also be used.
- Prepare the litter: Shred several pieces of newspaper into thin strips and put these in the container. Then add in a couple of handfuls of dark soil (the grit it contains will help the worms digest their food).
- Next, gradually add water until the mixture is damp to the touch. The mixture should have the texture of a well-wrung sponge when squeezed. If drops escape when you squeeze it, you have added too much water and will need to add more soil or paper.
- You are now ready to add the worms!
- Feeding the worms: You can now add some food waste to the vermicomposter in a single layer (see How to feed your worms for a list of which foods should go into a vermicomposter and which should not).
- Cover the food waste with 2.5 to 5 cm (1 to 2 in.) of shredded newspaper. This will prevent smells, help absorb excess moisture, and make the bin less inviting to unwelcome guests.
- Choose a spot for the bin that’s out of direct sunlight and away from heaters, so it can stay at a temperature between 15 and 25˚C.
- Let the bin sit for at least a week, to allow the ecosystem to get established, before adding more food.
Tips and further information
- If students are handling the worms, make sure that their hands are moist. Note that worms are also very sensitive to light; try to expose them to light for just a couple of minutes at a time.
- To help the worms do their work, you can cut the organic waste into small pieces. Try putting the waste in a different spot each time, so you can see how quickly the worms eat it and can adjust the amount you are feeding them. If a lot of the food is left uneaten, the worms have been given too much and your bin may attract flies. If most of the food is eaten, they haven’t been given enough.
- Successful vermicomposting is all about balance. At every feeding, make sure to add relatively equal proportions of food (“greens”) and dry matter (“browns”). See How to feed your worms for examples of both. This will prevent the compost from getting too wet or stinky and will create a compost that is rich in spongy organic matter.
- Worms like soil that is damp but not flooded with water. For them to breathe, their bodies must stay moist. If the soil is too dry, the worms will dry out. If the soil is too wet, the worms will drown.
- To break down the organic matter we add to their environments, worms work in cooperation with many other microorganisms. As the worms settle in, so will the other organisms, such as bacteria, mites, and fungi.
- After approximately six months of regular feeding, your vermicomposter should be full of compost and ready to be changed over (however, you can keep it going longer if you are not feeding it much). You can either empty the entire contents of the bin into a garden or harvest the worms to start a new vermicomposter.
How to harvest your vermicomposter
- Stop feeding the worms 2 to 3 weeks before your planned “harvest.”
- Put down a large sheet of plastic or a plastic tray in an area with lots of light. Empty the contents of the vermicomposter onto the plastic.
- Separate the compost into about 9 pyramid-shape piles. Leave the piles under the light for 5 to 10 minutes; the worms will head toward the centre of each pile to avoid the light.
- Gently remove the outer layer of compost of each pile. Repeat until you have only masses of worms, which you can then transfer to a new vermicomposter. The compost can be used in a school garden, or by students when planting seeds in the classroom.
Questions for discussion
- How do worms (and other members of Team Critter) help to give nutrients back to the soil? They are super-recyclers!
- Where does composting occur naturally? What are some good things about composting?
- Are worms important in the food chain? Who are their predators? What would happen if they disappeared?
- Are there different types of worms? The largest earthworm in the world is the giant Gippsland earthworm, found in Australia. It can measure up to 2 metres long!

Extensions
- As a class, keep an observation journal to record what you feed the worms. You can then measure how long it takes the worms to eat various different scraps. Also, using a scale, you can measure the amount of food you are giving. This will also help track any problems that may arise with the bin (see How to feed your worms for a list of common problems and solutions).
- Supervise your students in using the compost (humus) produced by the worms to fertilize your school’s plants. The dark water that is in the bottom bin is called compost tea and it can be diluted to water plants. Add 1-part tea to 10 parts water. Compost tea is like a probiotic for soil and plants; it contains nutrients and good bacteria.
- Encourage your students to explore the life cycle of an earthworm and have them draw a life cycle diagram.
- Have the students research the other organisms that live in their vermicomposter. What do they look like? Describe their life cycle. How do they fit into the food chain?
- In class, for an entertaining look at the life of an earthworm, read together the Diary of a Worm by Doreen Cronin.
Growing Fungi
Meet Fabulous Fungus. Even though most soil fungi are invisible to the naked eye, they have a big role to play in the soil habitat as decomposers. Neither plant nor animal, they belong to their own group, along with the mushrooms you eat on your pizza! These cool critters grow as hyphae, thread-like structures similar to roots. One teaspoon of soil contains hundreds of metres of hyphae.
Fungi don’t spend their whole lives as hyphae, however; they start off as spores. You can find fungal spores everywhere, in the soil and in the air. A spore is a reproductive structure similar to a seed. Fungal spores can survive for long periods of time without food.
Humans interact with fungi regularly. From the mushrooms in food, to the yeast used to make bread, to the mould growing on fruits in a refrigerator, all are members of the fungi kingdom.
This experiment will show students what kinds of fungi they can grow in their own classroom.
Time
15 to 20 minutes to set up; 1 to 3 weeks for observations
Materials
- Clean glass jar with lid or 1 jar per group if doing the experiment in small groups
- A variety of food samples (vegetables, fruits, bread, crackers, or cheese work well; do not use meat)
- Water
Instructions
- Place several samples of different foods in the jar. Or have each group try a different type of food in their jar. Do not use meat.
- Sprinkle a few teaspoons of water into the jar so that everything is moist.
- Close the lid tightly. Leave the jar in a place where it won’t be disturbed and is out of direct sunlight.
- Make and record observations for two weeks. Some questions to ask your students:
- On which foods did fungi grow fastest? Students may notice that fungi grow faster on the foods that contain more moisture.
- What colour were the fungi that grew? Mould is the most common fungi that this experiment will produce. Mould is usually blackish on starchy foods like bread, and is a fuzzier blue or green on fruit.
- How many different kinds of fungi were there? Students can try to classify the different fungi according to their colour, shape, etc.
- How did the food change as the fungi grew? The fungi consume the food they grow on, so the food may start to collapse or shrink.
- Once the class is finished observing, be sure to dispose of the food and clean the jars thoroughly with bleach.
Questions for discussion
- Unlike plants, which get their energy from the sun, fungi need to consume nutrients in order to obtain energy. Just like other living things, they also need water and air to grow. Was water and air available to the fungi in the jar?
- Discuss what makes an ideal habitat for fungi. Students can think about where they have found fungi in forests or at home.
- Where do fungi come from? Fungal spores are floating everywhere in the air around us. Once they come into contact with an object on which they can grow, like moist bread, they germinate into hyphae, which spread out into the bread like a net.
- Are fungi bad? What about mould? While you certainly don’t want to eat your bread once it’s covered in mould, since those hyphae extend beyond the surface into the whole loaf, there are some benefits to mould. The most well-known example is that of penicillin, an antibiotic discovered in the soil fungus Penicillium. The fungus produces penicillin, a toxin that can fight off enemy bacteria.

Habitats and communities
This cross-curricular class activity engages students to think about how their habitat and community is both similar and dissimilar to the soil habitat of Team Critter.
Time
10 to 15 minutes
Materials
- Chart paper or whiteboard
- Markers or dry-erase markers
- Copies of the ‘Habitats and communities’ worksheet (enough for 1 per student)
Instructions
- Introduce or review the definition of a habitat: The environment containing all that an organism needs to survive.
- On the board, write the word habitat at the top. Then create two columns underneath: one titled The Mole Habitat and the other My Habitat.
- Have your students brainstorm what might be listed under each different habitat. Prompt them by reminding them of the basic needs of all living things: food, shelter, water, space, air. Encourage them to be as specific as possible. You could also talk about how a habitat can be measured in very different ways. For example, does My Habitat mean my house or does it include the fields where my food grows? This might also be a good opportunity to review the difference between needs and wants, although the list might well include both!
- Remind the students that all living things also need a community, which can be defined as a group of different interacting species that share the same habitat.
- Write the word community on the board and, again, create two columns underneath, one titled ‘The mole community’ and the other ‘My community’. Have the students brainstorm who lives in each community and how these individuals interact together.
- Students may notice that their habitat and community also include all the organisms that live in the soil!
- After brainstorming together as a class, have the students complete the ‘Habitats and communities’ worksheet.
Extensions
- Students can create a Venn diagram to see how their habitat overlaps with that of The Mole

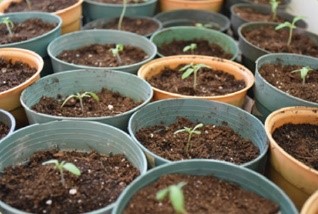
Controlled planting
Energy in the soil ecosystem starts with plants. As producers, they convert sunlight into food for themselves — and for all the soil critters that dine on them. At the end of life, they give back as members of Team Compost.
Through this series of experiments, students discover what plants need to grow. They use scientific methods and tools (hypothesis, analysis, observation journal) to find out what elements plants need to be healthy.
There are two separate experiments outlined in this activity:
Part A: Planting substrate (i.e., soil vs. no soil) as the control factor
Part B: Sunlight and water as two control factors
You may choose to do only one experiment with your class or to do both consecutively or concurrently. Each experiment is meant to be done by groups of 3 or 4 students.
Before you begin, talk to your students about what plants need to grow:
- Soil (or something to grow in)
- Water
- Sunlight
- Food (from sunlight and nutrients in soil)
- Space (when seeds are crowded they cannot get enough of the above resources)
Part A
Time
20 minutes to set up; 2 to 3 weeks for observation
Materials
- Cotton balls or paper towel
- 2 small clear jars with lids; 1 set for each group of students
- Potting soil
- Seeds of choice; larger seeds that germinate rapidly, such as beans, or peas, are best for observation — dry beans from the grocery store are perfect!
- Small watering cans or spray bottles filled with water
Instructions
- Hand out materials to each group. Each group will need 3 or 4 seeds, a handful of cotton balls or scrunched-up paper towel, 2 jars, some soil, and a watering can or spray bottle.
- Have your students fill their first jar with moist potting soil to about three-quarters full, then add 1 or 2 seeds, covering them lightly with the surrounding soil. Water the soil immediately and put the lid on the jar.
- Have the students fill their second jar with cotton balls or scrunched-up paper towel to about halfway. Add 1 seed to each side of the jar, nestling it into the cotton ball or paper, but leaving it visible. Spray the cotton ball or paper with water until damp but not too wet. Put the lid on the jar.
- Make sure that the seeds always stay moist. Sealing the jars will help to do this, but students should check the seeds twice a day and spray them as needed.
- Once the seeds have germinated, the lids can be removed, but the students should continue to spray the seedlings.
- Within 2 or 3 days, the seeds should have started to germinate. Have the students observe their seedlings and record their findings over the next 2 to 3 weeks. They can record their observations using either the observation chart in the Habitats and communities’ workshop or a little journal.
Extensions
- Students can measure the seedlings each day and record their growth progress
- They can draw a picture of what the plant looks like every 3 to 4 days and label the diagram with the parts of the plant as they develop
For further discussion
Ideally, the seeds in both containers should begin to germinate, but growth will stop or be stunted in the second one that used the cotton balls or paper towel. Why? In order to grow, all plants and animals need nutrients, including nitrogen, phosphorus, and potassium. Poor soil affects both a plant’s ability to take up the nutrients it needs and the quality of the nutrients that are passed from the plant to humans. When you eat plants, where do you think the nutrients come from? You guessed it: soil!
Potting soil contains a good mix of Team Mineral, Team Compost, and some microscopic members of Team Critter. This soil is rich in nutrients. The cotton balls or paper towel, on the other hand, do not provide the plant with any nutrients. In this experiment, the seed germinated and the seedling began to grow as it fed on the nutrients stored in the seed. But once it had used up its stored nutrients, the seed eventually died.
Part B
Time
20 to 30 minutes to set up; 3 to 6 weeks for observation
Materials
- 3 small pots or yogurt containers; 1 set for each group of students
- Potting soil
- Seeds of choice; seeds that germinate rapidly, such as pea, radish, marigold, or clover, are best for observation
- Small watering cans or spray bottles filled with water
Instructions
- Hand out materials to each group. Each group will need 6 to 10 seeds, 3 pots, some soil and a watering can or spray bottle.
- Have your students fill their containers with moist potting soil to about three-quarters full, then add 2 or 3 seeds to each pot, covering them lightly with the surrounding soil. If several seeds are sown it’s likely that at least one will germinate. Water the soil immediately.
- Students should label each pot according to these suggested control groups:
- Sun and water -> place this pot by a window and water it as needed after checking whether the soil is moist or dry.
- Sun, no water -> place this pot by a window, but do not water it after the initial seed planting.
- Water, no sun -> place this pot in a closet or cabinet where it will not receive any sunlight. Water the pot as needed after checking whether the soil is moist or dry.
- Using the Controlled planting part B: Observation chart, or their own journal, students can record the progress of each plant over a period of 3 to 6 weeks.
Extensions
Students can also try experimenting with three plants that each have a different volume of leaves. Leave one plant as is; take half the leaves off the second plant; and take all the leaves off the third plant. Place all three plants in the same environment and give them the same amount of water. Observe and record your findings as the three plants grow.
Questions for discussion
- Which plants grew the fastest? The tallest? Produced the most leaves? Why? Remind the students what plants need in order to grow.
- Discuss ways in which the plants they have grown can be beneficial to the Earth. As producers, plants make their own food. The energy from these plants can then be transferred to the consumers (like us!) who eat them. Even the plants that have died are beneficial, as they become food for decomposers, like worms, bacteria, and fungi.

Soil food-chain game
It’s dinner time! Plants, Team Critter, and Team Compost make up a complex food web. Plants are producers: they convert sunlight into food for themselves—and for all the soil critters that dine on them. Some members of Team Critter are consumers, they feed on plants or other critters. This means that some critters are predators, while others are prey. Many Team Critter members are decomposers—they eat some Team Compost members to release nutrients into the soil. Plant roots then take in these nutrients and the cycle begins again!
In this fun, active game, students learn how some Team Critter members form a food chain. If your students are familiar with Rock-Paper-Scissors, then they will love this version of the game.
Time
20 to 30 minutes
Materials
None! Just a large space in which to run.
Instructions
- This game replaces rock-paper-scissors with mole-worm-fungus (the mole eats the worm, the worm eats the fungus, and the fungus eats the mole once it’s died).
- Come up with your own actions to represent each creature and review them with the class.
- Divide the students into two teams and line each team up standing shoulder-to-shoulder and facing the other team.
- Explain that each team will have 30 seconds to decide which creature they’d like to be (everyone on the team plays the part of the same creature).
- Once both teams have made a decision, have them turn around so the teams are back-to-back and count down 3, 2, 1. On 1, both teams turn around and play their part.
- That round’s winning team chases the other team to a predetermined boundary line. Any member of the losing team who is tagged by a member of the winning team before reaching the boundary line must join the other team.
- The game ends when one team has been eliminated or when everyone is tired!
Questions for discussion
- Ideally, teams should continue to balance out after several rounds. How do food chains maintain balance in a habitat in real life?
- What might happen if a predatory species capable of outcompeting the other species was introduced to the food chain?
Extensions
- If you’d rather keep this as an indoor, classroom activity, you can still play it as a game with groups of 2 students. Instead of full-body actions, they can use hand gestures to represent each creature.
Metric measuring
In this quick and easy activity, students use their knowledge of metric measuring to determine the lengths and heights of plants.
Time
10 to 15 minutes
Materials
- Rulers or measuring tapes (at least 1 for every plant)
- A variety of plants (preferably of different sizes and shapes)
- Copies of the ‘Metric measuring’ worksheet
Instructions
- Form small groups so that each group has its own plant. Make sure each group also has at least 1 measuring tape or ruler.
- Hand each group a copy of the ‘Metric measuring’ worksheet.
- Students can take turns measuring specific parts of the plant and recording the measurements on the group worksheet.
Extensions
- If you don’t have a good assortment of plants in your classroom, you can take the activity outside.
- Using their knowledge of conversion, students can convert the measurements they record on the sheet from one unit to another. For example, if they record their measurements in centimetres, they can convert the measurements into metres.
Planting problems
Lead the class through these problems in a group. These questions are also available on a printable worksheet in Planting problems workshop, for students to work on independently.
Time
20 to 30 minutes
Materials
- Whiteboard or chart paper with writing supplies, or
- Copies of the ‘Planting problems’ worksheet; enough for 1 per student
Instructions
Lead the students through the following problems:
- The splitting plant
The splitting plant grows in a special way. In the first week, the stem splits into 2 branches. The next week, each branch splits in 2 again, making 4 branches in total. This keeps happening every week until the end of the sixth week, when each branch grows a flower. How many flowers will there be? - Grass seeds
Maria has 3,582 grass seeds. If she only needs 2,784 seeds to cover up a dry patch on her lawn, how many will she have left over? - Time spent gardening
Daniel worked in his garden for much of the day on Saturday. He spent 2 1/2 hours weeding, 1 1/2 hours transplanting seedlings, and 1hour watering. In total, how many minutes did he spend gardening? - Rates of growth
- If a plant grows at a steady rate of 3 cm per month, how many months will it take for the plant to reach 12 cm?
- If a tomato plant grows 2 tomatoes every other week, how many tomatoes will there be in 12 weeks?
- A flowering plant produces flowers, or blooms, at a steady rate. If the plant produces 30 flowers in 6 weeks, what is the weekly blooming rate?
- Planning gardens
Tony and his mom are creating gardens for the front and back of their house. They plan to plant the same number of seeds in the front and in the back garden. There are 630 lavender seeds, 44,000 grass seeds, and 860 morning glory seeds in total.- How many of each seed will they plant in the front and in the back?
- If all of the seeds sprout, how many plants will there be in total?

Extensions
Ask the students to map out on paper how they reach their answers; this will allow you to see different students’ thought processes as they solve the problems.
A soil superhero comic strip
In this activity, students consider what it means to be a superhero both underground and above ground. They learn about the effects of human activities on the soil and in life underground as they choose a soil superhero to research and then create their own comic strip.
Time
Two 40-minute periods
Materials
- Copies of the soil superhero stats sheet; enough for 1 per student
- Blank paper or copies of the superhero comic-strip template
- Drawing pencils
Part A
- Have your students brainstorm some of their favourite superheroes. Here are some questions for them to think about:
- What makes a superhero super?
- What is a superhero’s mission?
- Does a superhero need to have special powers in order to protect others?
- Discuss why it’s important to protect our soil. Protecting soil is super important because it takes the soil superheroes a really long time to make it. They can make some types of soil in about one hundred years. But in cool climates, it can take thousands of years of digging and dining. So, if soil is destroyed, it can’t be replaced in our lifetime!
- Have the students choose a soil superhero from the list below:
- Professor Leaf
- Super-Sand
- Done
- Number Two
- Secret Silt
- Captain Clay
- Band o’ Bacteria
- Fabulous Fungus
- Wonder Worm
- The Mole
Or encourage them to come up with their own soil superhero. They can use ideas from this Team Critter list:
- Salamander
- Millipede
- Mite
- Nematode
- Protozoa
- Ant
- Woodlice
- Springtail
- Algae
- Have the students develop their own idea of a soil superhero, using the soil superhero stats sheet.
Part B
- Dividing the class into small groups, have your students come up with ideas on how human actions affect the soil. Here are some questions for them to think about:
- What activities are bad for the earth beneath our feet?
- How do these activities change the soil?
- Can soil superheroes protect the soil without humans cooperating?
- What are some things humans can do to have a good impact on the soil? What are some simple things that we can all do?
- Every good soil superhero deserves its own comic! Using the superhero comic-strip template or a blank sheet of paper, have the students draw a comic strip based on their superhero and how it can help build healthy soil. Students can choose from one of the topics below or can come up with their own idea.
Topic #1: Do not disturb: Soil at work!
The soil superheroes suffer when soil gets disturbed. Heavy objects like trucks, or even lots of people, can crush soil. Digging up soil can kill members of Team Critter and disrupt the superhero communities. When you work with soil, remember to work with the soil superheroes!
Topic #2: Dear people, please help us! Sincerely, soil superheroes
The soil superheroes have a message for you: they need your help and you don’t even need a shovel! While some human activities can hurt the soil superheroes, there are others that can help. Keep the soil covered with plants or mulch, don’t disturb soil — it disrupts the superhero communities — and encourage biodiversity by planting as many types of plants as you can.
Topic #3: Taking care of soil
Think about why soil is important to different living things: to a farmer, a construction worker, an earthworm, a maple tree, a bird — or to you. How can you work with your soil superhero to protect the soil on which we all depend?
Exploring The Lorax by Dr. Seuss
We may not live in soil, but we couldn’t live without it! Keeping soil healthy isn’t just about protecting the soil superheroes’ home — it’s about protecting our home, too.
The amazing thing is that the soil superheroes don’t just make healthy soil, they make the foundation for life on land. The fact is, there’d be no us (or apple trees or beavers) without them! Healthy soil provides food, clothing, shelter, clean water — and it even protects our planet’s climate.
The story of The Lorax touches on environmental issues, and what can happen if we don’t use our resources responsibly. Through this experiment, your students will consider the interconnectedness of all things that live within an ecosystem.
Time
20 to 30 minutes
Materials
The Lorax by Dr. Seuss
Instructions
- Read the story aloud to your class. You could also invite your students to participate in the reading.
- After reading the story together, have the students answer the following questions in a Think, Pair, Share format.
Questions for discussion
- What is greed? How does greed affect others?
- What were the pros and cons of the Once-ler’s success in making Thneeds?
- As the Once-ler continued to cut down the Truffula Trees, how did the habitat change?
- What happened to the populations of creatures that called that habitat home?
- Why did the Barbaloots, Swommee Swans, and Humming Fish leave?
- Think of an example of how a similar situation might happen in our world.
- Do you think there would have been a way for the Once-ler to continue making Thneeds without causing harm to the environment? Why or why not?
- Why does the Lorax leave the word “unless” on a pile of rocks? What is the Lorax trying to say?
- The Once-ler claims that he did not mean to cause so much damage
- Does not meaning to cause harm make you less responsible for your actions?
- How do you take responsibility for the things you have harmed?
- Do we have a responsibility to repair the harm done by other people?
- In the beginning of the story, the Once-ler claims that “everyone needs Thneeds.” At the end of the story, he changes his words and states that people need Truffula Trees instead. What makes the trees so valuable in an ecosystem?
- Once the class has finished the discussion, have the students draw a picture of a truffula tree showing how it connects to other living things in its habitat. You could start by brainstorming, as a class, a list of things that occupy the same habitat (both living and non-living). For example: Barbaloots, Humming Fish, earthworms, minerals in the soil, birds, squirrels, children, etc.
Grass garden gnomes
This art project allows students to put into practice their knowledge about the wonderful powers of soil and what’s needed for plants to grow. This chia-pet project gives students an opportunity to take care of their own plants.
Time
1 to 7 days
Materials
- Old nylon pantyhose cut in half to make 2 socks; enough for 1 sock per student
- Spoons
- Grass seeds
- Potting soil
- Googly eyes
- Hot-glue gun
- Felt or foam in various colours, foam stickers can also be used
- Scissors
- Small flowerpots; enough for 1 per student
- Small cups (e.g., Dixie cups or yogurt or applesauce containers); enough for 1 per student
- Shallow plastic container/bin
- Water
Instructions
- Distribute the materials amongst the students so that each student has a nylon sock, a flowerpot, and a small cup.
- Have the students stretch the nylons over the top of the flowerpots so that the foot part of the nylon hangs down into the bottom of the pot.
- Distribute the seeds and soil amongst the students. Have the students put 1 spoonful of grass seeds inside the nylon, follow this with 2 handfuls of soil. The students should then push the contents into the foot part of the nylon.
- Have the students remove the nylon from the pot and tie a knot in the nylon as close as possible to the soil to keep it in place. This will be the gnome’s head.
- Allow the students to decorate their gnomes’ heads with the googly eyes and with felt/foam for the mouth and nose; assist with the hot-glue gun or supervise carefully. Make sure that the toe of the sock forms the dome of the head; the nylon below the knot is the neck.
- Fill the shallow container with 2.5 to 5 cm (1 to 2 in.) of water and have the students put the “heads” in for about 5 minutes. Make sure the heads are inverted, so that the grass seeds are underwater.
- Have students fill their small cup or container with water almost to the top. They should then insert the cup into the flowerpot.
- After the 5 minutes has passed, have the students take their gnome head out of the shallow container, flip it right-side up, and put it into the flowerpot. Make sure the material below the knot hangs down into the small cup or container, where it will act as a wick to draw the water upward, keeping the grass seeds watered.
- Make sure that the students have balanced the head of the gnome on the mouth of the cup. The students can then put the gnomes by a sunny window.
- Students can watch the grass “hair” as it sprouts over the course of a week!
Glossary
Habitat: The environment containing all that an organism needs to survive.
Population: A group of individuals of the same species living within a given habitat.
Community: A group of different interacting species that share the same habitat.
Ecosystem: A community of organisms interacting with each other and with non-living things like soil, water, and air.
Decomposer: A living thing that feeds on and breaks down dead plant and animal matter.
Producer: A green plant that makes its food from the energy of the sun.
Consumer: An organism that gets its food by feeding on other organisms or organic matter.
Printable PDFs
- Soil superhero cards (PDF, 460 KB)
- The dirt shake: Observation chart (PDF, 421 KB)
- Drink up! worksheet (PDF, 320 KB)
- How to feed your worms (PDF, 366 KB)
- Habitats and communities’ workshop (PDF, 279 KB)
- Controlled planting part A: Observation chart (PDF, 295 KB)
- Controlled planting part B: Observation chart (PDF, 291 KB)
- Metric measuring workshop (PDF, 311 KB)
- Planting problems workshop (PDF, 323 KB)
- Soil superhero stats sheet (PDF, 309 KB)
- Superhero comic-strip template (PDF, 305 KB)
You may also be interested in
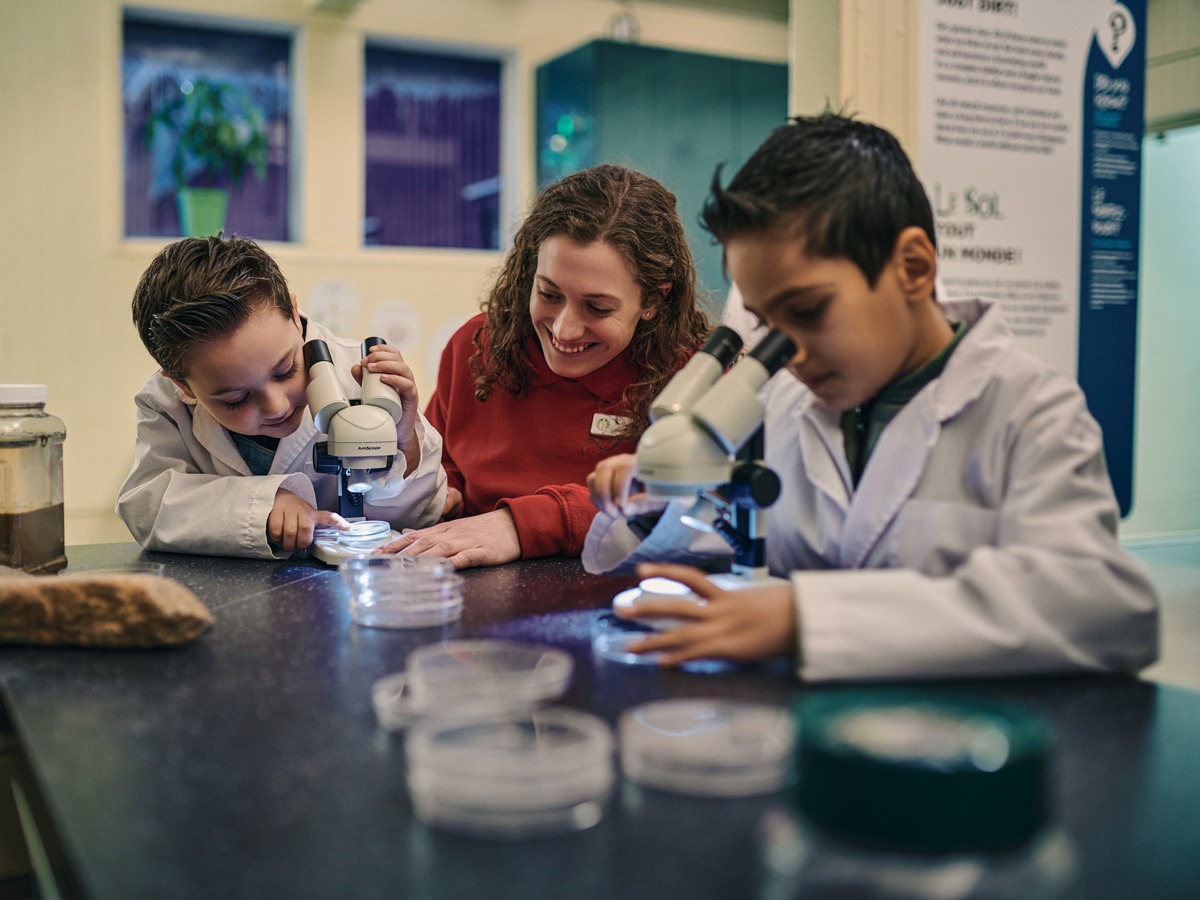
Living soil field trip
Using magnifying glasses and microscopes, students will discover the vibrant world hidden right under their feet!
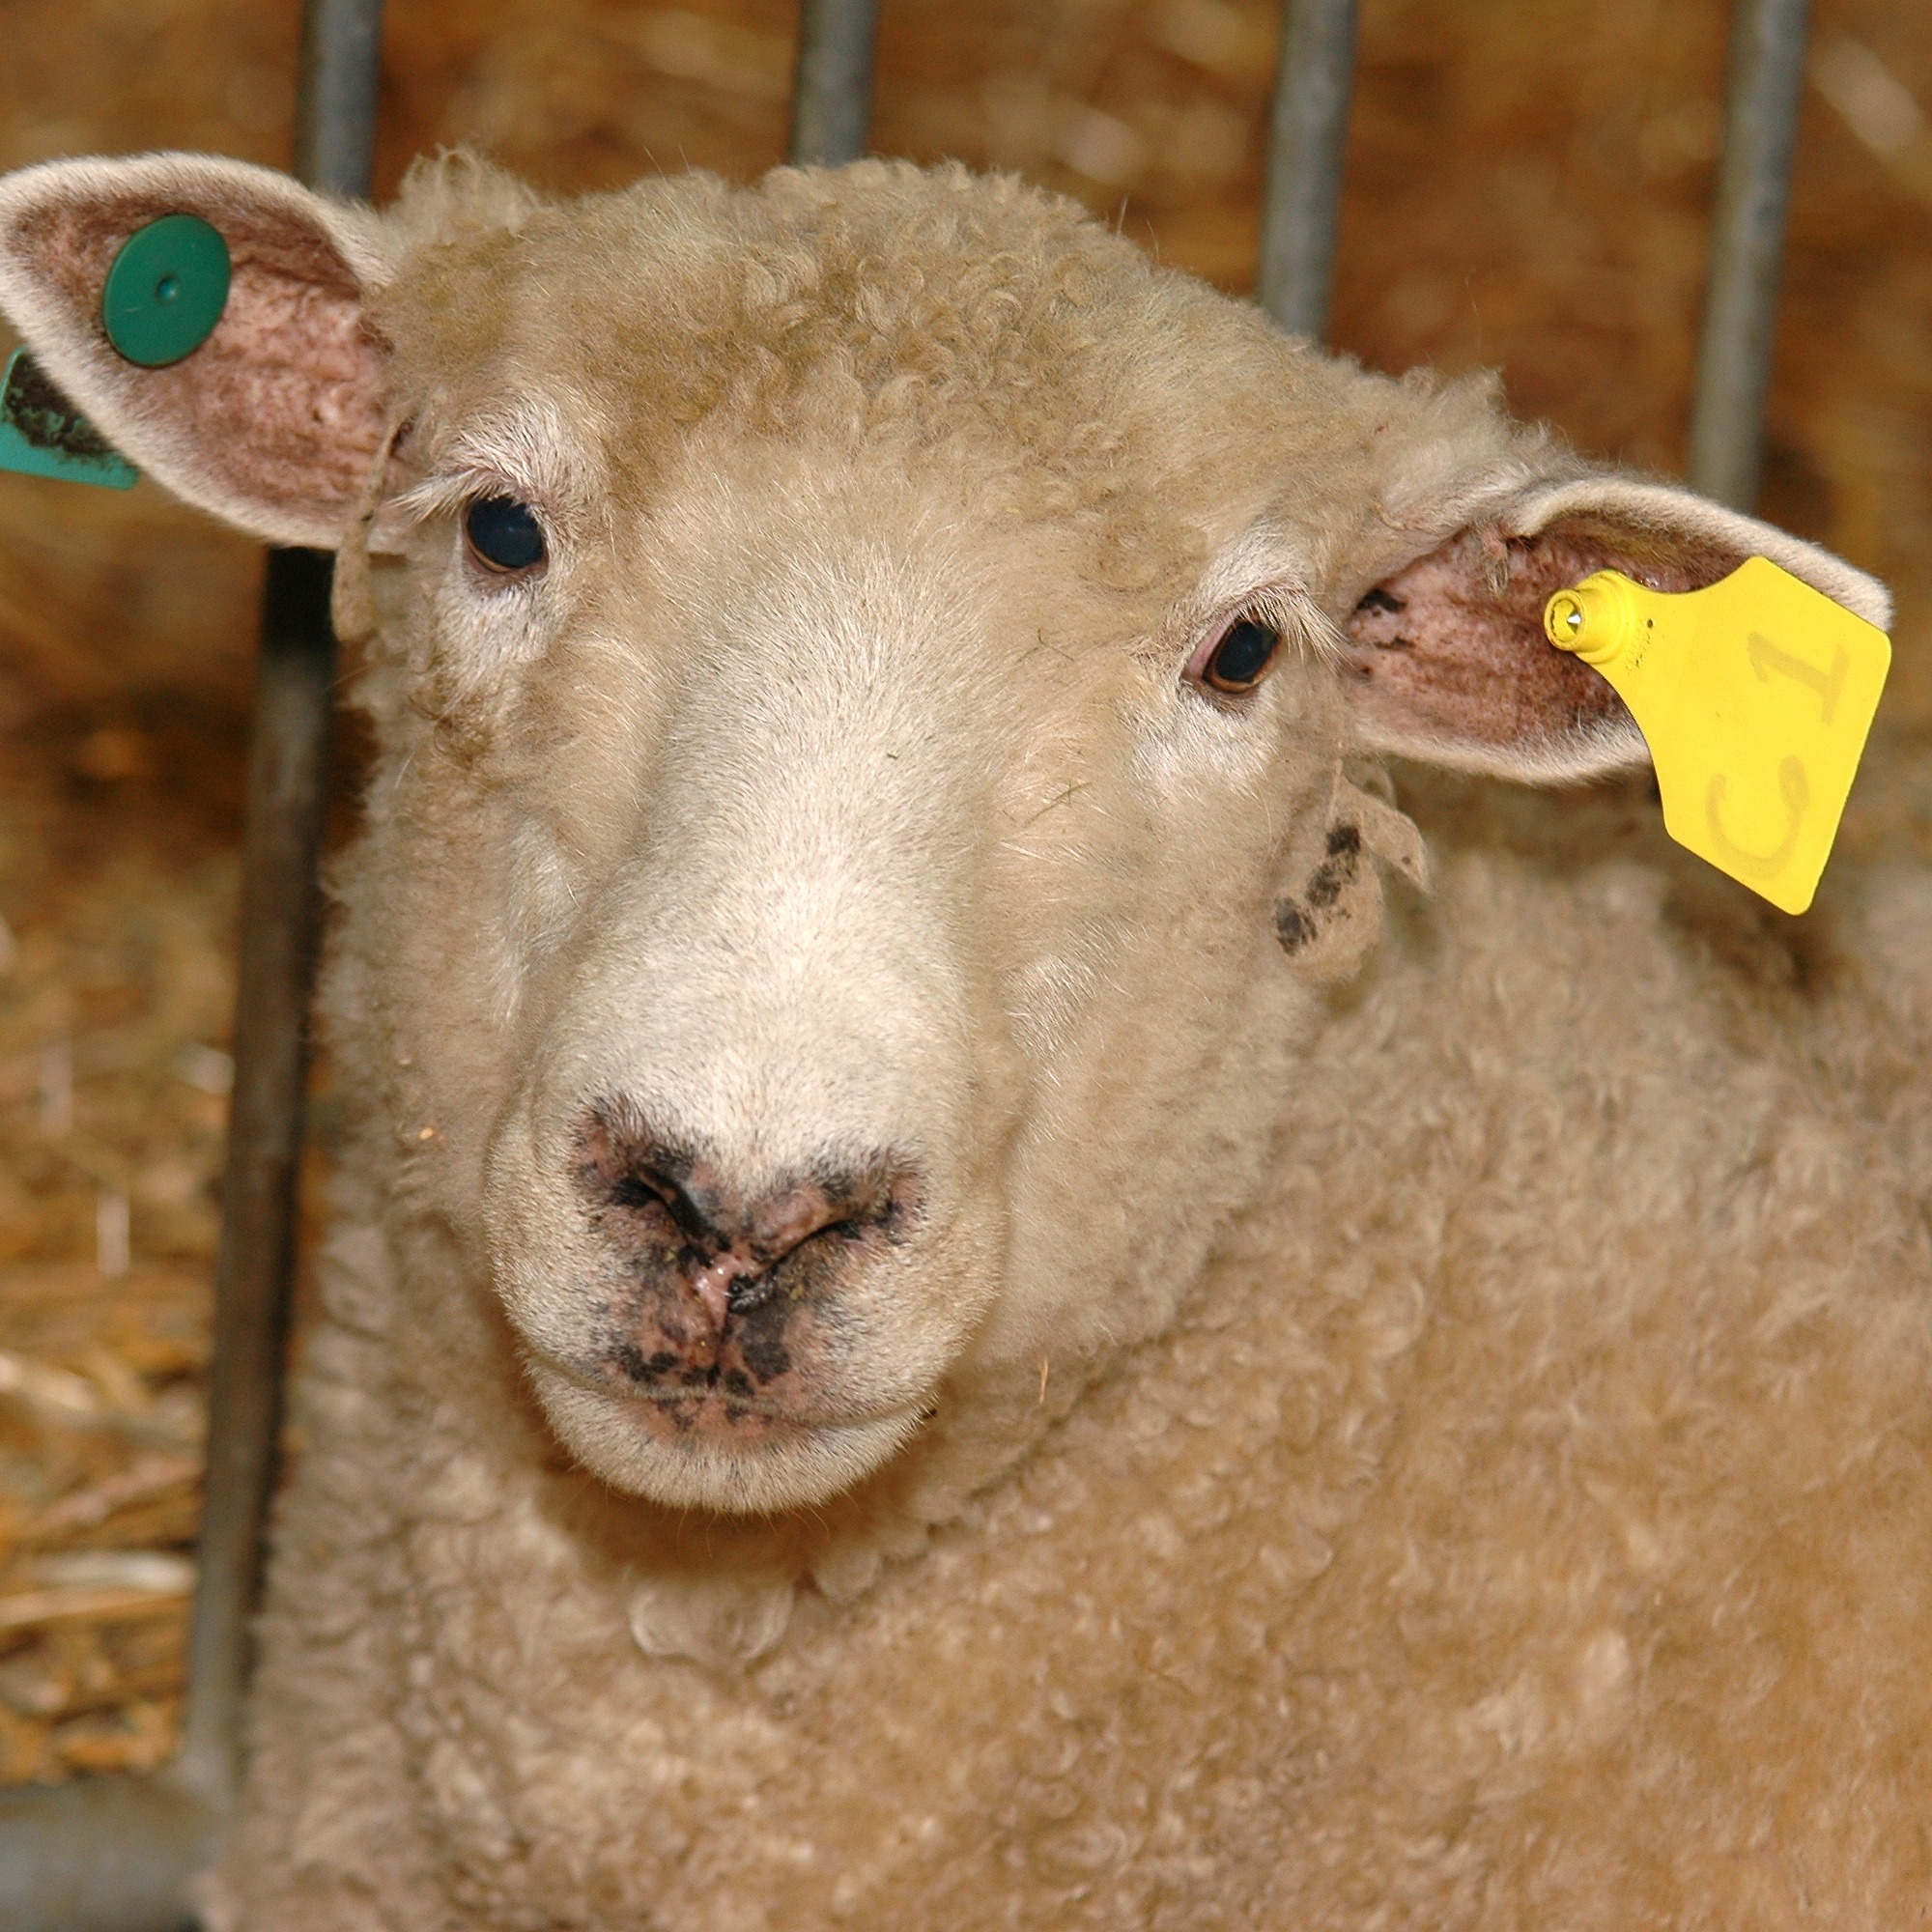
AgVenture: From sheep to sweater
How did pioneers turn a sheep’s fleece into clothing? This flexible program will allow your students to explore the properties of wool through fun activities.
Virtual field trips
Bring the museum to your classroom with bilingual, curriculum-linked programs for all grade levels that allow your students to discover various STEM topics.