Ocean explorers
Grades 6 and 7 (Ontario)
Elementary cycle 3 to secondary cycle 1 (Quebec)
Navigate the vast chartered territory of your school yard with your students as they aim to find and classify biotic and abiotic factors found within its explored depths.

Share :
Curriculum links
Grade 6
Science and technology – Understanding life systems: Biodiversity
Grade 7
Science and technology – Understanding life systems: Interactions in the environment
Elementary cycle 3
Science and technology – Living things: Systems and interactions
Secondary cycle 1
Science and technology – The Living world: Diversity of life forms
Before you visit: Biotic and abiotic elements of a school yard
Learning objective
Identify biotic and abiotic elements found in the school yard and consider the interactions between them.
Introduction
Begin by introducing the concept of biotic and abiotic elements, and identifying some that can be found in the classroom.
- Ask students to identify some living elements in the classroom environment (i.e. humans, possibly plants, insects, micro-organisms). These are biotic elements.
- Ask students to identify some non-living elements that make up the classroom environment (i.e. light – natural or electric, water, heat, gases – oxygen, carbon dioxide, dust, trash). These are abiotic elements.
- Ask students how we (humans) interact with each of these elements. How are we affected if there is too much or too little of each element?
Materials
- Worksheet: Biotic and abiotic elements of a school yard
- Pen or pencil
In preparation
- Divide the class into groups of 2-3 students.
- Ensure that each group has a copy of the worksheet and a pen or pencil.
- Ensure that students are dressed appropriately for the weather.
Instructions
- Introduce the goal of the activity in class: Students will go out to the school yard to identify biotic and abiotic elements in the environment around the school.
- Identify boundaries for the area the students are allowed to search.
- Bring the students to the school yard.
- In their groups, the students will search the area to identify and record as many biotic and abiotic elements as possible. This activity lends itself well to competition; points can be awarded for each correctly-identified element.
- Once the groups have finished their search, the class can return to the classroom or continue the discussion outdoors.
- Ask the groups to share the elements that they have identified. The students may add to their lists if other groups have identified elements that they hadn’t recorded.
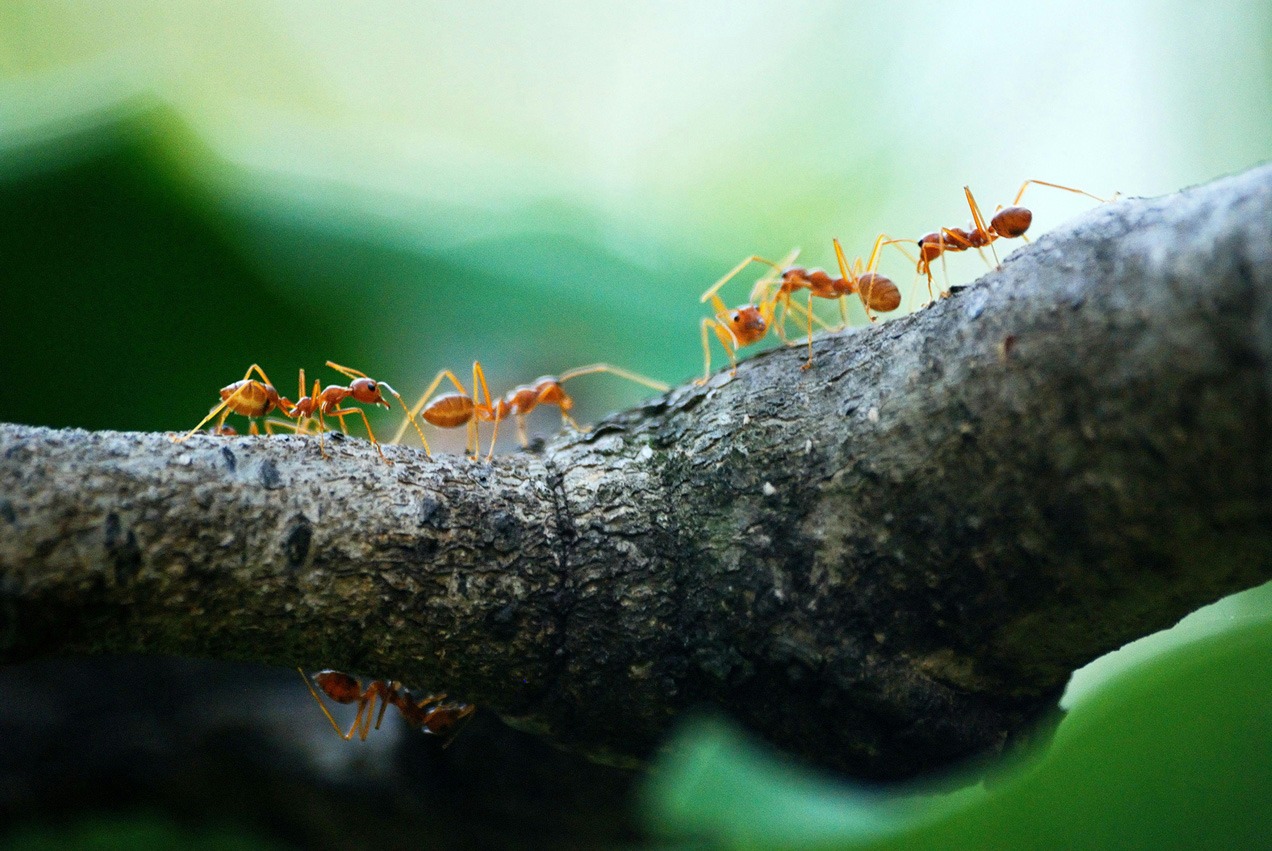
- Ask the groups to look at their lists and to identify some interactions that exist between the biotic and abiotic elements they have found. For example: the leaves collect energy from the sun, or the ant uses the soil for shelter. They may record the interactions they have identified on the worksheet: Biotic and Abiotic Elements of a School Yard: Interactions.
- Ask the groups to share the interactions they have identified.
Go further
Ask students to consider the effect that climate change has on biotic and abiotic elements of an ecosystem, and the interactions between them. Refer to the “Climate change and the environment” infographic (page 5 of infographics).
Please see the printable PDF at the bottom of the page.

Before you visit: Creating a classification system
Learning objective
Identify and classify organisms found near the school and organize them within a classification system, based on their characteristics.
Introduction
Begin by introducing the concept of classification by relating it to the classification of everyday objects. For example, organizing books in a library or organizing movies and television shows on streaming services by category.
Materials
- Recommended: Device with camera function. Alternative: “Living organisms descriptions” worksheet and pen.
- Recommended: Computer or tablet. Alternative: Paper and pen.
In preparation
- Divide the class into groups of 2-3 students.
- Ensure that each group has means to record their observations (pen/paper or camera).
- Ensure that students are dressed appropriately for the weather.
Procedure
- Introduce the goal of the activity in class: Students will go out to the school yard to record as many different living organisms as possible (either take a picture or write a detailed description).
- Identify boundaries for the area the students are allowed to search.
- Bring the students to the school yard.
- In their groups, the students will search the area to record as many living organisms as possible.
- Once the groups have finished their search, the class can return to the classroom or continue the activity outdoors.
- The students will create a classification system to organize all the organisms found, by identifying common characteristics shared by some of the organisms found. There is no “correct” way to organize the organisms; the students must decide as a group what works best for the organisms they found. Some tips that may help with the classification process:
- Start by organizing the organisms by the established kingdoms visible to the naked eye (i.e. plants, fungi, animals) and then look at common characteristics among the different kingdoms.
- Cut out the descriptions to organize them into groups of similar organisms. Or, if using photos, organize the photos into folders of similar organisms.
- Use Mind Mapping software (i.e. bubbl.us or imindmap.com) to organize classification systems. Alternatively, use “Hierarchy” SmartArt graphic in Microsoft Word (there is one design that includes the option to include photos).
- Access to the Internet could help students identify unknown organisms and/or non-visible characteristics that could be used for identification.
- Once the students have completed their classification system, they can circulate the room to see the classification systems that the other groups have created.
- Concluding discussion might include the following:
- Which characteristics were most used as classification criteria?
- How did they decide which characteristics to use as criteria?
- What other criteria might biologists consider when classifying organisms?
- Select one common organism found by the groups and ask them to compare their classification to the Linnean classification.
- Ask the groups to see if they can classify their organisms within another group’s classification system.
- Would their classification systems be able to accommodate organisms in a different ecosystem? For example: in the ocean or in a desert.
Please see the printable PDF at the bottom of the page.
After you visit: Build an ROV
(Activity adapted from Ocean Networks Canada’s Build an ROV, 30 minute student Challenge)
Learning objective
In this student challenge, teams of four or more students are tasked with constructing a device that can complete challenges analogous to real challenges faced by Remotely Operated Vehicle (ROV) drivers in the field. Teachers and students are encouraged to be creative during this challenge, as there are no right answers or defined solutions. Rather, you and your students will need to see what you can do with what you have.
Introduction
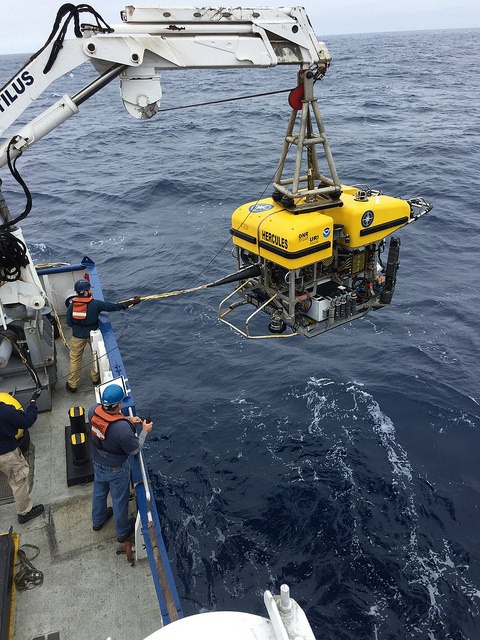
Begin by introducing the importance of ocean research and the use of ROV’s in learning about our oceans.
- Show the “Coastal Communities and Ocean Health” YouTube video by Ocean Networks Canada, in English or in French.
- Show the “Ocean Networks Canada – Selected Highlights” YouTube video by Ocean Networks Canada, which shows deep sea footage captured by a ROV.
- Explain the goal of the activity: to construct a device that can complete challenges analogous to real challenges faced by ROV drivers in the field.
- Groups students into teams of four or more.
- Explain the tasks that their device will be required to complete during the challenge (suggestions below).
- Show the students the materials that will be available to them during the challenge (suggestions below).
Suggested supplies for students
- One piece of recycling of their choosing
- An arm’s length of masking tape for construction
- Eight popsicle sticks
- Two chopsticks or bamboo skewers (to hang the ROV)
- A single piece of white paper
- 60 cm of yarn
- Six paperclips
Materials available to be used but not to be included in device
- One pair of scissors
- One pen and one pencil
Suggested supplies for tasks
- A few cups of flour
- Cookie sheets
- A large bag of marshmallows
- A large bag of gummy bears
- A few blindfolds
Suggested requirements for the ROVs
- The ROV must hang from a “suspension cord” to mimic how an ROV floats in the sea. Students must suspend their ROV from a string attached to a chopstick. Students may not touch the ROV directly, only the chopstick or string.
- The ROV must have a drag cable of 30 cm – this mimics the umbilical cord that protects the ROV from being lost at sea.
- The ROV must hang level from the suspension cord.
- The ROV must be able to pick up and drop off an item (students cannot touch the ROV directly, but they can touch it indirectly – for example, they may use strings)
- Students can use a pen, a pencil and scissors for building, but will not receive any additional supplies due to breakage.
- They will have only 30 minutes to build before the challenges begin.
Suggested tasks
- Navigate dangerous terrain
- Using chairs, tables, or desks, set up a terrain that students must navigate with their ROV.
- In real life, ROV drivers are not aboard the ROV, thus they can’t see what is around them. Instead they must imagine their ROV in three dimensions to keep it from crashing into things. To replicate this, have teams select one team member to “drive” the ROV hanging from the suspension cable through the terrain (over or around objects) while blindfolded. The ROV driver must listen to the directions of the other team members (who can see, but not touch the ROV).
- For an additional challenge, make this a timed challenge. For every mistake the ROV makes (bumps or becomes trapped on an object) add 10 seconds to the final time.
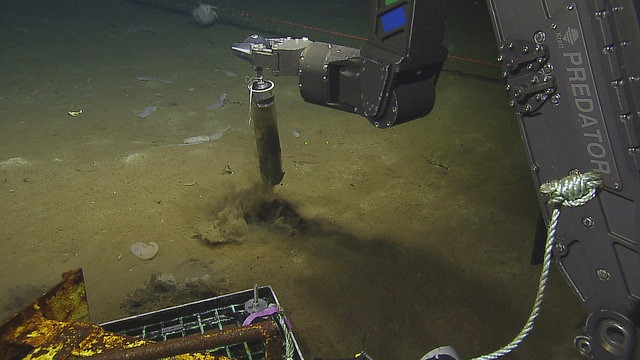
- Collect a sample from a sediment covered sea floor
- Using a cookie sheet covered in flour, recreate a “sediment” covered ocean floor. Scatter a few gummy bears or other soft candy on top of the flour. They represent animals or other samples that are sitting on the sea floor. ROVs lose visibility — and can possibly be damaged — by loose sediment in the water. The light flour replicates the soft sediment on the sea floor. During the task, the students will need to be careful to keep from disturbing the flour or getting any on their ROV, while also picking up an object from the sediment.
- For an additional challenge, limit the number of attempts the ROV has to collect the item from the sea floor, and give each attempt a point value. For example: award 50 points for a successful first attempt, 25 points if they are successful on the second attempt, or 15 points if they can successfully pick up the object on the third attempt.
- Carefully deposit a payload
- Designate an area as a “drop zone.” This can be a taped space on the floor, a box, target, or table top. A few metres from the drop zone, designate a start point. ROVs are often used to carry sensitive instruments to undersea networks, and in this challenge students must carry and drop off a marshmallow.
- Students may use any method they like to attach their marshmallow to their ROV, but once the ROV has left the start line, it cannot be touched directly by the students. The ROV must deposit the marshmallow in the drop zone without damaging it.
- For an additional challenge, limit the number of attempts the ROV has to deposit the marshmallow on to the sea floor, and give each attempt a point value. For example: award 50 points for a successful first attempt, 25 points if they are successful on the second attempt, or 15 points if they can successfully drop off the marshmallow on the third attempt.
Construction phase (30 minutes)
- Give the students 30 minutes to build a device that will be able to complete all of the tasks.
- Remind students that they are not able to have additional supplies; they can only use what is provided.
Testing phase (30 minutes)
- Assign several teams to each task station. After they have completed a task, have them continue to another task station.
- The activity is complete either when time is up, or teams have completed all of the tasks.
- Optional: give each team a score for each station.
Concluding the activity (15 minutes)
- Discuss successes and failures with students. What worked and what didn’t?
- Explore how actual ROVs meet and overcome similar or additional challenges in the field.
- Ask students to redesign their ROV based on their experiences.
- Have students reflect on the experience, and describe their own personal challenges and successes during the activity.
Printable PDFs
- Climate change and the environment infographic – page 5 (PDF, 4 MB)
- Worksheet: Biotic and abiotic elements of a school yard (PDF, 30 KB)
- Living organisms descriptions worksheet (PDF, 30 KB)
You may also be interested in
Climate change adaptation: To what degree?
Engage your students in climate change adaptation and mitigation with this comprehensive lesson plan! Includes interactive activities, a teacher’s guide, and downloadable infographics.

Pollutants in your environment
Engage your students in real-world environmental science with this lesson plan on Canada’s National Pollutant Release Inventory (NPRI). They’ll explore how pollutants are tracked, analyze real data, and discuss the benefits and limitations of pollution monitoring.
Aquatic sciences
Make a splash in the world of aquatic science using our interactive lesson plan to learn about the importance of preserving and protecting our aquatic habitats.