Light paths
Grade 10 (Ontario)
Secondary cycle 2 (Quebec)
Unlock the wonders of light with this engaging, hands-on lesson plan! Students will dive into the fascinating world of optics, exploring how light behaves, how it interacts with different materials, and how mirrors and lenses bend and reflect light in surprising ways. Through fun experiments and thought-provoking discussions, they’ll gain a deeper understanding of the science behind everyday phenomena. Spark curiosity, encourage critical thinking, and make learning about light an illuminating experience for your students!
Share :
Curriculum links
Grade 10
Science and Technology – Physics: Light and geometric optics
Secondary Cycle 2
Science and Technology – Material World: Waves
Piecing it together—The electromagnetic spectrum
Learning objectives
Students will:
- Learn about the properties of light, and how it behaves.
- Identify and label visible and invisible light in the electromagnetic spectrum.
Introduction
Begin by discussing a few basic light-related concepts.
- Ask students if they can explain what light is. How does it behave? How does it react when it encounters an object?
- Discuss the differences between objects that emit light, and objects that reflect light.
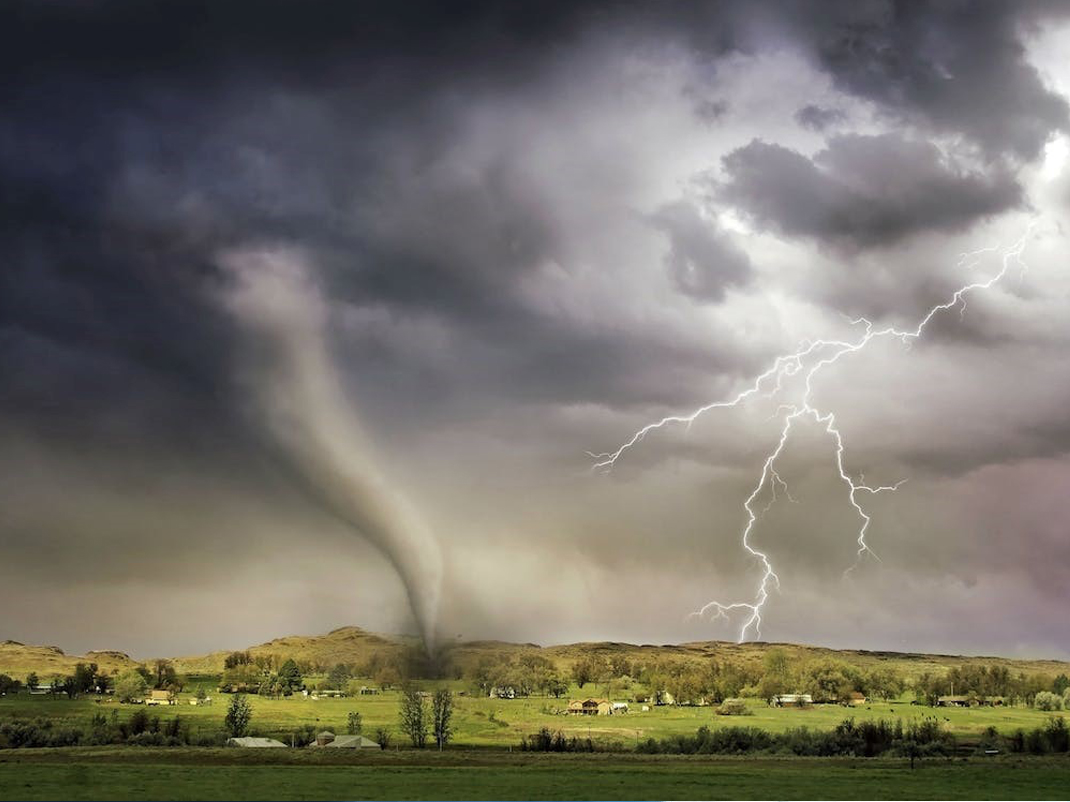
- Ask students if they have ever had a sunburn. How does it happen? What are the benefits of using sunscreen?
- Ask students about a time when they saw a rainbow. How are rainbows created? What is their relationship to the weather?
Materials
- 2 prisms
- Flashlight (white light)
- 2 mirrors
- Magnifying glass
- Bowl with water
- Scissors
- Laser
- Glue stick
- Lenses
- Light paths activity package
Preparation
- Print out the Light paths activity package and distribute it to each student.
Before you begin
Before the activity, start a discussion with your students, exploring the concept of light. Ask them to describe light (e.g., sources of light, the uses of light in our lives, the importance of sunlight, etc.). If you have already covered the electromagnetic spectrum in class, feel free to skim that topic.
You may also want to explain the nature of light: that light is composed of an electrical field and a magnetic field, which together produce an electromagnetic wave. A demonstration may help students understand this concept. For example, a 3D representation can be used to show the two types of fields that come together to create a wave.
Using the Light paths activity package, students will explore different waves and the terminology used to describe such waves (frequency, crest, wavelength, etc.). This can be used to explain the properties of waves, and what happens when one wave differs from another.
Part 1: Light it be
Instructions
- Divide students into groups of 3 or 4, and provide each group with the required materials and a printed copy of the Light paths activity package.
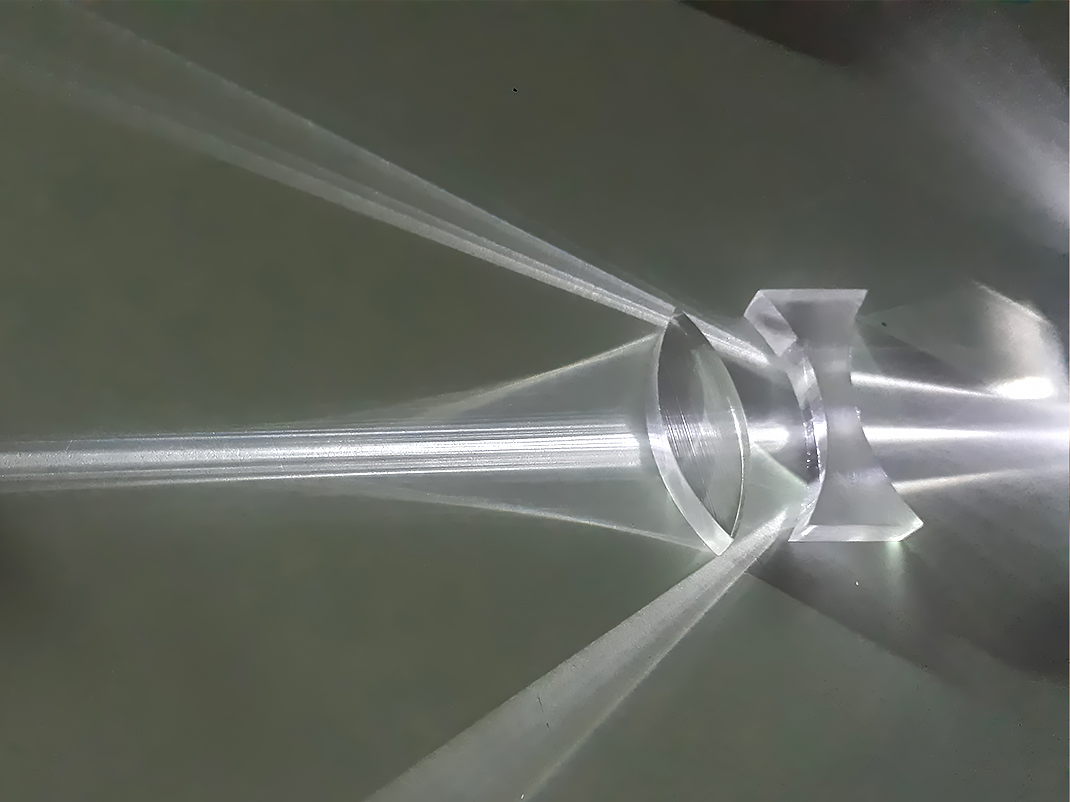
- Have students follow and complete the Activity 1, Part 1 “Light it be” worksheet. They will be asked to explain how light moves. Does it move in a straight line? (Yes; light moves in a straight line.) Can it go through objects? (Yes; it can move through objects that are transparent or translucent.) How will light behave when shone straight through a prism lengthwise?
- Have students check their hypotheses by shining light through a prism lengthwise. The light will shine straight through and will remain white. What did they observe, and why do they think this happens?
- Next, students will be asked to explain what they think will happen when light is shone width-wise through a prism.
- Students will check their hypotheses by shining light through the prism, width-wise this time. The light will emerge from the prism in a thin rainbow-like semi-circle. If the light is too thin for them to see the details, they can use a magnifying glass to view it more clearly.
- Note: Depending on the light used, results may vary. The light needs to be concentrated enough to produce rainbow-like light on the other side of the prism. Test out different light sources before the activity to determine what works best. The flashlight feature on a phone works well.
- What did they observe and why? Have students write down the order of the colours they saw.
- This is a good time to introduce the concept of light reflection and refraction. The dispersal of light within a prism is what creates rainbow-like effect. You can add information about how light behaves through different media.
- Next, what happens when we use a laser beam instead of white light? How does a laser beam travel through a prism? How will it differ from, or resemble, white light? Your students may test their hypotheses with the laser provided. Laser beams are produced by waves that have the same length and frequency. The light will continue to shine in the same direction, and will not be dispersed.
- Students can now try to determine how light would travel through two prisms placed perpendicular to one another.
- Students will check their hypotheses by placing the prisms perpendicular to one another, and shining light width-wise through the first prism. The rainbow-like light will change as it passes through the second prism, creating white light at the far end.
Part 2: Somewhere over the rainbow
- For the second part of this activity, students will try to create rainbow-like light within their groups, using the materials available to them (For example: water, lenses, a magnifying glass, and mirrors.)
Note: There is more than one solution to this activity. - Once the students have found a solution, ask them to draw what they did on a piece of paper. If one group finishes sooner than the others, ask them to look for another solution.
Discussion
Ask students to explain how they created rainbow-like light. Why was a rainbow-like light created? If they were not able to find a solution, ask them why they think that might be.
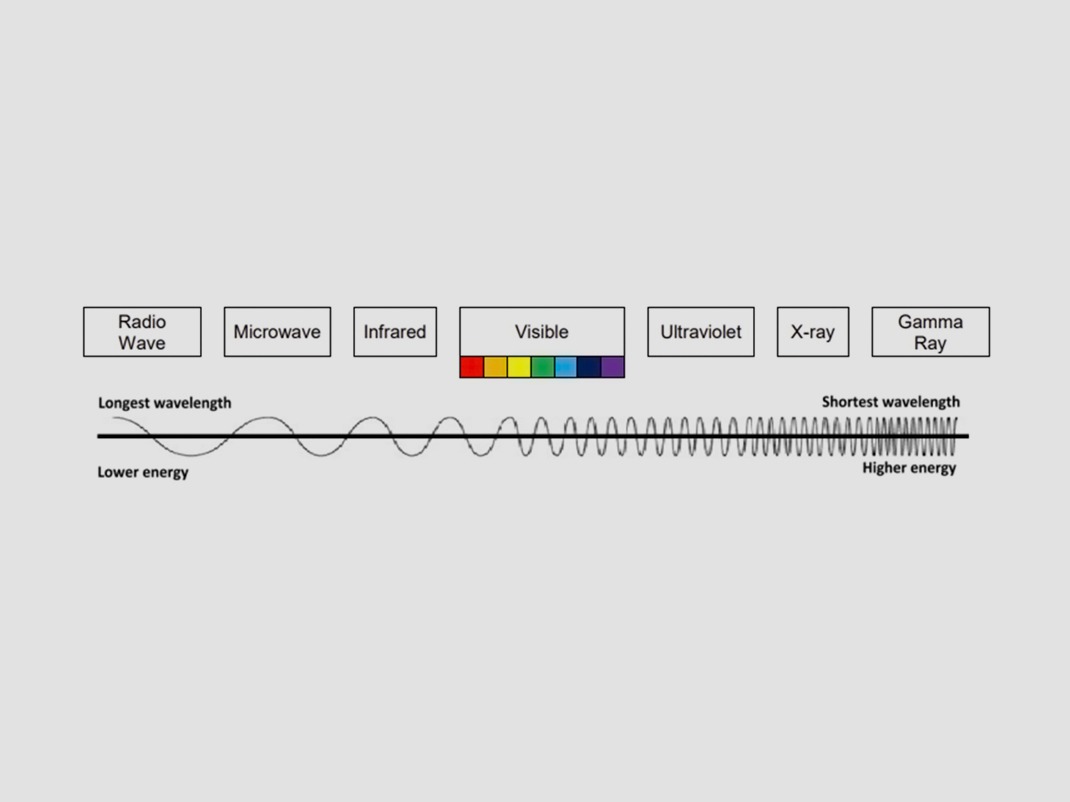
Part 3: Label the electromagnetic spectrum
- In the final part of this activity, students will examine and label the different wave types on the electromagnetic spectrum. Students will describe why we use an electromagnetic spectrum, and how different waves are classified.
- In the Light paths activity package at the end of this document, page 5 features an empty electromagnetic spectrum. Page 6 has labels to cut out for the different types of light, and pages 7 and 8 have a table with clues to help determine the various types of light (from longest wavelength to shortest).
Students will cut out the labels from page 6, then—using the clues from pages 7 and 8—will place the labels from page 6 onto the waves on the electromagnetic spectrum on page 5. - Using the clue in the box ‘colours in visible light’, students should be able to indicate the colours of visible light in the proper order on the ‘visible light’ label.
| Visible | This type of wave is the only one we can see with the naked eye. It is composed of all the colours in the rainbow. Its waves are longer than x-rays, and have more energy than infrared. |
| Infrared | This type of light can be detected with the help of night-vision goggles as they pick up the heat of our skin. This wave has more energy than a radio wave. |
| Microwave | This type of wave has less energy than both visible light and infrared. Microwaves can be used by astronomers to see into space, and by us to warm up food. |
| Radio wave | This type of wave is found in the radiation of the universe, and is emitted by stars in space. It has lower energy than a microwave. It allows you to listen to music in the car. |
| X-ray | This wave type can be emitted by hot gases from exploding stars in space. X-rays have shorter waves than ultraviolet light. They are also commonly used to generate images of the bones in our bodies. |
| Ultraviolet | This type of ray is emitted by many objects in space. It has shorter waves than visible light. Ultraviolet waves are known to cause sunburns, so we need to wear lotion to protect our skin. |
| Gamma ray | This type of wave can result from nuclear reactions. The universe is the biggest generator of these waves—for example, from black holes. Gamma rays are also used by doctors for imaging. This is the highest-energy wave in this activity. |
| Colours in visible light | Red light has more energy than violet light. Indigo light has shorter waves than orange light. In the boxes of the ‘visible light’ label, write the colours found from using the prism, in the proper order (left to right or right to left). |
Now you see me, now you don’t—exploring mirrors
Learning objectives
Students will:
- Review and/or acquire knowledge and terminology in relation to mirrors
- Think about and observe mirrors to make conclusions about their interaction with light
- Develop and test hypotheses regarding different types of mirrors, and predict the images they may create
Introduction
Begin by discussing a few basic mirror-related concepts.
- Ask students to talk about light. How does it behave? How does it react when it encounters an object?
- Ask students to propose sources of light (e.g., the sun, a lightbulb, a flashlight, etc.). How do various sources of light differ from one another (e.g., natural versus artificial)?
- Discuss mirrors. How do they differ from one another? For example: plane mirrors, converging (convex) and diverging (concave) mirrors. How do they work?
- Ask students where we find mirrors, and what purposes they serve (e.g., rear-view mirrors are used to observe the cars behind us).
Materials
- Plane mirror
- Converging mirror
- Diverging mirror
- Small figurine (anything not symmetrical from top to bottom) or a pencil
- Large plane mirror
- Tape
- Large protractor (Version 1 of part 2) or a small protractor (Version 2 of part 2)
- Meter stick (Version 1 of part 2) or a ruler (Version 2 of part 2)
- 6 dice or 6 cubes in different colours
- Blank paper
- Light paths activity package
Preparation
- Print out the Light paths activity package and distribute it to each student.
Part 1: Exploring different types of mirrors
Instructions
- Divide students into groups of 3 or 4. Ask students to label the images on pages 9 and 10 of the ‘Light paths: Activity package’. This allows them to review terminology they have acquired about mirrors. Ask them to explain their labels on the images. How do plane mirrors different from curved mirrors? How do converging and diverging mirrors differ from one another?
- Once the images are labelled, ask students to fill in table 1 on page 11 in the Light paths activity package. Students should draw an image of the object (for example, small figurine or a pencil) to illustrate how they believe it will be reflected in the different mirrors. Students will work in groups to form hypotheses about how the objects will be reflected in the mirrors.
Important: Students will need to predict the location, the relative distance, the orientation and the size of their object in the various mirrors. At this stage, the students are not using any materials to make these conclusions.
Discussion
- Ask students to describe the images they have drawn. How do you think the image in a plane mirror compares and contrasts to a converging mirror? To a diverging mirror? How does the image from a converging mirror compare and contrast to a diverging mirror?
- At this point in the activity, students will test their hypotheses by gathering information with the use of the various materials available to them. They will place the objects in front of the mirrors, and draw what they see.
- How did their results differ from their hypotheses? Ask them why they thought they would obtain their hypothetical image over the final one. Discuss why you would use a plane mirror over a curved mirror on a daily basis, and vice-versa.

Part 2: I spy…
Note: This activity can be done one of two ways, depending on the materials available. The first method involves using a large, long mirror, with a group of students sitting in front of it. The other method involves using a small mirror and placing different coloured cubes or different dice in front of it.
Version 1: Seeing people in a long mirror
Form groups of 4–6 students. Each student should have the Light paths activity package available.
Discussion
- Ask students if they have ever been in a situation when they are in front of a mirror in public and wonder if another person can see them. Why would the other person not be able to see them? How could they ensure that the other person would not see them, while they are still able to see the other person?
Instructions
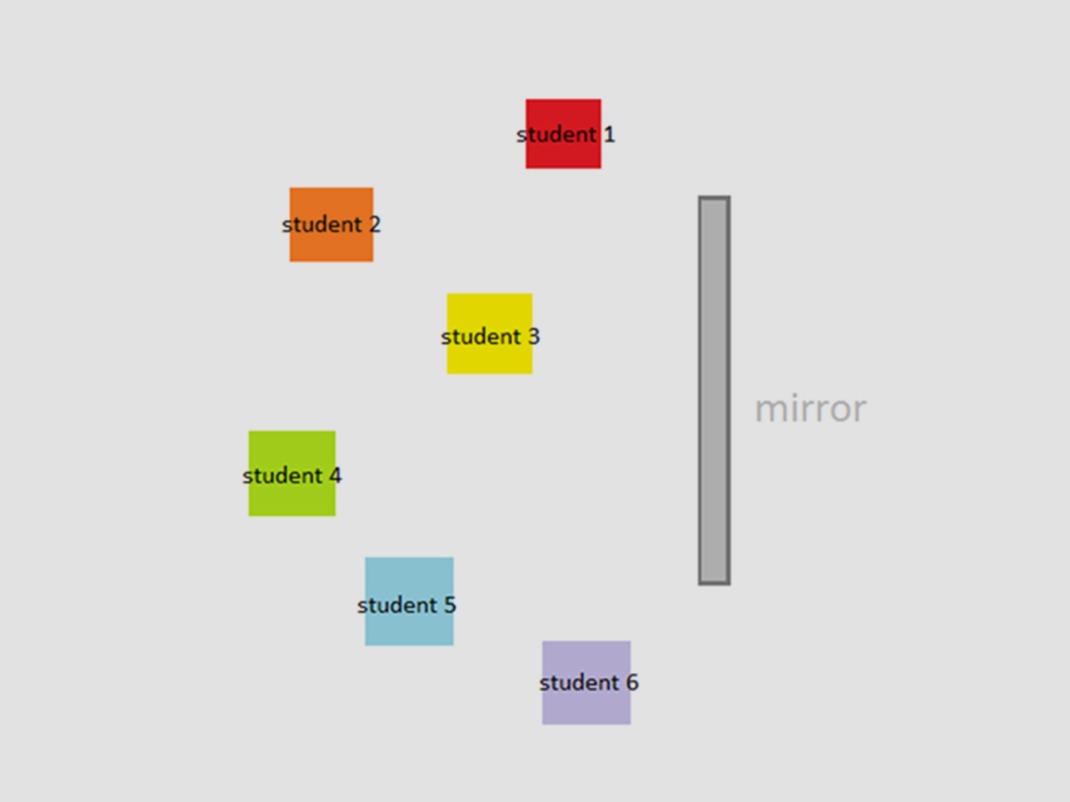
- This activity uses that concept to study mirrors. The goal of the activity is for students to identify who can see whom in the mirror, from their positions relative to the mirror. To start, place a large mirror against a wall, with enough room for six students to sit in front of it.
- Have students measure the length of the mirror, and mark the centre of the mirror with a small piece of tape. Students should also use a piece of tape on the floor to indicate the middle of the mirror, width-wise. This is known as the “normal line.”
- Students will then sit in different positions in front of the mirror, including different distances and different angles from the mirror. Students should position themselves so that they can see the centre of the mirror.
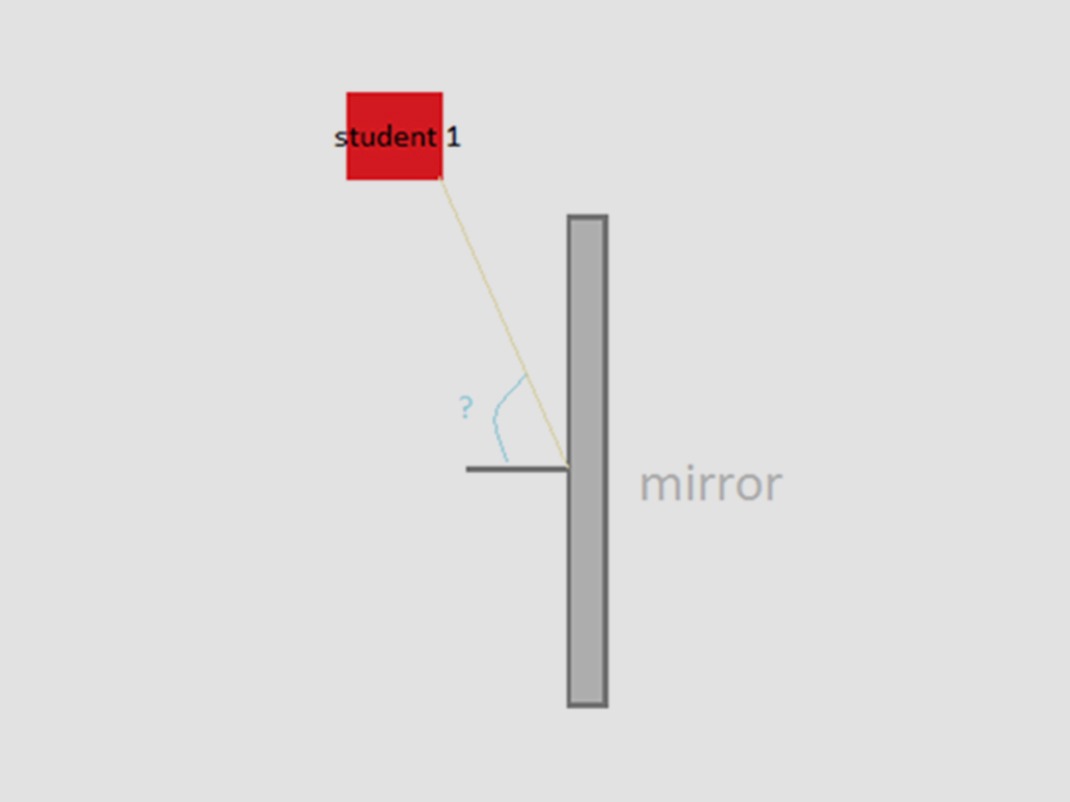
- Have students sketch the locations of each student in front of the mirror, using page 12 of the Light paths activity package. In table 2, each student will note whom they can see from their position. They will have an opportunity to collect the remaining information later in the activity.
- When students have completed their observations, have each of them use tape to make a line from where they are sitting to the mirror’s normal line. Following the tape, students will use the metre stick to measure the distance of their sitting position to the normal line. They will mark down the distance in table 3 on page 13 in the Light paths activity package.
- Next, students will need to measure their angle from the mirror to the normal line, using the protractor and the line they created with tape. This information should also be recorded in table 3.
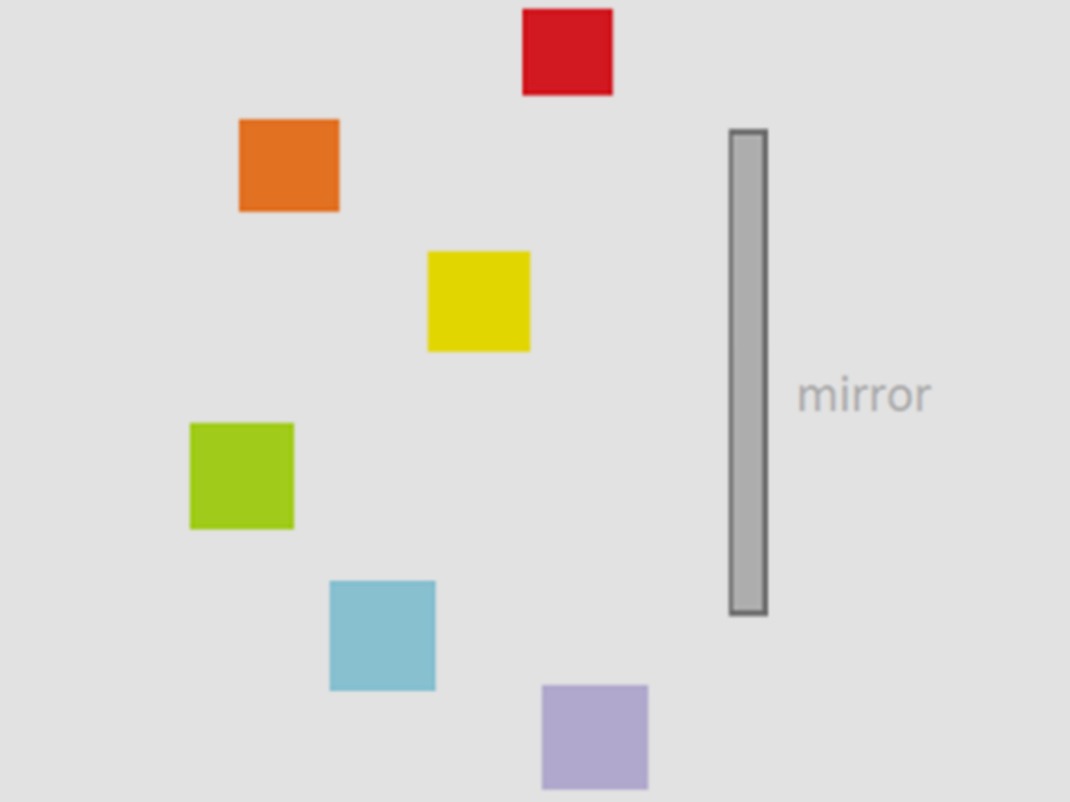
- Students may now share this information with their teammates to fill in table 2 and table 3 with the appropriate data.
- Finally, students will draw a diagram on page 13 to scale, with the data they collected. They should include a ray diagram relative to their locations to show who they were able to see in the mirror, and why they think that is.
Discussion
- Ask students why they needed to measure the length of the mirror. What was the importance of the angle of their location in relation to the normal line? Why did they see some people and not others? Ask them to use their ray diagram to help answer those questions.
Note: Students should only see students sitting between the incident ray and the reflected ray. Anything outside of this would not be observed by students at their particular angle from the centre of the mirror.
Version 2: Seeing cubes in a small mirror
If you do not have a large enough mirror at your disposal for version 1 of this activity, the experiment can be conducted using a small mirror with coloured cubes or dice.
Students will need to form groups of 3 or 4. Each student should have the Light paths activity package available.
Discussion
- Ask students if they have ever been in a situation when they have been in front of a mirror in public, and have wondered if another person can see them. Why would the other person not be able to see them? How can they ensure that the other person cannot see them, but that they can still see the other person?
Instructions
- This activity uses that concept to study mirrors. The goal of the activity is for students to identify who can see whom in the mirror, from the student’s own position relative to the mirror. Students will start by placing a mirror on a blank piece of paper. They should use a bit of tape on the back to ensure that it doesn’t move on the page.
- Have students measure the length of the mirror, and indicate the centre of the mirror with a small tick mark at that spot. Students will also draw a straight line from the middle of the mirror, width-wise. This is known as the “normal line.”
- Students will then place the six cubes or dice at different positions in front of the mirror, using different distances and different angles from the mirror.
- Have students sketch the locations of the cubes or dice in front of the mirror, using page 14 of the Light paths activity package. Ask students to select one cube or die for which they will be responsible.
- Ask students to imagine their cube or die being able to “see” for itself. On table 4, ask them to indicate which other cubes or dice they believe their cube or die could “see” reflected in the mirror. Students can place themselves at the “eye level” of their cube or die to try and determine what can be observed from that angle.
- When the students have completed their observations, have them each trace a line from the cube or die to the mirror’s normal line. Following the line, students will use a ruler to measure the distance from where the cube or die was positioned to the normal line, and note the distances from the mirror on table 5 (page 15) in the Light paths activity package.
- Next, each student will need to measure the angle at which their cube or die was positioned from the mirror to the normal line, using the protractor and the line they created. This information may also be recorded in table 5.
- Finally, have students draw a scale diagram on page 15, using the data they collected. They should include a ray diagram relative to the location of their cube or die on the diagram, to show which other cubes or dice they are were able to see in the mirror, and why they think that is.

Discussion
- Ask students why they needed to measure the length of the mirror. Why was it important to measure the angle of their cube’s or die’s location relative to the mirror’s normal line? Why did they see some cubes or dice and not others? Ask them to use their ray diagram to help answer these questions.
Go further
How are mirrors used every day? How can different images be created with mirrors?
Students will use the knowledge acquired from the previous activity to explore mirrors and their reflective properties.
Materials
Supply students with a plane mirror and a blank sheet of paper.
Procedure
This activity can be done at school with the students, or can be given as an extra activity for them to try at home.
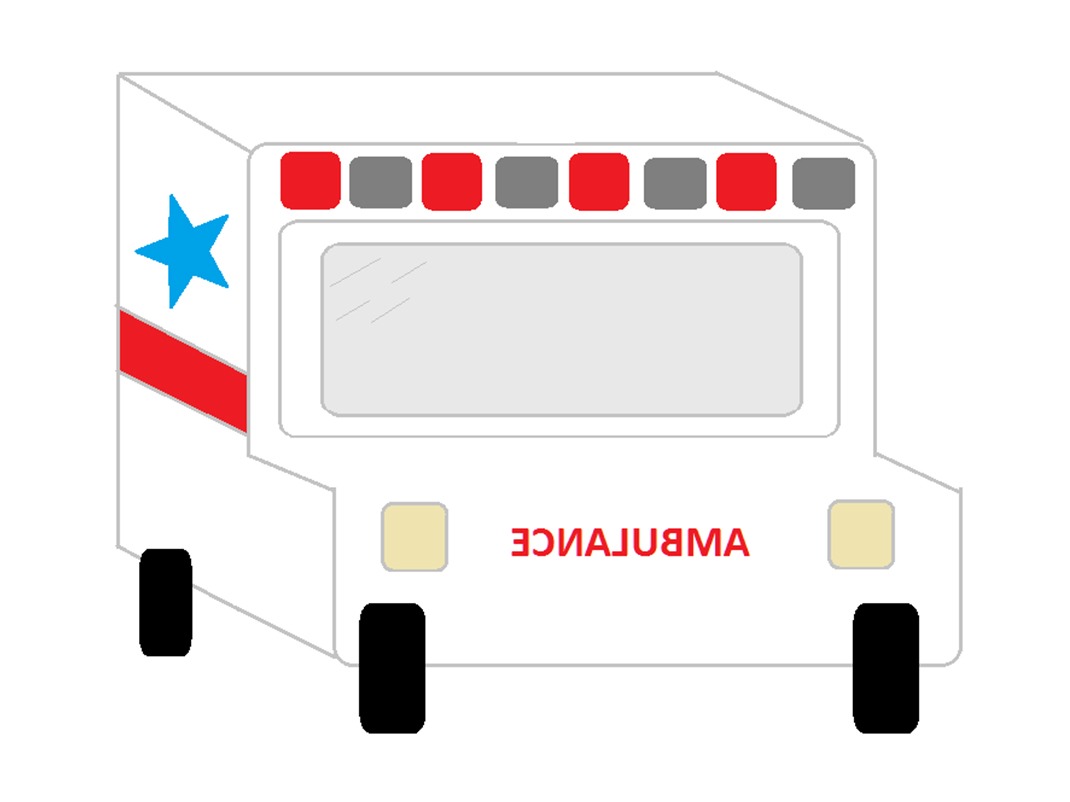
Ask students to predict the reflection of their name in a plane mirror. How does this reflection differ from their original name?
Ask students to write their names on the blank piece of paper and use a plane mirror to create a reflected image. How do their predictions differ from the actual reflected image? Why does this happen? Why may it be useful to write words backwards in everyday life? (For example, the writing on an ambulance).
More than meets the eye—exploring lenses
Learning objectives
Students will:
- Review and/or acquire knowledge and terminology with regard to lenses.
- Think about and observe lenses to make conclusions about their interaction with light.
- Develop and test hypotheses about different types of lenses, and predict the images they might create.
Introduction
Begin by discussing a few basic lens-related concepts.
- Ask students to share what they know about light. How does it behave? How does it react when it encounters an object?
- Ask students to describe a lens. Where we can find lenses, and how and why are they used?
- Ask students to reflect upon the different lenses they have encountered. How do they differ from one another (e.g., converging [convex] and diverging [concave] lenses). When would we use one type of lens over another?
- Ask students how light would travel through a lens. How do lens types differ in relation to their interaction with light? What factors would influence the behaviour of a lens?
Materials
- Plane lens or glass
- 2 converging lenses
- 2 diverging lenses
- Laser
- Flashlight
- Light paths activity package

Preparation
Print the Light paths activity package and distribute it to every student.
Part 1: Exploring converging and diverging lenses
Ask students to form groups of 3 or 4. Each student should have the activity package available.
Discussion
Ask students to describe what a lens is, and what it is used for. How does it differ from a mirror (for example, the way it interacts with light)?
Instructions
- There are different types of lenses that have different uses. Students will analyze the different lenses. Ask them to bring a plane lens, a converging lens, a diverging lens, along with a flashlight and a laser, to their workstation.
- Students will begin by completing table 6 on page 16 of the Light paths activity package. Firstly, they will describe the appearance of each lens and draw a sketch in the “What does it look like?” column of the table (without the use of a light source). Ask students how they would describe the appearance of each lens.
- Secondly, they will compare the lenses with one another to determine how they differ, and will fill in the boxes under “How do they differ?” in the table. Ask students to describe how they think the lenses differ.
- Once the students have properly assessed each lens, they will complete table 7 on page 17. Ask students to hypothesize how light will interact with the lenses. How will the light pass through each lens? Will the light curve? Will it go straight through? Will it disperse?
- Have students test their hypotheses with the use of a flashlight and a laser. How does each type of light interact with the lens? Do different light sources produce different results? If so, how?
Part 2: Optical devices and lenses
Instructions
- Have students explore the use of different lenses in optical instruments (e.g., cameras, telescopes, microscopes, etc.). What types of lenses are used in each instrument? What do we use each instrument for? Why do we use one type of lens over another? How would the light interact if a different type of lens was used? Would the optical instrument serve the same purpose? Are there mirrors present in the optical instrument? Why would a mirror be used instead of a lens?
- Ask students to form groups of 5 or 6. Ask them to share their research on an optical instrument with their teammates.
- As a team, students will complete the information in table 8 on page 18 in the Light paths activity package. They will classify the different optical instruments, based on the lenses they contain.
- Ask students to determine a relationship between the instruments and the types of lenses. Do they have similar uses? If you wanted to change the purpose of the instrument, what could you do differently?
Optical devices and light
Learning objectives
Students will:
- Review the different lenses and mirrors they have already explored to make connections with knowledge acquired during their visit to the museum.
- Sketch the direction of light within the optical device they have chosen.

Materials
- Plane lenses
- Converging lenses
- Diverging lenses
- Flashlight
- Laser
- Plane mirror
- Converging mirrors
- Diverging mirrors
- Laptops
Instructions
- If you have done activity 3, part 2 with your students, they will have already explored different optical instruments. For this activity, they should explore the same instrument as before. If you have not done the activity with the students, we recommend starting with that first.
- Students will explore the use of lenses and mirrors in different optical instruments. They will need to use the different lenses and mirrors at their disposal to test how light travels through their instrument.
- Ask students to make a sketch of the light in their instrument, using the materials at their disposal. Students may need to research their optical instrument to get more information about what is inside the device.
Discussion
- How does light work in your optical instrument? What kinds of lenses and/or mirrors does it contain? What would happen if you used a different kind of lens and/or mirror? Why is a lens used instead of a mirror, and vice-versa?
Printable PDF
Light paths activity package (PDF, 518 KB)
You may also be interested in
Climate change adaptation: Society and economy
Engage your students in dynamic activities on climate change! They will discover the causes, impacts and solutions, while exploring adaptation to protect society, the economy and the environment.

Climate change adaptation: Living world
Bring climate change lessons to life with interactive and exciting student activities! They’ll explore its causes, impacts on biodiversity, and solutions to protect the living world.
Design technology
- Grade 3 – Grade 10
- Elementary cycle 1 – Secondary cycle 2
Students will discover how technologies expand the possibilities of art and design while creating their own artwork for a laser-cut pin.