Electri-city
Grades 5 to 9 (Ontario)
Elementary cycle 3 to secondary cycle 2 (Quebec)
Static! Current! Circuits! Oh my! Through various hands-on electricity experiments and activities, students will explore properties of electrically charged materials, simulate how current electricity moves through a wire and learn about components of electrical circuits.
Share :
Balloons and static electricity
Learning objective
Introduction to electrical charges using balloons and everyday objects in the classroom.
Introduction
Begin by discussing a few basic concepts about static electricity:
- Ask students if they have ever noticed that they can get a balloon to stick against the wall or to their body. Ask them how they were able to do this. (By rubbing the balloon on a sweater or in their hair.)
- Ask students if they have ever received a static electricity shock. When does this happen? (Going down a plastic slide, rubbing your socks on the carpet and then touching a door knob, etc.)
- Why do they think this happens?
Materials
- 2 balloons
- Ribbon or string
In preparation
- Inflate two balloons.
- Attach each balloon to a string that is approximately 60 cm (24 in. long).

Instructions
- Ask the class to predict what will happen when the two balloons are rubbed on a piece of wool (or in someone’s hair).
- Rub the balloons against someone’s hair or a piece of wool and allow the balloons to hang.
- Observe the balloons.
- Why do the two balloons move away from each other? (Balloons have the same electrical charge: similar electrical charges repel.)
- Ask students to predict what will happen if a sheet of paper is placed between the two balloons.
- Check students’ hypotheses by placing a sheet of paper between the two balloons. (The balloons come closer; because the electric charge of the sheet of paper differs from that of the balloons it attracts them. When removing the sheet of paper, the balloons move away from each other because they have the same electrical charge.)
- What happens when we bring the charged balloon close to someone’s head? Why? (The hair will move. Just like with the sheet of paper, the electric charge of the hair differs from the balloon. The hair will be attracted to the negatively-charged balloon.)
- Optional extension: Charge a plastic tube by rubbing it with fur or wool and place it between the charge balloons. They will separate even further!

Go further
Could you use static electricity to move objects?
Materials
- Supply students with balloons or other objects/materials that can hold a static charge
Procedure
- Encourage them to go around the classroom and see if they can make things move, using only the item with the static charge.
Results for discussion
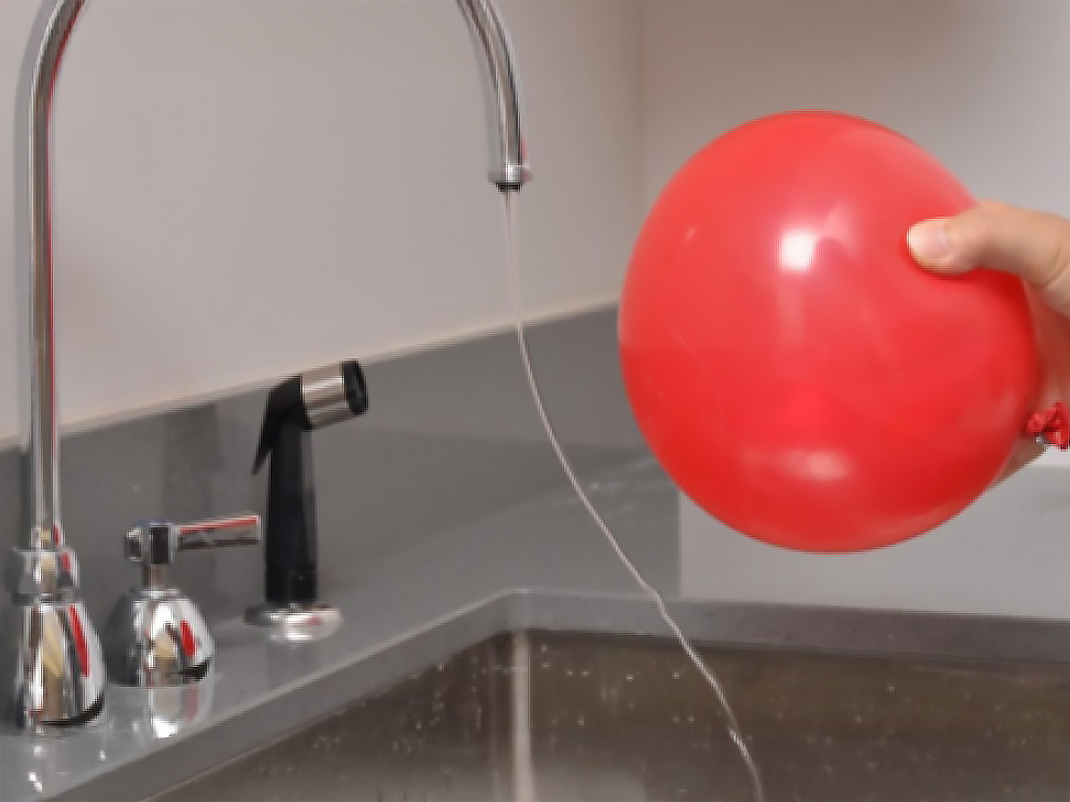
- Balloon and stream of water: The negative charge of the balloon will repel the electrons in the stream of water, leaving the stream below more positive, which in turn is attracted to the balloon.
- Balloon and pieces of paper: The paper will be attracted to the negative charge on the balloon, so it will jump up and stick to the balloon. A charged object will attract a neutral object, much like a magnet will attract a piece of steel.
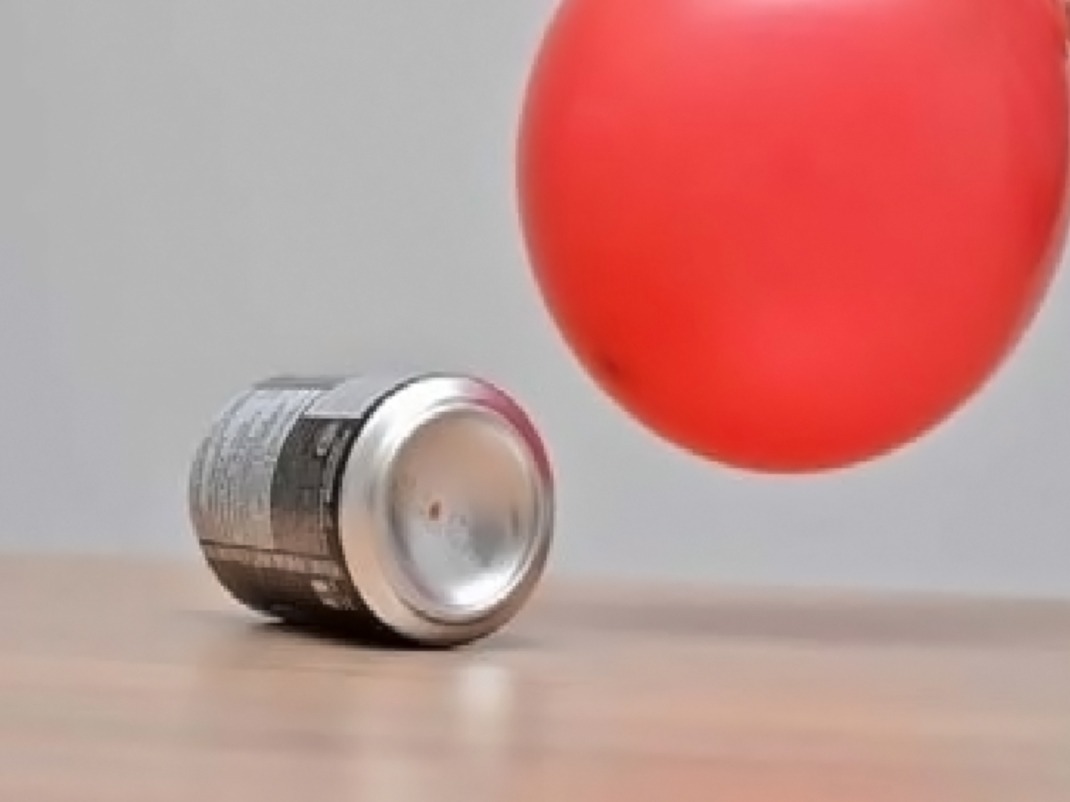
- Balloon and an aluminum can: The can is attracted to the negative charge on the balloon.

Current electricity
Learning objective
Students will simulate how current electricity moves through a wire.
Introduction
All matter is made up of atoms. Atoms have electrons that can move and protons in their nucleus which can’t move. The electrons carry a negative electric charge and can move from atom to atom and create current electricity. Current is simply electrons in motion along a path (or circuit). Current is measured as the number of electrons passing a given point in a second. The more electrons that pass the given point, the greater the current.
Materials
- Two objects. One placed at the end of each line of students.

Procedure
- Divide the class into two groups, facing each other. The students in each group will be standing shoulder to shoulder, about 15 cm (6 in.) apart.
- Provide an object for the last student in each line to pick up.
- Stand at one end of the two lines of students. Tell the students that you will act like the light switch. You will then tap the first student in each line at the same time. Each student will then (gently) tap the shoulder of the next student in line and so on, until the last student is reached. That student will then pick up the object.
- Explain that this is how electrical current passes through a wire! Each tap simulates an electron bumping into the next atom, pushing the electric current along!
- Discuss: How long does it typically take for the light to turn on after you flip the switch? (Seconds/no time at all; electricity moves close to the speed of light.)
Will these circuits work?
Learning objective
Students will analyze images of electric circuits to determine what is necessary for a successful circuit to function.
Introduction
Discuss with students what a circuit is.
- A circuit is a pathway that electrons flow through to make a device work.
- In order for the circuit to allow current to flow, the wires have to make a path for the electrons to leave one end of the power source, go to the device, and then back to the other end of the power source, so that the electrons can go out and come back.
Materials
- Printouts or projection of the Will these circuits work? activity sheet
Procedure
- For each for each of the circuits below, ask the students to discuss with their partner if they believe that the circuit will work.
- Discuss their answers and the correct responses as a group.
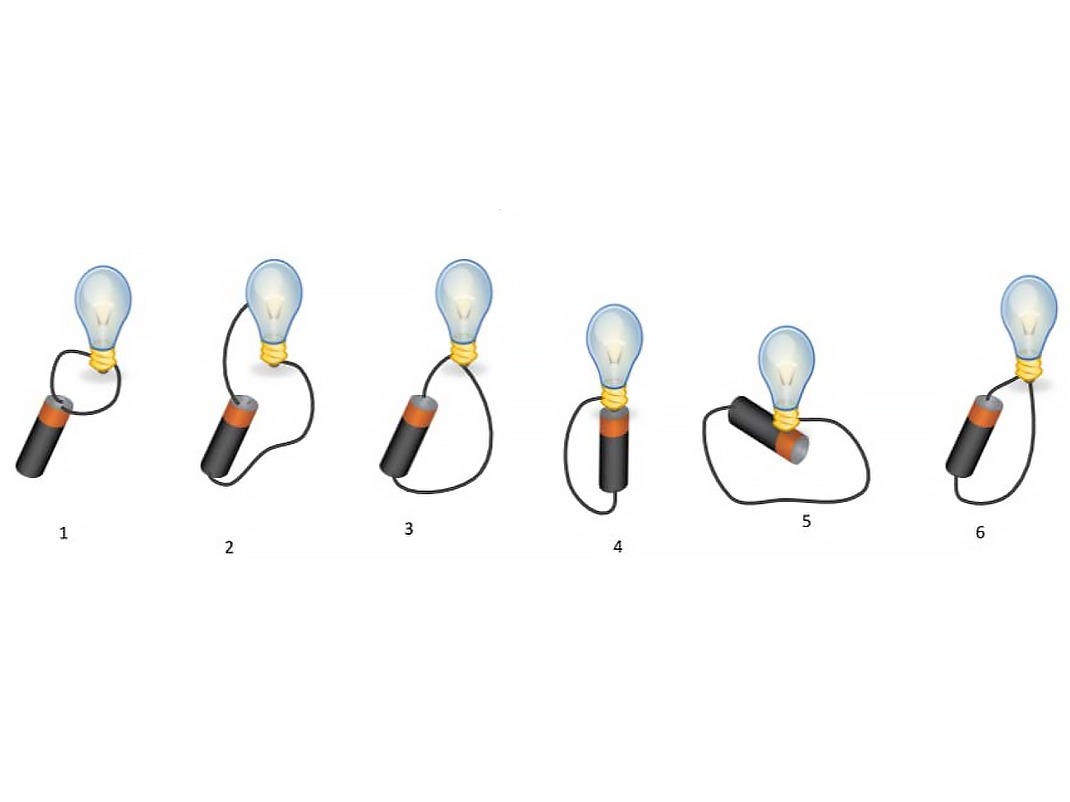
Results
- No – The circuit is incomplete; both wires are connected to the positive side of the battery and the electrons will not flow.
- No – The circuit is incomplete; one wire is connected to the positive side of the battery at one end but the glass of the bulb at the other (this will not allow the electrons to flow).
- Yes – The circuit is complete; the electrons can flow from the negative side of the battery through the wire to the lightbulb, then from the lightbulb to the positive end of the battery.
- Yes – The circuit is complete; the metal contact on the lightbulb is in direct contact with the positive end of the battery. The electrons will flow through the wire from the negative side of the battery to the lightbulb, then from the light bulb to the positive end of the battery.
- No – The circuit is not complete; the wire connects the negative end of the battery to the lightbulb; however, the lightbulb is in contact with the battery casing and not the positive end. Electrons will not flow.
- Yes – The circuit is complete; the electrons can flow from the negative side of the battery through the wire to the lightbulb, then from the lightbulb to the positive end of the battery.
Electric circuit matching game
Learning objective
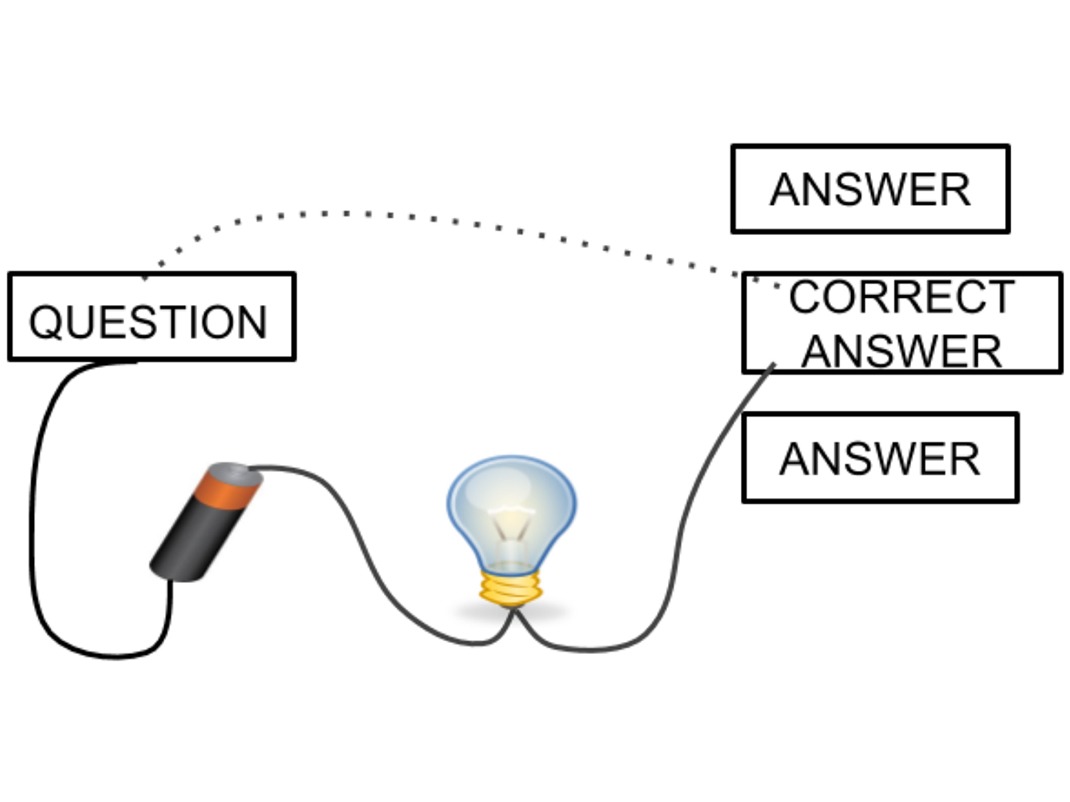
Students will practice making electrical circuits by creating a matching game where a light turns on when the right answer is chosen. A circuit will be hidden behind the game and when the player connects the question to the correct answer the light should turn on.
Materials
- Cardboard and paper to make the game board
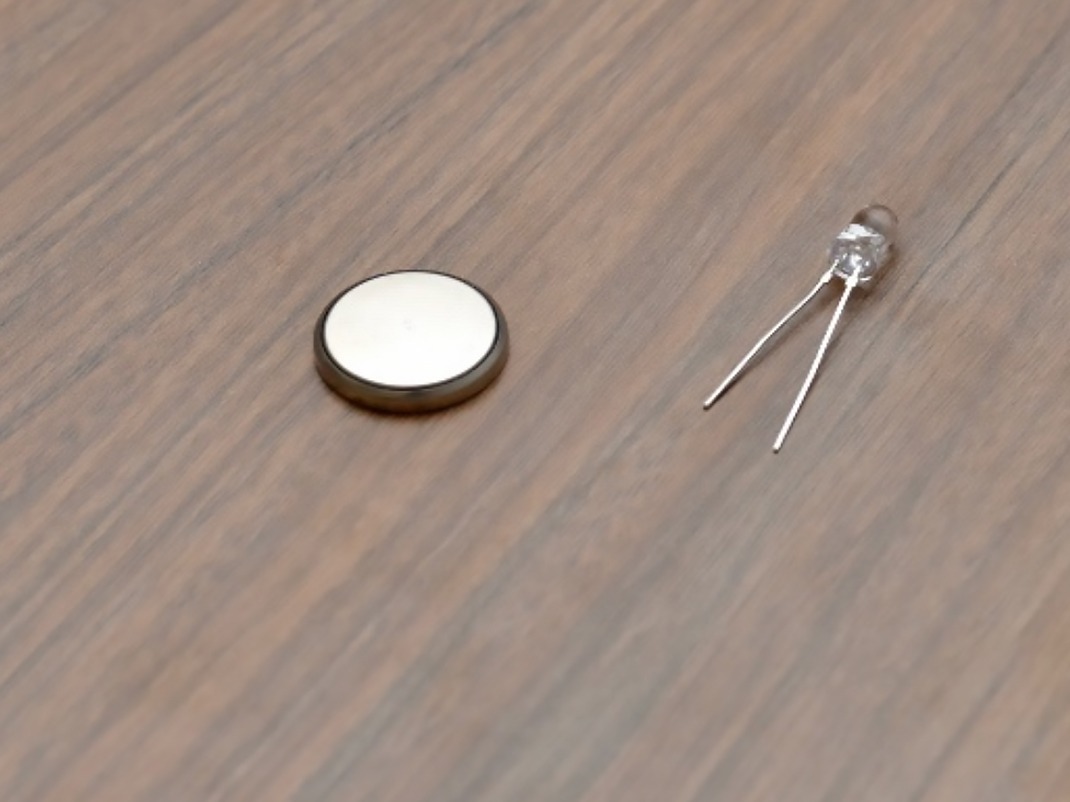
- LED light (one per student)
- Button battery (one per student)
- Aluminum foil to make the wires and connections
- Hole punch
- Tape or glue
- Markers or colouring pencils for decorating (optional)
Instructions for students
- Using a piece of paper, write out six to eight questions and answers that you want to use. These could be related to the curriculum or a subject of your choosing.
- Draw or print your questions and answers on pieces of paper.
- Use a piece of cardboard as a base. You can choose the dimensions, but 60 cm x 90 cm (24 in. x 35 in.) is suitable depending on the size of your questions and answers.
- Affix the questions and answers in two columns on each side of the cardboard – make sure to mix up the order of the answers.
- Cut a piece of cardboard that fits between the two columns. This will be used to hide the circuits and protect them.
- Use a hole punch to cut holes that will line up with the questions and the answers, plus one extra hole at the top for the LED light.
- Now you have to determine how to construct the circuits behind the cardboard, so that the light will turn on when the question and the correct answer are selected.

Instructions for educators
The goal of this project is for the students to problem solve how to make the circuits on their own. Students should not be provided detailed instructions for this portion of the project. Instructions below are to help the teacher support the students.
When the question and the correct answer are connected with the leads the light will turn on.
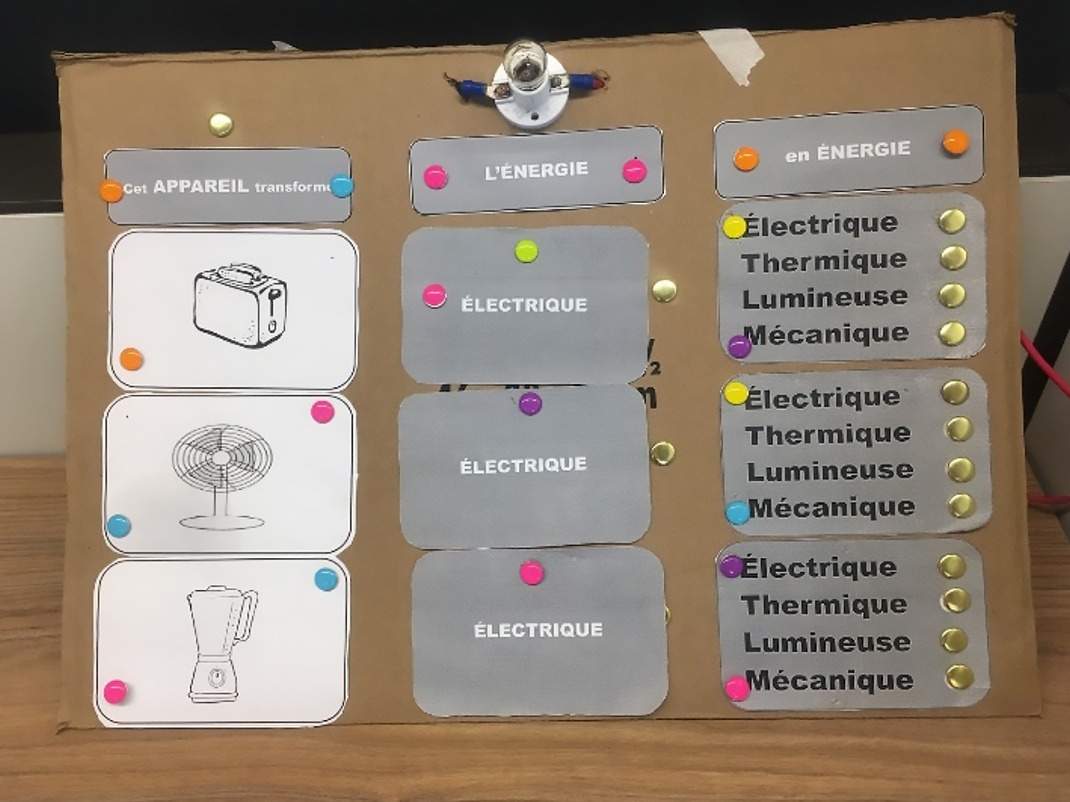
- The questions and answers are on the front face of the cardboard along with the light bulb.
- The connections to the light bulb could be through a hole in the cardboard.
- The battery and wires (or foil) should be behind the cardboard.
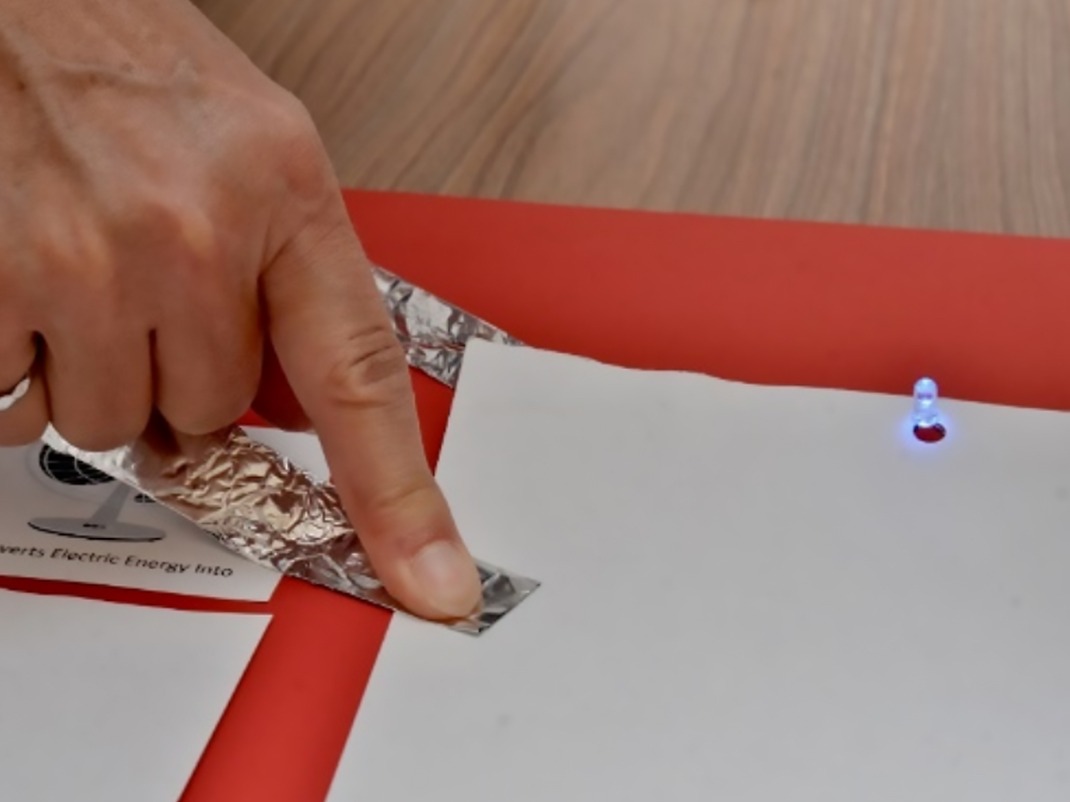
- When the player connects the question with the correct answer with a conductor (wire, piece of aluminum foil) they will complete the circuit and the lightbulb will turn on.
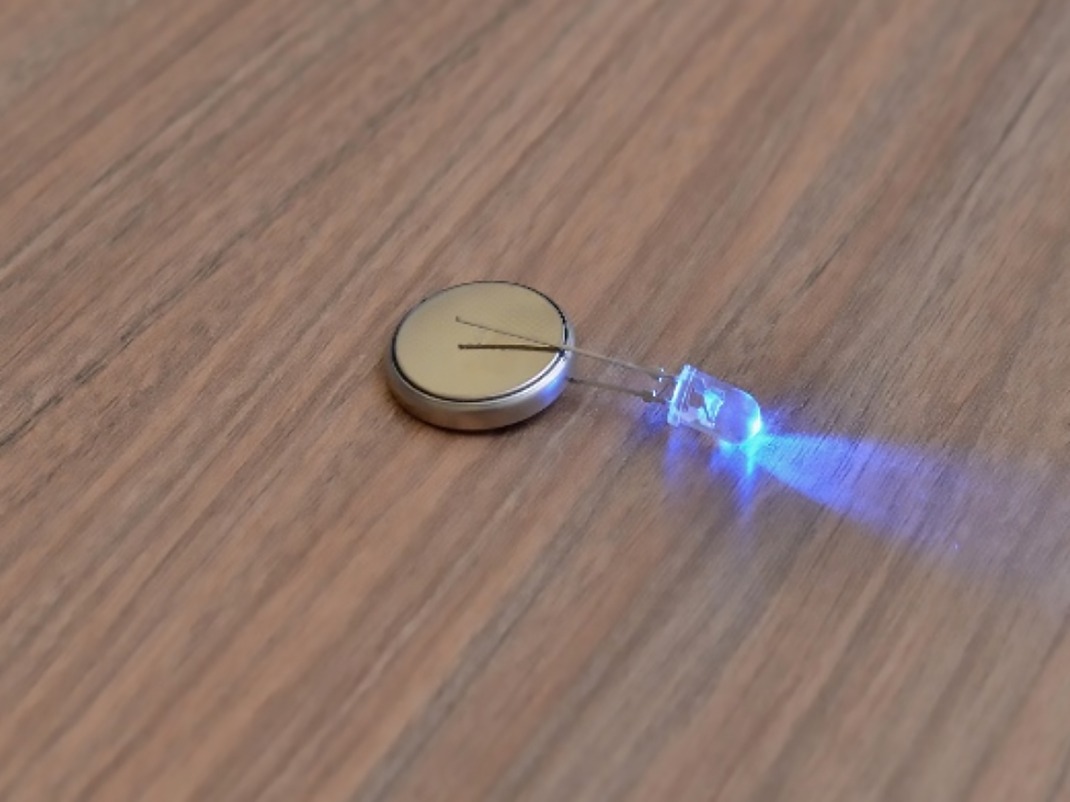
The LED light is turned on by putting the legs on each side of the battery. Determine the polarity of your LED to ensure it is properly connected in the circuit (the longer ‘leg’ is the positive end and needs to be on the positive side of the battery).
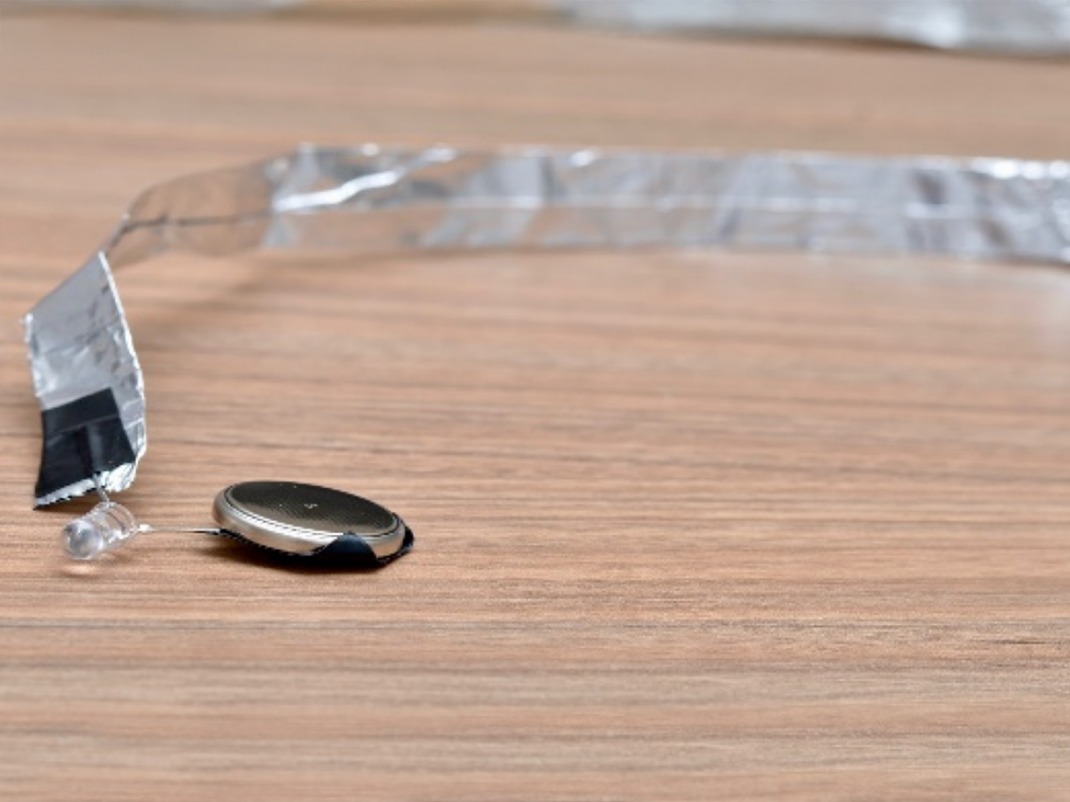
The aluminum conductor is connected to one leg of the LED, the other leg is attached to the proper side of the battery.
The other conductor is connected to the same side of the battery as the LED leg.
The battery with attached conductors is affixed behind the game. The light should poke through a hole to be visible from the front of the game.
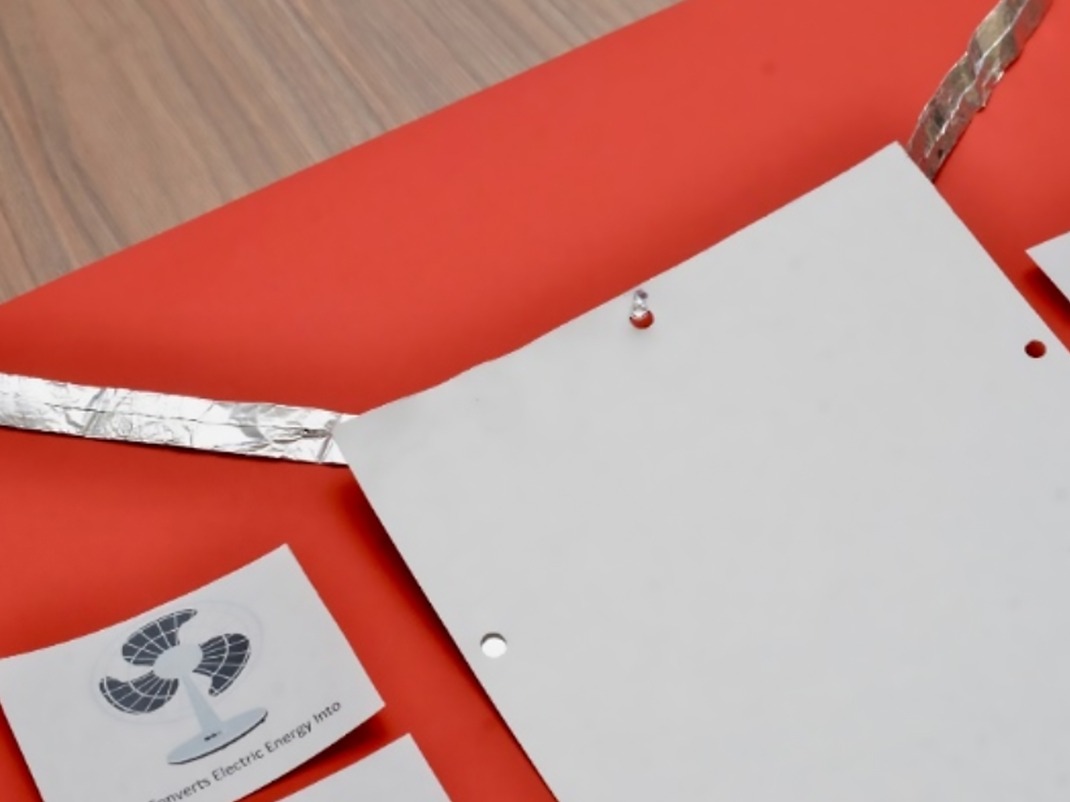
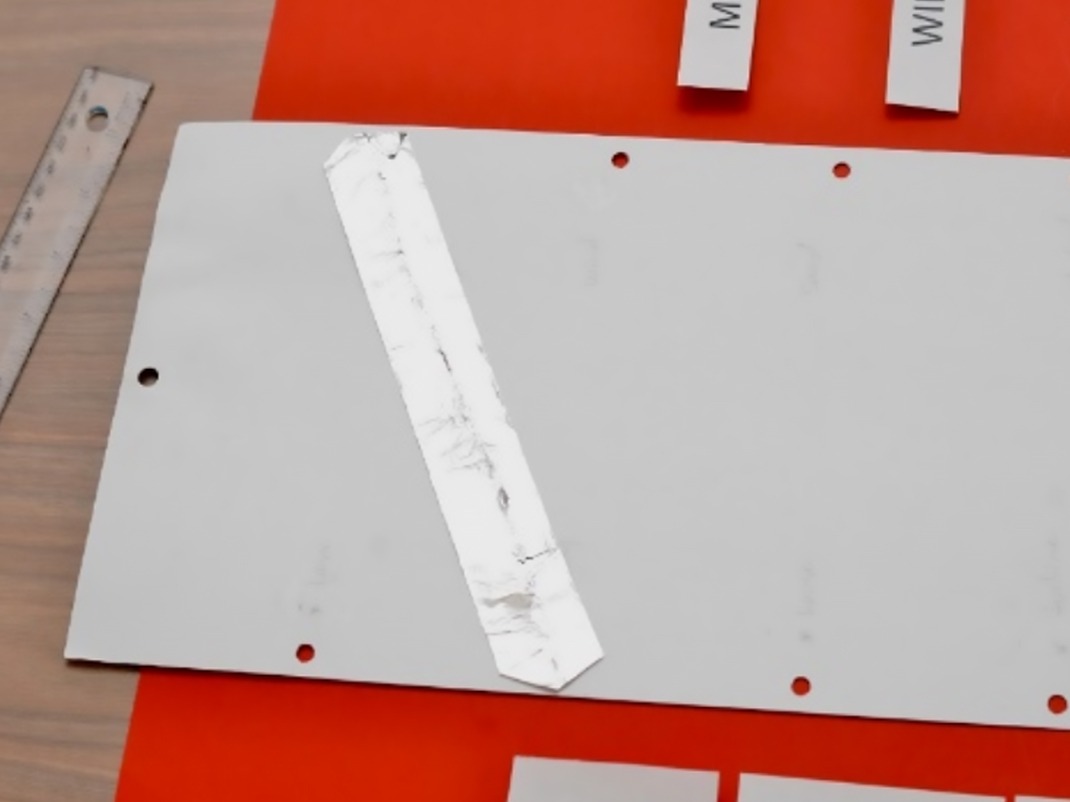
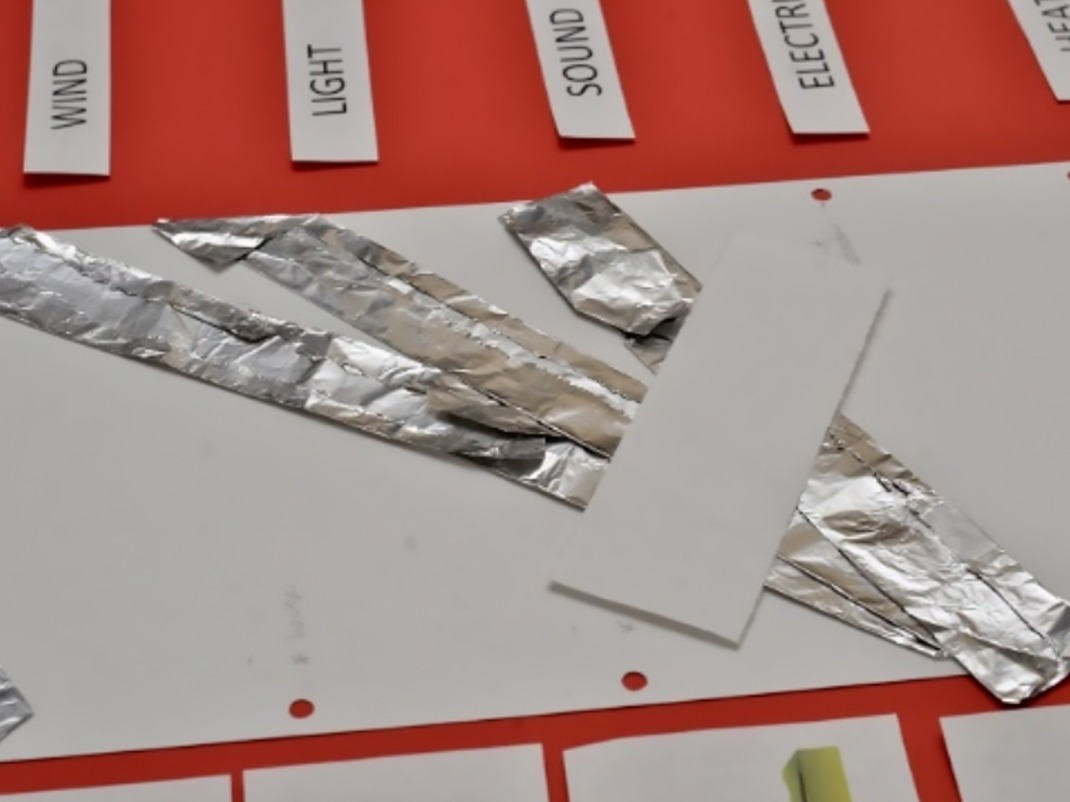
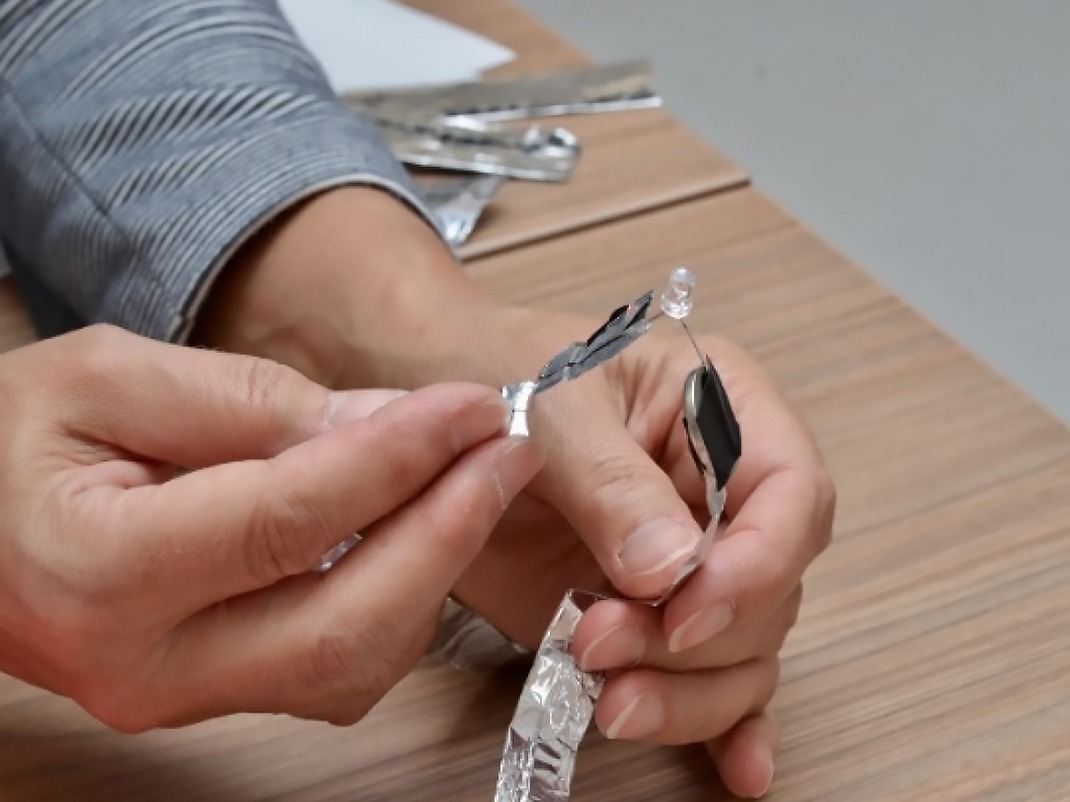
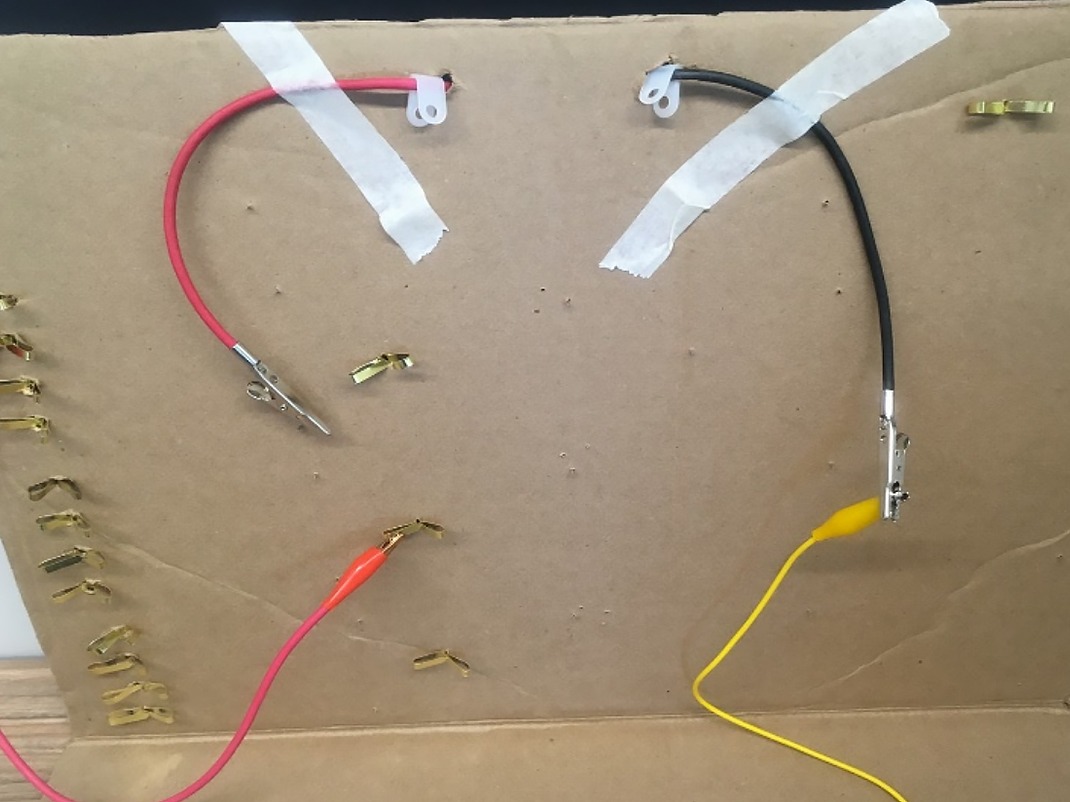
The conductors connect the correct answers behind the game. Wires can overlap if they are going to the same answer. If wires have to cross and are going to different answers, they must be insulated from one another. In this case, a piece of paper is used to separate the wires.
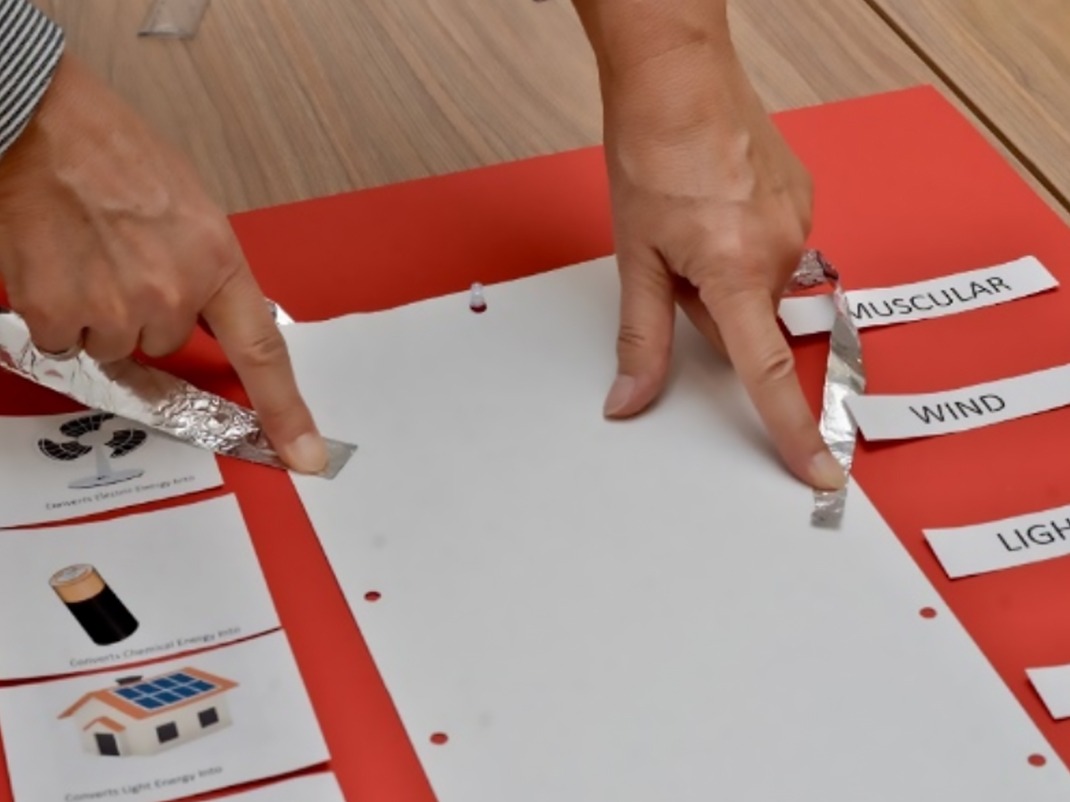
To play the game, one conductor is placed on the question and the other is placed on the answer. If the answer is correct, the circuit will be completed and the light will turn on.
Electrical wires can be used as conductors and provide an excellent result. In order to provide a less expensive example we have used aluminum foil as the conductors, an LED light as the load, and a single-cell button battery as the power source.
The attachment points can be created using holes punched in the face of the game, with the aluminum taped to the back, push pins, brads, or even paper clips.
Our testing showed us that the aluminum ‘wires’ held by the participant worked better when they were formed into pointy ends like a pencil, which was then touched to the answer (rather than simply holding the flat aluminum foil to the cutout).
A sample game using an incandescent light bulb (rather than an LED), and wires and brads rather than aluminum foil.
Printable PDF
Will these circuits work? (PDF, 236 KB)
You may also be interested in

Energy
Explore energy with your students in this engaging lesson plan! From the Sun’s power to energy use on farms and at home, students will conduct experiments, create art, and investigate how energy changes form, making it a fun and interactive way to learn about sustainability and conservation.

Earth in focus
Explore how Earth observation has evolved from the first space photos to advanced satellite technology with this engaging lesson plan! Teach students about remote sensing, climate monitoring, and the role of satellites in understanding our planet.

Climate change adaptations
- Grade 7 – Grade 12
- Secondary cycle 1 – Secondary cycle 2
Students will explore climate change adaptation and mitigation strategies through a variety of activities, including taking on the role of exhibition designer!