Apprentice chef: Sprouting experiments
Share :
Each experiment comes with a recipe for a tasty, nutritious dish that you can enjoy with your family and friends. The secrets of cooking are yours to discover, apprentice chef!
At the heart of a fruit – Propagating plants from seeds
Cloning – Vegetative propagation
Printable PDFs
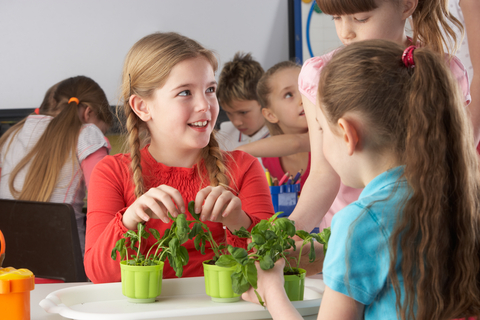
“Eat your carrots! Finish off those potatoes!” You’ve no doubt been given similar orders. But why do grown-ups insist on young people eating vegetables?
Vegetables and fruit provide vitamins, minerals and fibre that are essential to good health. Some vegetables and fruit help our bodies metabolize (or process) nutrients, while others make our bones stronger. Many vitamins and minerals help produce the red cells that carry oxygen in our blood, or help our immune system fight illness. So we do need to eat vegetables and fruit at every meal.
Before eating them, it’s important to wash vegetables and fruit and, in some cases, to peel them, cut off ends or roots and take out seeds in the form of pips or pits. What do you do with these leftovers? Instead of putting them in the compost bin, why not use them to grow new plants? Carry out the experiments below to learn how plants propagate, then use up the leftover vegetables and fruit in the recipes that follow. Who knows: maybe you’ll discover you have a green thumb!
At the heart of a fruit: Propagating plants from seeds
Most fruits have seeds in the form of pips, or a pit, at the centre. These are the seeds from which new plants grow. In each seed, there is an embryo or “baby plant” called the germ. Seeds are the result of sexual reproduction in plants.
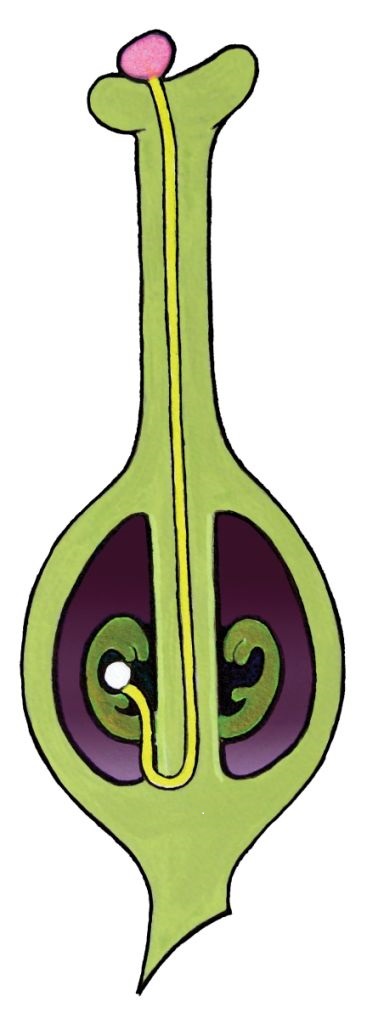
To reproduce sexually, plants must first produce flowers. Seeds then develop in the pistil of the flower. The pistil is the plant’s female organ. It’s made up of the stigma, style, ovary and ovule.
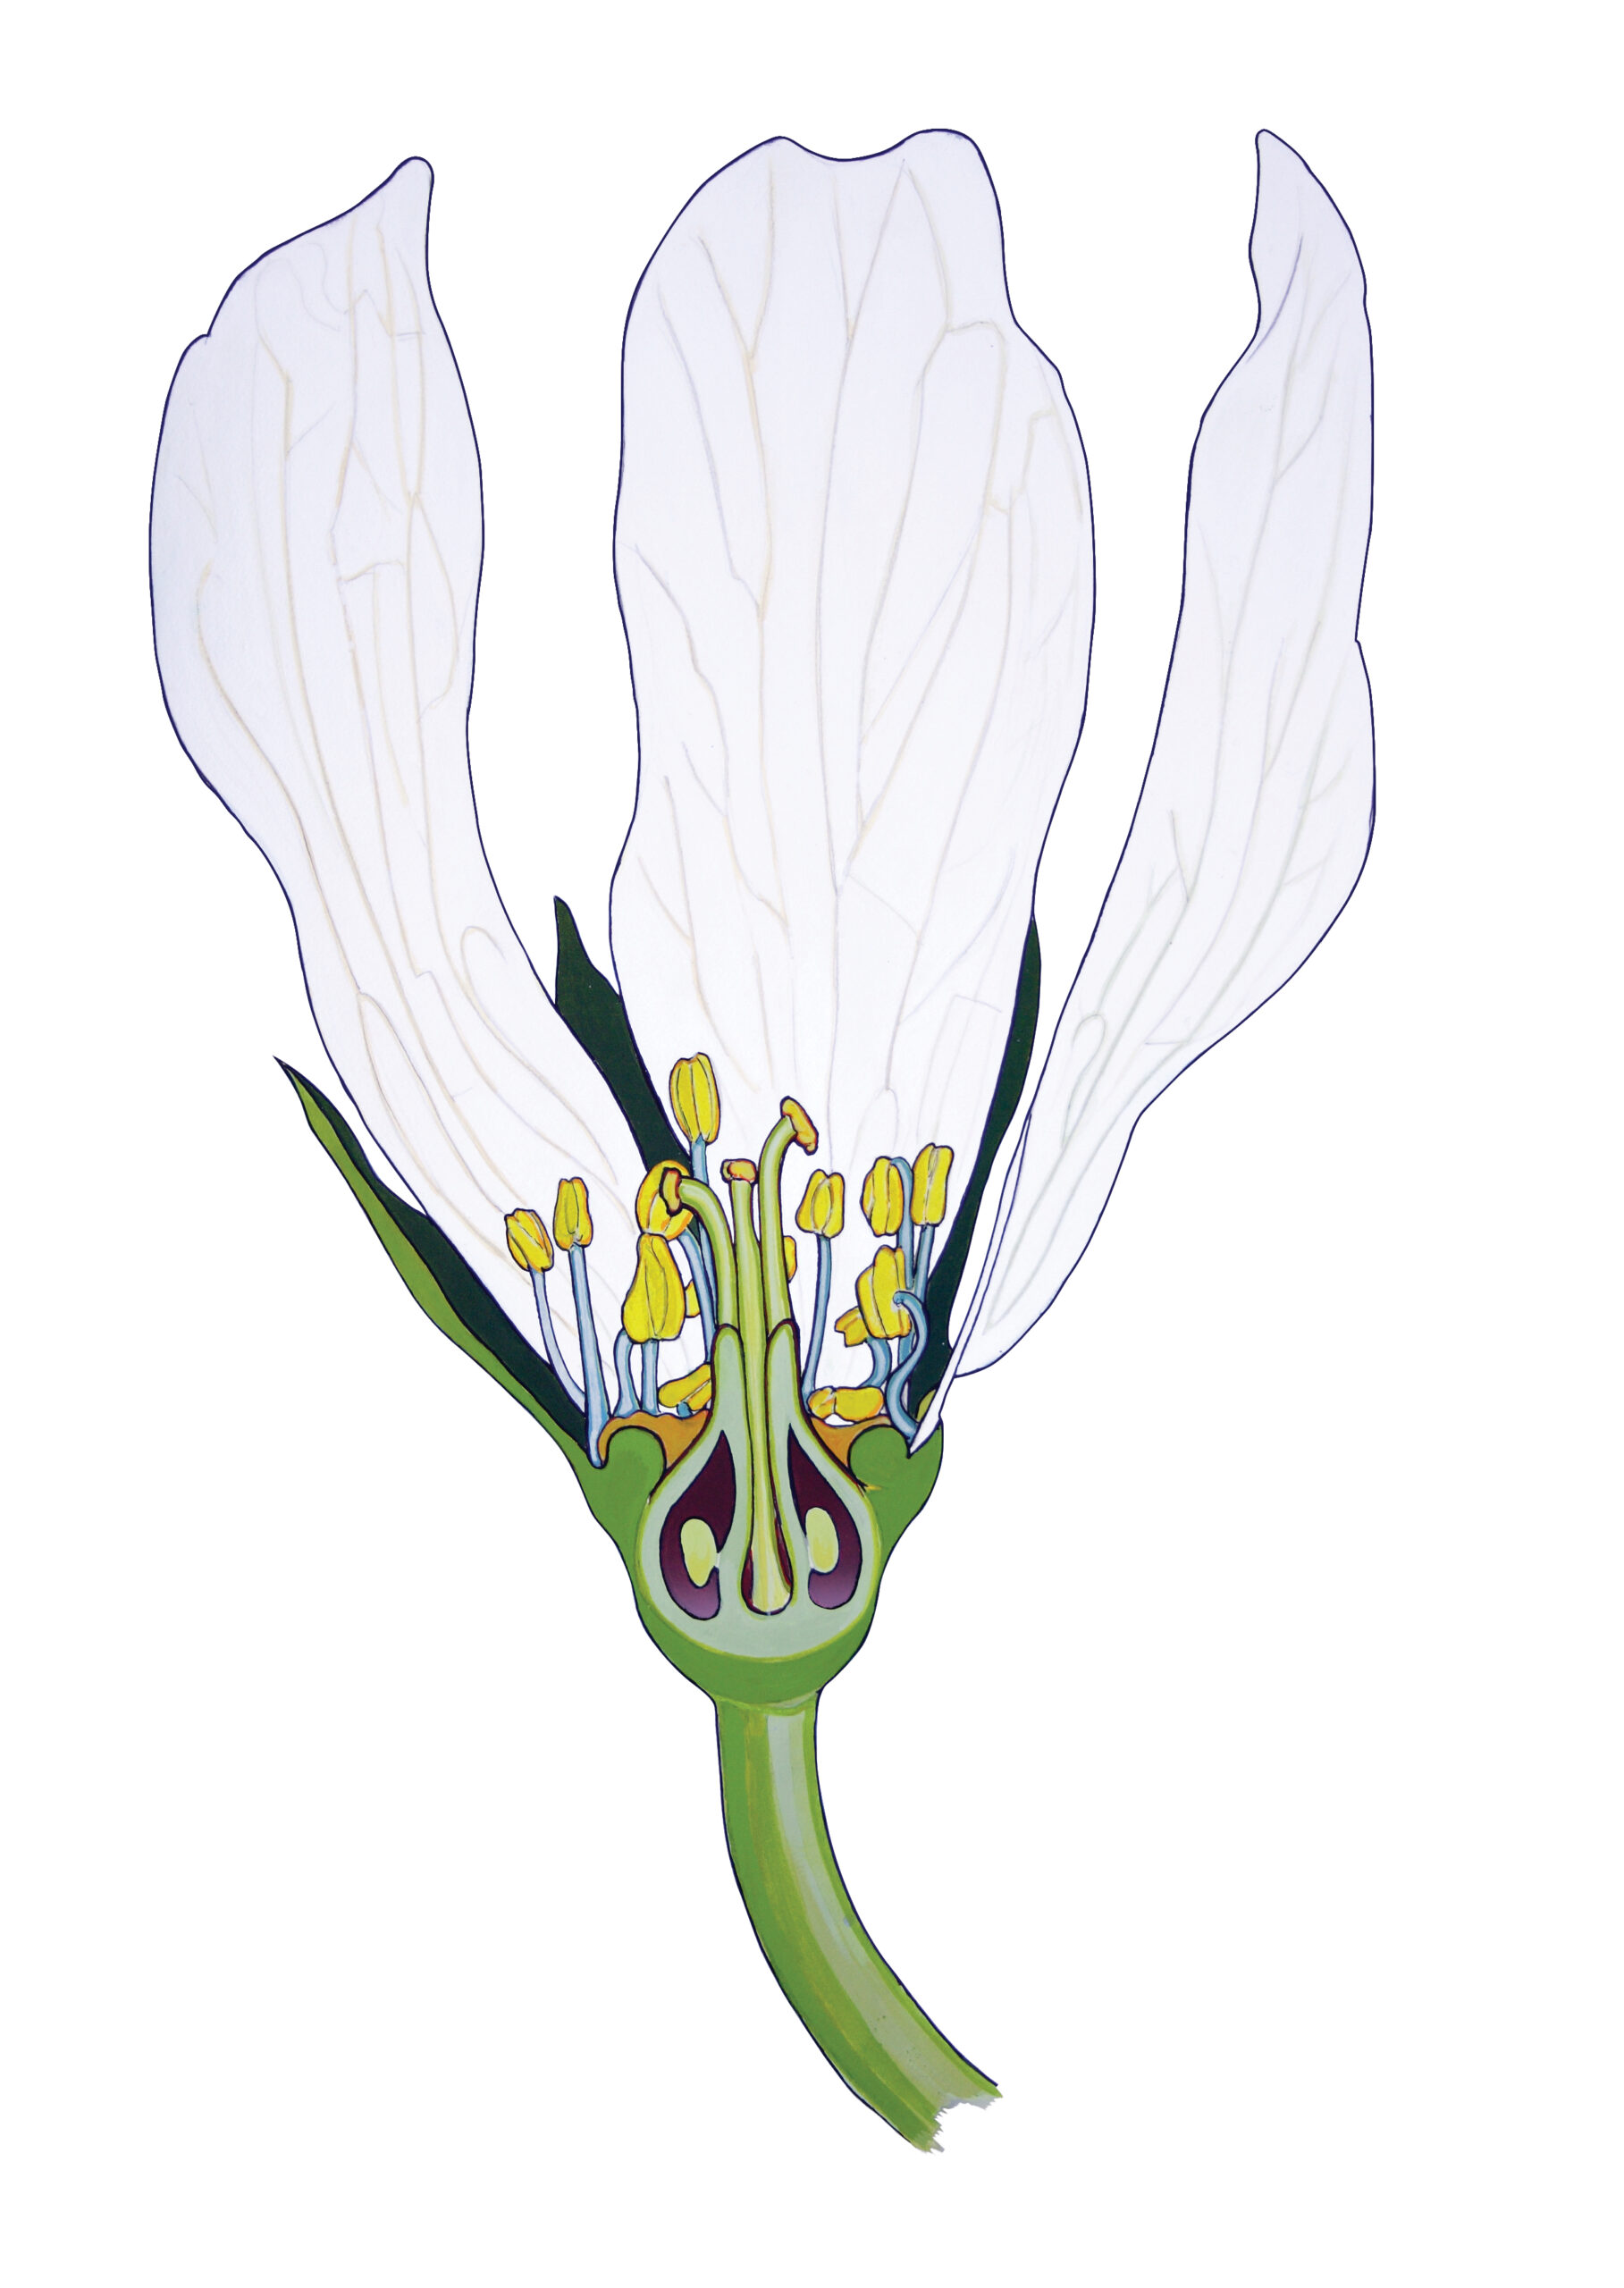
An ovule becomes a seed when it is fertilized by a grain of pollen from the stamen, or male organ, of a plant.
If the pollen grain is compatible with the flower, after landing on the stigma (at the top of the pistil), it germinates. A long tube (the pollen tube) grows inside the style towards the ovary. There, it releases the male seed. The fertilized ovule becomes a seed.
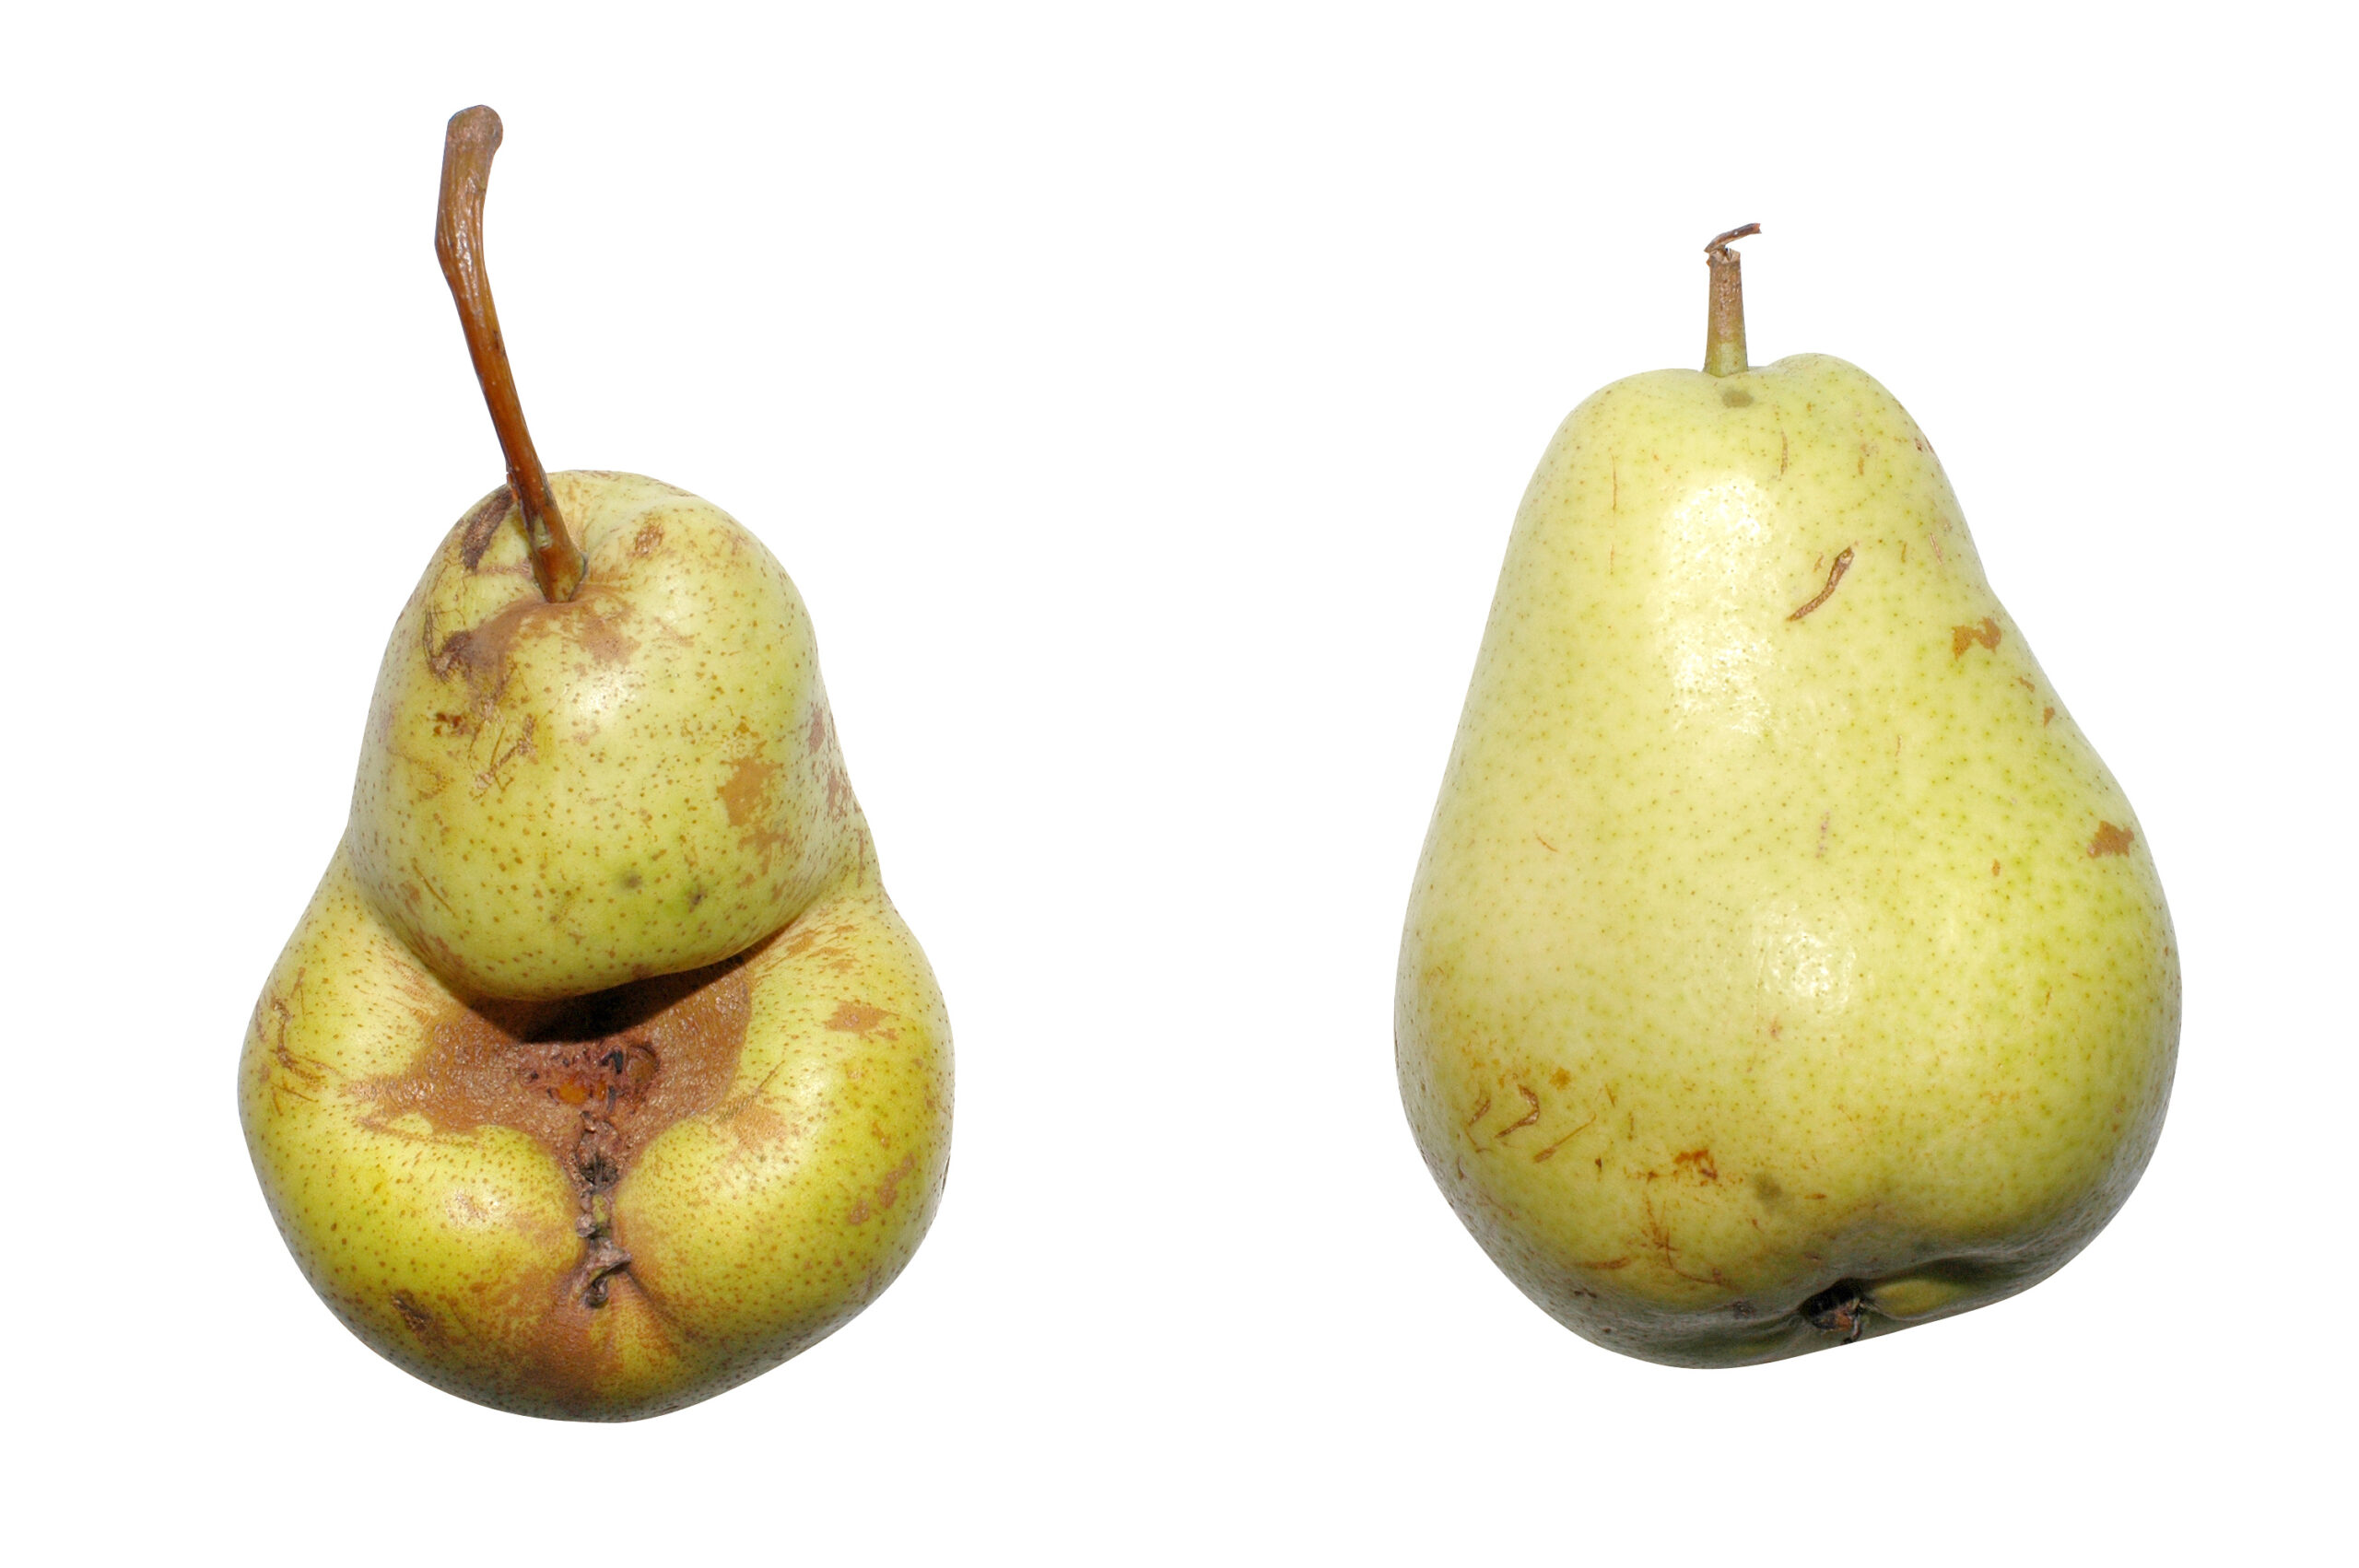
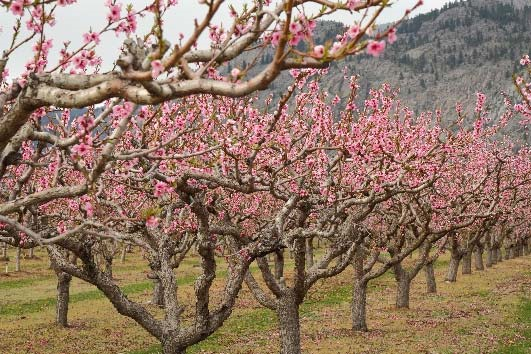
Some fruits, like peaches, have only one seed: the pit. There is only one seed because the flower has only one ovule. Other fruits, like pears, contain several seeds, or pips. This is because a pear blossom has several ovules.
One of the many ways you can produce new plants is by germinating or sprouting their seeds. With a little patience and a few tips, you can germinate the seeds of many plant varieties.
Here are some germination experiments. Now after cutting up your fruit to eat the flesh, try sprouting the seeds instead of putting them in the compost bin. Tropical fruit trees make beautiful decorative plants that you can keep outdoors in the summer and bring indoors when the weather starts to get cooler in the fall.
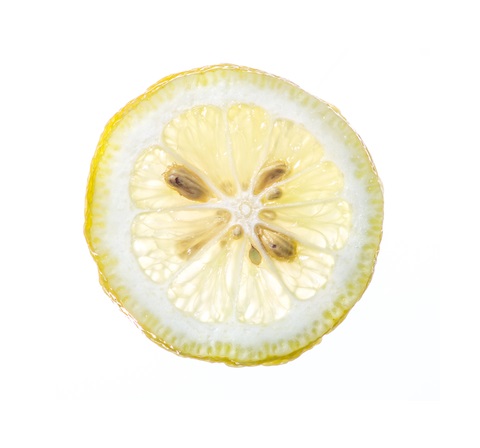
The citrus seed secret
The seeds of fruits that produce more than one seed, such as apples, grapes and citrus fruits, are sometimes called pips. Citrus fruits — oranges, limes, lemons, grapefruit, clementines and mandarins — can have a sour taste and their flesh is divided into sections. Citrus fruit seeds are very easy to germinate once you know their secret: the seed is protected by a slippery seed coat (like a fine skin). For the seed to germinate, the seed coat must first soften and disintegrate. This is why citrus seeds planted directly in the soil take a long time to germinate. But you can remove the seed coat from the seeds to speed up the process, and then watch the seeds germinate over one or two weeks, once you begin the experiment.
Experiment
In this experiment, you’ll compare the germination rate of citrus seeds with and without a seed coat.
Objective
This experiment will show you how a seed coat protects the seeds of certain plants, including citrus fruits, and that germination can be speeded up by removing the seed coat.
Materials
- 1 lemon (or other citrus fruit of your choice)
- Chopping board
- Paper towels
- Permanent marker
- Sharp knife
- Citrus juicer
- Airtight sandwich bags
- Water
Instructions
- Rinse the lemon under running tap water while rubbing by hand or scrubbing with a clean brush. Dry the lemons with a clean cloth or paper towel.
- Cut the lemon in half on the chopping board. Be careful when cutting the lemon. If necessary, ask an adult to help you.
- Using the citrus juicer, extract the juice and the seeds from the lemon. To do this, press the half lemon down on the juicer and turn it from left to right and back. Save the juice to make lemon ice cubes and frozen pops (see the recipe below).
- Take the seeds out of the juicer and wipe them with a paper towel.
- Divide the seeds into two equal groups.
- Fold a piece of paper towel in two and then in four. Lift up the corner of the paper towel and place the seeds from one group inside the pocket. Leave some space between the seeds.
- Place the paper towel in a sandwich bag. Pour enough water into the bag to moisten the paper well. With the bag opening at the bottom, hold the bag between your hands and squeeze the paper towel to remove excess water. Carefully close the bag. The water must not evaporate. Using a permanent marker, write “With Seed Coat” on this bag.
- Remove the slippery seed coat from the seeds in the other To do this, hold the seed firmly in the fingers of one hand, with the pointed end up, and use the thumb and index finger of your other hand to split the seed coat. Then peel off the seed coat like a banana, piece by piece, being very careful not to damage the seed inside.
- Fold a piece of paper towel in two and then in four. Lift up the corner of the paper towel and place the seeds from the second group, with no seed coat, inside the Leave some space between the seeds.
- Place the paper towel in a sandwich bag. Pour enough water into the bag to moisten the paper towel With the bag opening at the bottom, hold the bag between your hands and squeeze the paper towel to remove excess water. Carefully close the bag. The water must not evaporate. Using a permanent marker, write “No Seed Coat” on this bag.
- Place the bags in a dark place, at room temperature.
- Every day, open and re-close the bags to give the contents some air. Remember to re-close the bags carefully. The seeds will not germinate if the paper towel dries out completely, because they will not have enough moisture.
- After 10 days, take the paper towel out of both bags and gently open them up. What do you notice? Have any of the seeds germinated? If so, which ones? Look at the label on the bag they came from.
What happened?
A seed coat, or skin, covers the seeds of certain plants. The seed coat’s job is to protect the seed until the conditions are right for it to germinate. The seed coat prevents water from penetrating the seed. Without water, the seed cannot germinate. When there is a great deal of moisture, the seed coat softens and the seed can germinate.
Plants that produce fruits with pulp, like lemons and oranges, rely on animals to scatter their seeds. When animals eat these fruits, they also swallow the seeds. The animals then scatter the seeds in their excrement. The seed coat protects the seeds in the animals’ digestive systems.
By removing the seed coat from the seeds, you allowed the seed to absorb water and germinate sooner. Without your intervention, water would have penetrated the seed and begun the germination process only once the seed coat had disintegrated.
Suggestion
When the plantlets’ stems are about 3 cm long, plant them in a pot filled with potting soil.
- Using your index finger, make a hole in the soil.
- Place a seedlings in the hole, with the root facing down. Make sure that the tip of the sprout is above the soil.
- Gently press the soil down to cover the seed and the root. Be careful: if you press too hard, you might break off the seedling’s root or stalk.
- Do the same for each seedling. Be careful: the seedlings need room to grow. Leave at least 8 cm between them, or plant them in separate pots.
- Water the seedlings. Keep your lemon seedlings in a sunny location. Let the soil dry up before you water it again.
Please see the printable PDF at the bottom of the page: Lemon ice cubes and frozen pops.
Suggestion
Don’t have a frozen pop mould? Make moulds out of clean, empty individual yogurt containers and use wooden sticks. Place the containers filled with lemonade in the freezer. When the lemonade begins to thicken and freeze, insert the wooden sticks. To remove a frozen pop from the container, hold it under the tap and run hot water over it. Gently pull on the stick until the frozen pop slides out of the container.
Cold wake up call
Did you know that if you took the pit from a peach you’d just eaten, planted it carefully in the earth and watered it faithfully, it still wouldn’t geminate? That’s because the peach pit (seed) is dormant. It needs to go through a cold period before it can germinate. Dormancy is a safety mechanism that prevents the seed from germinating at the wrong time. If the seed were to germinate at the end of fall, when peaches have fallen to the ground, the little peach seedling would not be strong enough or have enough reserves to survive winter. Once the seed has experienced winter’s cold, its dormancy is broken. A peach pit that falls to the ground in the fall will germinate the following spring, when the timing is right.
But it is possible to break a seed’s dormancy by making it believe it’s experiencing winter, even if it’s not. This process is called vernalization. In the experiment that follows, you can fool Mother Nature and watch peach seeds germinate, right inside your refrigerator!
Experiment
In this experiment, you’ll compare the germination rate of peach pits, or seeds, with and without vernalization (exposure to cold).
Objective
This experiment will show how the seeds of certain plants, including peach trees, are protected by dormancy, which prevents them from germinating until a winter has passed, and how the dormancy of a seed can be broken by exposing it to a manufactured cold.
Materials
- 6 to 8 peaches
- Hammer
- Knife and chopping board
- Glass or cup
- 2 jars with lids
- Potting soil
Instructions
- Rinse the peaches under running tap water while rubbing gently by hand. Pat dry with a clean cloth or paper towel.
- Cut the peaches in half on the chopping board. Remove the pit from each peach. Be careful when cutting the peaches. If necessary, ask an adult to help you.
- Carefully rinse each peach pit, and then let it dry on the counter for a few days. Once dry, the outer shell will be more brittle and break more easily. Drying also allows the seed inside the pit to shrink a little so that it’s easier to get out of the shell later.
- When you’re sure each pit is dry, use the hammer to break into it so that you can gather the seed, which looks like an almond. Watch your fingers! If necessary, ask an adult to help you.
- To break open a pit, place it on a hard surface such as stone, cement or asphalt. Don’t hammer it on the countertop: it could leave a dent in the counter. And don’t strike it too hard or you might crush the seed along with the shell! Start by tapping it gently and work up to a harder blow. It’s likely some seeds will be damaged, so make sure you start out with 6 to 8 peach pits.
- Place all the seeds in the glass or cup and cover them with water. Let the seeds soak at room temperature overnight.
- Fill both the jars half full with potting soil that’s slightly moist. It should not be soaking wet: if you squeeze the soil hard in your hand, no water should come out. Place half the seeds on top of the soil in the first jar and put the lid on it (don’t bury the seeds). Place the rest of the seeds on top of the soil in the second jar and put the lid on it.
- Store the first jar in the refrigerator in a spot where it won’t freeze (the second or third shelf down is best because the cold air comes from the upper part of the refrigerator). Store the second jar at room temperature.
- After about a month, it will be easy to tell which seeds have germinated: the white roots give it away. Check the jars every week from here on.
What’s happening?
The seeds you stored in the refrigerator will have germinated. The seeds of peach, apple and pear trees and other plants adapted to a temperate climate (like Canada’s) contain germination inhibitors, whose job is to protect the seeds and make sure they germinate only in the spring. Exposure to cold for two or three months deactivates these inhibitors. In nature, this deactivation takes place over the winter. But in this case you’ve managed to fool Mother Nature: the peach seeds believe that winter’s over and spring is here! The seeds that were not exposed to cold — the ones you stored at room temperature — cannot germinate. The inhibitors in them are still active and are preventing germination.
Suggestion
If you like, you can plant the plantlets in soil. You’ll need one pot for each plantlet. Using your index finger, make a hole in the soil. Gently place a plantlet in the hole, with the root facing down and the stalk up. Cover the parts of the seed that are not stalk or root with soil. Then very gently press the soil down and around the plantlet, to keep it in place, and water it.
Now you know
Peach trees in Canada
In some regions of Canada (zone 5 and up), certain varieties of peach tree can survive the winter outdoors. You can put your home-grown tree outdoors if its seed came from a peach grown in your region. These varieties are adapted to the local climate and should be hardy enough to survive the winter where you live. Otherwise, it would be better to keep your peach tree indoors during the winter.
Please see the printable PDF at the bottom of the page: Cool peach salsa.

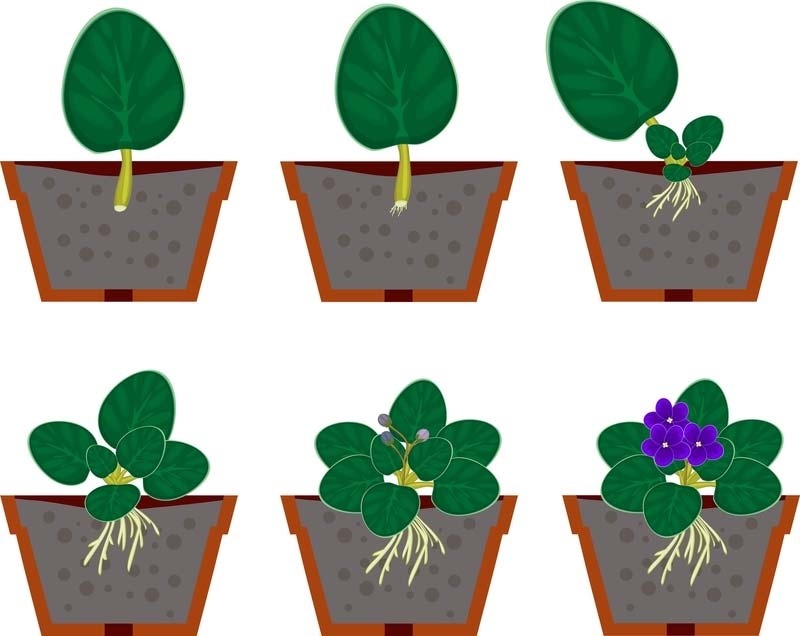
Cloning: Vegetative propagation
Vegetative propagation produces a new plant without producing seeds.
In humans, nearly all the cells in our bodies are specialized. For example, a bone cell can only produce bone tissue. It cannot turn into a muscle cell and make muscle tissue. However, in plants, some cells can change function. A cell from a stem can produce roots if conditions are right (if it’s allowed to stand in water and then placed in soil).
These versatile cells allow a plant to propagate by growing clones of itself, instead of making seeds. In vegetative propagation, the new plants are identical to the parent plant (they have the same genetic code).
Try these two vegetative propagation experiments. You can produce a magnificent ornamental plant from pineapple leftovers and grow a climbing plant from a sweet potato.
Crowned with roots
Look closely at a pineapple and you’ll see that it’s not one single fruit but, rather, a lot of small fruits packed closely together. Each small hexagon fruit comes from an individual flower.
When the pineapple plant is a couple of years old, a long stalk grows at its center. The stalk supports many flowers that will bloom one after another.
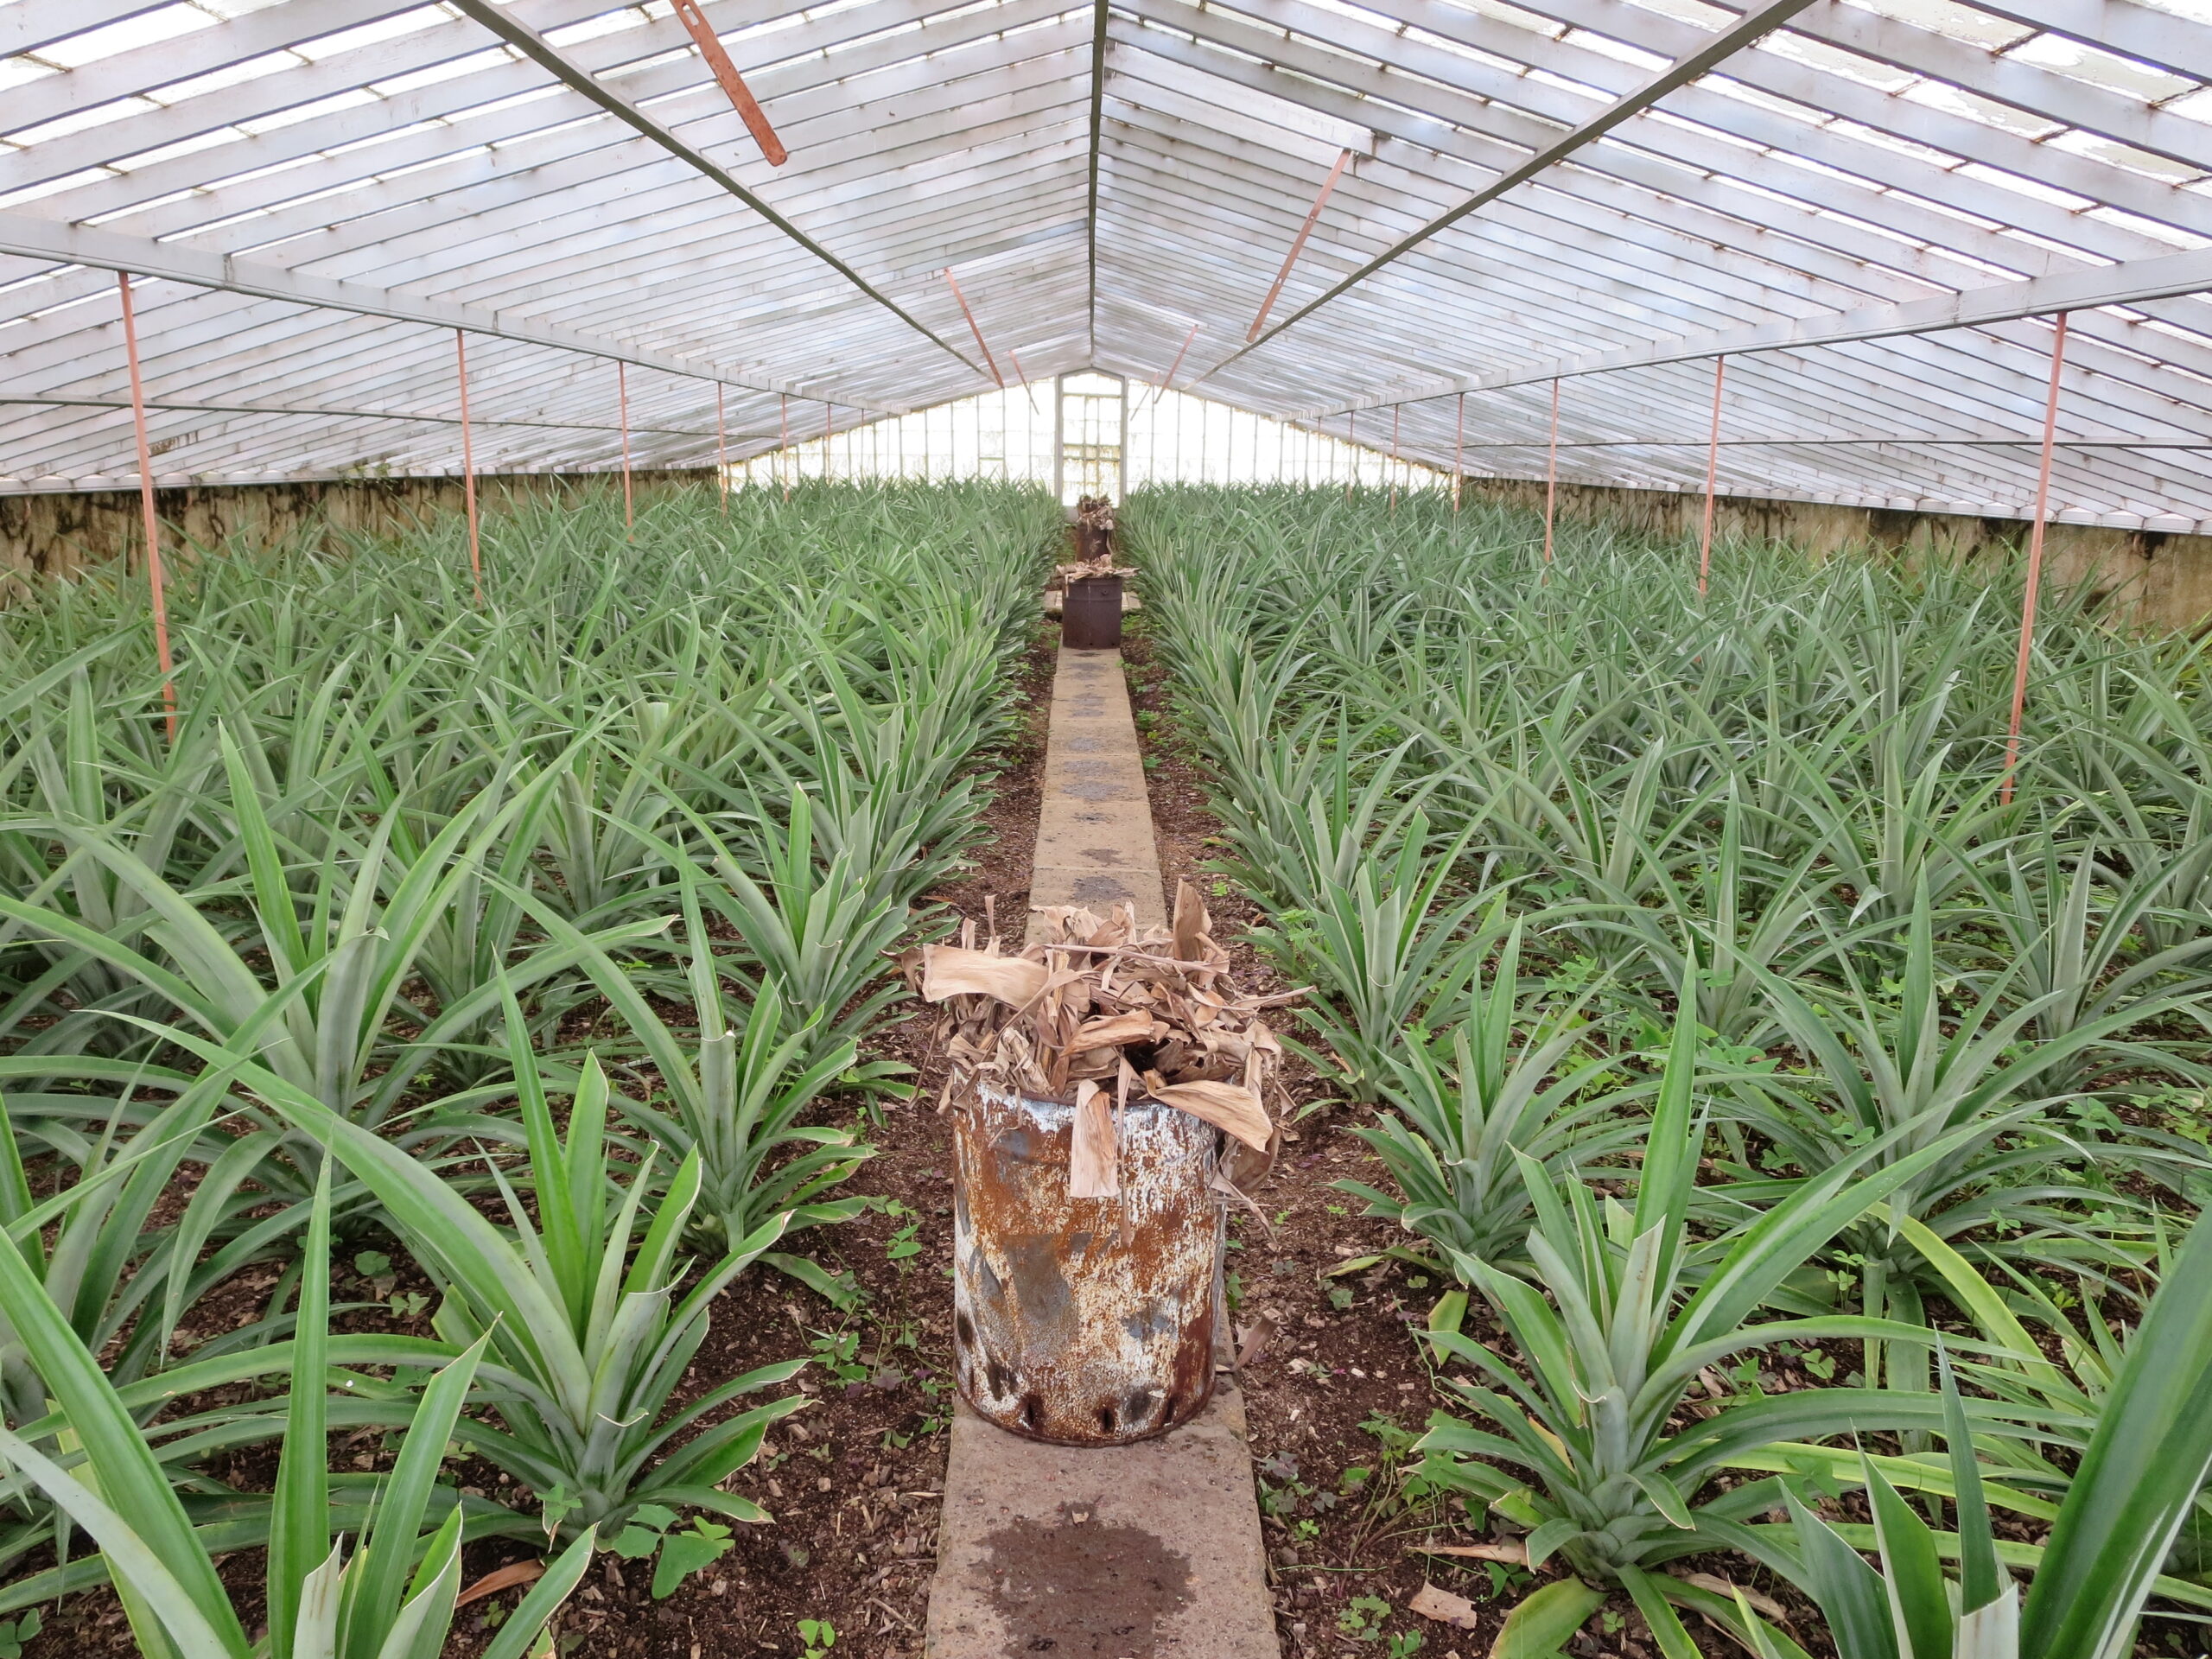
Where pineapples grow in the wild, hummingbirds pollinate (or fertilize) the flowers, which then produce seeds. But on pineapple plantations, hummingbirds are kept away because the seeds give the fruit a bad taste. Interestingly, pineapple flowers produce fruit whether or not they are fertilized, whereas other flowers such as apple blossoms produce fruit only if they are fertilized.
In addition to reproducing through seeds, pineapple plants reproduce through shoots. Shoots are stalks that can form at several locations on the plant, and eventually separate from the parent plant. Shoot reproduction is a form of vegetative propagation.
This is the method of reproduction used on pineapple plantations.
In this experiment, you’ll produce a pineapple plant from a crown, that is, the cluster of leaves on top of the pineapple fruit. All you’ll need is a little patience!

Experiment
In this experiment, you’ll use the crown of a pineapple to produce a clone of the parent plant.
Objective
This experiment will show how a new plant can grow from parts of another plant, when the conditions are right.
Materials
- 1 pineapple (ideally organically grown, although this is not essential)
- Pot (at least 20 cm wide)
- Potting soil


Instructions
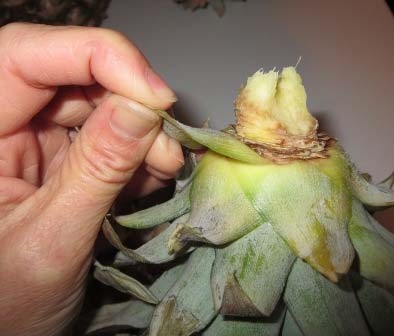
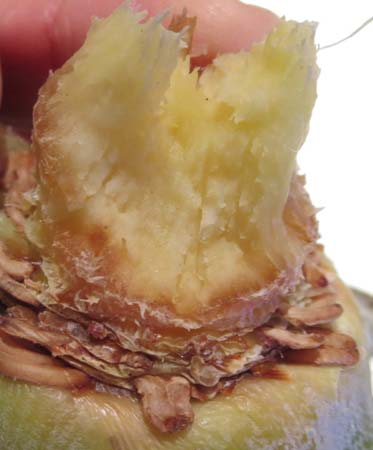
- Hold the pineapple firmly in one hand. With your other hand, twist the crown until it comes off.
- Remove any wax you find at the top of the pineapple: it can hinder root growth. Producers often dip the pineapple in wax (locking moisture inside) to keep it fresh longer.
- Pull off the small leaves at the base of the crown to expose 3 to 4 cm of the stalk.
- Sometimes you can see small roots between the leaves at the base of the crown. These roots are often dry and inactive, but under favourable conditions they start to grow again. The presence of roots increases the crown’s chances of taking root after it is planted.
- Fill the pot with potting soil. Dig a hole in the centre and place the crown in the hole. Fill in the hole around the crown with soil, packing it down to hold the crown in place. Water the crown well so that the soil is moist. Pour the water directly into the centre of the crown so that it reaches the soil where the roots are located.
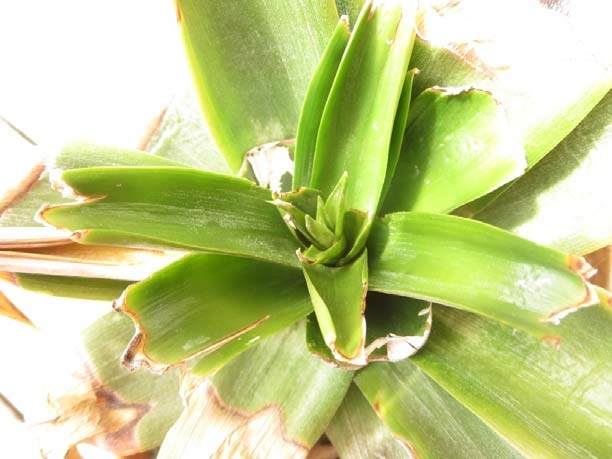
- Place the pot in the sun and keep the soil moist. Using scissors, cut away any leaves that turn yellow. The crown will dry out, but don’t be discouraged. The crown is concentrating its energy on developing roots, not leaves. After about four weeks, new leaves will appear in the centre of the crown, which means that roots have grown and the plant is thriving again.
Note: Pineapple plants are very sensitive to cold. Your plant will die if it is exposed to temperatures below 10°C.
Please see the printable PDF at the bottom of the page: Pineapple and fresh berry salad.


From potato to plant
The sweet potato plant is a perennial, which means it can live for several years. It’s a tropical plant grown mainly in hot countries. In Canada, this plant dies in the fall when the weather gets cold.
We eat the sweet potato’s tubers. Tubers are the part of a plant that grows underground and acts as a storage container for the plant’s energy. Sweet potato tubers are highly nutritious. Like carrots, they are very rich in beta-carotene, a pigment that our bodies use to synthesize vitamin A. In other countries where sweet potatoes grow, people also eat the plant’s leaves, which contain even more nutrients than spinach.
To propagate (reproduce) a sweet potato, you simply need to encourage the versatile cells from the peel to develop into root or stalk cells. This is done by soaking the sweet potato in water. In this experiment, you’ll help a sweet potato to grow roots and shoots and watch it become a beautiful edible plant.
Experiment
In this experiment, you’ll soak a sweet potato tuber to encourage the formation of root or stalk cells.
Objective
This experiment will show how a new plant can grow from a tuber, when the conditions are right.
Materials
- 1 sweet potato
- Small glass of cold water
- Toothpicks
Instructions
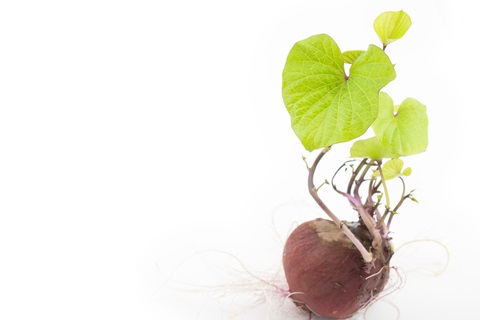
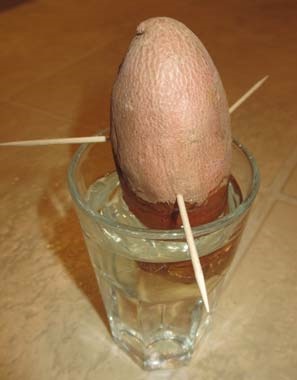
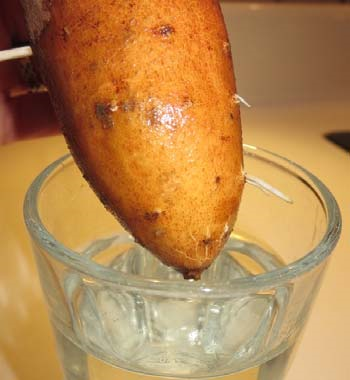
- Insert three toothpicks into the sides of the sweet potato.
- Fill the small glass with cold water. Place the sweet potato in the glass with the pointed end in the water. Now you need to wait until roots or stalks begin to form. Remember to add water as necessary, because the water in the glass gradually evaporates.
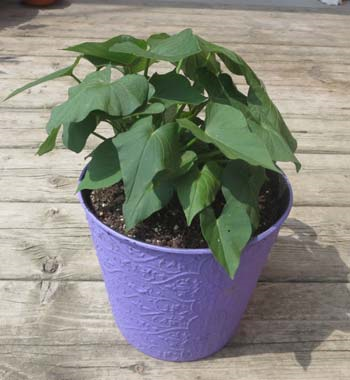
- Usually roots and stalks are visible after two You can leave the sweet potato in the glass or transplant it to a pot or the garden. If you transplant it, dig a hole in the soil and place the sweet potato in the hole with the roots down. Fill in the hole with soil, being very careful not to break off the roots or stalks. Water the tuber well.
Be careful!
Remember that while sweet potato leaves are edible and nutritious, leaves from ordinary potatoes are highly toxic. NEVER eat the leaves from ordinary potatoes: they could poison you.
Suggestion
Sweet potatoes have attractive leaves that grow on a vine. They can be green or purplish in colour. Whether you grow your sweet potato in a pot or in the garden, you can pick the leaves and add them to salads and soups. The leaves are highly nutritious. If you grow your sweet potato in the garden, you’ll be able to harvest sweet potatoes in the fall in October. Your sweet potatoes will taste better if you store them for a week before eating them. This time allows starch, a complex sugar, to change into simple sugar, which is sweeter and tastier. Store your sweet potatoes in a hot, humid place (approximately 30°C). The kitchen counter, although not perfect, will do.
Please see the printable PDF at the bottom of the page: Tasty oven fries.
Printable PDFs
- Lemon ice cubes and frozen pops (PDF, 834 KB)
- Cool peach salsa (PDF, 911 KB)
- Pineapple and fresh berry salad (PDF, 205 KB)
- Tasty oven fries (PD, 200 KB)
Be food safe and allergy aware! Visit Health Canada’s website to learn more about food safety and food allergies.
You may also be interested in

Apprentice chef: Bread science
Discover the science of bread through fun, educational activities! Learn how yeast, fermentation, and baking transform ingredients into delicious bread.
Apprentice chef: Mighty proteins
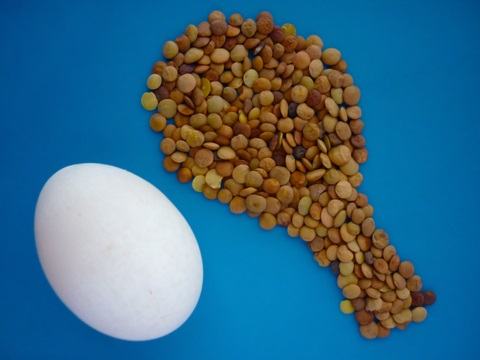
Learn about proteins and their role in your body through fun experiments with eggs and pulses. Discover how protein-rich foods help you stay strong and healthy!

Apprentice chef: The ferment wars
Your digestive system is full of “good” bacteria that aid digestion and boost health. Try a fun experiment and make a probiotic smoothie packed with live bacteria!