Apprentice chef: Mighty proteins
Share :
Each experiment comes with a recipe for a tasty, nutritious dish that you can enjoy with your family and friends. The secrets of cooking are yours to discover, apprentice chef!
Guts and gas – a gassy experiment
Printable PDFs
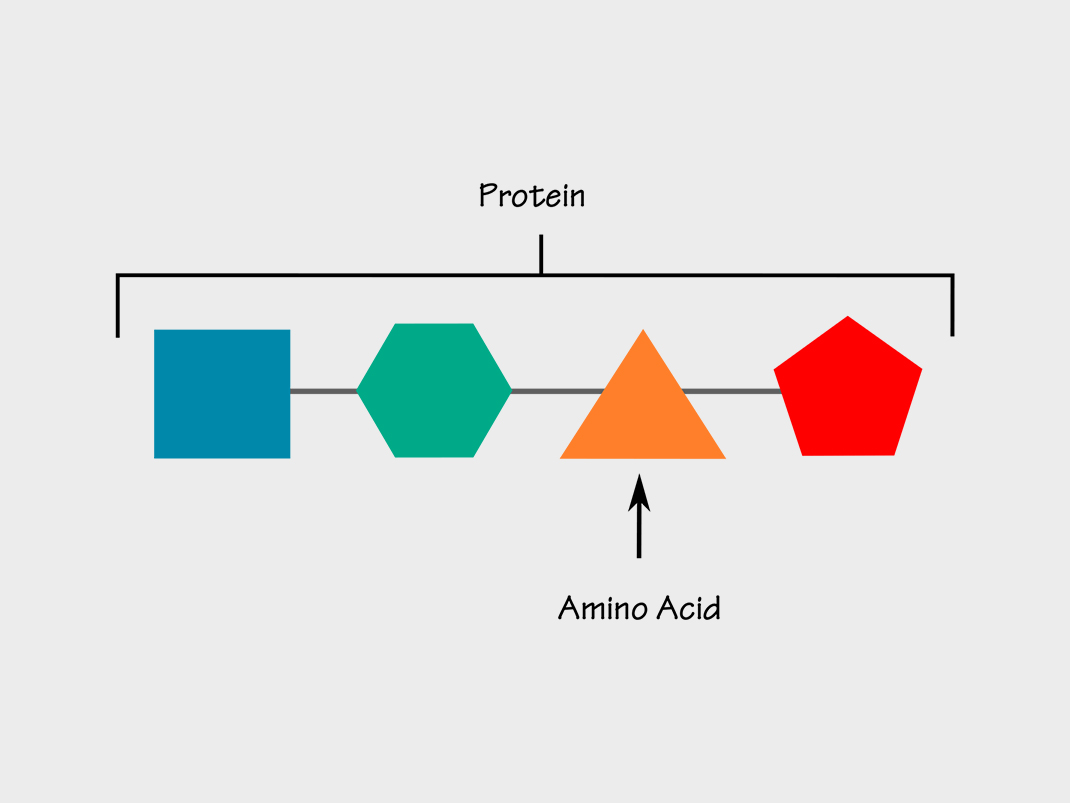
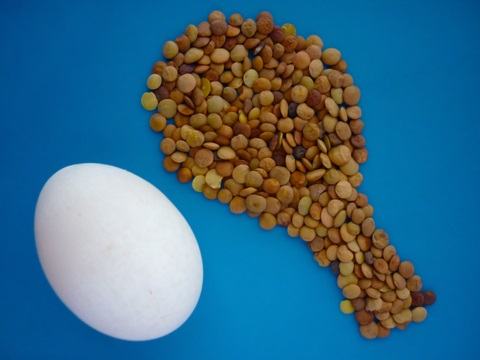
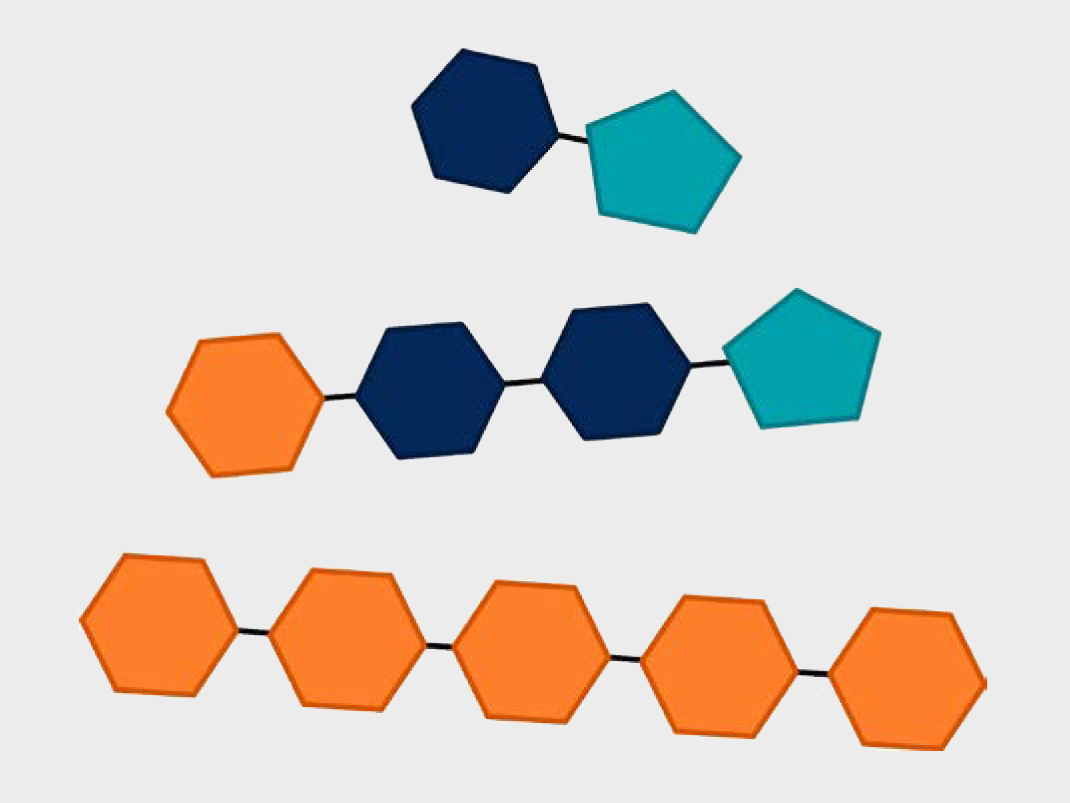
You’ve no doubt heard that, if you want to be strong and healthy, it’s important to eat protein. Meat, eggs, nuts, dairy products, and pulses such as dried beans and lentils are all protein-rich foods. But what are proteins? Proteins consist of chains of “building blocks” called amino acids.
All sorts of proteins exist in your body. Each protein has a specific function. Some proteins make up your hair, nails, muscles, skin and bones. Others, called enzymes, help you digest your food or allow your brain to communicate with the rest of your body. Within your bloodstream, some proteins carry oxygen, while others protect you from illness.
Your body breaks down the protein-rich foods you eat and uses the amino acid building blocks to make the protein you need. Your body is not able to store any extra protein you eat and use it later, as it can for sugar and fat. This means that you need to take in protein at every meal, every day.
Discover more about two protein-rich foods—eggs and pulses—as you try the following experiments.
How Egg-citing! Eggsperiments
Eggs are a nutritious, inexpensive source of protein. They contain everything a living being needs for healthy growth. In addition to protein, eggs contain fat, carbohydrates, vitamins, minerals and water.
You may already know several ways of preparing eggs: they can be hard-boiled, poached, fried or scrambled, included in a quiche or the egg whites used in meringue.
To discover more about eggs, try these simple experiments.
Allergy warning!
Do not conduct the eggsperiments if you are allergic to eggs.
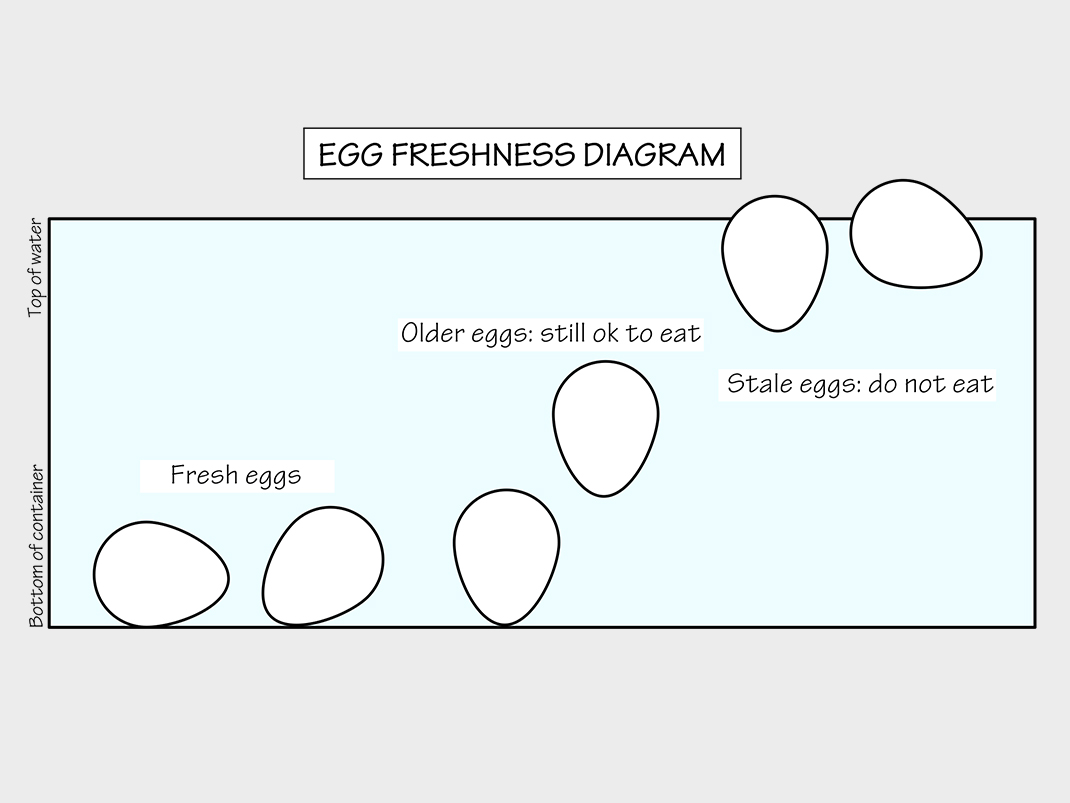
Experiment 1: Is your egg fresh?
In this experiment, you’ll compare how a fresh egg and a stale egg float in water.
Objective
This experiment will show you how to quickly determine the age of an egg.
Materials
- 1 fresh egg, in its shell
- 1 stale egg (an egg left on the counter for a week or more), in its shell
- Transparent container at least 15 cm deep
Instructions
- Using a permanent marker, write the letter F on the shell of the fresh egg and an S on the shell of the stale egg.
- Fill the transparent container with water (to a depth of approximately 10 cm).
- Place the fresh egg in the container. Write down or draw your observations. Does the egg sink or float? Does it stay horizontal or vertical?
- Remove the fresh egg and place the stale egg in the container. Write down or draw your observations, as in the previous step.
Please see the printable PDF at the bottom of the page: Observations.
Why does this happen?
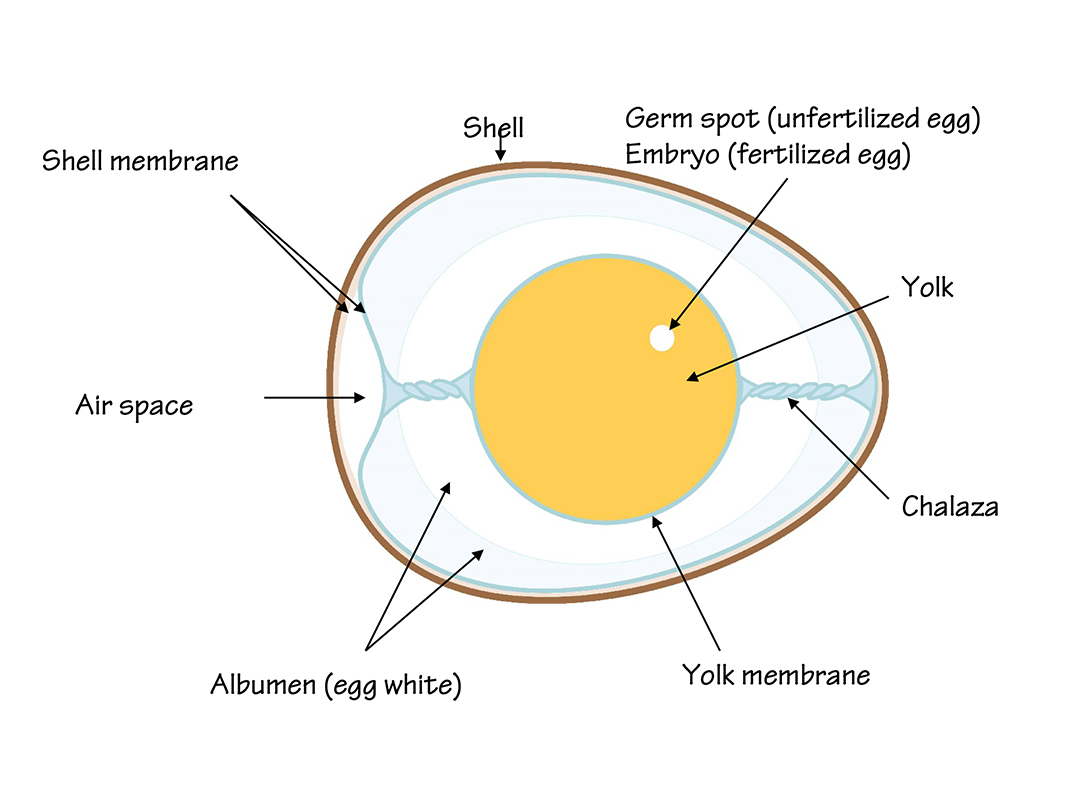
An eggshell has microscopic holes called pores. These pores allow air into and out of the egg. In a fertilized egg, the pores allow the developing chick to breathe.
When an egg is exposed to air, it dries out; some of the water in the egg evaporates through the pores. As the egg loses water, the volume of the air space (located at the large end of the egg) expands. In our experiment, we saw our dried out (stale) egg float once it contained more air and less water than the fresh egg.
When older eggs are hard-boiled, they are easier to peel. Since some of the water inside has evaporated, the content has shrunk, allowing the shell membrane to come away from the albumen, or egg white, more easily. To keep them fresh, it’s important to store the eggs in their carton in the refrigerator. The carton reduces evaporation from the eggs. It also prevents the eggs from absorbing odours from other food stored in the refrigerator.
Experiment 2: Hard-boiled or uncooked egg?
Experiment
In this experiment, you’ll compare how a hard-boiled egg and an uncooked egg spin.
Objective
This experiment will show you how to tell a hard-boiled egg from an uncooked egg without breaking the shell.
Materials
- 1 hard-boiled egg, in its shell
- 1 uncooked egg, in its shell
Instructions
- Take the uncooked egg and spin it around. How does it spin?
- Spin the uncooked egg a second time. Touch it lightly with your finger to stop it and take your finger away. Does the egg keep spinning or does it stop?
- Repeat the experiment with the hard-boiled egg. How does the hard-boiled egg spin? Does it keep spinning after you touch it and take your finger away?
What did you notice?
The uncooked egg wobbled as it spun. It spun well at first, but then quickly slowed down. It kept spinning after it was touched. The hard-boiled egg spun quickly and kept spinning longer than the uncooked one. It completely stopped spinning when it was touched.
Why does this happen?
An uncooked egg spins more slowly and wobbles more because the egg yolk inside it is also moving. When it spins, its contents turn too, making the egg wobble. The uncooked egg also keeps spinning after it’s touched. Even though the shell has stopped moving, the liquid inside the egg maintains its circular trajectory. When released, the egg follows the movement of the liquid inside.
The hard-boiled egg spins faster and is more stable because its contents are solid. It doesn’t wobble because it’s well balanced and the yolk inside is not moving. Without any internal movement, the hard- boiled egg stops spinning when it’s touched.
Experiment 3: Bare-naked egg
Experiment
In this experiment, you’ll dissolve an eggshell using a weak acid.
Objective
This experiment will teach you about the parts of an egg.
Materials
- 1 uncooked egg, in its shell
- Vinegar
- Jar
Instructions
- Place the egg in the jar and cover it with vinegar. What do you notice?
- Leave the jar in the refrigerator and check the egg after a few hours. Gently rub the shell with your finger. What happens?
- Check the egg after 24 hours. Gently rub the shell again. Is it still intact? Be careful: the egg is now very fragile. Be careful when handling raw eggs; they can contain bacteria that could make you sick. Wash your hands with warm water and soap after conducting this experiment.
Please see the printable PDF at the bottom of the page: Observations table.
What did you notice?
When the vinegar was poured over the egg, small bubbles formed on the surface of the shell.
After a few hours, a pasty white foam came off the shell when rubbed. After 24 hours, the shell had disappeared. The egg was soft and the yolk was visible through the shell membrane.
Why does this happen?
Eggshells are composed mainly of calcium carbonate, the same substance that makes up chalk, seashells and coral. Calcium carbonate crumbles easily.
The eggshell starts to dissolve when it comes in contact with vinegar, which is an acid diluted in water. The acid breaks down the calcium carbonate, creating new chemicals that combine with the vinegar.
This chemical reaction is very similar to the foaming reaction that occurs when vinegar and baking soda are combined. The interaction between the eggshell and vinegar also creates a small quantity of carbon dioxide gas. This is why we see small bubbles on the surface of the shell.
After 24 hours, the shell has disintegrated completely, leaving only the flexible shell membrane around the content of the egg. This membrane keeps bacteria and other micro-organisms from entering the egg through the pores in its shell.
Experiment 4: Shrinking egg
Experiment
In this experiment, you’ll use syrup to make an egg shrink.
Objective
This experiment will show you how water can travel from one solution to another through a semi- permeable membrane.
Materials
- 1 egg, with its shell dissolved (leftover from the previous experiment)
- corn syrup
- container with lid
Instructions
- Place the naked egg in the container.
- Pour enough corn syrup into the container to completely cover the egg.
- Put the lid on the container and set it aside, at room temperature or in the refrigerator.
- Check the egg after a few hours, after 8 hours and after 24 hours.
Be careful when handling raw eggs; they can contain bacteria that could make you sick. Don’t forget to wash your hands after conducting this experiment.
Observations
What happened to the egg in the syrup? Compare the size of this egg against one the size it was at the start of the experiment.
What did you notice?
The egg shrank.
The egg yolk solidified. Its colour changed.
The syrup around the egg became thinner in consistency.
Why does this happen?
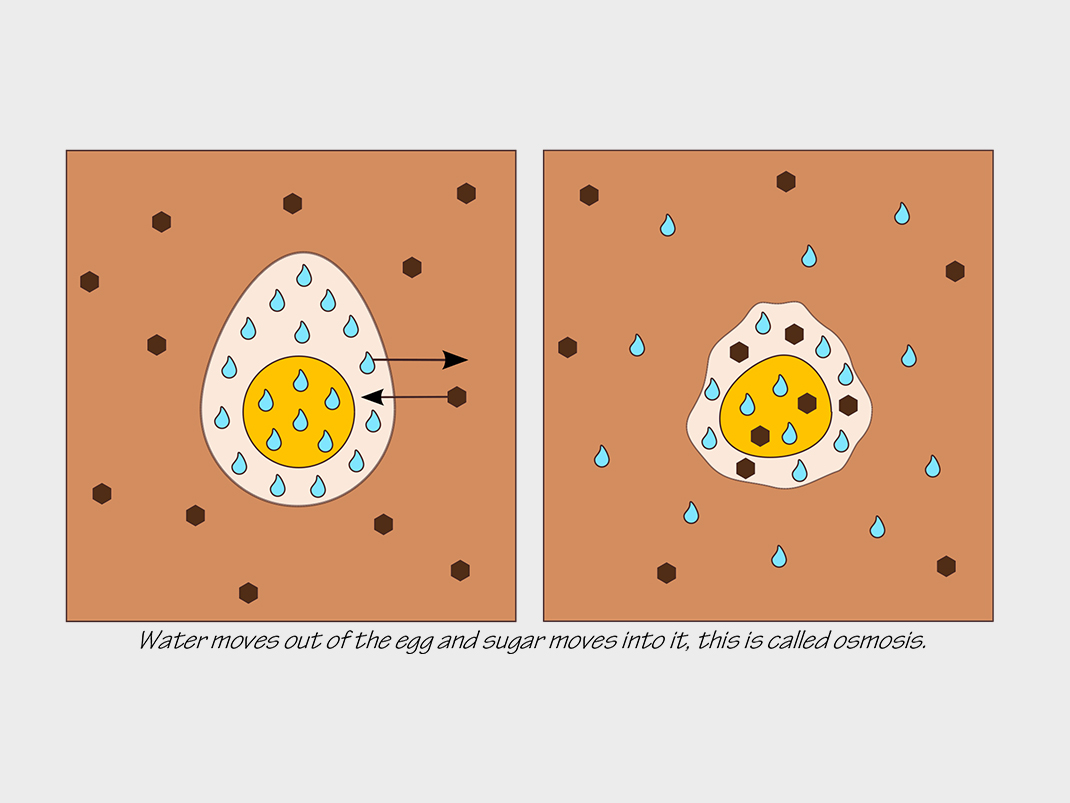
This experiment shows how water moves in and out of the egg membrane, just as it moves through the cells of all living organisms. This process is called osmosis.
Some substances, such as salt and sugar, dissolve in water to form a solution. The solution will be strong or highly concentrated if it contains a large volume of the dissolved substance. It will be weak if it contains just a little of the dissolved substance.
When the egg is placed in syrup, the shell membrane separates the albumen, or egg white, from the syrup. The membrane allows small molecules, like water, to pass through but it blocks large molecules, like protein.
Corn syrup is a strong sugar solution, whereas the albumen in the egg is a weak solution (it’s mostly water). This means that the proportion of water is much higher inside the egg than in the syrup. Through the process of osmosis, these concentrations seek to become balanced.
Water molecules move from the solution with the higher concentration of water to the solution with the lower concentration of water, in this case, the corn syrup.
The water from the albumen moves out of the egg and into the syrup through the membrane. This process continues until the concentrations of the dissolved substance (sugar) in the two solutions — inside and outside the egg — are practically the same. This is why the egg shrinks (it contains less water) and why the syrup around the egg becomes thinner (the ratio of water to dissolved sugar in the syrup has increased).
Now you know
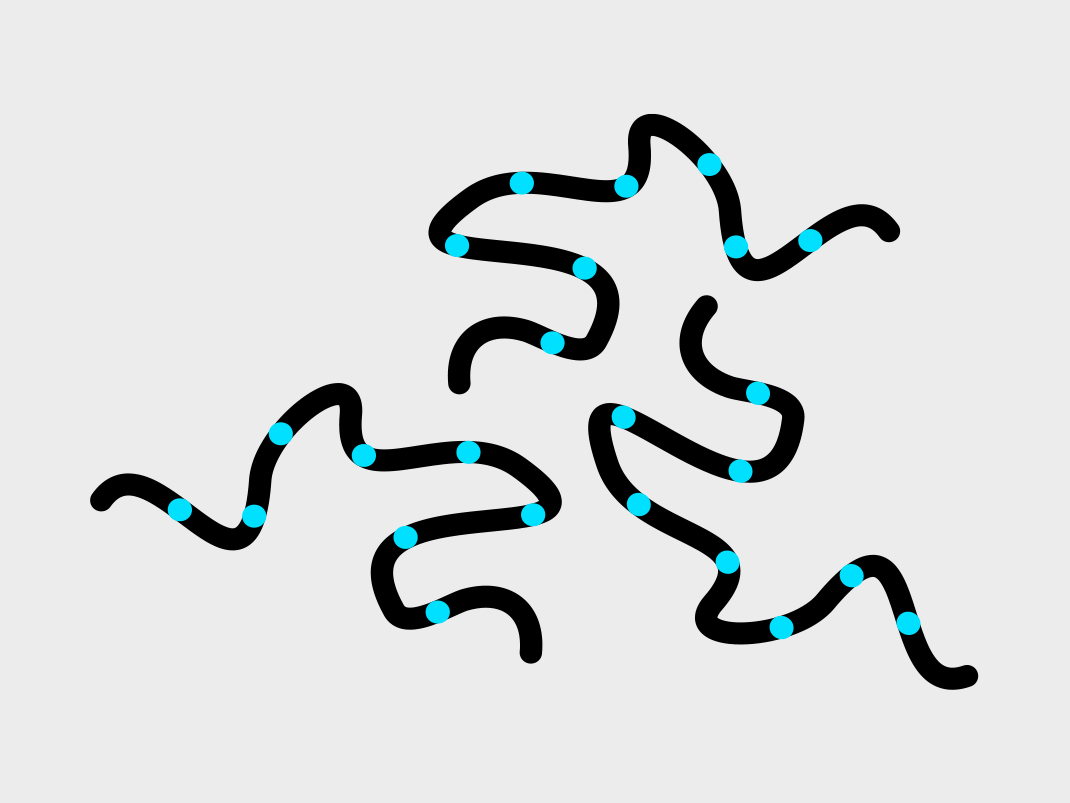
What happens when an egg is cooked? In an uncooked egg, the albumin‒the type of protein in the albumen‒is folded into a spherical shape. Small links between sections of the amino acid chain keep the protein globules curled together. The globules float individually in the water of the egg white but when heated, they start to move around. The agitation breaks the links between the amino acids and the protein unfolds.
The unfolded protein globules then become enmeshed and form new links with other nearby protein. They are a bit like small balls of wool that unroll and then get tangled up.
As this happens, the transparent albumen becomes white and firm. This is a permanent change: it can’t be reversed. An egg that’s cooked for too long becomes rubbery because too many links have been formed between the newly unfolded protein globules.


Please see the printable PDFs at the bottom of the page: Hard-boiled egg sandwich filling and Mini-frittatas with ham and cheese.
Guts and gas: A gassy experiment
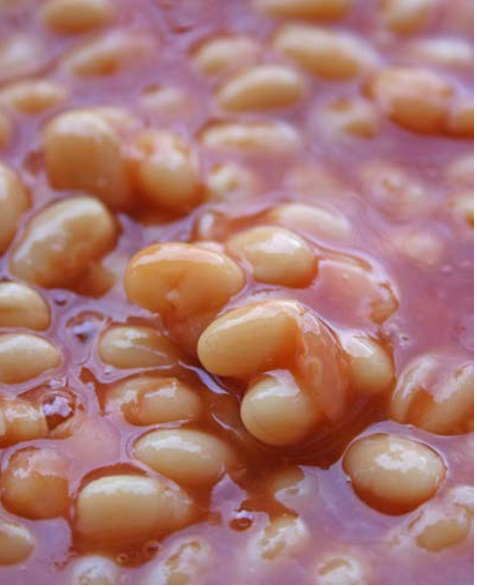
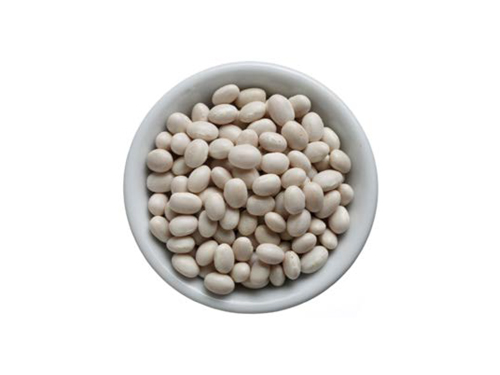
Have you ever eaten baked beans? What about hummus, dal made from lentils or pea soup? Dried beans and peas, lentils and chickpeas are called pulses. Pulses are the dried seeds of plants that belong to the legume family. They develop in rows inside long pods. They contain lots of protein, along with many sugars that our bodies cannot easily digest.
If you’ve eaten pulses, you probably know the consequences! Like a high-octane fuel that produces smelly emissions, pulses, while very nutritious, can lead to gas in the intestine. Gas happens when we take in lots of sugars and the bacteria in our gut have to work at breaking them down.
Try this funny experiment to learn whether eating pulses increases the amount of gas your body produces.
Experiment
In this experiment, you’ll record the number of times you produce gas (or fart) before and after eating pulses like beans.
Observations
This experiment will determine whether you pass more gas when you eat pulses.
Instructions
- Tear out the Fart Log sheet (found on page 5) and then fold it in half, along the horizontal dotted line in the centre of the page. Now fold the sheet in three, along the vertical dotted lines, to make a pamphlet.
- This experiment takes three days. On Day 1, do not eat any pulses. On Day 2 and Day 3, eat at least
- 125 ml (½ cup) of beans or other pulses, at approximately the same time. You can also eat hummus, bean chips or any other food made with pulses.
- Keep the pamphlet with you and fill it in each day. On the blank side, write down everything you eat and drink during the day. On the printed side, draw a symbol in the cloud each time you fart, from when you get up until the time you go to bed. You can create a special symbol to indicate smelly farts, or you can use different symbols to represent different kinds of farts (silent, loud, smelly, and odourless). Remember that a number of foods can cause flatulence (intestinal gas): vegetables in the cabbage family, refined sugars, fried foods and, for some people, dairy products.
- You can extend the experiment and record your farts for a week (or even longer!) to obtain more reliable data. You can repeat the experiment eating beans you have sprouted before cooking, to see whether this process actually reduces the amount of gas the bacteria in your gut produces. For sprouting and cooking the beans, follow the Preparing Dried Beans instructions below.
Please see the printable PDFs at the bottom of the page:
Now you know
Why do pulses produce gas?
Pulses contain sugars known as complex sugars. These sugars are too large for your body to absorb.
Everything you eat goes through your digestive system. It’s where food is broken down and absorbed by your body. Complex sugars remain intact until they reach the colon (or large intestine). In this part of the intestine, billions of bacteria (good bugs) are just waiting for their meal of undigested complex sugars.
These bacteria take over from your digestive system. When they consume complex sugars, they release waste in the form of carbon dioxide gas and methane gas. This process is a type of fermentation, like the reaction that yeast produces in bread dough!
Because we cannot reabsorb the gas these bacteria produce, it accumulates in our intestines. But eventually the gas has to escape: it takes the nearest exit, in the form of a fart!
Learn more about complex sugars and enzymes in the Now you know section below the next experiment.
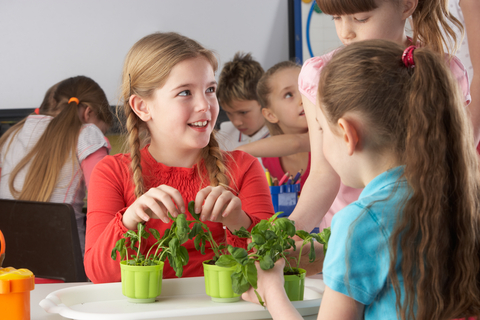
Surprising pantry: Germination experiment
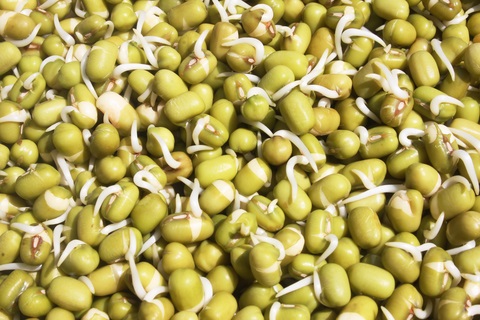
By reducing the sugar content in pulses, we also reduce the amount of gas our intestinal bacteria produce. It’s easy to do: we simply sprout (or germinate) the dried seeds before cooking them.
In this experiment, you’ll find out about the stages of transformation from a seed to a plant. This will help you understand how sprouting helps reduce flatulence caused by pulses. Maybe then you’ll dare to eat pulses every day!
Experiment
In this experiment, you’ll sprout your own pulses, observing changes in the seeds over a week.
Objective
This experiment will show you how a young plant uses sugar stored in the seed’s cotyledons to sprout.
Materials
- 3 dried seeds from pulses such as black beans, Lima beans, pinto beans, mungo beans, chickpeas (garbanzo beans), kidney beans, black-eyed peas, navy beans, green peas, adzuki beans or green lentils Note: For this experiment, use whole (not split) seeds; we recommend using large seeds.
- Small disposable transparent cup (approximately 250 ml)
- Paper towel or cotton batting
- Ruler
- Permanent marker
- Magnifying glass

Instructions
- Fill the cup with paper towel or cotton batting. Don’t compact the contents too much, since the seeds you add later will need some space to grow.
- Place three seeds between the side of the cup and the paper towel or cotton batting. The seeds should stay put. Be sure to separate the seeds so that they each have enough space to grow. (Follow the example in the illustration below.)
- Pour enough water into the cup to moisten the paper towel or cotton batting. Be careful: it should be moist but not dripping (if you turn the cup over, no water should run out).
- Choose one seed and, looking through the side of the cup, use the ruler to measure the seed. Under Observations below, note the length of the seed in the appropriate spot in Table 1. Using the permanent marker, draw the shape of the seed so that you can identify it the next time you measure it. This will help you see whether the seed is changing.
- Measure the seed again 6 hours and then 24 hours from the start of the experiment. Draw the shape of the seed each time you measure it.
- Twenty-four hours from the start of the experiment, take one of the other seeds out of the cup, without disturbing the seed you have been measuring. Using your fingers, gently remove the seed casing.
- What you see now are two cotyledons. These leaf-like structures contain food reserves that the baby plant, or embryo, uses to develop. The embryo is hidden inside the seed.
- There is a fine division between the cotyledons that you can use to separate them. Separate the two cotyledons in the same way that you’d open a book. Carefully observe the inner surface of the cotyledons. You should be able to see the tiny embryo on one of the cotyledons. If you have trouble finding it, use the magnifying glass. In the appropriate box in Table 2, draw what you see. Refer to the Anatomy of a Pulse diagram (on page 9) to identify the parts of the seed. Place the cotyledon with the embryo back in the cup to see if it will keep growing.
- On Day 4, repeat step 6 with another seed, to see how the embryo has developed into a plantlet. This time, remove both cotyledons and place only the plantlet back into the cup.
- Each day, record your observations on how the sprouting seeds are progressing. In Table 1, write down the date and time, draw the seed that you measured at the start of the experiment and note the changes you see. Each day, draw the outline of the stem and root on the outside of the cup, marking the end of each line with an X. The distance between the Xs will show you how much the plantlet has grown since the last time you measured it.
- At the end of the experiment, plant the sprouted seeds in the earth: they will grow into full- size plants.

Please see the printable PDFs at the bottom of the page:
- Germination experiment observations
- Germination experiment questions
- Germination experiment answer sheet
- Anatomy of a pulse
Now you know
How does sprouting pulses help decrease flatulence?
Our small intestine can absorb simple sugars, but not complex ones. Complex sugars are too large to pass through the wall of our small intestine and into our bloodstream.

When our intestinal bacteria eat complex sugars that we haven’t digested, they produce gas. Bacteria don’t produce gas unless they have something to eat. To decrease flatulence caused when we eat pulses, we need to reduce the quantity of complex sugars in these foods.
Sprouting pulses begins to change complex sugars into simple sugars, right in the seed. When the embryo hidden inside the seed absorbs water, it sends a signal to the outer layer of the seed. This layer then releases enzymes, which are like small molecular scissors. The enzymes cut the complex sugars stored in the cotyledons into smaller pieces. These pieces are simple sugars that the embryo can absorb and use as energy to grow.
When we eat sprouted pulses, our small intestine absorbs the simple sugars that are created during sprouting. This means less for our intestinal bacteria to eat — and less flatulence!
Simple sugars, complex sugars and enzymes
All living beings need energy to survive, grow and reproduce. This energy comes from sugars, also called carbohydrates. In our food, sugars take various forms.

Imagine you want to store some glasses in a cupboard. The glasses take up less room if you stack them one on top of the other. If you want to use the glasses, you have to take down the stack.
Sugars are similar: they take up less room when they are linked to form chains. To be absorbed by the small intestine, complex sugars first have to be broken down into simple sugars.
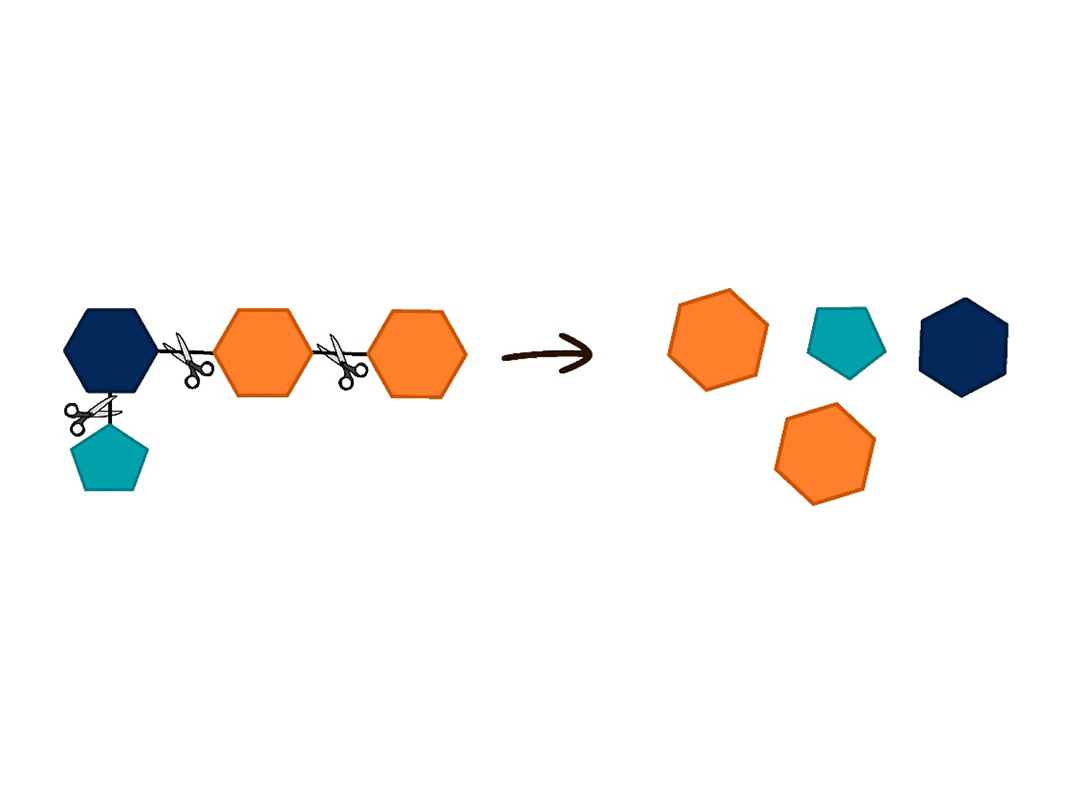
To release simple sugars, enzymes are needed. Enzymes are like small scissors made of protein and manufactured by living cells. Different enzymes break down specific molecules, a bit like keys that open only specific locks. For example, our saliva contains amylase, an enzyme that breaks down starch (complex sugar) and releases the glucose (simple sugar) it contains.
Preparing dried beans
Canned beans are handy when we want to save time preparing meals. But the taste and texture of dried beans prepared at home can’t be beat! In addition, homemade beans are more economical than canned beans, and they contain no added salt (sodium). Here’s how to prepare dried beans to use in your recipes. It’s a good idea to prepare a large quantity that you can store in small portions in the freezer for later use.
Steps in preparing dried beans
- Clean: Pour the beans (any type will work) into a large bowl and remove any foreign matter such as small pebbles.
- Soak: Add enough water to cover the beans (make sure you have approximately 5 cm of water above the beans). Let the beans soak at room temperature for at least 12 hours so that they can absorb water.
- This step is important because it allows the beans to absorb the cooking liquid evenly, without bursting or cooking only on the outside. It also greatly reduces cooking time and helps decrease flatulence caused by beans.
- Sprout: Pour everything into a strainer to drain the beans. Rinse the beans under the tap. After rinsing the beans, place a bowl or a cookie sheet under the strainer to catch any dripping water. Place a damp towel over the beans to keep them from drying out while sprouting.
- Let the beans sprout for between 24 and 36 hours. Rinse them twice a day to keep them fresh and moist. After sprouting, small roots should be visible and should measure less than 1 cm.
- Note: This step is not essential but helps decrease flatulence by reducing the amount of complex sugars contained in the cotyledons of the pulses.
- Put in the pot: Place the beans in a large pot. For each 250 ml (1 cup) of beans, add 750 ml (3 cups) of water. Add 3 ml (½ teaspoon) of salt to the cooking water.
- Note: Add a few cloves of garlic, some bay leaves and a quartered onion to the contents of the pot to give the beans added flavour during cooking. Remove these ingredients after cooking. These ingredients can also decrease flatulence caused by beans.
- Cook: Cook the beans, covered to reduce water loss, over medium heat. Stir the beans regularly to prevent them from sticking to the bottom of the pot. If the beans become exposed to the air because the water has evaporated, add some hot water.
- The beans should cook for between 45 minutes and 2 hours, depending on how large they are, how much water they have absorbed, how fresh they are and the cooking water you use (for example, hard water that’s rich in minerals makes the cooking time longer). Follow any instructions on the package. The beans are ready when you can easily crush them between your fingers (but don’t try to crush a bean until it’s cooled!).
- Note: You can also cook the beans in a slow cooker for approximately 7 hours. With this method, there’s no need to stir or watch the beans, which makes the job easier.
- Enjoy: Beans are excellent served with rice, in soups and salads or blended to make a dip. Store extra portions of beans in the freezer for later use!
Please see the printable PDF at the bottom of the page: Mexican black bean dip.
Printable PDFs
- Observations (PDF, 266 MB)
- Observations table (PDF, 168 KB)
- Hard-boiled egg sandwich filling (PDF, 244 KB)
- Mini-frittatas with ham and cheese (PDF, 214 KB)
- A gassy experiment questions (PDF, 188 KB)
- A gassy experiment answer sheet (PDF, 212 KB)
- Fart log (PDF, 216 KB)
- Germination experiment observations (PDF, 362 KB)
- Germination experiment questions (PDF, 200 KB)
- Germination experiment answer sheet (PDF, 190 KB)
- Anatomy of a pulse (PDF, 410 KB)
- Mexican black bean dip (PDF, 216 KB)
Be food safe and allergy aware! Visit Health Canada’s website to learn more about food safety and food allergies.
You may also be interested in

Apprentice chef: Bread science
Discover the science of bread through fun, educational activities! Learn how yeast, fermentation, and baking transform ingredients into delicious bread.
Apprentice chef: The ferment wars
Your digestive system is full of “good” bacteria that aid digestion and boost health. Try a fun experiment and make a probiotic smoothie packed with live bacteria!
Apprentice chef: Sprouting experiments
Discover how fruits and vegetables support your health while learning to regrow plants from scraps and create delicious recipes in these fun experiments!