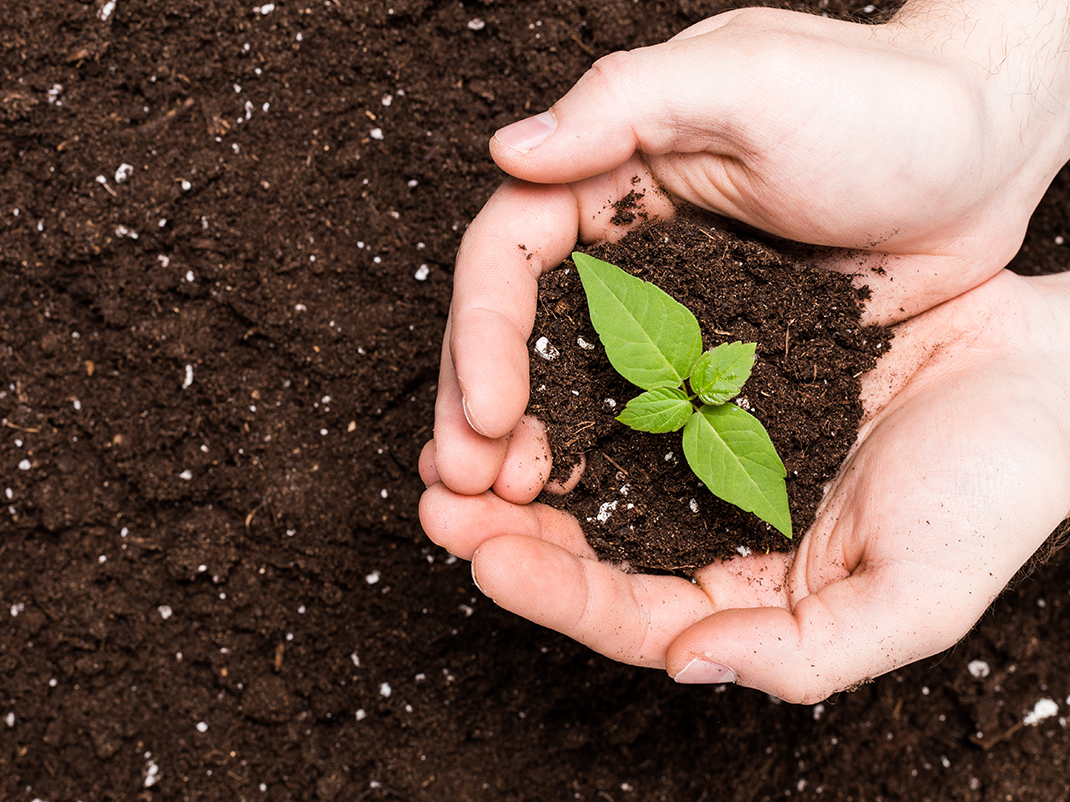
A handful of soil
Junior kindergarten to Grade 1 (Ontario)
Preschool to Elementary cycle 1 (Quebec)
The soil beneath our feet is teeming with life! Dig into some play- and inquiry-based activities with your students to learn about soil and plant life. Discover the rich life soil gives to the wonderful plant world.
Share :
Language
Curriculum links
Kindergarten
Problem Solving and Innovating
Belonging and Contributing
Grade 1
Science and Technology: STEM Skills and Connections – STEM Skills and Communication Skills
Science and Technology: Life Systems – Relating Science and Technology to Our Changing World
Science and Technology: Life Systems – Exploring and Understanding Concepts
Preschool
Cognitive Development: Thinking Skills
Cognitive Development: Strategies
Elementary cycle 1
Mathematics, Science and Technology: Science and Technology – Living Things – Matter
Mathematics, Science and Technology: Science and Technology – Living Things – Appropriate Language
Play-based learning stations
The following play-based activities offer students the opportunity to discover and investigate soil and plant life. Students find out what plants need in order to grow and stay healthy. Students practise life skills, independent and collective play skills, and boost language development, as they explore the learning stations. Young learners typically learn best through hands-on play experiences.
Before introducing some of these activities to your students, read them a book about soil, plant life or the environment. Have a short discussion about what they will be exploring in the learning stations.
Suggestions
- The Lorax by Seuss
- The Tiny Seed by Eric Carle
- Oh Say Can You Seed? by Bonnie Worth
- How Do Apples Grow? by Betsy Maestro
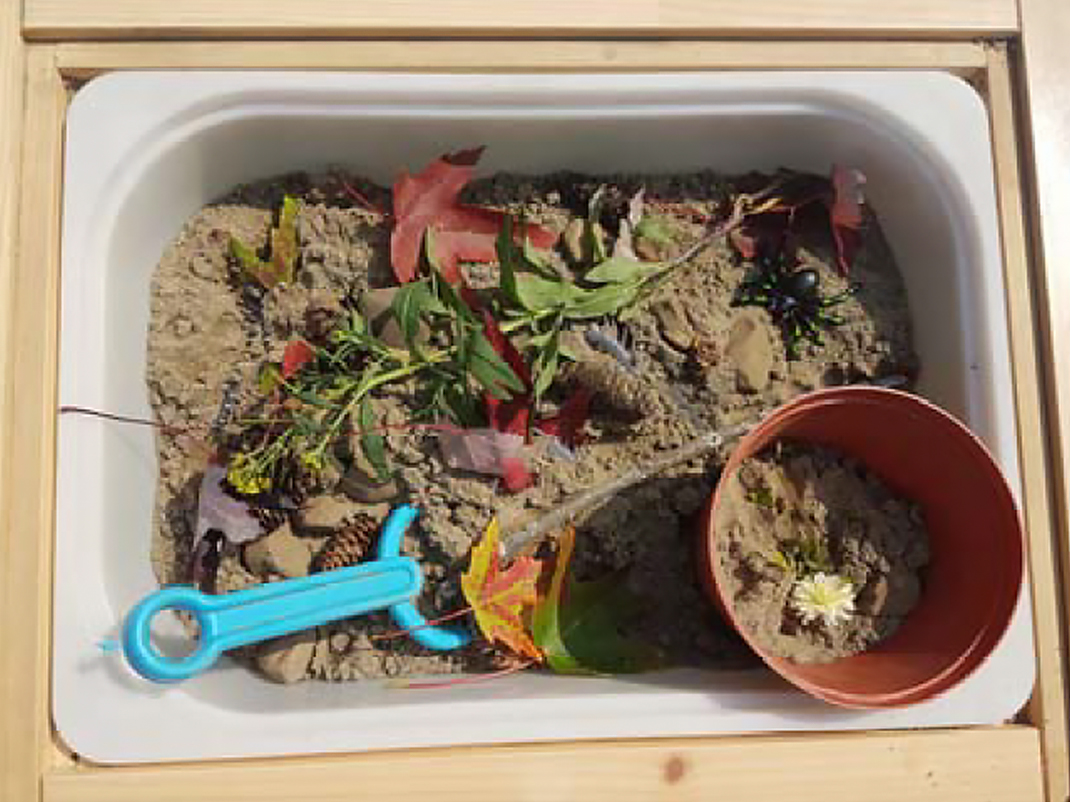
Sensory bin
Sensory bins are an amazing resource for early primary classes. They allow students a tactile, hands-on experience in a contained space.
Materials
- Large container (under-the-bed rolling storage bin, Rubbermaid plastic bin, bulk food container)
- Filler (soil, dried beans, dried pasta shells, sand, shredded paper or a combination of these materials)
- Other items, including fun toys and tools (shovels, pails, plastic plants and insects, felt flowers, rocks, flowerpots, watering cans, etc.)
- Laminated images of other items
Instructions
- Choose a suitable space in the classroom: the bin should be out of the way but have enough room around it for little explorers to reach it.
- Fill the bin with any of the filler and other items you have collected, and leave it as an invitation for students to explore on their own or with one or two peers.
- Demonstrate how and encourage students to practise scooping and digging, and— depending on the other items (e.g., pails)—dumping and filling.
Suggestions
- On a wall near the bin, tape laminated images of the other items in the bin. When students find an item, they can use a dry-erase marker to tick off the image on the
- Have the students put filler in the pails or other containers, and then “plant” the plastic flowers or add insects or rocks to the “soil.”
- Try to incorporate filler and other items that will have students use all five senses and prompt discussion on:
- Touch: The feel of the materials
- Sight: The different colours of the materials
- Hearing: The sound of the materials being mixed together
- Smell: The smell of the materials (if you opt to include add lavender/herb pouches)
- Taste: Not practical for this particular activity!
Questions for students
- What did you find?
- What does that feel like?
- How many different things do you see in the bin?
- Do you know the name of this insect?
Playdough centre
This activity can be offered during free play. It encourages students to apply their number and counting skills. It’s also a creative time and a great opportunity to introduce or review plant vocabulary, such as petal, leaf and stem.
Materials
- Modelling clay in different colours
- Plastic numbers or number stamps
- Textured blocks or other objects to make imprints (optional)
- Printed images of different flowers (optional)
Instructions
- Tell your students they will be making flowers out of the modelling clay.
- Ask the students to take a small piece of modelling clay in one colour and roll it into a ball with their hands. This will be the centre of the flower.
- Have the students use both hands to roll another piece of modelling clay—in a second colour—along the surface of the table to create the flower’s stem.
- Tell the students to put the ball on top of the stem, and press down lightly on the ball to stick the two pieces together.
- Ask the students to choose a plastic number or a number stamp and press it down gently onto the ball. This number represents how many petals their flower needs.
- Have the learners take some modelling clay in a third colour and make petals in the number they stamped onto the flower’s centre.
- Students can roll more modelling clay in another different colour into a ball and then stamp a number into it. This new number represents how many leaves the stem could have.
- Repeat as many times as possible during the allotted playtime.
Suggestions
- Encourage students to play with different shapes and textures when they are making their petals.
- Have printed images of different flowers available so that students can see a variety of possibilities for their petals.
Questions for students
- Do all flowers have the same number of petals? Or leaves?
- How many different flowers did you make? Are they different sizes?
- Are your stems all the same length?
- What colour are the petals?
- Can you count the number of petals?
Bingo marker flower stencils
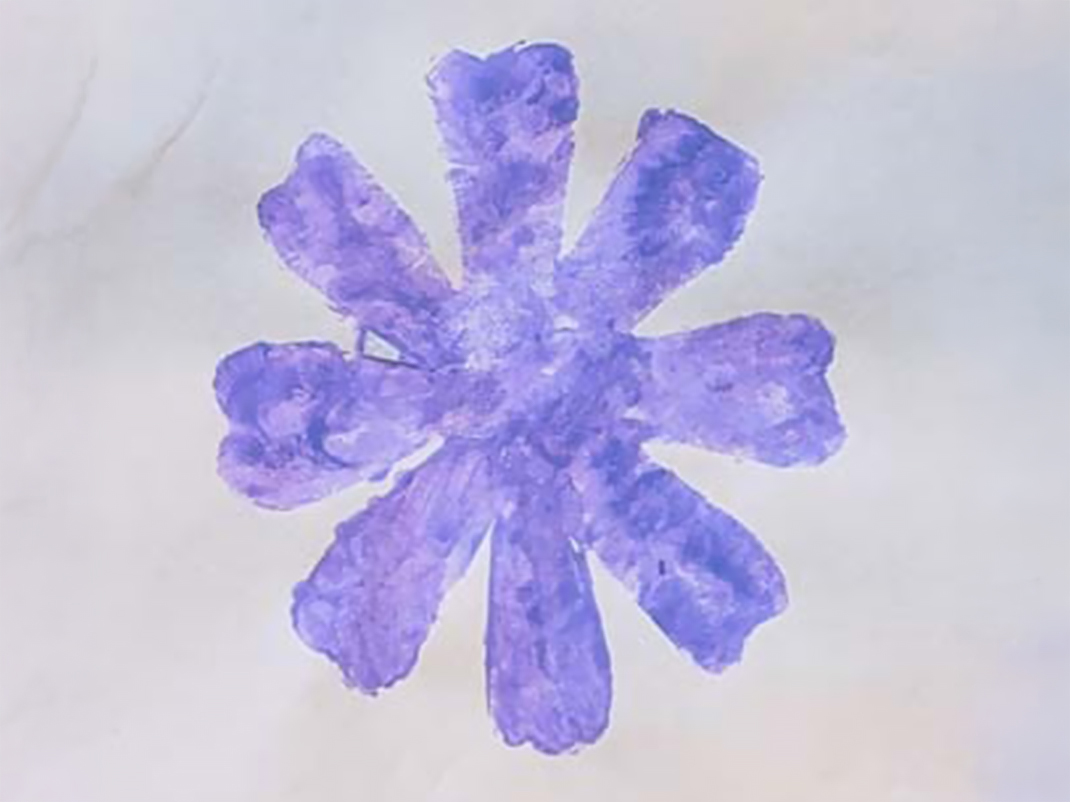
This activity can serve as a visual arts lesson or be offered at a station during playtime. Creating flowers using stencils and bingo markers is a simple art activity that students enjoy.
Materials
- Card stock
- Flower stencils (see Appendix A for template)
- Scissors
- Bingo markers/daubers/dabbers
- Paper
Instructions
- Print the flower stencils on card stock.
- Cut along the dotted lines to separate the flowers, and then cut out each flower to leave empty space in the middle.
- Give the students blank paper, the stencils, some bingo markers and crayons.
- Show the students how to use the stencils:
- Put the stencil flat on the blank paper
- Hold the stencil down with one hand
- Use the bingo markers to colour in the flower on the paper
Suggestions
- Encourage your students to experiment by mixing colours and patterns within the stencil flower.
- Suggest the students add stems and leaves to their stencil flowers, using the crayons.
- Encourage the students to try making flowers without using a stencil.
- Students can cut out a flower and glue a coloured popsicle stick to the back of it.
- They can also make leaves out of construction paper and glue these onto the popsicle stick.
- You can use these flowers in the sensory bin, to create a play “garden,” and/or use them in the Word- and Sentence-Building with Flowers activity in this kit.

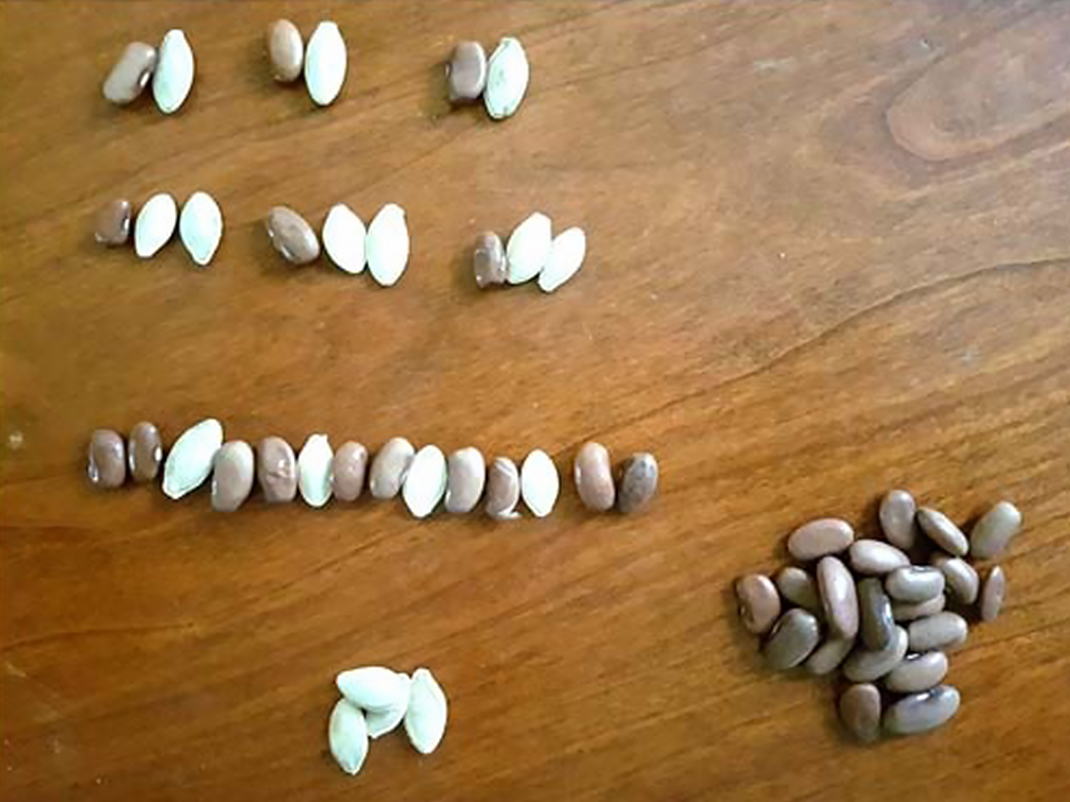
Seed sorting and patterning
In this activity, students use their sorting and patterning skills, based on the similarities and differences between objects.
Materials
- Variety of larger seeds (sunflower, pumpkin, beans, corn, etc.)
- Containers to hold the seeds
Instructions
- Put the containers filled with different seeds at a station where your students can play with them.
- Encourage the students to create different patterns with the seeds, for example:
- AB, AB
- AAB, AAB
- Also encourage students to examine the seeds and sort them in terms of similarities and differences.
Questions for students
- How many patterns did you make?
- What is the pattern here?
- What seed goes next, if I want to carry on with this pattern?
- What happens if I take this seed out? Does it change the pattern?
Potting and planting simulation
Students use their knowledge of numbers and counting in this activity. Learners can pretend they are potting real plants, so they are aware of the planting process.
Materials
- Clay or plastic flowerpots
- Filler (soil, dried beans, or corn)
- Gardening tools (shovel, watering can)
- Pompoms
- Plastic or felt flowers and/or plants
Instructions
- Write a number from 1 to 15 on each of the pots. This number will indicate the number of pompom “seeds” that will go into each pot.
- Have each student fill a pot with the filler, using the shovel. This calls on their motor skills, as they try to avoid spilling anything.
- In each pot, ask students to put the number of “seeds” that corresponds to the number written on that pot.
- Students can continue this simulation using other tools that may be available, for example, with a watering can they can pretend to water the seeds. They can then add the plastic or felt flowers and plants to demonstrate plant growth.
Suggestion
This activity can be used to assess each student’s knowledge of counting and numbers.
Questions for students
- How many seeds did you plant?
- What steps did you follow to plant your seeds?
- What does a plant need to grow?
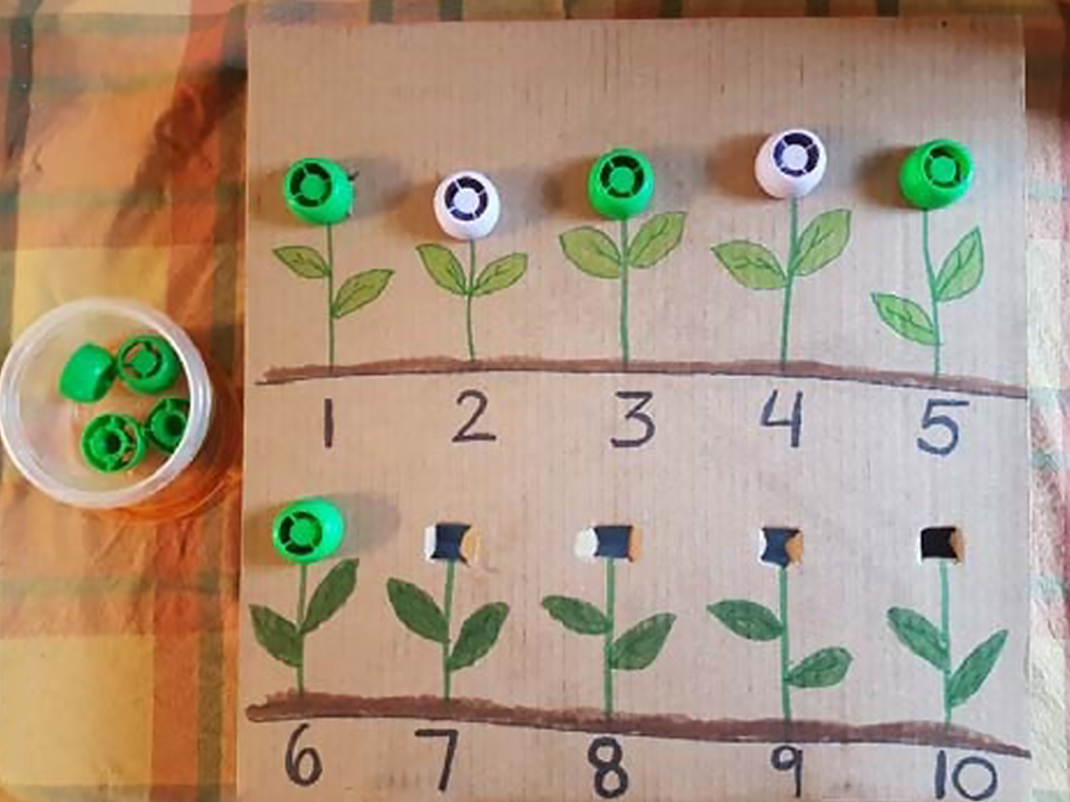
Pouch-cap flowers counting box
A counting box is a useful tool to have in the classroom because it functions as a one to one correspondence counting toy! Children love the act of growing their own flowers, as they put the pouch caps into the cardboard box, and count out loud at the same time.
Materials
- Small to medium-size cardboard box (small pizza boxes work well)
- 10 pouch caps (saved from fruit sauce pouches) or similar object
- Coloured markers
- Exacto knife/penknife
- Medium-size container
Instructions
- Draw 10 evenly spaced stems with leaves on the cardboard box, using the coloured markers. Do not draw the flower part.
- Write the numbers 1 to 10 underneath the stems.
- Using the knife, carefully carve out an X in the cardboard at the top of each stem.
- Put the caps into the container. Leave the box and the container of caps out for children to play with.
- Have students count out loud, as they put a cap into the slot at the top of each stem.
Suggestions
- Challenge students to count backwards from 10 to 1 as they take each cap out of its slot.
- Give younger students simple addition or subtraction questions. Children can add or subtract the number of caps, depending on the equation.
- The box can also be used in a seed-counting activity. Instead of using caps, students put seeds (up to the number they see under each flower) in the slot.
Geometric shapes garden
In this activity, which is part of the geometry unit, children learn about two-dimensional shapes. Encourage them to use pattern blocks to explore and create their own flower and plant garden, using the manipulatives that are available: there are many possibilities!
Materials
- Classroom set of two-dimensional pattern blocks
Instructions
- Put out the bin of pattern blocks for your students to play with.
- As they explore the blocks, the students are likely to arrange them according to shape, size and colour.
- Encourage the students to use their imagination and to create flowers and plants using blocks of different shapes (e.g., a flower can have a square as its centre and petals made from triangles).
- To reiterate the names of the geometrical shapes, ask students to point to the names of the ones they have used.
Suggestions
- Guide students with instructions or questions if they are having trouble creating flowers out of the pattern blocks.
- Any type of blocks (e.g., Lego or wood blocks) can be used for this activity. Students are creative and will still imagine they are making flowers.
Questions for students
- Can you make a flower using only squares and triangles?
- Can you make a flower using blocks that are all the same shape?
- Can you add a stem and leaves to your flower?
Science and technology
The life cycle of a flower
This quick and easy craft will show students the life cycle of a growing plant! Students use the templates provided to colour, cut out and assemble a paper flower that has a petal representing each stage of plant growth.
Materials
- Printed colouring pages (see Appendix C)
- Pencil crayons and/or colouring pencils
- Glue
- Scissors
Instructions
- Print out the colouring pages for each student.
- Have the students colour in all the elements on the printed pages.
- Ask the students to cut around the outside of the flower.
- Instruct the students to fold the petals of the flower down towards the centre, along the lines of the pentagon, and then glue the base of the pentagon to the top of the stem.
- They can glue all elements down onto another piece of paper (optional).
- Have the students play with opening and closing the flaps; explain or review the life cycle of the flower out loud with the students.
Suggestion
This activity can be offered towards the end of the science unit, to help the students consolidate their knowledge of plant growth.
Drama activity: The life cycle of a plant
This short activity allows teachers to introduce the concept of a life cycle to their students. It also gives younger learners the chance to move their bodies, as they imitate a seed developing into a full-grown plant.
Materials
- Sequence cards (see Appendix D for template)
- Seed
- Seedling
- Small plant
- Adult plant
- Drama props (optional)
- Plastic watering can
- Yellow ball or flashlight, to imitate the sun
Instructions
- In a class discussion, ask your students if they know what a life cycle is. The takeaway: the students should know that a life cycle is the natural sequence of events for all living things, including plants and animals.
- To give context, explain that they will be learning specifically about the life cycle of a plant, for example:
- Just as babies grow up to be adults, plants start off as tiny seeds and, over time, they grow up and then make new plants that will start the cycle all over again.
- Show the students the sequence cards and ask them:
- What do you see in these pictures?
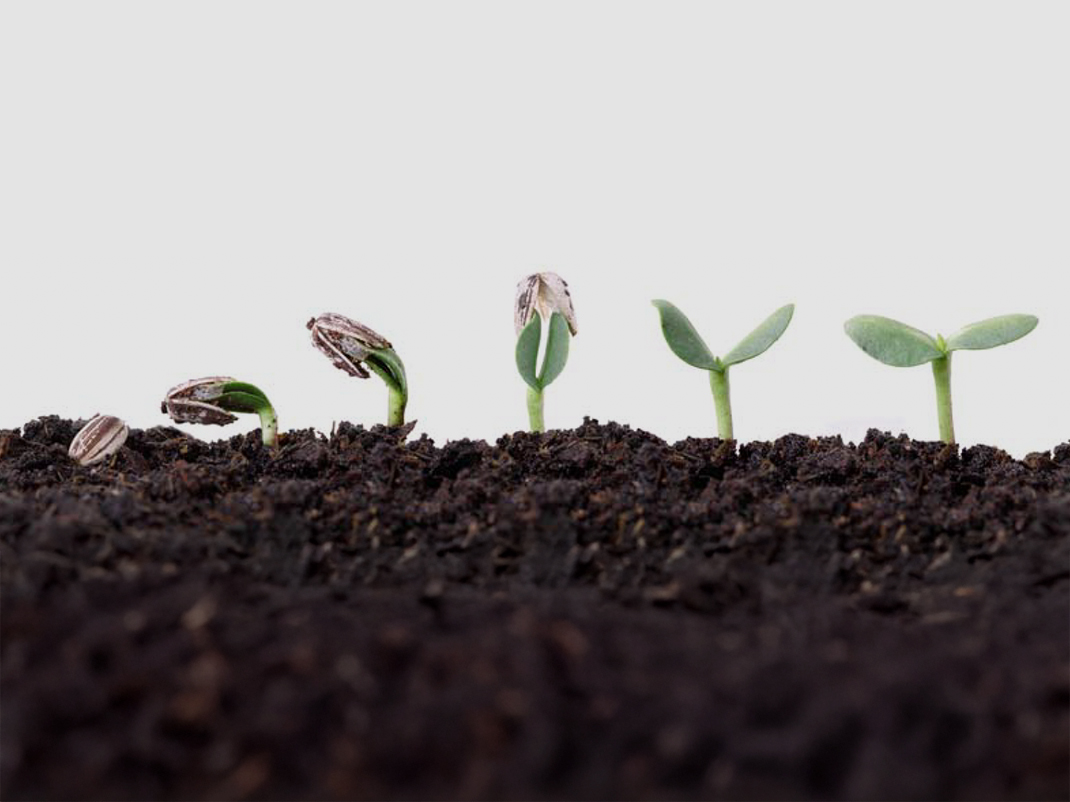
- Seed: explain that inside every seed is a tiny baby plant called an embryo. The embryo is safe inside the seed. You can compare an embryo in a seed to a chick in an egg. When the embryo has everything it needs, starts to grow and gets bigger: the seed sprouts/germinates.
- What does it need to sprout? It needs water, warmth (sun) and soil for its roots to grow into. After it sprouts, tiny leaves appear and they push out of the soil towards the sun.
- Seedling: explain that a seedling is like baby plant. The seedling has a root, a stem and one or two leaves. It needs the right amount of water, nutrients (food) from the soil and sunshine to grow and be healthy.
- Small plant: introduce the specific parts of the plant that are now visible, including the stem, many leaves and roots.
- Adult plant: ask the students if they notice any differences between the small plant and the adult plant (fruit and flower); explain that this is the last stage in the plant’s life cycle. The plant is all grown up. It will make seeds of its own, with tiny plants inside them.
- If we were telling the story of a plant’s life cycle, how would we put these cards in the right order?
- What do you see in these pictures?
- Tell the students that, now they have learned about the life cycle of a plant, it’s their turn to use their bodies and imaginations to become plants themselves.
- Narrative:
- We’re going to pretend that we’re growing our own garden! You are going to plant your own seeds in your own space, so spread out around the room to give all the seeds some space to grow.
- Let’s begin by pretending to dig a hole in the ground, where we can plant our seeds. Next you need to cover your seeds with some soil, and pack it down lightly.
- Now that we have planted our seeds, use your bodies to show me what a tiny seed looks like: crouch down into a small ball. I’m going to walk around and water all of the seeds (hold the watering can above the students’ heads), and shine some sunlight on them, too (hold the yellow ball over or shine the flashlight on the students).
- Now that the tiny plants (embryos) inside the seeds have everything they need to sprout, they are going to slowly start growing. The seeds will open and a tiny root will dig into the soil. Make sure your feet are planted to the ground, since roots don’t move. I’m going to give you a little bit more water and sunlight.
- When I clap my hands, your leaves will push out of the soil. Show me your leaves by touching your elbows to your torsos and slowly wiggling your wrists. I will come around with water and sunlight one more time. *Clap!* Move your hands up above your heads, towards the sun. The leaves are out of the soil now!
- Now when I clap my hands, you are going to become adult plants! *Clap!* Stand up as tall as you can. Use your hands to make flowers/ and reach to the ceiling to try and touch the sun. Make sure your roots are still firmly planted in the ground!
- Now the wind is about to pick up your seeds and blow them away. Pretend you’re a tiny seed being blown by the wind, and fall to the ground, slowly and gently.
- At this point the cycle will restart!
- Narrative:
Seed germination in a jar
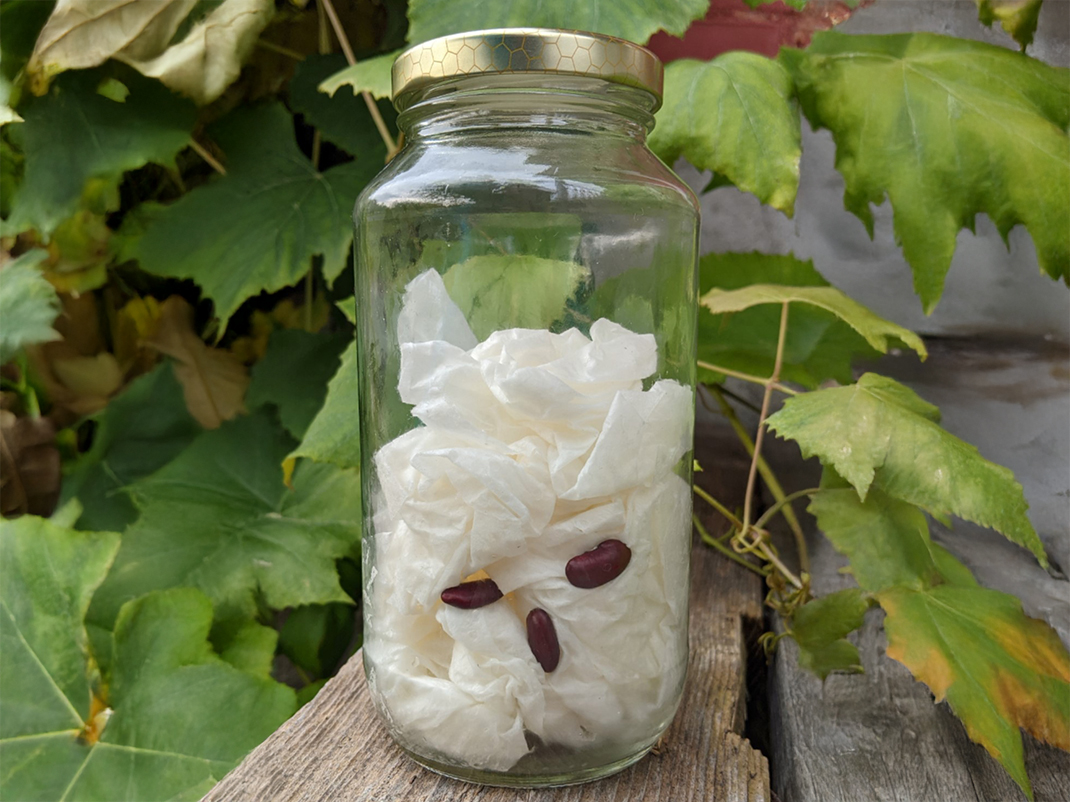
Students have fun with this activity, examining and observing the growth of a seed in a jar!
The experiment allows children to see what takes place underground, as a seed begins to grow into a plant.
Before the activity: Ask students to bring in clear jars. Students may work in groups if the number of jars is limited.
Materials
- Large clear jars (e.g., Mason jars)
- Paper towel
- Seeds (pea and bean tend to grow quickly)
- Water
- Magnifying glasses (optional)
Instructions
- Dampen sections of the paper towel with water and wring out any excess moisture.
- Have the students fill the jars with the paper towel; their little hands will be able to push it down to the bottom.
- Ask the students to carefully push a few seeds down into the paper towel, placing them closer to the edges of the jar so that they can be seen, and making sure they are firmly held in place.
- Ask the students to put their name on a label and tape it to the outside of the jar.
- Put the jars by the window and observe! The students can use magnifying glasses when roots and sprouts have developed.
- Let the students know what they can expect to see after a few days (depending on the type of seed).
- Roots are likely to pop out at the bottom of the seeds.
- A sprouting stem should appear from the top of the seeds once root hairs have extended downwards.
Suggestions
Here are some extensions students could try:
- Keep an observation journal (see Appendix E), to track the germination of their seeds.
- Experiment with different moisture content: keep more water in the paper towel and others no liquid at all.
- Use sunlight as a control measure to show how plants depend on sunlight for growth. Prepare at least two jars and put some by the window and others in a dark cabinet.
- Use different types of seeds. Compare the germination and growth rate of the different plants. Every morning, draw a line on the jar to track the growth of each plant. Use a ruler to measure the growth and write observations in a journal.
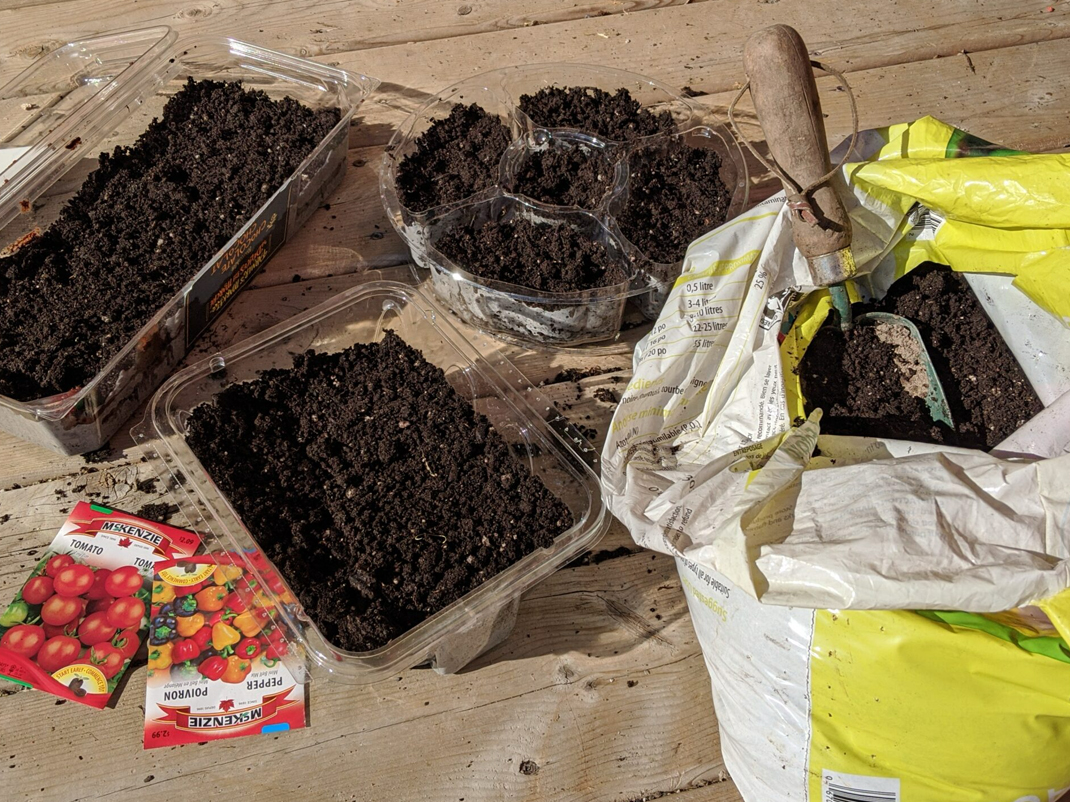
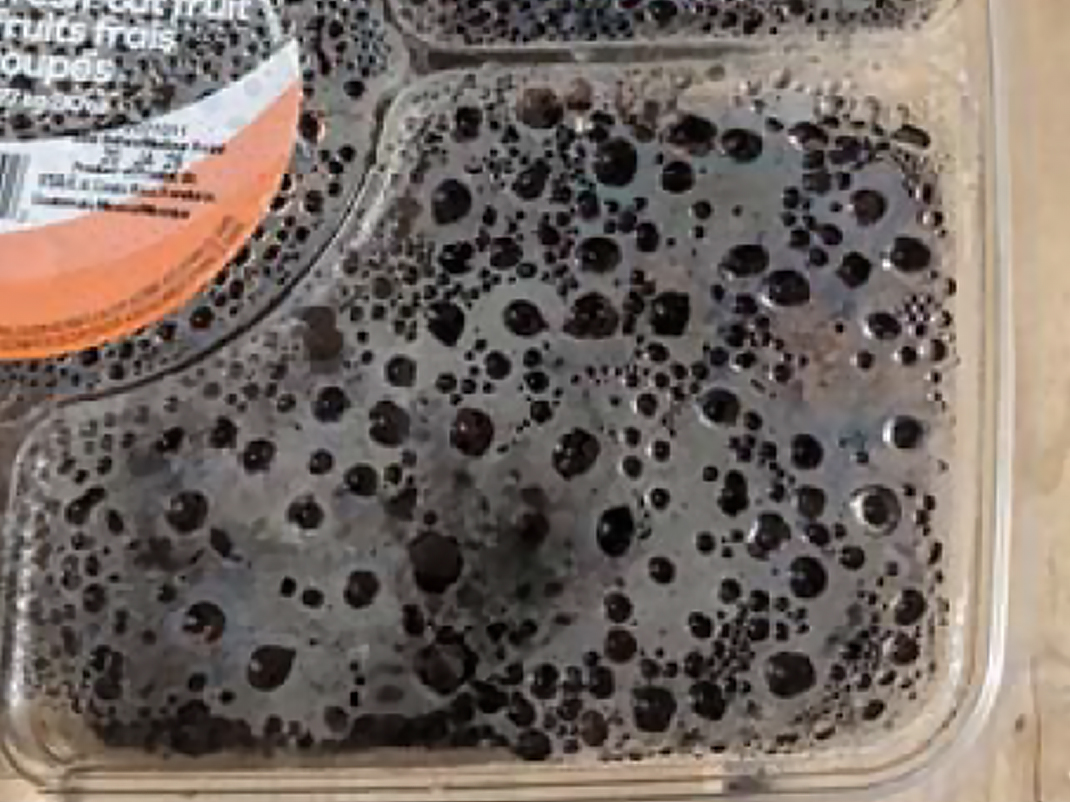
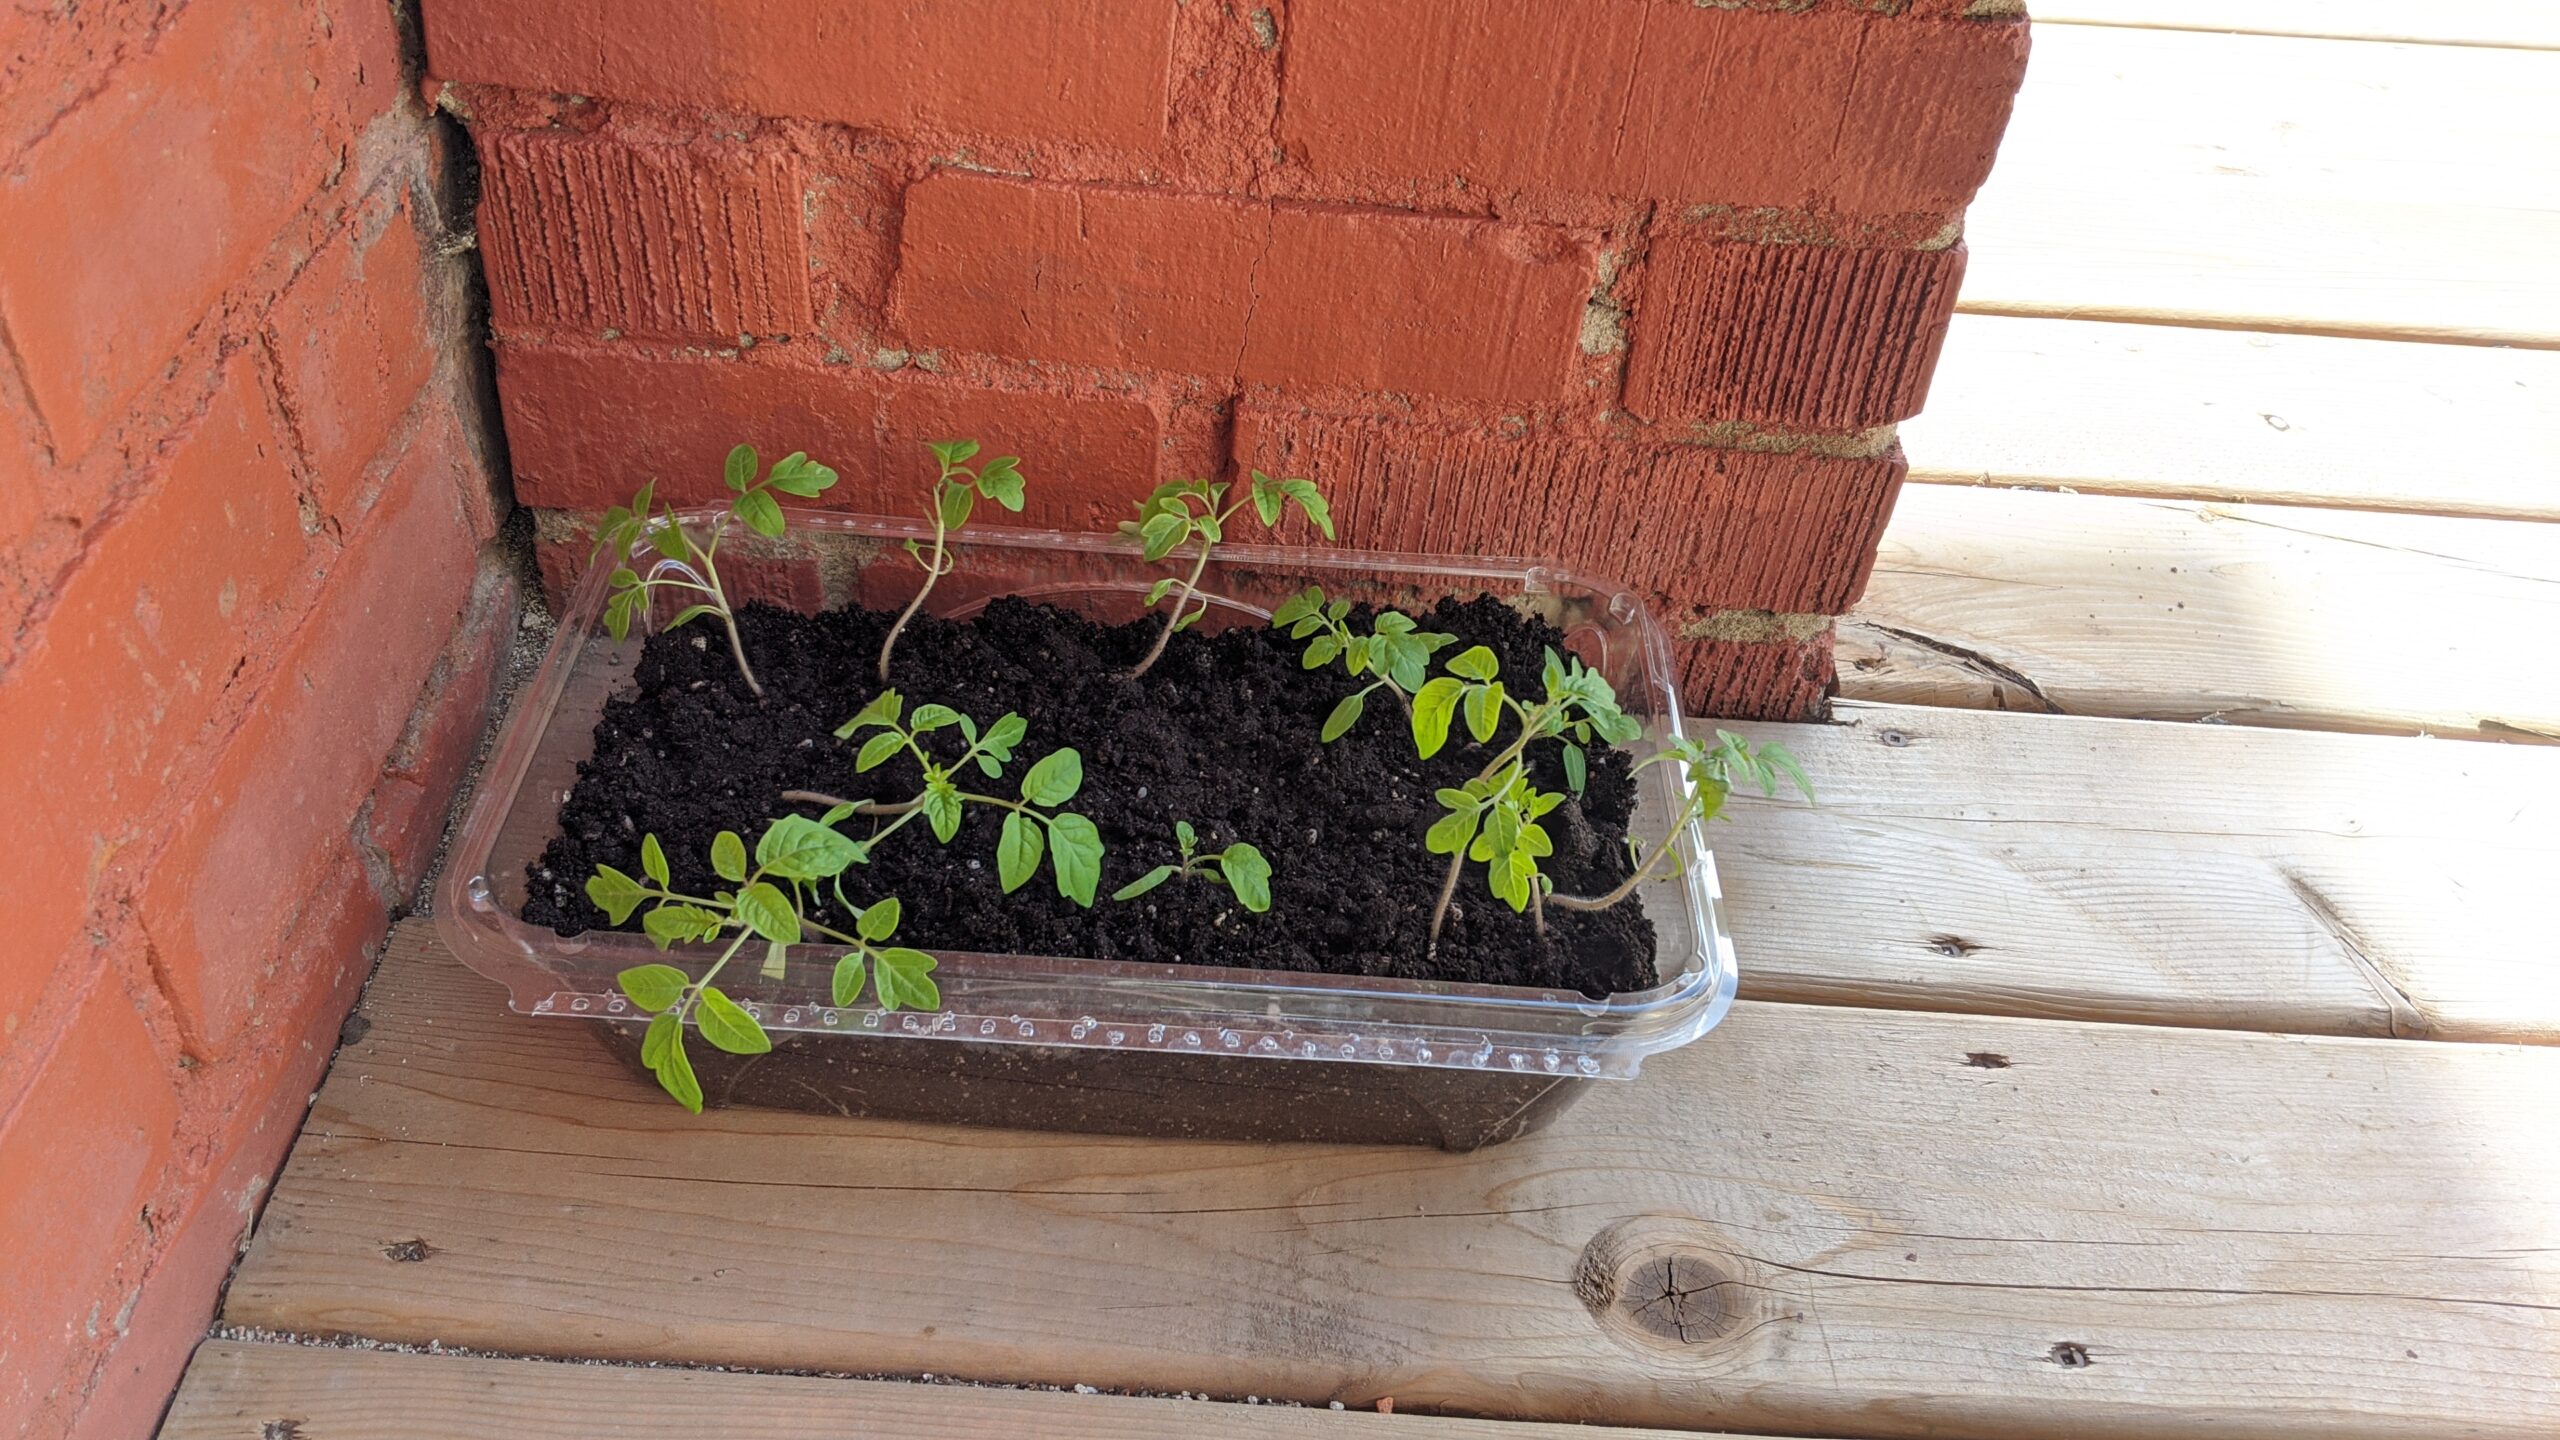
Mini greenhouses
Reduce, reuse, recycle
This activity gives students a great opportunity to take on the responsibility of caring for their own plants! They can take the plants home at the end of the project.
Materials
- Salad or other transparent plastic containers, or trays, with lids (watertight – no holes)
- Potting soil
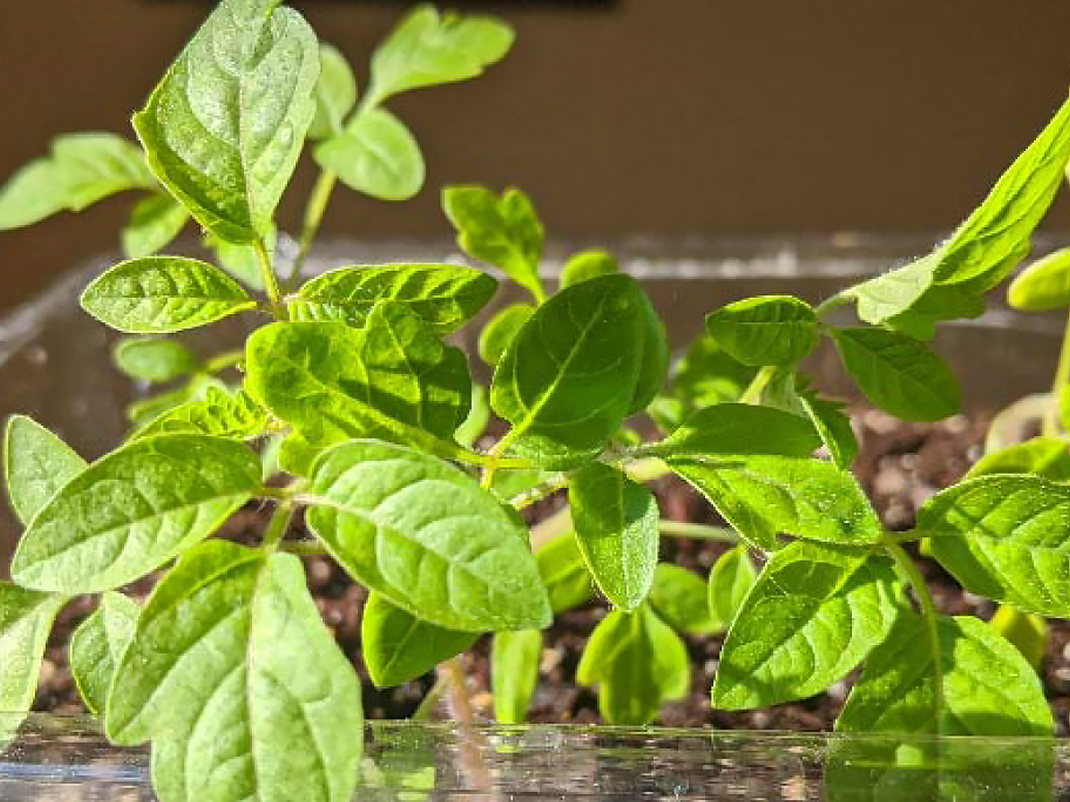
- Cherry tomato seeds (tomato plants are easy to transplant and to take home later; cherry tomatoes are easy to grow in flowerpots for students who may not have a garden at home)
- Water
Instructions
Part 1
- Divide the students into small groups (4 or 5 students) and give each group a container.
- Have the students fill their container about ¾ full with soil (you can mark a line on the outside of the container to help students with this). Most potting soils sold in bags are moist enough, and won’t need watering. If the soil feels dry, pour a little water on it and mix it until moist.
- Have the students gently pat down the soil.
- Show the students how to poke a small hole in the soil: using a finger, go no deeper than the base of the nail. Holes should be evenly spaced across the container. Each student can make one.
- Hand 3 seeds to each student and have them put the seeds in the hole they made.
- Have the students carefully brush soil over all the seeds.
- Close the lid of the container. Use a permanent marker to write the students’ names on the lid, above their seeds.
- Put the container in a sunny location. Wait and watch!
Part 2
- Over time, water droplets will form under the lid, as moisture evaporates.
- The water will drip back down into the soil, keeping it moist.
- The mini greenhouse is self-watering, so the students won’t need to add water, as long as the lid is on the container.
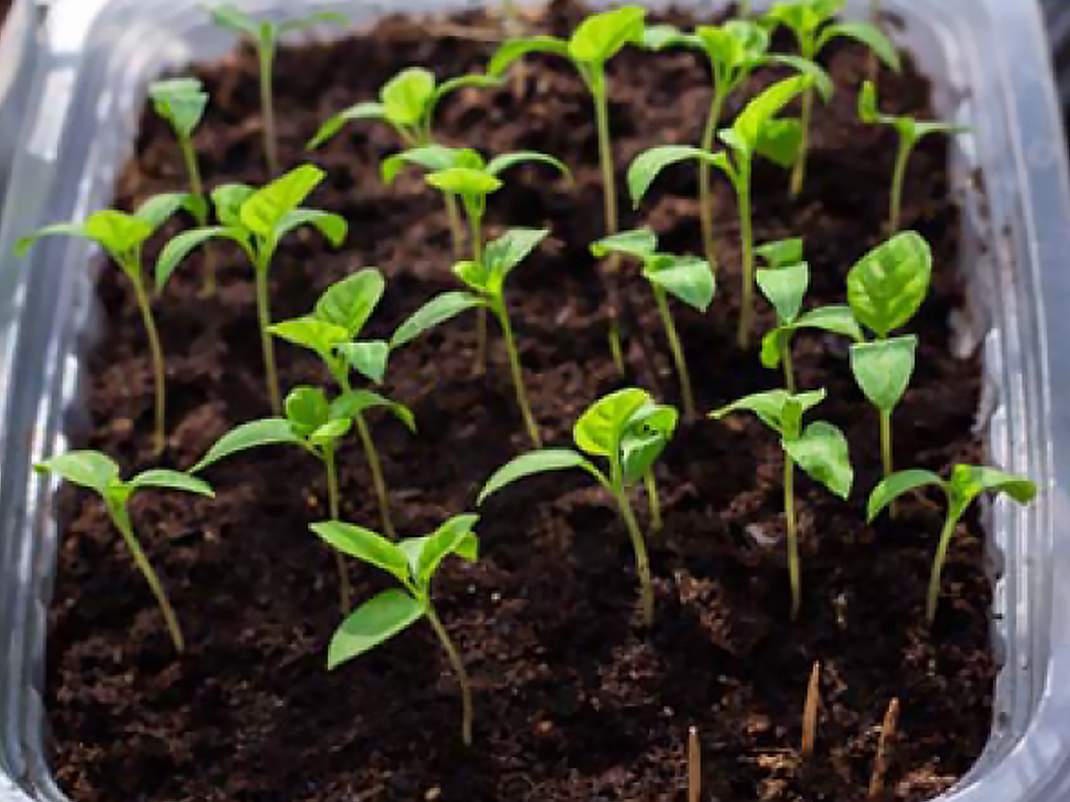
- Students can take off the lid when most of the seedlings have sprouted and reached the top of the mini greenhouses.
- Without the lid, any moisture will quickly evaporate.
- Students should water the seedlings when the first 2 to 3 centimetres of soil have dried up completely.
- Make sure they don’t add too much water, or the roots will rot.
- The students (perhaps with your help) can also poke holes in the base of the container, to drain excess water.
- If they do so, they can put the lid under the container to catch the drips.
- This will also help you keep track of which seedlings belong to each student since their name will be on the lid.
Suggestion
Encourage students to keep an observation journal (see Appendix E), to record seed growth.
Questions for students
- How does the water cycle play a part in the seeds starting to grow?
- What would happen if the container had no lid?
- Will all of the sprouts appear at the same time?
- What part of the plant will we see first?
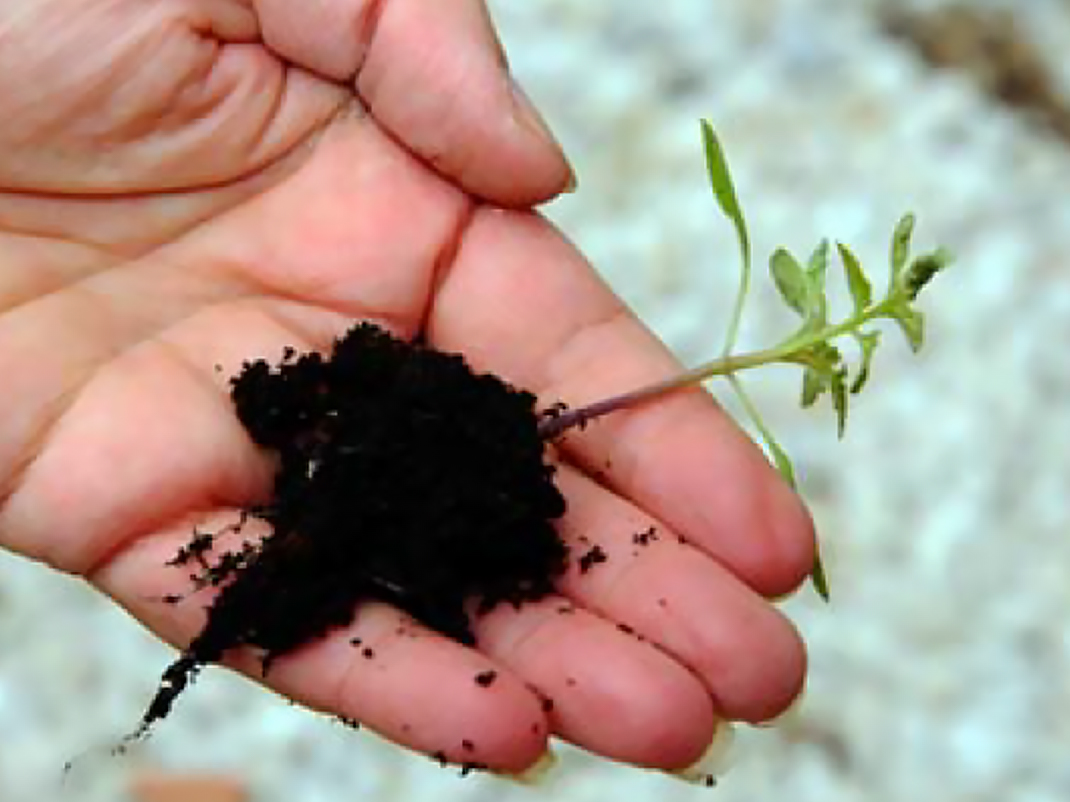
Transplanting seedlings
Keep the seedlings in the container until they have grown at least six leaves.
Materials
- Yogurt containers, paper cups, empty cans or other containers of similar size
- Potting soil
- Spoons
Instructions
- Give each student a container and ask them to fill it between 1/4 and 1/3 full with soil.
- Show the students how to gently loosen the soil around their tomato seedlings, using a spoon, and then lift them out of the container.
- Have the students put each seedling into a new container. Ask them to add more soil around the seedling’s roots and stem, until the two bottom leaves are covered with soil.
- Note: Tomato plants will grow new roots on the stem. Transplanting this way will protect the seedlings as they are transported home, especially if the stems are flimsy.
- Have the students water the transplanted seedlings. Make sure they don’t add too much water—if the tomato plant sits in water it will drown or its roots will rot.
- Your students can either take their tomato plants home, or keep them at school to observe longer.
- Explain to the students that they need to “harden off” the seedlings before transplanting them to a garden bed or a patio container outside. They must expose them slowly to the sun, wind and rain for longer and longer periods of time, starting with 1 hour on the first day. For more information on how to harden off seedlings, see Appendix F.
Suggestions
- Ask the students to create their own booklet on how to care for their tomato plants.
- To discover what the plant needs to thrive, ask the students to experiment with different control measures, for example, by giving the plant no water, little water or a lot of water, and no light, indirect light or direct light.
Questions for students
- Can you name the different parts of the sprout?
- What does the seedling need in order to grow into a plant?
- What would happen if we left the seedlings in the mini greenhouses?
- What would you need to do if the plant looked sad and droopy?
- What do the seedlings smell like? Does the smell remind you of a particular plant?
Vermicomposting
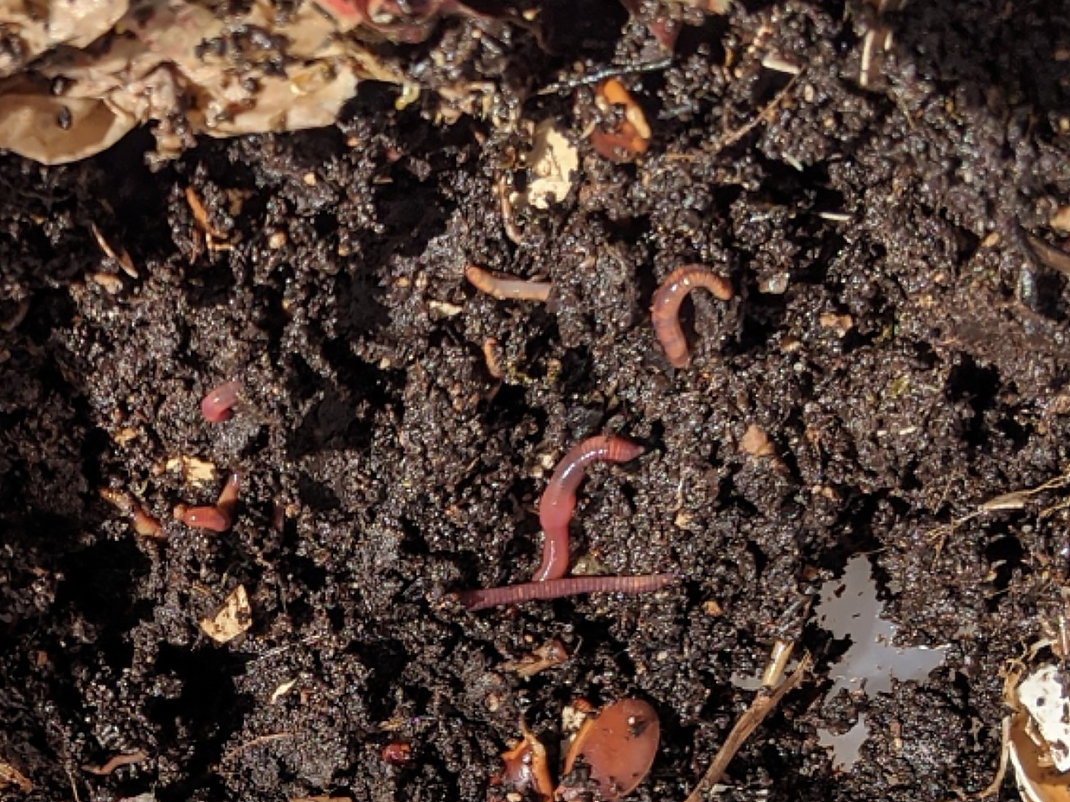
Students learn the basic needs and characteristics of worms in this activity, including how to provide them with a healthy environment so that they grow and stay healthy. Share this information with your students:
Did you know…
- That earthworms are among the most effective decomposers? They consume more organic waste material than all other decomposers combined! The organic material that worms consume is transformed into excrement containing a high concentration of minerals that dissolve in water. These minerals are absorbed by plants when they take in water from the soil through their roots.
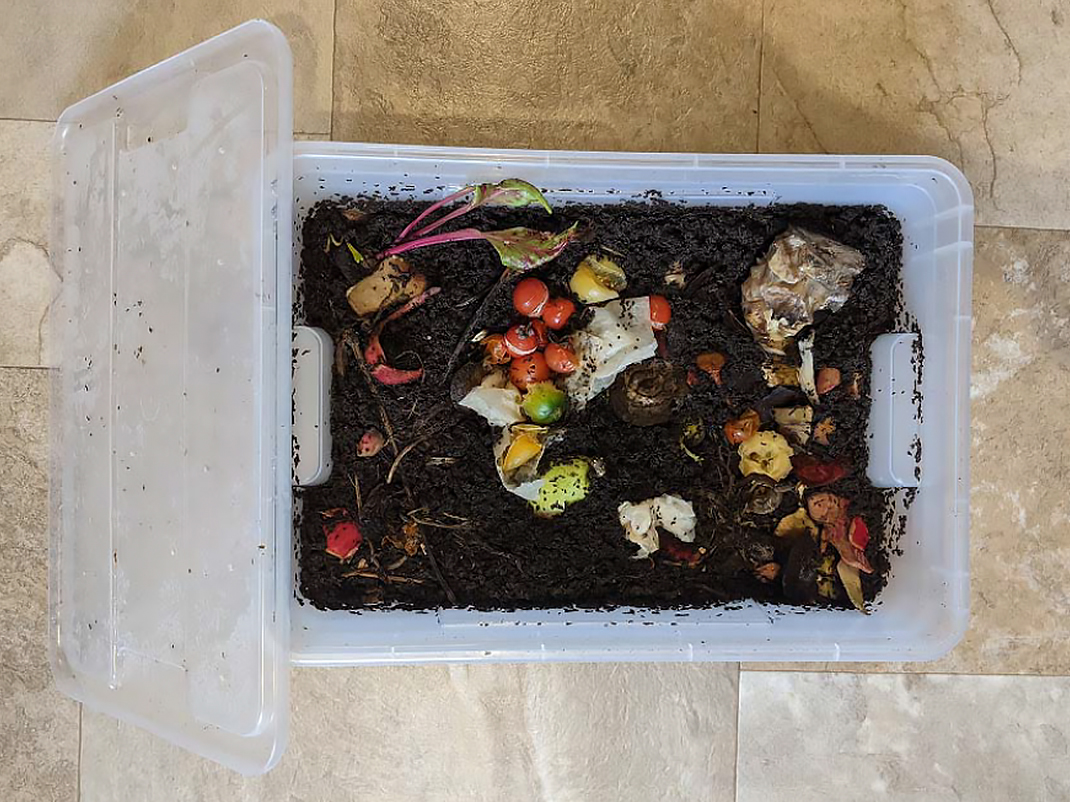
- Vermicomposting is the process of using worms to convert or transform organic waste into compost, or humus—a dark, nutrient-rich substance. Approximately 33 percent of waste sent to landfills could be recycled into fertilizer for the garden. Worms do not give off an odour and do not need to be cleaned. At the end of the school year, your worms can be released into a garden.
Materials
- 2 plastic containers of the same size (that fit into one another) totalling approximately ½ cubic metre
- 1 cover for the 2 containers
- Dark soil (enough to fill the container ⅓ full)
- Water
- Newspaper (black and white only)
- ½ kilogram of red wiggler worms or garden worms
- Organic waste: fruit and vegetable scraps
Instructions
- Ask students to describe a worm’s natural environment. Explain that, to survive in the classroom, worms will need an environment similar to their natural habitat.
- The earthworm’s environment:
- A cool, humid and dark tunnel.
- Description and explanations:
- Worms like soil that is damp but not flooded with water. In order for them to breathe, their bodies must stay moist. If the soil is too dry, the earthworms will dry out. If the soil is too wet, the worms will drown.
- The ideal temperature for earthworms is between 13°C and 25°C. At this temperature, worms eat and reproduce well. Below 13°C, worms eat little and have difficulty reproducing. Above 25°C, worms can die. Worms are highly sensitive to light and avoid it. Just a few minutes of light can harm them.
- Prepare the containers:
Containers: Like us, worms need air to survive. Drill air holes (¼ inch) in the lid and then drill drainage holes (⅛ inch) in the bottom of one of the containers. Put the container with holes inside the other one. This will allow any extra liquid to drain out and keep the worms from getting too wet.
Litter: Ask each student to shred a piece of newspaper into very small pieces or thin strips, and put these in the container. They can then add in dark soil until there is an equal amount of paper and soil. Next, ask the students to gradually add water until the mixture is damp to the touch. Warn them against adding too much water: the mixture should have the texture of a well-wrung sponge when squeezed. If drops escape when they squeeze it, they have added too much water and will need to add more soil.
- The containers and litter are now ready for the worms. Once you have added the worms, supervise the students in feeding them once or twice a week. Ask them to simply spread organic waste (see below for ideas) on top of the soil and cover it with fresh litter. Then put the lid back on the bin. The organic waste should be cut into small pieces to help the worms do their work. They should put the waste in a different spot each time, so that they can see how quickly the worms eat it and can adjust the quantity as needed. If a lot of food is left uneaten, the worms have been given too much. If most of the food is eaten, they haven’t been given enough.
- Ask the students to keep an observation journal (see Appendix E), to record what they feed the worms. They can then measure how long it takes the worms to eat various different scraps.
- Review with the students the role that worms play in the soil. Stress the importance of recycling organic waste, and producing minerals that are essential for plant survival.
- Use the compost (humus) produced by the earthworms to fertilize your school’s plants.
| Feed worms fruits and vegetable scraps from: | Do not feed worms: |
|---|---|
| Apples | Citrus fruit |
| Bananas | Meat |
| Carrots | Whole eggs |
| Watermelon | Dairy products |
| Strawberries | Plastics |
| Celery | |
| Lettuce | |
| Corn | |
| Pumpkin |
Arts
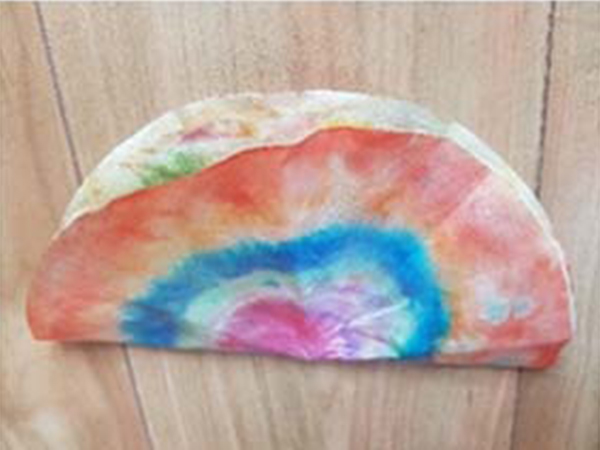
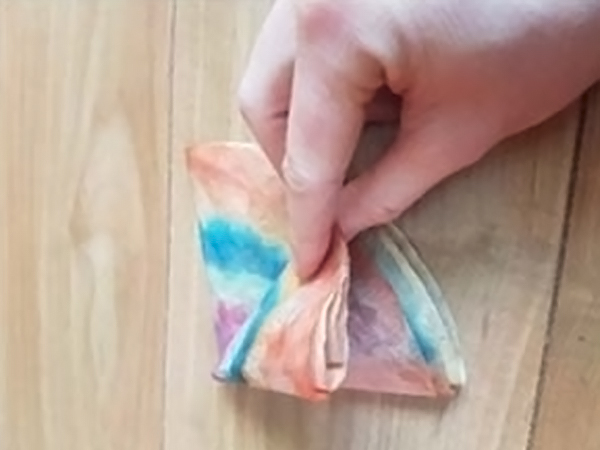
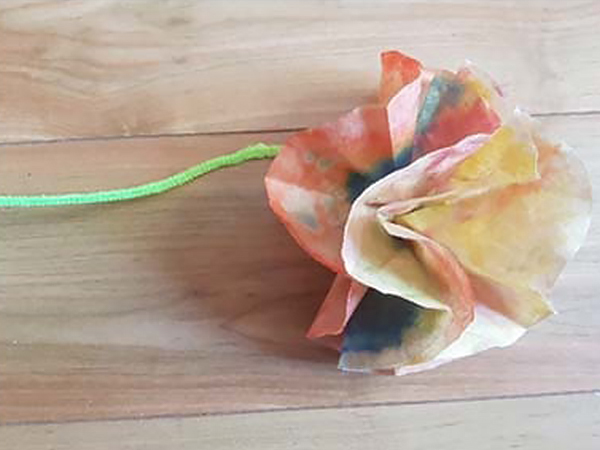
Tie-dye coffee filter flowers
Tie-dyeing coffee filters to create their own flowers makes for an amazing experience for students. It’s a great activity for the beginning of spring, once flowers start to bloom outside, and gives students the perfect gift for Mother’s Day!
Materials
- Large and small coffee filters
- Washable markers
- Spray bottle
- Water
- Green pipe cleaners
Instructions
- Hand each of the students 1 large and 1 or 2 small coffee filters.
- Have students colour the filters, using the washable markers, and then draw a design or patterns on them. Remind students that their design will change once it’s sprayed, so they don’t need to make it too detailed.
- Fill the spray bottle with water while the students are hard at work.
- Once the colouring is finished, have the students label their filters in some way and then put them on a drying rack or newspaper.
- Using the spray bottle, dampen the filters (3 to 4 sprays should be enough); watch as the colours bleed, blend together and then spread out along the paper. Let everything dry completely for the rest of the day.
- Once the filters are dry, hand out each student’s artwork, along with a pipe cleaner.
- Have the students stack their smaller filters on top of each other and put them on top of the larger one.
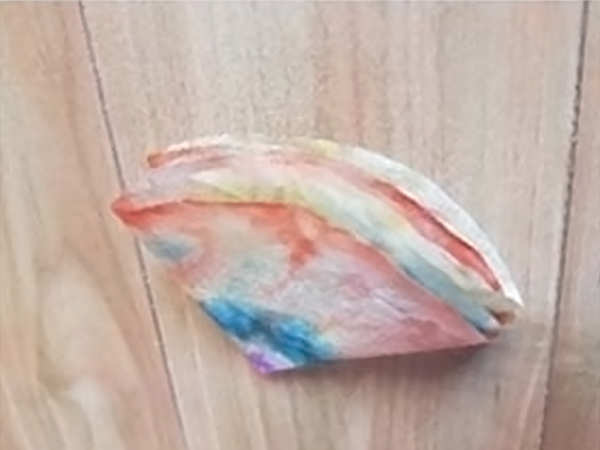
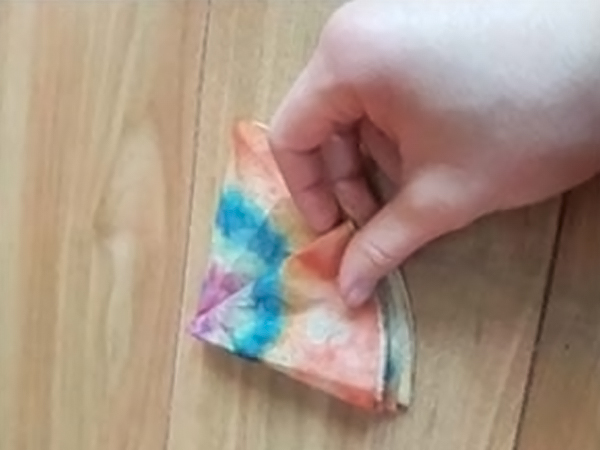
- Ask the students to fold all of the filters in half, and then in half again.
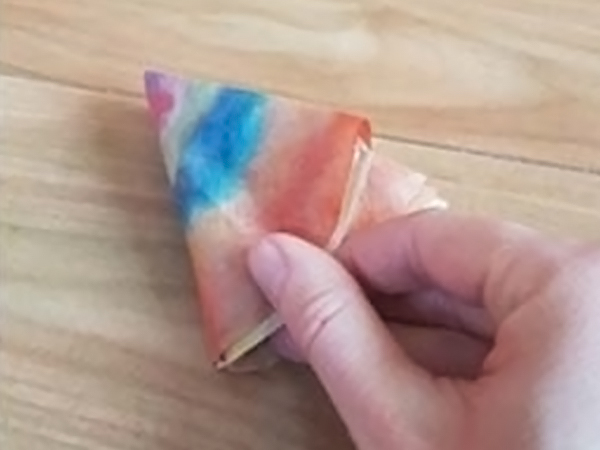
- Have the students fold the top portion of the filter package backwards onto itself, then flip the entire bundle over and repeat on the other side, the filters should look like a zigzag as they open. Some students may need some help with this part.
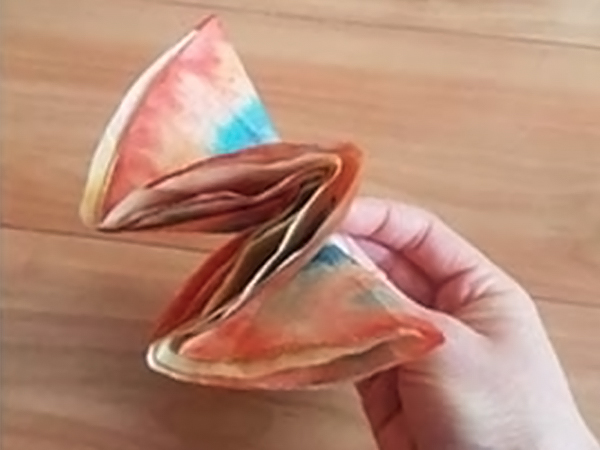
- Get the students to wrap one end of the pipe cleaner tightly around the folded point of the filters, and then cinch it tightly so that they are all held in place.
- As students gently separate the layered pieces from each other, the flower’s petals will spread out.

Language
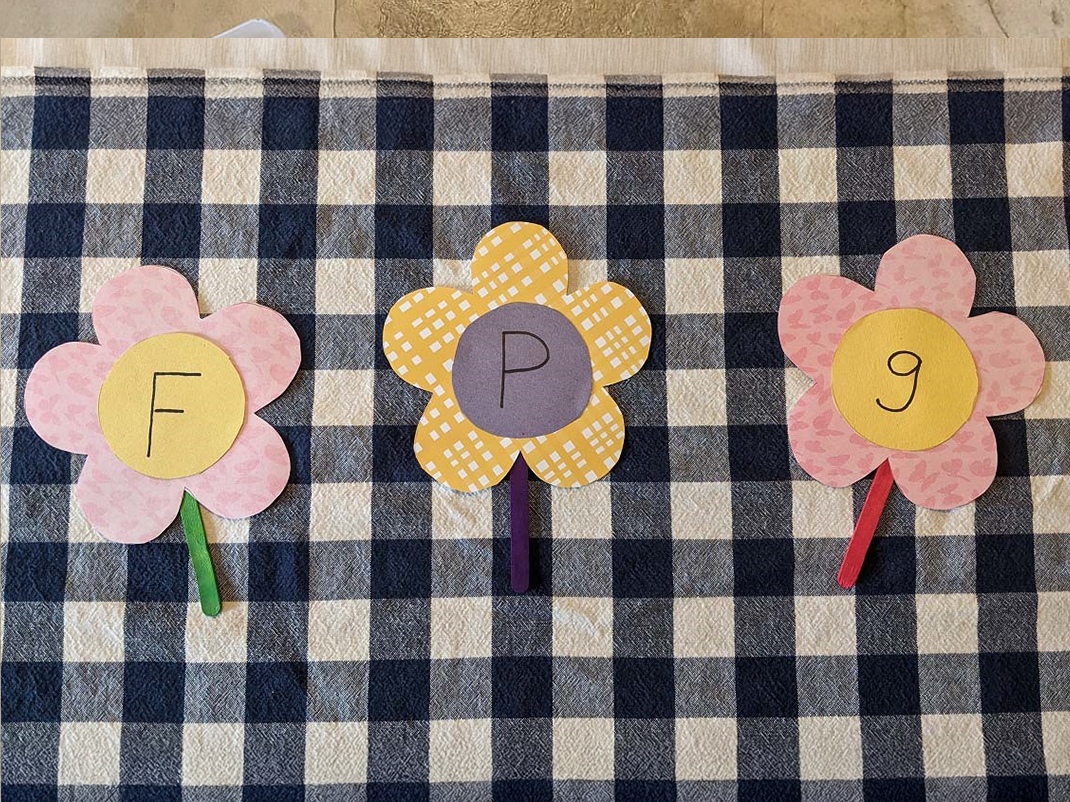
Word building with flowers
This great activity creates a “word garden,” which students can then use to create stories. It can be offered to the whole class at circle time or as a station-based activity.
Materials
- Paper flowers
- Large container with filler (dried beans, marbles, rice) (optional)
- Coloured markers or pencil crayons
Instructions
- Have your students make paper flowers that are big enough to write words (Grade 1) or letters (JK and SK) on. Flowers can be made using the Bingo Marker activity or using the template in the Appendix B.
- Depending on the level of the students, ask them to write a letter on each of the flowers or a word related to flowers or plants. They can choose a word that describes the plants or flowers, or an action word such as plant.
- Once the students have added the letters or words have them put their flowers (face up) in “the garden”: either a circle on the floor, or a container of filler.
- Ask the students to, in turn, “pick flowers from the garden,” to make a word with the letters, or pick words to make a sentence. As needed, you can prompt the students to find specific words or letters.
- After each student has had a turn, instruct them to put the flowers back in the garden.
Suggestions
Kindergarten/Quebec preschool
- Ask the students to find a certain letter of the alphabet and, once they find it, to sound out the letter and name one or two words that start with that letter.
- Alternatively ask the students to match up the flowers with lowercase letters to the flowers with uppercase letters. Or have students find a lowercase letter and then turn the flower over and write the uppercase letter on the back.
Grade 1 / Quebec cycle 1
- Pass the flowers with words on them to each student so every student has their own word. In turn, and ask them to tell a short story that includes the words they see.
- As new words are introduced throughout the year, students can make more flower words to add to the garden (consider putting them on a wall to create a flower wall).
Printable PDFs
- Appendix A: Bingo marker flower stencils (PDF, 304 KB)
- Appendix B: Word building with flowers (PDF, 302 KB)
- Appendix C: Flower template (PDF, 423 KB)
- Appendix D: Drama activity: Sequence cards (PDF, 796 KB)
- Appendix E: Observation journal (PDF, 153 KB)
Appendix F: How to harden off seedlings
You need to harden off the seedling before transplanting them outside to your garden or patio containers. So far, the seedlings have been sheltered from the elements in your house or apartment. To harden them off, you must expose them slowly to the sun, wind and rain. Hardening off plants doesn’t take a long time, but it is important to do it right.
Instructions
- Choose a good spot: Your seedlings will need some protection from the sun and wind on their first days out. Look for a shady spot next to your home, garden shed, or even under a picnic table or a tree.
- Start slowly: On the first day, move your seedlings to the hardening off spot for an hour or two, then move them back indoors. Bring the seedlings out in early morning or mid to late afternoon. Avoid midday, when the sun is at its strongest. Make sure the plants are protected from the wind.
- Increase the time: Each day, leave your seedlings outside for an hour more than the previous day. Give them more and more direct sunlight. After the third day, move the seedlings to a less sheltered spot.
- Leave your seedlings out overnight: Once your seedlings have spent several days in the sun, you can leave them outside after sunset. Leave them outside longer and longer, until they have spent the entire night out.
Tips
- Watch out for bad weather. At any given time during the hardening off, if the weather gets too cold or windy, bring your seedlings inside.
- Do not overwater the seedlings when hardening them off. Let the soil dry up between waterings.
You may also be interested in
A handful of soil field trip
It’s easy to forget that soil is teeming with life! With your students, dig into the ground and discover the creatures hiding there.
AgVenture: Soil science
In this hands-on program, students measure the levels of various soil nutrients and learn how farmers use this information to increase the sustainability of their farm.
Virtual field trips
Bring the museum to your classroom with bilingual, curriculum-linked programs for all grade levels that allow your students to discover various STEM topics.